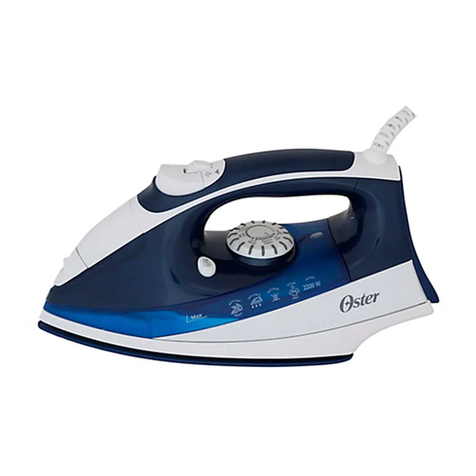
Oster PRESS X PRESS GCSTSG1200 User manual

MODELO/MODEL
MODELO/MODEL
Manual de Instrucciones
Central de vapor Press X press
LEA TODAS LAS INSTRUCCIONES ANTES DE USAR ESTE APARATO
Instruction Manual
Steam Generator Press X press
READ ALL INSTRUCTIONS BEFORE USING THIS APPLIANCE
GCSTSG1200
GCSTSG1200

Español-1
IMPORTANTES MEDIDAS
DE SEGURIDAD
1. LEA ESTAS INSTRUCCIONES ANTES DE USAR EL ARTEFACTO.
2. Utilice este artefacto sólo para su uso previsto.
3. Para reducir el riesgo de descarga eléctrica, no sumerja el artefacto en agua ni
ningún otro líquido.
4. Siempre apague el artefacto antes de enchufarlo o desenchufarlo del tomacorriente.
Nunca hale el cable para desconectarlo del tomacorriente; en su lugar, tome el
enchufe y tire de él para desconectar.
5. Nopermitaqueelcabletoquesuperciescalientes.Permitaqueelartefactoseenfríe
completamente antes de guardarlo. Pase el cable sin apretar alrededor del artefacto
cuando lo guarde.
6. Asegúrese de que la unidad esté apagada, desenchufada y permita que se enfríe
completamente antes de llenarla o limpiarla.
7. Siempre desconecte la unidad del tomacorriente cuando la llene con agua o la vacíe,
y cuando no la esté utilizando.
8. No opere este artefacto con un cable dañado, o si el mismo se ha caído o dañado.
Para reducir el riesgo de descarga eléctrica, no desarme ni intente reparar el
electrodoméstico,lléveloauncentrodeserviciocalicadoparasurevisióny
reparación. El re-ensamblaje o reparación incorrectos pueden causar un riesgo de
incendio, descarga eléctrica o lesiones a las personas cuando se usa el artefacto.
9. Este artefacto no está diseñado para ser utilizado por personas (incluyendo niños)
con capacidades físicas, sensoriales o mentales reducidas, o con falta de experiencia
y conocimiento, a menos que se les supervise o hayan recibido instrucciones sobre
el uso del artefacto por parte de una persona responsable de su seguridad.
10. Los niños deben ser supervisados para asegurarse de que no jueguen con el
artefacto.
11. Se pueden producir quemaduras al tocar partes metálicas calientes, agua caliente o
vapor. Tenga cuidado cuando coloque un artefacto de vapor al revés: puede haber
agua caliente en el tanque.
12. Para reducir el riesgo de contacto con el agua caliente que emite la ventilación de
vapor, revise el artefacto antes de cada uso manteniéndolo alejado del cuerpo y
accionando el botón de vapor.
13. Para reducir la probabilidad de sobrecarga del circuito, no opere otro artefacto de alta
potencia en el mismo circuito.
14. Si un cable de extensión es absolutamente necesario, utilice un cable con una
capacidad de amperes igual o mayor que la capacidad máxima de la plancha.
Uncableclasicadoparamenosamperajepuedeprovocarunriesgodeincendio
o descarga eléctrica debido al sobrecalentamiento. Se debe tener cuidado para
arreglar el cable de manera que no pueda ser halado o tropezado.
15. Cuando llene el tanque de agua, observe si hay agua que pueda gotear en el piso y
hacer que se resbale y se caiga.
16. El artefacto puede causar lesiones personales o dañarse si se cae.
17. El uso de accesorios no recomendados o vendidos por el fabricante del artefacto
puede causar lesiones o anular su garantía.
18. Para evitar lesiones personales y daños al artefacto, solo agregue agua al tanque
de agua. NUNCA agregue soluciones de limpieza, perfumes, aceites o cualquier otro
aditivo químico.
19. Se debe tener cuidado al usar el artefacto debido a la emisión de vapor.
20.Nocoloquelaplanchasobreunasuperciedesprotegida,inclusivesiestáapoyada
sobre su soporte.
21. La plancha no debe dejarse desatendida mientras está conectada en el
tomacorriente.

Español-2
22. El enchufe debe retirarse del tomacorriente antes de llenar el depósito de agua.
23. La abertura de llenado no debe abrirse durante el uso. Vea las instrucciones para
llenar de manera segura el depósito de agua.
24.Laplanchadebeusarseydescansarsobreunasupercieestable.
25.Alcolocarlaplanchasobresusoporte,asegúresedequelasuperciesobrelaque
se coloca el soporte sea estable.
26. La plancha no debe usarse si se ha caído, si existen signos visibles de daño o si
tiene fugas.
27. Si la plancha no funciona normalmente, desconéctela del tomacorriente y lleve la
plancha a un centro de servicio autorizado para su reparación.
GUARDE ESTAS INSTRUCCIONES
Este electrodoméstico está diseñado sólo para uso doméstico y ambientes
similares, tales como:
•Entiendas,ocinasyotrosambientesdetrabajosimilares.
• En ranchos o granjas.
• Por clientes en hoteles, moteles y otros tipos de ambientes residenciales.
• En ambientes de alojamiento y desayuno.
(Únicamente para artefactos de 120 V y 127 V con dos clavijas planas)
Para reducir el riesgo de descarga eléctrica, este artefacto cuenta con un enchufe
polarizado (una clavija es más ancha que la otra). Este enchufe entra sólo de una
manera en un tomacorriente polarizado. Si el enchufe no entra por completo en el
tomacorriente simplemente inviértalo. Si aún así no encaja, comuníquese con un
electricistacalicado.Nointentealterarestacaracterísticadeseguridad.

Español-3
1 Luz Indicadora de Limpieza / Botón de Auto-Limpieza
2 Luz Indicadora de Temperatura
3 Mango
4 Disparador de Vapor
5 Disco instead of Dial
6 Botón de Bloqueo
7 Botón de Desbloqueo
8 Tanque de Agua
9 Botón de Encendido/Apagado (I/O)
10 Estación Base
11 Manguera de Vapor
12 Cable de Alimentación
13 Bandeja de Limpieza
DESCRIPCIÓN DEL APARATO
8
12
13
9
10
1
23
4
5
6
11
7

Español-4
ANTES UTILIZAR SU GENERADOR DE
VAPOR POR PRIMERA VEZ
LIMPIANDO SU GENERADOR DE VAPOR
ANTES DE UTILIZARLO
Advertencia: Retire todo el material de embalaje, incluyendo la protección de la
suela antes de operar su generador de vapor.
1.Limpie la suela con un paño suave.
2.Coloque el mango de la plancha (3) en la estación base (10), en su tabla de planchar
(sieslosucientementegrande)oenunasupercieresistentealcalor,segurayque
tenga la misma altura que su tabla de planchar.
3.Antes de conectar su generador de vapor en el tomacorriente, asegúrese de que su
voltaje de alimentación sea el mismo que el indicado en su generador de vapor.
4.Cuando utilice su generador de vapor por primera vez, puede que haya un ligero olor
y salga un poco de humo durante los primeros minutos de funcionamiento. Esto es
bastante normal y desaparecerá.
IMPORTANTE: Durante el primer uso, el sistema de agua necesitará llenar cebado
antes de que el mango genere vapor. Es necesario operar la función de refuerzo de
vapor varias veces antes de que la unidad esté lista para generar vapor. Para operar la
función de refuerzo de vapor, haga doble clic en el disparador de vapor (4) rápidamente.
Siga estos sencillos pasos para eliminar cualquier impureza o residuo que pueda haber
quedado dentro de su generador de vapor durante el proceso de fabricación.
1.Siga las instrucciones de las secciones “Llenando su generador de vapor” y “Llenando
el tanque de agua” (8) tal y como se describe.
2.Vacíe el tanque de agua para enjuagar cualquier partícula extraña y luego vuelva a
llenarlo.
3.Siga las instrucciones para planchar con vapor. Ajuste la temperatura a la
conguracióndeMAX(5)
4.Planche un paño viejo (el algodón o las toallas son ideales) durante unos minutos.
Mientras plancha, presione el disparador de vapor (4) 4 o 5 veces. Al primer uso, la
bomba necesitará cebado y es posible que deba mantener apretado el disparador de
vapor para extraer agua a través del sistema y crear vapor.
5.Las impurezas serán expulsadas de su plancha a través del vapor y absorbidas por la
tela. Su plancha ya está lista para que la utilice.
LLENANDO SU GENERADOR DE VAPOR
1.Retire el tanque de agua (8) sosteniendo el mango y halando el tanque hacia adelante
desde la estación base (10).
2.Retire el tanque de agua.
3.LleneeltanquedeaguaconaguafríadelgrifohastalamarcadeMAX.
4.Deslice el tanque de agua nuevamente dentro de la unidad base hasta que encaje en
su lugar. Debería escuchar un sonido de “Clic”.

Español-5
LLENADO DURANTE EL USO
PLANCHANDO CON VAPOR
Usted puede llenar su generador de vapor mientras lo está utilizando. Simplemente
retire el tanque de agua (8) como se describe anteriormente y agregue agua según sea
necesario.NollenemásalládelamarcadelindicadordeMAXeneltanque.
Su generador de vapor emitirá dos pitidos y la luz indicadora de encendido (9)
parpadeará para dejarle saber que el tanque de agua necesita llenarse.
Lasfuncionesinteligentesdelaplanchaleimpidencrearvaporenconguraciones
de temperatura inferiores a . Esto es para asegurar que las telas delicadas estén
protegidas del planchado con vapor.
Se recomienda que para planchar telas más difíciles, como algodón y lino, se use vapor
al planchar.
Advertencia: Nunca use vapor para planchar telas delicadas como nylon, acrílicos y
sintéticos.
1.Llene el tanque de agua (8) con agua.
2.Conecte su generador de vapor en el tomacorriente y presione el botón de encendido
(I) / apagado (O) (9) para encender su generador de vapor.
3.Gire el disco de control de temperatura (5) para ajustar el indicador entre la
conguración ylaconguracióndecalormáximo(MAX).
4.La luz indicadora de temperatura (2) parpadeará cuando su generador de vapor se
caliente. Cuando la luz indicadora de temperatura se enciende, su generador de vapor
está listo para usar.
5.Con la suela haciendo contacto con la prenda, presione el disparador de vapor (4)
durante unos segundos. No es necesario mantener el disparador presionado de forma
continua ya que se emitirá vapor desde la suela por un corto tiempo después de que
se haya soltado el disparador. Si se requiere más vapor, presione el disparador de
vapor nuevamente. s
6.Para utilizar la función de refuerzo de vapor, haga doble clic en el disparador de
vapor rápidamente. La plancha generará un impulso de vapor altamente concentrado
durante un corto período de tiempo.
Siempre suelte el disparador de vapor y permita que se libere cualquier vapor residual
antes de colocar la plancha en su soporte.

Español-6
PLANCHANDO SIN VAPOR
PLANCHANDO VERTICAL CON VAPOR
FUNCIÓN DE APAGADO AUTOMÁTICO
Si tiene la intención de planchar las telas en seco, no es necesario llenar el tanque de
agua. Sin embargo, si el agua ya está en el tanque de agua, no necesita vaciarlo.
1.Gireeldiscodecontroldetemperatura(5)paraajustarelindicadoralaconguración
de calor deseada.
2.Cuando la luz indicadora de temperatura (2) se enciende, su generador de vapor está
listo para usar.
3.Planche la ropa sin presionar el disparador de vapor (4).
El planchado vertical a vapor es especialmente útil para planchar artículos como cortinas
mientras están colgadas, o chaquetas, trajes y abrigos.
Seleccione un ajuste de temperatura superior a (5). Una vez que la luz indicadora de
temperatura (2) se vuelve sólida, su unidad está lista para usar. Sostenga la plancha en
posición vertical y presione el disparador de vapor (4) según sea necesario.
ADVERTENCIA: la suela emite vapor caliente. No planche/vaporice ninguna prenda
mientras la tenga puesta. No opere el vapor en dirección suya o de otra persona.
La plancha cuenta con una función de seguridad de apagado automático que funcionará
cuando su artefacto no se haya utilizado por un período de tiempo de 5 minutos. La
unidad entrará en modo de suspensión y todas las luces se apagarán. Para reiniciar,
simplemente apriete el disparador de vapor (4). La unidad se reiniciará y puede que
necesite poco tiempo para volver a calentarse a la temperatura deseada, lo que será
indicado con la luz indicadora de temperatura intermitente (2).
IMPORTANTE
Sugeneradordevaportardaencalentarseyenfriarse.Sicambialaconguraciónde
temperatura en su generador de vapor, usted debe darle tiempo para que se ajuste a la
nuevaconguración.
Estoesespecialmenteimportantecuandocambiadeunaconguraciónaltaaunamás
baja. El generador de vapor tarda más en enfriarse que en calentarse y esta es la razón
por la que le recomendamos que comience a planchar a temperaturas más bajas.
Porejemplo,sihaestadoplanchandoutilizandolaconguraciónlinoydeseacambiara
laconguraciónlana:

Español-7
MANTENIMIENTO Y LIMPIEZA
AUTO-LIMPIEZA
ADVERTENCIA: No use abrasivos fuertes, limpiadores químicos o solventes para
limpiar el exterior de su plancha.
Permita que su plancha se enfríe por completo y limpie la suela con un paño suave y
húmedo. Si el poliéster se ha quemado en la suela, planche un paño de algodón húmedo
mientras la plancha aún esté caliente. Limpie el resto de su plancha con un paño suave y
húmedo y luego seque. No sumerja el artefacto, el cable de alimentación o el enchufe en
agua u otro líquido.
Active la auto-limpieza solo cuando desee activar el sistema de auto-limpieza. Nunca
active la función de auto-limpieza al planchar.
La función de auto-limpieza elimina la cal y las impurezas. El generador de vapor cuenta
con un modo de limpieza recordatorio inteligente que se activa después de un planchado
de vapor continuo durante un total de 25 horas. Si se encuentra en un área de agua
dura, puede realizar el ciclo de limpieza antes de las 25 horas asignadas siguiendo los
pasos a continuación.
La luz indicadora de limpieza (1) se iluminará para recordar a los usuarios que limpien la
unidad.
1.1. Para activar la función de auto-limpieza, ajuste el disco de control de temperatura
(5)alaconguracióndeMáx.Mantengapresionadoelbotóndeauto-limpieza(1)
durante 3 segundos. La luz indicadora de limpieza parpadeará. Coloque el mango de
la plancha (3) en la bandeja de limpieza (13) y hale el disparador de vapor (4) una vez
que retire las manos del mango, esto iniciará la función de limpieza.
2.Aguacalienteyvaporseránexpulsadosporlosoriciosdelasuela,juntoconlas
impurezas. Durante el proceso de limpieza no hay necesidad de sostener la unidad.
3.Cuando la luz indicadora de limpieza deja de parpadear, el ciclo de limpieza se habrá
completado y podrá apagar la unidad y guardarla cuando se enfríe.
ADVERTENCIA: No intente levantar el mango mientras la luz indicadora de limpieza
parpadea, ya que puede expulsar agua caliente y vapor. Solo retírelo de la bandeja de
limpieza una vez que la luz indicadora de limpieza haya dejado de parpadear y haya
desconectado el cable. Utilice siempre la bandeja de limpieza provista y no la deje
desatendida durante el ciclo de limpieza.
1.Gire el disco de control de temperatura (5) para establecer el indicador en la
conguraciónlana.Inicialmente,laluzindicadoradetemperatura(2)puedeestar
intermitente mientras la unidad se ajusta a la nueva temperatura.
2.Espere hasta que la luz indicadora de temperatura se encienda de nuevo. Su
generador de vapor ahora se ha enfriado a la temperatura correcta.

Español-8
Para más resolución de problemas y preguntas frecuentes, visite www.oster.com.
SOLUCIÓN DE PROBLEMAS
Problema Causa principal Posible solución
La plancha no produce vapor. El nivel del tanque de agua es
demasiado bajo. Su generador
de vapor emitirá dos pitidos y
la luz indicadora de encendido
parpadeará para dejarle saber
que el tanque de agua necesita
llenarse.
Llena el tanque de agua.
El tanque de agua no está
completamente insertado en la
estación base. Compruebe si la
luz de encendido parpadea.
Retire y vuelva a insertar el
tanque de agua hasta que
escuche un clic audible.
Si la está usando por primera vez,
es posible que la unidad no haya
sido cebada.
Opere el impulso de vapor varias
veces haciendo doble clic en el
disparador de vapor en rápida
sucesión.
La unidad todavía se está
calentando. El vapor solo
funcionará cuando la luz
indicadora de temperatura
estéja.Compruebesilaluz
parpadea.
Espere hasta que la luz
indicadora de temperatura deje de
parpadear y se vuelva sólida.
Partículas marrones están
saliendo de la suela
Elmangonecesitadescalcicarse. Opere el proceso de auto-
limpieza. Siga las instrucciones
proporcionadas en la Sección de
“Auto-limpieza”.
No hay luces mostrándose en la
pantalla
El generador de vapor no ha
utilizado la función de vapor
durante 5 minutos y ha entrado
en el modo de “Apagado
automático”.
Apriete el disparador de vapor.
La unidad debe salir del modo
“Apagado automático”. Es posible
que deba esperar un poco para
que la unidad se caliente antes
de que pueda producir vapor.
Cuando la luz indicadora de
temperatura se enciende, la
unidad está lista para usarse.
SERVICIO POSTVENTA Y PIEZAS DE
REPUESTO
En el caso de que el aparato no funcione, pero esté bajo garantía, lleve la unidad al
Centro de servicio autorizado Oster®más cercano para su revisión, reparación o ajuste.
Tenga en cuenta que se requerirá una forma válida de comprobante de compra.

English-1
IMPORTANT SAFETY
INFORMATION
1. READ ALL INSTRUCTIONS BEFORE USING
2. Use appliance only for its intended use.
3. To reduce the risk of electric shock, do not immerse the appliance in water or other
liquids.
4. Always turn the appliance to “Off” before plugging or unplugging the appliance from
the electrical outlet. Never yank cord to disconnect from outlet; instead, grasp plug
and pull to disconnect.
5. Do not allow cord to touch hot surfaces. Let appliance cool completely before putting
away. Loop cord loosely around appliance when storing.
6. Makesureunitisoff,unpluggedandallowittocoolcompletelybeforellingor
cleaning.
7. Alwaysdisconnectappliancefromelectricaloutletwhenllingwithwateroremptying,
and when not in use.
8. Do not operate appliance with a damaged cord, or if the appliance has been dropped
or damaged. To reduce the risk of electric shock, do not disassemble or attempt to
repairtheappliance,takeittoaqualiedservicecenterforexaminationandrepair.
Incorrectreassemblyorrepaircouldcauseariskofre,electricshock,orinjuryto
persons when the appliance is used.
9. This appliance is not intended for use by persons (including children) with reduced
physical, sensory or mental capabilities, or lack of experience and knowledge, unless
they have been given supervision or instruction concerning use of the appliance by a
person responsible for their safety.
10. Children should be supervised to ensure that they do not play with the appliance.
11. Burns could occur from touching hot metal parts, hot water, or steam. Use caution
when you turn a steam appliance upside down – there may be hot water in the
reservoir.
12. To reduce the risk of contact with hot water emitting from steam vents, check
appliance before each use by holding it away from body and operating steam button.
13. To reduce the likelihood of circuit overload, do not operate another high wattage
appliance on the same circuit.
14. If an extension cord is absolutely necessary, a cord with an ampere rating equal to
or greater than the maximum rating of the iron shall be used. A cord rated for less
amperagecanresultinariskofreorelectricshockduetooverheating.Careshall
be taken to arrange the cord so that it cannot be pulled or be tripped over.
15.Whenllingthewatertank,watchforwaterthatcandripontotheoorandcauseyou
to slip and fall.
16. Appliance may cause personal injury or be damaged if dropped.
17. The use of attachments not recommended or sold by the appliance manufacturer may
cause injuries or void your warranty.

English-2
SAVE THESE INSTRUCTIONS
18. To avoid personal injury and damage to the appliance, only add water to the water
tank. NEVER add cleaning solutions, perfumes, oils or any other chemical additives.
19. Care should be taken when using the appliance due to the emission of steam.
20. Do not set the iron on an unprotected surface, even if it is on the heel rest.
21. The iron must not be left unattended while it is connected to the supply mains.
22.Theplugmustberemovedfromthesocket-outletbeforethewaterreservoirislled
with water.
23.Thellingaperturemustnotbeopenedduringuse.Instructionsforthesaferellingof
the water reservoir shall be given.
24. The iron must be used and rested on a stable surface.
25. When placing the iron on its stand, ensure that the surface on which the stand is
placed is stable.
26. The iron is not to be used if it has been dropped, if there are visible signs of damage
or if it is leaking.
27. If the iron is not operating normally, disconnect from power supply and have the iron
serviced by an authorized service center.

English-3
1 Clean Indicator Light / Self-Clean Button
2 Temperature Indicator Light
3 Iron Handset
4 Steam Trigger
5 Temperature Control Dial
6 Lock Button
7 Unlock Button
8 Water Tank
9 Power Switch (I/O)
10 Base Station
11 Steam Cord
12 Power Cord
13 Cleaning Tray
PRODUCT DESCRIPTION
8
12
13
9
10
1
23
4
5
6
11
7

English-4
BEFORE USING FOR THE FIRST TIME
Warning: Remove all packaging including any soleplate protection before
operating your steam generator.
1.Wipe over the soleplate with a soft cloth.
2.Position the iron handset (3) on the base station (10), on your ironing board (if it is
large enough) or on a heat resistant and secure surface at the same height as your
ironing board.
3.Before connecting your steam generator to the mains supply, make sure your supply
voltage is the same as the one indicated on your steam generator.
4.Whenyourstuseyoursteamgenerator,theremaybeaslightodouranditmay
smokeslightlyfortherstfewminutesofoperation.Thisisquitenormalandwill
disappear.
MPORTANT: Onrstusethewatersystemwillneedprimingbeforethehandsetwill
create steam. It is necessary to operate the steam boost function a few times before the
unit will be ready to create steam. To operate the steam boost function, double-click the
steam trigger (4) quickly.
Follow these simple steps to remove any impurities or residues inside your steam
generator that may be left over from the manufacturing process.
1.Followtheinstructionsunderllingyoursteamgeneratorandllthewatertank(8)as
described.
2.Emptythewatertanktorinseoutanyforeignparticlesthenrellit.
3.Followtheinstructionsundersteamironing.SetthetemperaturetotheMAXsetting(5)
4.Iron an old piece of cloth (cotton or towels is ideal) for a few minutes. While ironing,
pressthesteamtrigger(4)4or5times.Uponrstusagethepumpwillneedpriming
and you may need to hold the steam trigger to pull water through the system and
create steam.
5.Anyimpuritieswillbeushedfromyourironbythesteamandabsorbedbythecloth.
Your iron is now ready for use.
1.Remove the water tank (8) by holding the handle and pulling the tank forwards from the
base station (10).
2.Slide the water tank out.
3.FillthewatertankwithcoldtapwatertotheMAXmark.
4.Slide the water tank back into the base unit until it latches securely into place. You
should hear an audible click.
CLEANING YOUR STEAM
GENERATOR BEFORE USE
FILLING YOUR STEAM GENERATOR

English-5
Youcanllyoursteamgeneratorduringuse.Simplyremovethewatertank(8)as
describedaboveandaddwaterasrequired.DonotllpasttheMAXindicatormarkon
the tank.
Yoursteamgeneratorwillbeeptwiceandthepowerindicatorlight(9)willashtoletyou
knowthatthewatertankneedslling.
The smart features of the iron prevent you from creating steam in temperature settings
below . This is to ensure that delicate fabrics are protected from ironing with steam.
It is recommended that for harder to iron fabrics such as cotton and linen, steam should
be used when ironing.
Warning: When ironing delicate fabrics like nylons, acrylics and synthetics. Steam
should never be used.
1.Fill the water tank (8) with water.
2.Plug your steam generator into the mains supply and press the on (I) /off (O) button (9)
to switch your steam generator on.
3.Rotate the temperature control dial (5) to set the pointer to between the setting and
themaximumheat(MAX)setting.
4.The temperature indicator light (2) will pulse as your steam generator heats up. When
the temperature indicator light turns solid your steam generator is ready to use.
5.With the soleplate in contact with the garment, press the steam trigger (4) for a couple
of seconds. It is not necessary to hold the trigger down continuously as steam will still
be emitted from the soleplate for a short time after the trigger has been released. If
more steam is required, press the steam trigger again.
6.To operate the steam boost function, double-click the steam trigger quickly. The iron
will generate a highly concentrated steam boost for a short period of time.
Always release the steam trigger and allow any residual steam to be released before
replacing the iron on its stand.
FILLING DURING USE
STEAM IRONING

English-6
Ifyouintendtodry-ironfabrics,thereisnoneedtollthewatertank.However,ifwateris
already in the water tank, you do not need to empty it.
1.Rotate the temperature control dial (5) to set the pointer to the desired heat setting.
2.When the temperature indicator light (2) turns solid your steam generator is ready to
use.
3.Iron your laundry without pressing the steam trigger (4).
Vertical steam ironing is especially useful for ironing items such as curtains while they are
hanging, or jackets, suits and coats.
Select a temperature setting higher than (5). Once the temperature indicator light (2)
turns solid, your product is ready to use. Hold the iron in a vertical position and press the
steam trigger (4) as required.
WARNING: Hot steam is emitted from the soleplate. Do not iron/steam a garment
whilst wearing it. Do not operate steam in the direction of yourself or anybody else.
The iron has an Auto Off safety function that will operate when your appliance has not
been used for 5 mins. The unit will enter a sleep mode and all the lights will turn off. To
restart simply pull the steam trigger (4). The unit will restart and may need a short time
to reheat to the desired temperature, which will be indicated by the pulsing temperature
indicator light (2).
IRONING WITHOUT STEAM
VERTICAL STEAM IRONING
AUTO OFF FUNCTION

English-7
Your steam generator takes time to heat up and cool down. If you change the
temperature setting on your steam generator, you must give it time to adjust to the new
setting.
This is especially important when you change from a high setting to a lower one. It takes
your steam generator longer to cool down than it does to heat up and this is the reason
we recommend that you begin ironing at lower temperatures.
For example, you have been ironing using the lino/linen setting and wish to change to the
lana/wool setting:
1.Turn the temperature control dial (5) to set the pointer to the lana/wool setting.
Initially, the temperature indicator light (2) may pulse while the unit adjust to the new
temperature.
2.Wait until the temperature indicator light comes on solidly again. Your steam generator
has now cooled to the correct temperature.
WARNING: Do not use harsh abrasives, chemical cleaners or solvents to clean the
exterior of your iron.
Allow your iron to completely cool down and wipe the soleplate with a soft damp cloth. If
polyester has burnt to the soleplate, iron a damp cotton cloth while your iron is still hot.
Wipe over the rest of your iron with a soft damp cloth then wipe dry. Do not immerse the
appliance or power cord or plug in water or any other liquid.
Only activate the self-clean when you want to activate the self-cleaning system. Never
activate the self-clean function when ironing.
The self-clean function removes scale and impurities. The steam generator has an
intelligent reminder cleaning mode which activates after continuous steam ironing over
a total of 25 hours. If you are in a hard water area you can perform the cleaning cycle
sooner than the allocated 25 hours by following the steps below.
The cleaning indicator light (1) will illuminate to remind users to clean the machine.
1.To activate the self-clean function, adjust the temperature control knob (5) to the Max
setting. Press and hold the self-clean button (1) for 3 seconds. The clean indicator light
willash.Placetheironhandset(3)onthecleaningtray(13)andpullthesteamtrigger
(4) once then remove hands from the handset, this will initiate the cleaning function.
2.Hot water and steam will be ejected from the holes in the soleplate along with any
impurities. During the cleaning process there is no need to hold the product.
3.The cleaning cycle lasts approximately 1 minute When the clean indicator light stops
ashing,thecleaningcycleiscomplete,andyoucanswitchoffyourunitandstore
when cooled.
IMPORTANT
CARE AND CLEANING
SELF-CLEANING

English-8
WARNING: Do not attempt to pick up the handset while the clean indicator light is
ashingashotwaterandsteammaybeejected.Onlyremovefromthecleaningtray
oncethecleanindicatorlighthasstoppedashingandyouhaveswitchedoffthepower.
Always use the cleaning tray provided and do not leave unattended during the clean
cycle.
For further troubleshooting and FAQs visit www.oster.com.
TROUBLESHOOTING
Issue Root Cause Possible solution
The iron does not produce steam. Water tank level is too low. Your
steam generator will beep twice,
and the power indicator light will
ashtoletyouknowthatthe
watertankneedslling.
Fill water tank.
Water tank is not fully inserted to
the base station. Check if power
lightisashing.
Remove and re-insert the water
tank until an audible click is heard.
Ifitisonrstusetheunitmay
have not been primed.
Operate the steam boost a few
times by double-clicking the steam
trigger in quick succession.
The unit is still heating up. The
steam will only operate when the
temperature indicator light is solid.
Checkiflightisashing.
Wait until the temperature
indicatorlightstopsashingand
turns to solid.
Brown particles are emitted from
the soleplate
The handset needs to be de-
scaled.
Operate the self-clean process.
Follow instructions provided in
“Self-cleaning” section.
No display lights are showing. Steam generator has not used
steam function for 5 minutes and
entered “Auto Off” mode.
Pull the steam trigger. Unit should
come out of “Auto Off” mode.
You may need to wait a short
time for unit to heat up before it
can produce steam. When the
temperature indicator light turns
solid the unit is ready for use.
AFTER SALES SERVICE AND SPARE
PARTS
In the event that the appliance does not work, but is under warranty, take the unit to the
nearest authorized Oster®Service Center for inspection or repair
Please note that a valid form of proof of purchase will be required.

Printed in China Impreso en China
P.N. TBA
GCDS-OST-SL
For Mexican models only:
La siguiente información es para Mexico:
IMPORTADOR:
NEWELL BRANDS DE MEXICO S.A. DE C.V.
AVE.JUAREZNO40-201,COLONIAEXHACIENDASANTA
MONICA,TLALNEPANTLA54050,ESTADODEMEXICO
TEL: 5366-0800
Características eléctricas de los modelos de la serie:
Electric characteristics of series models:
Modelo / Model Voltaje / Voltage Frecuencia / Frequency Potencia / Power
GCSTSG1200-052 220 V~ 50 Hz 2000 W
GCSTSG1200-013 127 V~ 60 Hz 1600 W
XXXendondeXescualquiernumeroentre0y9ocualquierletraentreAyZ.
XXXwhereXisanynumberbetween0and9oranyletterbetweenAandZ.
© 2020 Sunbeam Products, Inc. Todos los derechos reservados.
Garantía limitada de un año – por favor consulte los detalles en el inserto.
© 2020 Sunbeam Products, Inc. All rights reserved.
One year limited warranty – please see insert for details.
www.oster.com
This manual suits for next models
2
Table of contents
Languages:
Other Oster Iron manuals

Oster
Oster 6020 User manual

Oster
Oster GCSTSP6201 User manual

Oster
Oster 4415-449 User manual

Oster
Oster GCSTBS4801L User manual

Oster
Oster GCSTCS-412 User manual

Oster
Oster GCSTBS5802 User manual

Oster
Oster GCSTCM2001 User manual

Oster
Oster GCSTUP8201 User manual

Oster
Oster GCSTBS4951L User manual

Oster
Oster 5002 User manual

Oster
Oster GDSTCM2001 User manual

Oster
Oster GCSTPM7201 User manual

Oster
Oster GCSTCM2001P User manual

Oster
Oster 5104 User manual

Oster
Oster GCSTBV4112 User manual

Oster
Oster GCSTBS5802 User manual

Oster
Oster GCSTBV4119 User manual

Oster
Oster GCSTAE6501 User manual

Oster
Oster GCSTSP6101 User manual

Oster
Oster GCSTBS5802 User manual