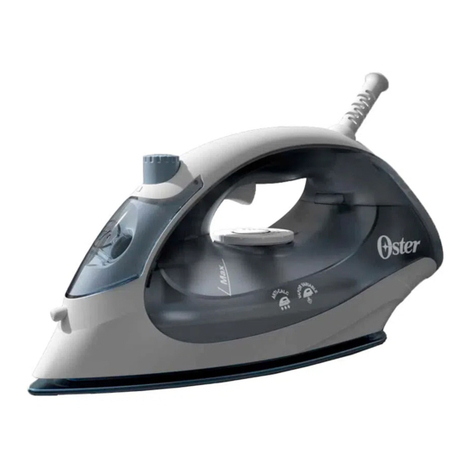
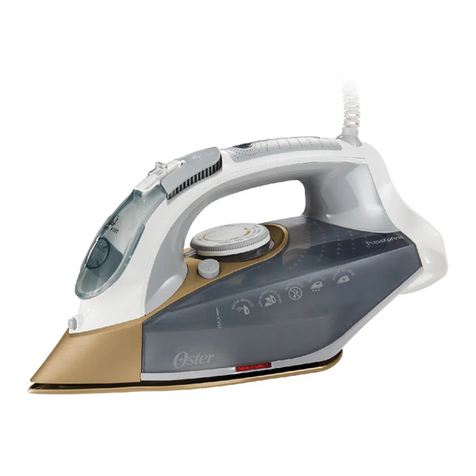
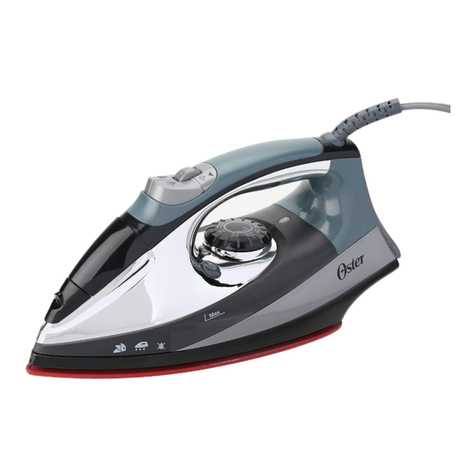
Oster GCSTTS7010 User manual

Instruction Manual
ACTIVE STEAM IRON WITH ANTI-SCRATCH TIP
PLEASE READ ALL INSTRUCTIONS BEFORE USING THIS APPLIANCE
Manual d’ Instructions
FER A VAPEUR ACTIVE AVEC POINTE ANTIRAYURES
LIRE TOUTES LES INSTRUCTIONS AVANT D’ UTILISER CET APPAREIL
Manual de instrucciones
PLANCHA DE VAPOR ACTIVO CON PUNTA RESISTENTE
LEA TODAS LAS INSTRUCCIONES ANTES DE USAR ESTE APARATO
Manual de Instruções
FERRO COM VAPOR ATIVO E PONTA RESISTENTE ANTI-ARRANHÕES
LEIA TODAS AS INSTRUçõES ANTES DE USAR ESTE APARELHO
GCSTTS7010,
GCSTTS7012
& GCSTTS7014
GCSTTS7010,
GCSTTS7012
& GCSTTS7014
MODELS/ MODÉLES
MODELOS
MODELS/ MODÉLES
MODELOS

English - 1
IMPORTANT SAFEGUARDS
When using electrical appliances, basic safety instructions should always be followed,
including the following:
1 READ ALL INSTRUCTIONS BEFORE USING THE STEAM IRON. PLEASE MAkE
SURE TO REMOvE ALL STICkERS FROM THE PRODUCT BEFORE USING THE IRON.
2 Use iron only for its intended use.
3 To protect against risk of electric shock, do not immerse iron in water or other liquids.
4 The Fabric Select and Steam Dials/Buttons (for model GCSTTS7014 only) should always
be turned to off O/ before plugging or unplugging from outlet. Never yank cord to
disconnect from outlet; instead, grasp plug and pull to disconnect.
5 DO NOT allow cord to touch hot surfaces. Let iron cool completely before putting away.
Loop cord loosely around iron when storing.
6 Alwaysdisconnectironfromelectricaloutletwhenllingwithwateroremptyingandwhen
not in use.
7 DO NOT operate iron with a damaged cord or if the iron has been dropped or damaged.
To avoid the risk of electric shock, do not disassemble the Iron. Take it to an Oster®
Authorized Service Center for examination and/or repair. Incorrect reassembly can cause
a risk of electric shock when the iron is used.
8 DO NOT leave Iron unattended while plugged in or turned on or on an ironing board.
9 Burns can occur from touching hot metal parts, hot water or steam. Use caution when
you turn a steam iron upside down - there may be hot water in the Reservoir.
10 If the Iron is not operating normally, disconnect from the power supply and have the Iron
serviced by an Oster®Authorized Service Center.
11 Your Oster®iron is designed to rest on the heel rest. DO NOT leave the Iron unattended.
DO NOT set iron on an unprotected surface, even if it is on its heel rest.
12 This is a high wattage appliance. To avoid a circuit overload, do not operate another high
wattage appliance on the same circuit.
13 If an extension cord is absolutely necessary a cord with the same amperage should be
used. Cords rated for less amperage may overheat. Care should be taken to arrange the
extension cord so that it cannot be pulled or tripped over.
14 This appliance is not intended for use by persons (including children) with reduced
physical, sensory or mental capabilities, or lack of experience and knowledge, unless
they have been given supervision or instruction concerning use of the appliance by a
person responsible for their safety. Children should be supervised to ensure that they do
not play with the appliance.
15 Close supervision is necessary when any appliance is used by or near children, or
incapacitated individuals.
SAVE THESE INSTRUCTIONS
(For 120 & 127 Volts with two at pins only) To reduce the risk of electrical shock, this
appliancehasapolarizedplug(onebladeiswiderthantheother).Thisplugtsapolarized
outlet only one way. This is a safety feature intended to help reduce the risk of electrical
shock.Iftheplugdoesnottfullyintotheoutlet,reversetheplug.Ifitstilldoesnott,
contactaqualiedelectrician.Donotattempttodefeatthissafetyfeature.

English - 2
Congratulations on your purchase of an Oster® Steam Iron!
We have designed your Iron to provide the utmost in quality, ease of use and
convenience. Your Steam Iron offers the following features:
WELCOME
®
7014
7010 7012
Ceramic soleplate for a smooth glide and superior resistance.
Anti-Scratch Resistant tip for durability.
Digital controls to provide easy and precise ironing settings.
Motion smart auto-off turns iron off if left unmoved for a determined
amount of time based on its position.
Active Steam feature provides powerful and continuous steam that
deeply penetrates the fabrics to easily remove stubborn wrinkles.
Manual controls to provide easy and precise ironing settings.
Resistant hard anodized anti-scratch tip for greater durability.
Non-stick soleplate with resistant hard anodized anti-scratch tip for
greater durability.
Anti-Scratch Tip
Active Steam
Ceramic Soleplate
Non-Stick Soleplate
Manual Controls
Digital Controls
Smart Auto-Off

English - 3
1. Spray Mist Release
2. Covered Water Fill Hole
3. Auto-Off Indicator/Wait/Ready Light
4. Digital Electronic Display (model GCSTTS7014 only)
5. a. Active Steam Selection Dial (models GCSTTS7010 & GCSTTS7012 only)
b. Active Steam Selection Buttons (model GCSTTS7014 only)
6. Spray Mist Button
7. Shot of Steam Button
8. a. Fabric Select Dial (models GCSTTS7010 & GCSTTS7012 only)
b. Fabric Select Buttons (model GCSTTS7014 only)
9. Soft Grip Handle (models GCSTTS7012 & GCSTTS7014 only)
10. 360° Tangle-Free Swivel Cord
11. Anti-Calcium System
12. See-Through Water Reservoir
13. Self-Clean Button
14. Resistant Hard Anodized Anti-Scratch Tip
15. Non-Stick Soleplate with micro holes (model GCSTTS7010 only)
Ceramic Soleplate with micro holes (models GCSTTS7012 & GCSTTS7014 only)
16. Water cup included
DESCRIPTION OF THE APPLIANCE
(Model GCSTTS7014 Only)
1
2
3
5a
8a 67
9 10 45b
12
11
13
15
14
8b
16

English - 4
INSTRUCTIONS FOR USE
Before First Use
• Whenusingtheironforthersttime,testitonapieceofclothtobesurethatthe
soleplate and the water reservoir are clean.
• Itispossiblethattheironwilldischargesomesmokeandreleasesomeodorduringits
rstuse.Thisisduetotheinitialheatingofthematerialsused.Thisiscompletely
normal and will stop shortly afterwards.
FILLING WITH WATER
YoumustllthewaterreservoirwithwatertousetheShotofSteamandSprayMist
features and to get steam out of your iron.
TIP: Each iron is tested at the factory to ensure that they function correctly. The test
may leave a small, harmless amount of water within the water reservoir.
Beforeyoullthewaterreservoir,pleaseconsiderthefollowing:
• Thisironwasdesignedforusewithtapwater,veryhardwater.
Since the Anti-Calcium System is a permanent system located
inside the water reservoir. This system removes calcium from
the water and reduces calcium build-up on the soleplate.
Therefore your iron accepts tap water eliminating the need of
keeping distilled water on hand for ironing.
IMPORTANT: When not ironing, always set the Steam Lever to
the closed position “ ” and the Fabric Select Dial to the off
position “O”.
Tollthewaterreservoir:
1.Liftthewaterllholecover.
2. Make sure the iron is unplugged. Set the Steam Dial/Buttons (for
model GCSTTS7014 only) to closed position “ ” and the Fabric Select Dial/Buttons
(for model GCSTTS7014 only) to off position “O”.
3.Fillwatercupwithwater.Pourwaterintoiron’swaterreservoir.Donotllwater
reservoirbeyondmaximumlllevel“MAX”.
WARNING: Topreventtheriskofburns,becarefulwhenllingahotironwithwater.
Hot metal parts, hot water and steam can cause injuries.
Model GCSTTS7014

English - 5
SELECTING FABRIC SETTINGS
To select a fabric setting, turn the Fabric Select Dial/Press the “ “ Buttons (for model
GCSTTS7014 only) to the desired fabric selection. The wait light will glow red while the
iron heats up. The light will then change to green indicating that the iron is ready to be
used.
Dry Ironing
1.Make sure the Steam Dial/Buttons (for model GCSTTS7014
only) is turned to the closed position “ ”.
2.Plug the cord into the appropriate outlet.
3.Turn the Fabric Select Dial/Buttons (for model GCSTTS7014
only) to the fabric setting you desire (Silk “Seda” or Synthetics
“Sintet”).
Allow the iron to heat for 2 minutes. While the iron is heating,
make sure it is sitting on its heel rest on a stable, protected
surface.
NOTE: While the Steam Dial/Button (for model GCSTTS7014 only)
is turned to the closed position “ ”, you may still use the Shot of
Steam or Spray Mist features. Please make sure the water reservoir
is 1/4 full of water.
TIP: Refer to the “Ironing Guide” for the recommended setting for
your fabric.
Steam Ironing
1.Follow the instructions for “Filling With Water”.
2.Plug the cord into the outlet. The power indicator light will
illuminate.
3.Turn the Fabric Select Dial/Buttons (for model GCSTTS7014
only) to the steam ironing fabric setting you desire (Linen “Lin”,
Cotton “Algod”, Wool “Lana” or Silk “Seda”) and allow iron to heat
for 2 minutes. While the iron is heating, make sure it is sitting on
its heel rest on a stable, protected surface.
TIP: Refer to the “Ironing Guide” for the recommended setting for
your fabric.
4.After the iron has heated (2 minutes), turn the steam dial/button
(for model GCSTTS7014) to the desired steam setting.
IMPORTANT: When not ironing, always set the Steam Dial/Buttons (for model
GCSTTS7014 only) to closed position “ ” and the Fabric Select Dial/Buttons (for model
GCSTTS7014 only) to off position “O”.
Model GCSTTS7014
Model GCSTTS7014

English - 6
IRONING TIPS
• Alwaysreadgarmentlabelsandfollowthemanufacturer’sironinginstructions.
• Sortthearticlestobeironedaccordingtothetypeoffabric.
• Youshouldfirstirongarmentsrequiringlowtemperature(e.g.,silksandsynthetics)toavoid
damaging them with an iron that is too hot.
• Ifyouareunsureofthefabriccontentofthegarment,testasmallarea,suchasaseamor
facing, before ironing a visible area. Start with a low temperature and gradually increase the
heat to find the best setting.
• Whenchangingthetemperaturefromahighsettingtoalowsetting,allowapproximately5
minutes for the lower temperature to be reached.
• Whensteamironing,uselong,slowpassesoverthefabric.Thiswillallowthesteamto
penetrate the fabric while allowing the heat of the soleplate to dry out the moisture.
• Toironlinens,turngarmentinsideout.Becarefulnottouseanironthatistoohotbecause
the lining may melt or stick to the soleplate.
• Toironzippers,useanironingclothormakesurethezipperisclosedandironovertheflap.
Never iron directly over an unprotected zipper.
• Usethe“IroningGuide”toselectthebestsettingandmethodforthefabricyouplantoiron.

English - 7
IRONING GUIDE
Suggested Fabric Salect
Fabric Steam Setting Dial/Buttons Ironing Recommendations
Acrylic Synthetic “Sintet” Iron garment inside out.
Acetate Synthetic “Sintet” Iron garment inside out while still
damp.
Silk Silk “Seda” Iron garment inside out. Use an
ironing cloth* to prevent shine
marks.
Viscose Silk “Seda” Mainly dry iron; steam may be
used under garment
manufacturer’s instructions.
Nylon Silk “Seda” Iron garment inside out while still
damp.
Polyester Synthetic “Sintet” Iron garment inside out while still
damp.
Rayon Synthetic “Sintet” Iron garment inside out.
Wool Wool “Lana” Iron garment inside out or use an
ironing cloth.*
Wool Blends Wool “Lana” Iron garment inside out or use an
ironing cloth.*
Cotton Blends Cotton “Algod” Follow garment manufacturer’s
instructions. Use setting for the
berrequiringthelowestsetting.
Corduroy Cotton “Algod” Iron garment inside out or use an
ironing cloth* and then brush the
garment with your hand to raise
the texture of the fabric.
Cotton Cotton “Algod” Iron dark fabrics inside out to
prevent shine marks.
Linen Linen “Lin” Iron garment inside out or use an
ironing cloth* to prevent shine
marks (especially on dark fabrics).
Denim Linen “Lin” Iron dark fabrics inside out to
prevent shine marks.
* An ironing cloth is made with cotton, dry-cleaned cloth that you place over the garment you are
ironing to prevent the fabric from looking shiny.
Note: Use the Spray Mist and/or the Shot of Steam feature for deeper penetration to remove
wrinkles.
Note: Some fabrics may require more steam than others. Your iron has the capability to adjust steam
as needed.

English - 8
USING THE IRON’S SPECIAL FEATURES
We have designed your steam iron to provide the utmost in quality, ease of use and
convenience. Your steam iron offers the following special features:
Spray Mist Feature
The Spray Mist is a powerful water spray mist that dampens the fabric to aid in removing
wrinkles from heavy fabrics and for setting creases.
To use the Spray Mist Feature:
PresstheSprayMistbuttonrmlyapplyingwaterinthedesiredarea.Ironoverthefabric
to dry.
Shot of Steam Feature
The Shot of Steam feature provides an extra burst of steam for deep penetration of
stubborn wrinkles. You can use this feature while Dry or Steam ironing, but the water
reservoir must at least ¼ full of water.
To use the Shot of Steam Feature:
Place the iron on top of the wrinkly and press the Shot of Steam button each time you
would like an extra burst of steam. The Shot of Steam feature may be used continuously
with just three-second intervals between shots.

English - 9
Vertical Shot of Steam
The vertical steam feature allows your iron to function as a
garment steamer.
Tip: When using the vertical shot of steam on clothing, hang the
clothing on a clothes hanger for best results. Hanging curtains
and drapes may also be steamed.
How to use Vertical Steam:
1.Allow iron to warm up (2 minutes)
2.Hold the iron in a vertical position, with the iron close to but not
touching the fabric you want to steam.
3.With your other hand, pull the fabric tight.
4.Press the Shot of Steam button in approximately 3-second
intervals as you move the iron across the wrinkled area.
WARNING: To prevent the risk of burns, keep your hand away from the area being
steamed.
WARNING: DO NOT steam garments while wearing them; this may result in injuries.
3-Way Motion Smart Auto-Off Feature
When the iron is plugged in, the power indicator will light steadily, indicating there is
power to the iron. If you leave the iron:
• Inahorizontalpositionwithoutmovingit,oraccidentallytiptheironover,itwill
automatically stop heating after 30 seconds. The off selection on the digital display
(model GCSTTS7014 only) and the red wait light will blink to let you know that the iron
has stopped heating.
• Inaverticalposition(onitsheelrest)withoutmovingit,theironwillautomaticallyturn
off after 15 minutes. The off selection on the digital display (model GCSTTS7014 only)
and the red wait light will blink to let you know that the iron has stopped heating.
IMPORTANT: The off selection on the digital display (model GCSTTS7014 only) and the
red wait light will continue to blink for 5 minutes, then turn totally off.
To reset the iron:
• Movetheironbackandforth.Theoffselectiononthedigitaldisplay(model
GCSTTS7014 only) and the red wait light will stop blinking and the iron will start
heating again (allow it to reheat for 2 minutes); the iron is now ready to use.
WARNING: Motion smart auto-off is a safety feature, not a recommended means for
turning your iron off. See”Caring for Your Iron After Use” for information on turning off
your iron and storing it safely between uses.

English - 10
Wait/Ready Light
Indicates when your iron reaches the desired temperature. When a fabric setting has
been selected, the red wait light will illuminate. Once the iron heats up to the desired
fabric selection, the light will change from red (Wait) to green (Ready). This occurs each
time the fabric setting is changed. It will also occur when the iron has been reset after the
Auto-Off is deactivated.
Anti-Calcium System
The Anti-Calcium System is a permanent system located inside the water reservoir. This
system removes calcium from the water and reduces calcium build-up on the soleplate.
Therefore your iron accepts tap water eliminating the need of keeping distilled water on
hand for ironing.
Self-Cleaning
Prevents mineral build up that can reduce the life of your iron. See the “Caring For Your
Iron” section for instructions on how to use this feature.
Anti-Drip
Produces steam without dripping, spitting, or leaking through the soleplate, even at low
temperatures.
Ceramic Soleplate
Provides a smooth glide for quick and easier ironing and a superior resistance (models
GCSTTS7012 & GCSTTS7014 only).
Anti-Scratch Tip
The resistant hard anodized anti-scratch tip provides greater durability.
Micro Holes
The micro holes in the soleplate grant more concentrated steam diffusion.
360° Tangle-Free Swivel Cord
Keeps the power cord off of the fabric and out of your way, whether you are right or
left-handed.
Longer Power Cord
Provides 2.5 meters (8 feet) of power cord to give you added flexibility when ironing.
Soft Grip Handle
Provides a comfortable grip and helps eliminate slipping (models GCSTTS7012 &
GCSTTS7014 only).

English - 11
CARING FOR YOUR IRON AFTER USE
TURNING OFF YOUR IRON
1. Turn the fabric selector dial/press the button (for model GCSTTS7014 only) until the
light turns off. Unplug the iron from the power source.
WARNING: NEvER yank the power cord when unplugging the Iron. This can
damage the cord.
CLEANING THE SOLEPLATE
Clean the soleplate if starch or other residue accumulates.
To clean the soleplate:
1.Allow the iron to cool and then wipe it with a soft, damp cloth.
WARNING: DO NOT use abrasive cleansers, scouring pads or vinegar to clean the
soleplate.Thiswilldamagethenish.
2.Run the iron over an all-cotton cloth to remove any residue.
USING THE SELF-CLEANING FEATURE
You should use the Self-Cleaning feature to maintain the optimal performance of
your iron. The Self Cleaning feature will clean the water reservoir and steam vents of
accumulated minerals, dust and lint.
To use the Self-Cleaning feature:
1. Move the Steam Dial/Buttons (for model GCSTTS7014 only) back and forth several
timestoremovedebrisandmineralsfromthesteamvalve.Thiskeepswaterowing
into the steam chamber.
2. Fillthewaterreservoirwithtapwatertothe“MAX”line.
3. Plug in the iron and move the fabric select dial/press the button (for model
GCSTTS7014 only) to linen position “Lin”, and allow the iron to heat until the wait/
ready light turns green.
4. Unplug the iron.
5. Hold the iron over a sink in a horizontal position.
WARNING: Be careful not to touch the iron’s hot surfaces.
6. Press the Self-Clean button and hold. Water will begin dripping from the steam vents.
Slowly rock the iron side-to-side and front to back for 30 seconds. When rocking the
iron, dip the nose of the iron slightly below the rear to make certain the water
circulates completely.
7. Turntheironupsidedownandallowtheremainingwatertoowoutofthellhole.
8. Dry the soleplate with a towel.
9. Plug in the iron and turn the Fabric Select Dial/press the Button (for model
GCSTTS7014 only) to the linen position “Lin”. Let the iron heat until the wait light
turns green and dry out the iron completely.
10. Turn the fabric select dial/press the button (for model GCSTTS7014 only) to the off
position “O”. The light will go out, indicating that the iron has turned itself off. Unplug
the iron and allow it to cool before storing.

English - 12
CLEANING THE ANTI-CALC SYSTEM
Your Steam Iron houses an Anti-Calc Filter in the Reservoir, which eliminates impurities
from the water.
To prolong the efciency of this lter:
1. Unplug the iron and allow it to cool.
2. Locate the water cup that accompanied the iron. Fill it with water to the Max Fill mark.
Add1teaspoonofsalttothewaterandllthewaterreservoirwiththissolution.
3. Leave the solution in the water reservoir for 15 minutes, then empty it.
4. Fill the water reservoir a second time with the salt-water solution and empty it again
after 15 minutes.
5. Fill the reservoir with fresh water to rinse and empty. The Anti-Calc System should be
cleaned approximately once a month.
STORING YOUR IRON
1. Allow the iron to cool.
2. If you do not use your iron on a daily basis, empty the water reservoir after each use
for a longer iron life. To do so, unplug the Iron, turn the iron upside down, open the
fill hole cover, and allow water to flow from the fill hole. Shake the iron gently to
remove trapped water drops.
3. Loosely loop the power cord around the heel rest and store the Iron on its heel rest.
IMPORTANT: Wrapping the cord around the Iron too tightly can damage the cord.
TIP: When not ironing, always set the steam dial/button (for model GCSTTS7014 only)
to closed position “ ”and the fabric select dial/button (for model GCSTTS7014 only) to
off position “O”.

Français - 1
MESURES PRÉVENTIVES IMPORTANTES
Les mesures de sécurité de base doivent toujours être suivies, lorsque vous utilisez des
appareils électriques, et elles comprennent ce qui suit:
1 LIRE TOUTES LES DIRECTIvES AvANT L’UTILISATION. vEUILLEz RETIRER TOUS
LES AUTO-COLLANTS SE TROUvANT SUR LE FER à REPASSER AvANT DE
L’UTILISER.
2 N’utilisez le fer que pour l’usage auquel il a été conçu.
3 Veillezànepassubmergerleferdansl’eauoudansd’autresliquidesandevousprotégercontrele
risque d’électrocution.
4 Les boutons de sélection du Tissu ou du Mode Vapeur (modèle GCSTTS7014 uniquement) doivent
toujours être tourner sur arrêt O/ ” avant de brancher ou de débrancher l’appareil. Ne jamais tirer
surlecordonélectriquepourdébrancher,maisplutôtsaisirlacheélectriqueettirersurlachepour
débrancher.
5 Veillez à NE PAS permettre au cordon de toucher des surfaces chaudes. Laissez le fer refroidir
parfaitement avant de le ranger. Enroulez de façon lâche le cordon autour du fer au moment de le
ranger.
6 Débranchez toujours le fer de la prise électrique lors du remplissage avec de l’eau, lors de la vidange
et lorsqu’il n’est pas utilisé.
7 Veillez à NE PAS faire fonctionner le fer avec un cordon détérioré ou lorsque le fer a été échappé ou
endommagé.Nedémontezpasleferandevousprotégercontrelerisqued’électrocution.Apportez-
le à un Centre de Service Autorisé Oster®pour un examen et/ou une réparation. Un ré-assemblage
inapproprié peut occasionner un risque d’électrocution lors de l’utilisation du fer.
8 NE laissez PAS le fer sans surveillance lorsqu’il est branché ou en marche ou sur une planche à
repasser.
9 Le fait de toucher les parties métalliques chaudes, l’eau chaude ou la vapeur peut occasionner des
brûlures. Soyez prudent lorsque vous retournez un fer à vapeur à l’envers - de l’eau chaude pourrait
se trouver dans le réservoir.
10 Débranchez le fer de l’alimentation électrique et faites-le examiner dans un centre de service autorisé
Oster®s’il ne fonctionne pas correctement.
11 Votre fer Oster®est conçu pour s’appuyer sur le support de talon. Ne laissez pas le fer sans
surveillance. Ne déposez pas le fer sur une surface non protégée même s’il repose sur le support de
talon.
12 Get appareil consomme beaucoup d’énergie. Ne faites pas fonctionner un autre appareil à haute
consommation d’énergie sur le même circuit.
13 Si l’utilisation d’une rallonge est absolument nécessaire, il est recommandé d’utiliser une rallonge
aveclemêmeampérage.Leslsélectriquesavecunpluspetitampéragepourraientsurchauffer.Il
estaussirecommandédeplacerlelélectriquedetellefaçonquepersonnenepuisseparaccident
tirer dessus ou s’enchevêtrer et tomber.
14 Cet appareil n’est pas destiné à être utilisé par des personnes (enfants y compris) dont les capacités
physiques, sensorielles ou mentales sont diminuées, ou qui ne disposent pas des connaissances
ou de l’expérience nécessaire, à moins qu’elles n’aient été formées et encadrées pour l’utilisation de
cet appareil par une personne responsable de leur sécurité. Les enfants doivent être surveillés pour
s’assurer qu’ils NE jouent PAS avec l’appareil.
15 Les enfants et personnes handicapées doivent être surveillés lorsqu’ils utilisent l’appareil ou que
l’appareil est utilisé à côté d’eux.
CONSERVER CES DIRECTIVES
(Seulement pour appareils de 120 & 127 V avec deux fiches plates)
Cetappareilpossèdeuneche
polarisée(unelameestpluslargequel’autre)andevousprotégercontrelerisqued’électrocution.Cette
chenes’adaptequed’uneseulefaçonàuneprisepolarisée.Ceciestunecaractéristiquedesécuritéconçue
pouraideràréduirelerisqued’électrocution.Inversezlachesiellenes’insèrepasparfaitementdansla
prise.Consultezunélectricienqualiésilachenes’adaptetoujourspascorrectement.Necherchezpasà
contourner cette caractéristique de sécurité.

Français - 2
Nous vous félicitons pour l’achat votre fer à repasser OSTER® !
Nous avons conçu votre fer à repasser pour qu’il vous donne d’excellents résultats, qu’il
soit facile à utiliser et pratique. Votre Fer à Vapeur a les caractéristiques suivantes:
BIENVENUE
®
7014
7010 7012
Semelle en céramique résistante qui glisse parfaitement sur les
tissus. Pointe résistante anti-rayure pour plus de durabilité.
Des boutons de contrôle pouvoir ajuster précisément et facilement
tous les paramètres de votre fer à repasser.
Arrêt Automatique Intelligent à détection de mouvement, éteint
l’appareil si ce dernier est immobile pendant un certain lapse de
temps.
La fonction Vapeur vous donne de la vapeur continue et puissante
qui pénètre profondément pour enlever plus facilement les plis
résistants des tissus chiffonnés.
Des boutons de contrôle manuel pour pouvoir ajuster précisément
tous les paramètres de votre fer à repasser.
Pointe dure anodisée résistante aux rayures pour encore plus de
durabilité.
Semelle non adhérente avec une pointe dure anodisée résistante
aux rayures pour encore plus de durabilité.
Pointe Anti-Rayures
Vapeur
Semelle en Céramique
Semelle Non Adhérente
Boutons de Contrôle Manuel
Boutons de Contrôle Numérique
Arrêt Automatique Intelligent

Français - 3
1. Brumisateur
2. OriceCouvertdeRemplissagedel’Eau
3. Voyant Lumineux de Marche/Arrêt/Attente/A disposition
4. AfchageNumériqueElectronique(modèleGCSTTS7014uniquement)
5. a. Cadran de Réglage de la Vapeur (modèles GCSTTS7010 & GCSTTS7012 uniquement)
b. Boutons de Réglage de la Vapeur (modèles GCSTTS7014 uniquement)
6. Bouton Brumisateur
7. Bouton d’Arrêt de la Vapeur
8. a. Cadran de Sélection du Tissu (modèles GCSTTS7010 & GCSTTS7012 uniquement)
b. Boutons de Sélection du Tissu (modèle GCSTTS7014 uniquement)
9. Poignée Confortable (modèles GCSTTS7012 & GCSTTS7014 uniquement)
10. Cordon Pivotant à 360° qui ne s’emmêle pas
11. Système Anti-Calcaire
12. Réservoir d’Eau Transparent
13. Bouton Auto Nettoyage
14. Pointe Dure Anodisée résistante aux rayures
15.Semellenonadhérenteavecmicroorices(modèleGCSTTS7010uniquement)
SemelleenCéramiqueavecmicroorices(modèlesGCSTTS7012&GCSTTS7014
uniquement)
16. Gobelet Inclus
DESCRIPTION DE L’APPAREIL
(modèle GCSTTS7014 uniquement)
1
2
3
5a
8a 67
9 10 45b
12
11
13
16
15
14
8b

Français - 4
DIRECTIVES D’UTILISATION
AVANT PREMIER USAGE
• Lapremièrefoisquevousutilisezvotreferàrepasser,ilestrecommandédefaire
un essai sur un morceau de tissu pour s’assurer que la semelle et le réservoir sont
propres.
• Ilestpossiblequ’àlapremièreutilisation,unpeudefuméesorteduferetqu’ildégage
une certaine odeur. Ceci est provoqué par la première chauffe des matériaux utilisés
à l’intérieur du fer. C’est parfaitement normal et ce phénomène s’arrêtera en quelques
minutes.
REMPLISSAGE AVEC DE L’EAU
Vous devez remplir le réservoir d’eau avec de l’eau pour utiliser les caractéristiques du
jet de vapeur et du jet pulvérisé et pour obtenir de la vapeur de votre fer.
CONSEIL: Chaque fer est testé à l’usine pour assurer qu’il fonctionne correctement.
L’essai peut laisser une petite quantité inoffensive d’eau à l’intérieur du réservoir.
Prièrederééchiràcequisuitavantderemplirleréservoird’eau:
• Ceferaétéconçupourpouvoirêtreutiliséavecdel’eaudurobinet,trèscalcaire.
Le Système Anti-Calcaire est permanent et situé à l’intérieur du réservoir d’eau. Ce
système élimine le calcium qui s’accumule sur la semelle. Votre fer accepte donc l’eau
du robinet et il n’est pas nécessaire de maintenir une réserve d’eau distillée pour le fer à
repasser.
IMPORTANTE: Au moment de repasser, maintenir le Bouton/Cadran de Vapeur (modèle
GCSTTS7014 uniquement) en position fermée “ ” et le Bouton/Cadran de Sélection du
Tissu (model GCSTTS7014 uniquement) sur la position d’arrêt “O”.
Pour remplir le réservoir d’eau:
1. Soulevez le couvercle de l’ouverture de remplissage d’eau.
2. Assurez-vous que le fer est bien débranché. Tourner le Bouton/
Cadran de Vapeur (modèle GCSTTS7014 uniquement) sur la
position fermée “ ” et le Bouton/Cadran de Sélection du Tissu
(modèle GCSTTS7014 uniquement) sur la position d’arrêt “O”.
3. Remplissez le gobelet avec de l’eau. Versez l’eau dans le
réservoir d’eau en fer. Ne remplissez pas le réservoir d’eau de
façon à dépasser le niveau maximum de rem plissage.
AvERTISSEMENT : Soyez prudent lorsque vous remplissez un fer
chaudavecdel’eauand’éviterlerisquedebrûlures.Lesparties
métalliques chaudes, l’eau chaude et la vapeur peuvent occasion
ner des blessures.
Modèle GCSTTS7014

Français - 5
REGLAGES DE SELECTION DU TISSU
Pour choisir un certain type de tissu, tourner le Cadran/Bouton de Sélection du Tissu “ ”
(modèle GCSTTS7014 uniquement) sur le tissu que vous désirez. Le voyant de
préparation passera au rouge pendant que le fer chauffe. Puis le voyant passera au vert
pour vous indiquer que le fer est prêt à être utilisé.
REPASSAGE À SEC
1.Assurez-vous que le bouton/cadran de la Vapeur (modèle
GCSTTS7014 uniquement) est bien tourné sur la position d’arrêt
“ ”.
2.Brancher le cordon dans la prise.
3.Tourner le Bouton/Cadran de sélection du Tissu (modèle
GCSTTS7014 uniquement) sur le réglage que vous désirez (Soie
“Seda” ou Synthétique “Sintet”).
Laissez chauffer le fer pendant 2 minutes. Pendant que le fer
chauffe, assurez-vous que celui-ci repose sur son support de talon
sur une surface stable et protégée.
NOTA: Avec le Bouton/Cadran (modèle GCSTTS7014 uniquement)
en position fermée “ ”, il vous est encore possible d’utiliser le Jet
de Vapeur ou le brumisateur. Assurez-vous que le réservoir a au
moins ¼.
CONSEIL: Référez-vous au guide de repassage pour obtenir le
réglage recommandé pour votre tissu.
REPASSAGE À LA VAPEUR
1.Suivez les directives du “Remplissage Du Réservoir D’Eau”.
2.Branchez le cordon dans la prise. Le voyant d’alimentation
s’allumera.
3.Tourner le Bouton/Cadran de Sélection du Tissu (modèle
GCSTTS7014 uniquement) sur le réglage du tissu à repasser à la
vapeur que vous désirez (Lin “Lin”, Coton “Algod”, Laine “Lana”
or Soie “Seda”) et attendre 2 minutes que le fer chauffe. Pendant
que le fer chauffe, assurez-vous que le fer est bien assis sur son
talon et sur une surface stable et protégée.
CONSEIL: Référez-vous au guide de repassage pour obtenir le
réglage recommandé pour votre tissu.
4.Une fois que le fer est chaud (2 minutes), tourner le bouton/
cadran (modèle GCSTTS7014) sur le réglage de vapeur que vous
désirez.
IMPORTANT: Quand vous ne repassez pas, toujours maintenir le Bouton/Cadran de
Vapeur (modèle GCSTTS7014 uniquement) en position fermée “ ” et le Bouton/Cadran
de Sélection du Tissu (modèle GCSTTS7014 uniquement) sur la position d’arrêt “O”.
Modelo GCSTTS7014
Modelo GCSTTS7014

Français - 6
CONSEILS DE REPASSAGE
• Liseztoujourslesétiquettesdesvêtementsetsuiveztoujourslesdirectivesderepassagedu
fabricant.
• Triezlesarticlesàrepasserselonletypedetissu.
• Vousdevriezrepasserenpremierlesvêtementsquidemandentunetempératurepeuélevée
(par exemple la soie et les synthétiques) afin d’éviter de les abîmer avec un fer trop chaud.
• Faitesl’essaisurunepetitepartietellequ’unecoutureouunrevers,sivousêtesincertaindu
contenu du tissu, avant de repasser une partie visible. Commencez avec une température
peu élevée et augmentez graduellement la chaleur pour trouver le meilleur réglage.
• Attendezenviron5minutespouratteindreleréglagedetempératuremoinsélevélorsque
vous changez le réglage d’une température plus élevée à une température moins élevée.
• Employezdelongsetlentsmouvementsdeva-et-vientsurletissulorsquevousrepassezà
la vapeur. Ceci va permettre à la vapeur de pénétrer à travers le tissu tout en permettant que
la chaleur de la semelle puisse assécher l’humidité.
• Tournezlevêtementàl’enverspourrepasserlalingerie.Surveillezprudemmentquelefer
n’est pas trop chaud car la doublure peut fondre ou coller à la semelle.
• Lorsquevousrepassezunefermeture-éclair,utilisezunlingederepassageouassurez-vous
que la fermeture-éclair est fermée et repassez par-dessus le rabat. Ne repassez jamais
directement par-dessus une fermeture-éclair non protégée.
• Utilisez“LeGuideDeRepassage”pourchoisirlemeilleurréglageetlameilleureméthode
pour le tissu que vous désirez repasser.

Français - 7
GUIDE DE REPASSAGE
Tissu Sélection Du Réglage Du Recommandations
Suggéré Tissu Réglage Cadran De Repassage
De La Vapeur
Acrylique Synthétique “Sintet” Repasser le vêtement à l’envers.
Acétate Synthétique “Sintet” Repasser le vêtement à l’envers
pendant qu’il est encore humide.
Soie Soie “Seda” Utiliser un linge de repassage*
pour éviter les marques luisantes.
Viscose Soie “Seda” Repassage principalement à sec;
la vapeur peut être utilisée selon
les directives du fabricant.
Nylon Soie “Seda” Repasser le vêtement à l’envers
pendant qu’il est encore humide.
Laine, laine et vapeur, repasser
le vêtement à l’envers ou utiliser
un linge de repassage*.
Polyester Synthétique “Sintet” Repasser le vêtement à l’envers
pendant qu’il est encore humide.
Rayonne Synthétique “Sintet” Repasser le vêtement à l’envers.
Laine Laines “Lana” Repasser le vêtement à l’envers
ou utiliser un linge de repassage*.
Laines Laines “Lana” Repasser le vêtement à l’envers
variées ou utiliser un linge de repassage*.
Cotons Coton “Algod” Suivre les directives du fabricant
variés du vêtement. Utiliser le réglage du
tissu qui demande le réglage le
moins élevé.
Velours Coton “Algod” Repasser le vêtement à l’envers
côtelé ou utiliser un linge de repassage*
et brosser ensuite le vêtement
avec la main pour soulever le grain
du tissu.
Coton Coton “Algod” Repasser les vêtements foncés à
l’envers pour éviter les marques
luisantes.
Lingerie Lingerie “Lin” Repasser le vêtement à l’envers
ou utilisez un linge de repassage*
pour éviter les marques luisantes
(surtout les tissus foncés).
Toile Lingerie “Lin” Repasser les vêtements foncés à
(jeans) l’envers pour éviter les marques
luisantes.
* Un linge de repassage est un coton, un tissu nettoyé à sec que vous placez par-dessus le vêtement
quevousrepassezandeprévenirlesmarquesluisantessurletissu.
NOTE: Utiliser la caractéristique Brumisateur et/ou le Jet de Vapeur pour une pénétration plus pro-
fondeand’enleverlesfauxplis.
NOTE: Certains tissus peuvent réclamer plus de vapeur que d’autres. Votre fer possède la capacité de
régler la vapeur comme cela est nécessaire.
This manual suits for next models
2
Table of contents
Languages:
Other Oster Iron manuals

Oster
Oster GCSTTS7001 User manual

Oster
Oster GCSTBS5902 User manual

Oster
Oster 4019 User manual

Oster
Oster 4415-449 User manual

Oster
Oster 5002 User manual

Oster
Oster GCSTCM2001P User manual

Oster
Oster GCSTBS4901L User manual

Oster
Oster GCSTBS6001 User manual

Oster
Oster GCSTSP6201 User manual

Oster
Oster GCSTBV4112 User manual

Oster
Oster GCSTAE6501 User manual

Oster
Oster GCSTCS-412 User manual

Oster
Oster GCSTBS5802 User manual

Oster
Oster GCSTSP6101 User manual

Oster
Oster GCSTBS5802 User manual

Oster
Oster GDSTCM2001 User manual

Oster
Oster GCSTSP6212 User manual

Oster
Oster GCSTBS5001 User manual

Oster
Oster GCSTUP8201 User manual

Oster
Oster 6014 User manual