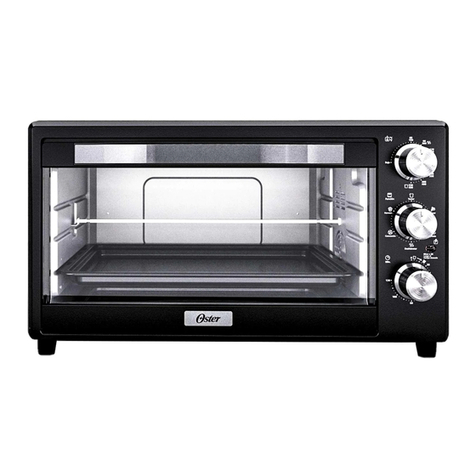
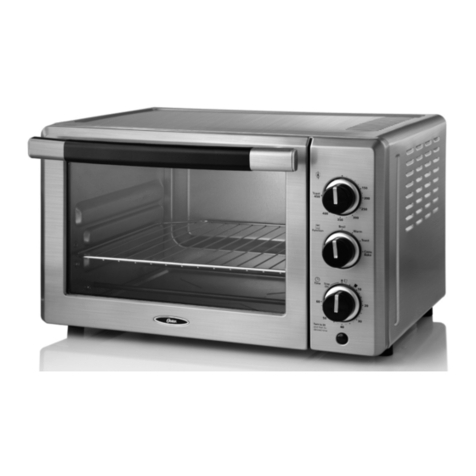
Oster TSSTTV0000 User manual

For product questions contact:
Jarden Consumer Service
USA : 1.800.334.0759
Canada : 1.800.667.8623
www.oster.com
© 2010 Sunbeam Products, Inc. doing business as Jarden Consumer Solutions.
All rights reserved. Distributed by Sunbeam Products, Inc. doing business as
Jarden Consumer Solutions, Boca Raton, Florida 33431.
SPR-111210-814
Para preguntas sobre los productos llama:
Jarden Consumer Service
EE.UU. : 1.800.334.0759
Canadá : 1.800.667.8623
www.oster.com
© 2010 Sunbeam Products, Inc. operando bajo el nombre de Jarden Consumer Solutions.
Todos los derechos reservados. Distribuido por Sunbeam Products, Inc. operando bajo el
nombre de Jarden Consumer Solutions, Boca Raton, Florida 33431.
Printed in China
Impreso en China
P.N. 146333
www.oster.com
Congratulations on your purchase of an OSTER
®
Countertop Oven!
For entertaining tips and delicious recipes visit www.oster.com. Do not return
to place of purchase. Please contact us at www.oster.com or 1.800.334.0759.
User Manual
Countertop Oven
Manual del usuario
Horno De Mostrador
Model / Modelo
TSSTTV0000

THIS UNIT IS FOR HOUSEHOLDUSEONLY
Short Power SuPPly Cord InStruCtIonS
A short power-supply cord is provided to reduce the risk resulting from becoming
entangled in or tripping over a longer cord. An extension cord may be used if care is
exercised in its use. If an extension cord is used, the electrical rating of the cord must be
at least as great as the electrical rating of the appliance. The extension cord should be
arranged so that it will not drape over the countertop or tabletop where it can be pulled on
by children or tripped over unintentionally.
For Products Purchased in the United States and Canada Only
To reduce the risk of electrical shock, this appliance has a polarized plug (one blade is
wider than the other). This plug fits a polarized outlet only one way; if the plug does not fit
fully into the outlet, reverse the plug. If it still does not fit, contact a qualified electrician.
Do not attempt to modify the plug in any way.
SAVE THESE INSTRUCTIONS
IMPORTANT SAFEGUARDS
When using electrical appliances, basic safety precautions should always be followed
including the following:
•
READ ALL INSTRUCTIONS, PRODUCT LABELS AND WARNINGS
BEFOREUSING THE TOASTER OVEN.
•Donottouchhotsurfaces.Alwaysuseovenmittswhenhandlinghotmaterials
and allow metal parts to cool before cleaning. Allow the unit to cool thoroughly
before putting in or taking off parts. Always use the oven handles when moving the unit.
•Whentheunitisnotinuseandbeforecleaning,unplugthecountertopovenfromthe
wall outlet. Note:Make sure the oven is turned off before unplugging.
•Toprotectagainstriskofelectricalshock,donotimmersetheapplianceinwater
or any other liquids.
•Closesupervisionisalwaysnecessarywhenthisoranyapplianceisusednearchildren.
This appliance is not for use by children.
•Donotoperatethisappliancewithafrayedordamagedcordorplugoraftertheappliance
malfunctions or is dropped or has been damaged in any manner. Return appliance to the
nearest authorized service facility for examination, repair, or adjustment.
•Donotuseattachmentsnotrecommendedbythemanufacturer;theymaycausefire,
electric shock or personal injury.
•Donotuseoutdoorsorforcommercialpurposes.
•Donotusethisapplianceforotherthanitsintendeduse.
•Donotletthecorddangleovertheedgeofatabletoporcountertoportouchhotsurfaces.
•Donotplacetheappliancenearahotgasorelectricburnerorinaheatedoven.
•Extremecautionshouldbeusedwhenusingcontainersconstructedofmaterialotherthan
metal or glass.
•Afiremayoccurifthecountertopoveniscoveredortouchingflammablematerials,
including curtains, draperies, walls, etc., when in operation. Do not store any items on top
of the appliance when in operation.
•Whenusingcountertopoven,pulltheunitoutaminimumof6inchesawayfromwallson
all sides. Remove cords from other products from behind countertop oven.
•Donotstoreanymaterials,otherthanmanufacturer’srecommendedaccessories,inthis
unit when not in use.
•Donotplaceanyflammablematerialsinoven,suchaspaper,cardboard,
plastic or any materials that may catch fire or melt.
•Donotcovertheovenwithmetalfoil.Thiswillcauseoverheatingoftheappliance.
•Oversizedfoodsormetalutensilsmustnotbeinsertedintheapplianceastheymaycreate
a fire or risk of electrical shock.
•Donotcleanwithmetalscouringpads.Piecescanbreakoffthepadandtouchelectrical
parts involving a risk of electrical shock.
•Alwaysuseextremecautionwhenremovingtrayordisposingofhotgrease.
•Toturnthisapplianceoff,returnallcontrolstothe“OFF”position.
•Todisconnect,turnallcontrolsto“OFF”,thenremoveplugfromwalloutlet.
English-1 | oster.com English-2 | oster.com

Preparing To Use Your Countertop Oven for the First Time
If you are using your countertop oven for the first time, please be sure to:
•Removeanystickersfromthesurfaceoftheoven.
•Openovendoorandremoveallprinteddocumentsandpaperfrominsidethe
countertop oven.
•Cleantherack,tray,andpanwithhotwater,asmallamountofdishwashingliquid
and a non-abrasive sponge or cleaning pad.
DONOTIMMERSETHEBODYOFTHEUNITINWATER.
•Drytheunitthoroughlybeforeusing.
•Selectalocationforthecountertopoven.Thelocationshouldbeinanopenareaon
a flat counter where the plug will reach an outlet.
The heating elements are designed to work efficiently and maintain a precise temperature.
You may not see the elements glowing, however they are working properly.
PLEASE NOTE – During initial start up, you may detect a slight smell and/
or smoke. Don’t worry, this is normal. Turn the temperature to 450° and
let ovenheat for approximately 15 minutes to allow the smell or smoke to
dissipate.
English-3 | oster.com English-4 | oster.com
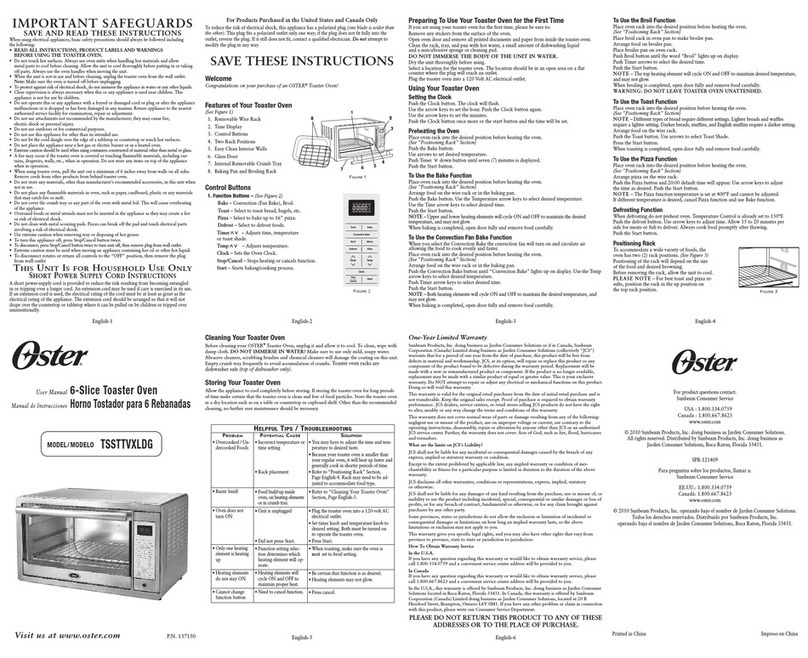
GENERAL INFORMATION
Timer / Toast Shade Setting Tip
To set the timer for less than 20 minutes, ALWAYS turn the timer past the
20-minute mark to engage timer switch and then turn it back to desired time.
Heating Elements
ThetopandbottomheatingelementswillcycleONandOFFtomaintainthe
desiredtemperature.Youmaynotseetheheatingelementsglowing.
Positioning Rack
To accommodate a wide variety of foods the oven has
three rack positions.
Positioning of the rack will depend on the size of
the food and desired browning.
Before removing the rack allow the unit to cool.
PLEASENOTE–Forbesttoastandpizzaresults,
position the rack in the center rack position.
Removing Food
Always open door fully and remove food carefully with oven mitt.
Baking Pan and Broiling Rack
(Select Models Only)
Use for all your baking, broiling and grilling needs. (not shown)
Interior Light
(Select Models Only)
Illuminates oven chamber when in use.
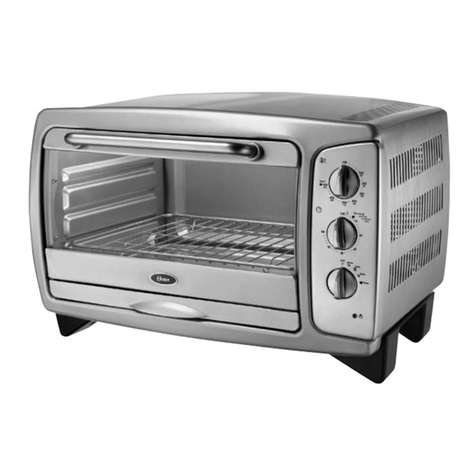
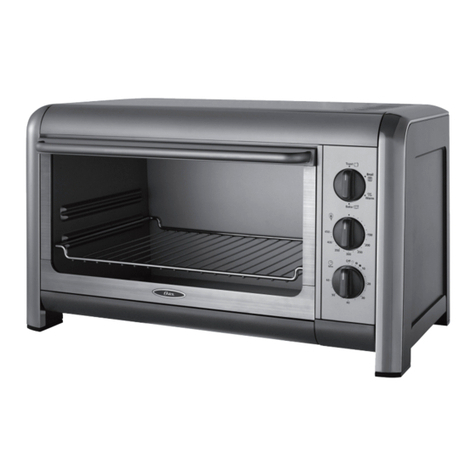
Learning About Your
Countertop Oven
Removable Wire Rack
To accommodate a wide
variety of foods, the oven
has a removable wire rack
and three rack positions.
Removable
Crumb Tray
Pulls out for
easy cleaning.
Glass Door
Allows you to see
food cooking.
Three Rack Positions
4Timer/Toast Shade
Setting
Adjust the dial to the
desired time.
Temperature Setting
Power Light
Function Setting
Timer/Toast Setting
1
2
3
4
2Power Light
Indicates that oven is
plugged in and that the
timer is set to begin
warming.
1Temperature Setting
Adjust the dial thermostat
to the desired temperature
.
3Function Setting
Select cooking function
by turning knob to desired
setting.

English-6 | oster.comEnglish-5 | oster.com
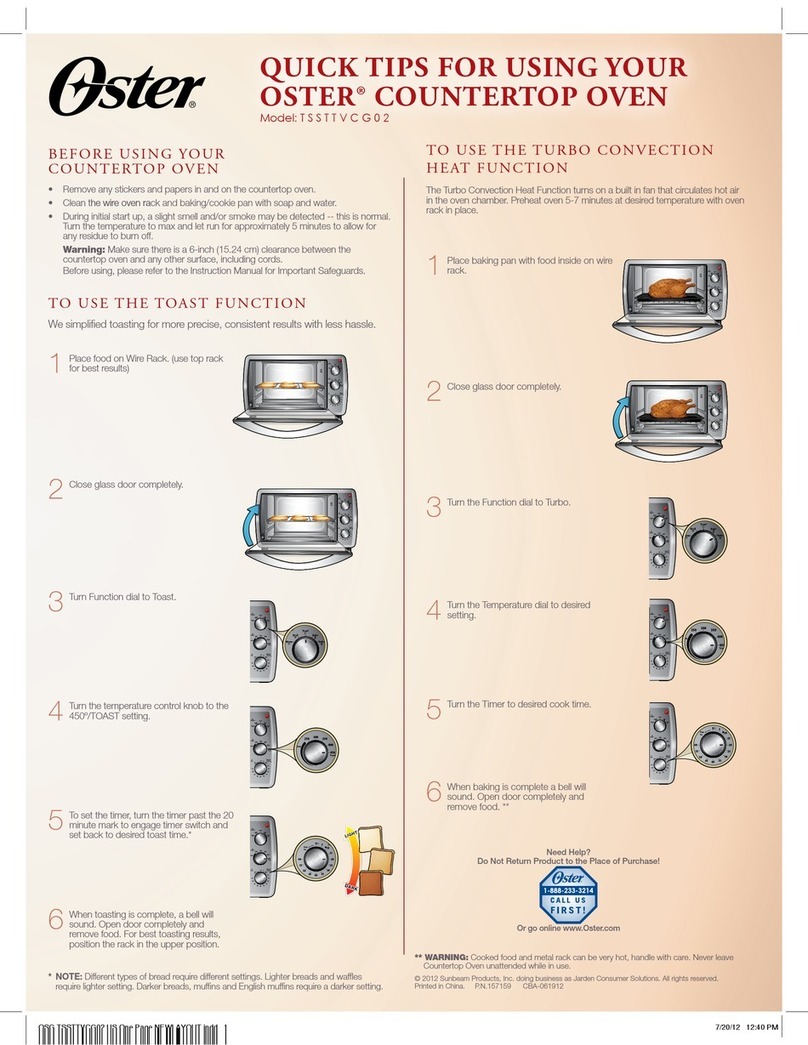
Toast Function
NOTE–Differenttypesofbreadrequire
different settings. Lighter breads and
waffles require a lighter setting. Darker
breads, muffins, and English muffins
require a darker setting.
Arrange food on the wire rack.
• SetfunctiontoTOAST
3
. Both the
top and bottom heater elements will
operate.
•Turn the Temperature Control Knob
tothe450°F/TOAST
1
setting.
•To set the timer
4
, ALWAYS turn the timer past the20 minute mark to engage
timer switch and set back to desired toast setting.
NOTE –ThetopandbottomheatingelementswillcycleONandOFFtomaintainthedesired
temperature.
Preheating the Oven
• SettothedesiredFunction
3
.
• TurntheTemperatureControlKnob
1
to the desired temperature.
• SettheTimerKnob
4
todesiredtimeandallow7–9minutesfortheoven
to preheat.*
Bake Function
(Select Models Only)
• Arrangefoodonthewirerackorinthebakingpan.
• SetfunctiontoBAKE.
3
Both the top and bottom heater elements will operate.
• TurntheTemperatureControlKnob
1
to the desired temperature.
• TurntheTimerKnob
4
to the desired time.*
NOTE–ThetopandbottomheatingelementswillcycleONandOFFtomaintainthe
desired temperature.
Convection Bake Functio
n (Select Models Only)
• Arrangefoodonthewirerackorinthebakingpan.
• SetfunctiontoCONVECTIONBAKE
3
. Both the top and bottom heater elements will
operate.
• TurntheTemperatureControlKnob
1
to the desired temperature.
• TurntheTimerKnob
4
to the desired time.*
NOTE–ThetopandbottomheatingelementswillcycleONandOFFtomaintainthe
desired temperature.
* To set the timer for less than 20 minutes, ALWAYS turn the timer past the 20-minute mark to engage
timer switch and then turn it back to desired time.
FAQs About Convection Baking
What is Convection?
InyourCountertopOventhereisabuiltinfanthatcirculatesthehotairintheoven
chamber to better heat the food.
How do I adjust the time for Convection?
Onaverage,convectionwillshortenthecookingtimeby30%butitvariesbyfood.Itis
suggested to go with a shorter cooking time to start with and then add time if it is needed.
What are the best foods to use with Convection?
While a shorter cook time is often desirable, baked goods in particular benefit from
convection cooking as the circulating air keeps oven temperature consistent throughout.
Variable Broil Function
• PlaceBroilRackinOvenPantomakeBroilerPan.
• ArrangefoodonBroilerPan.
• PlaceBroilerPanonovenrack.
• Closethedoortothefirstnotch,leavingasmallgapatthetop.Thiswillensure
adequate airflow during broiling.
• SetfunctiontoBROIL
3
.Onlythetopheaterelementwilloperate.
• TurntheTemperatureControlKnob
1
to the desired temperature.
• TurntheTimerKnob
4
to the desired time. Turn food over about halfway through the
broiling time.*
Warm Function
NOTE–TheWarmFunctionisforwarmingandkeepingfoodwarmafterheating.
• ArrangefoodontheWireRackorintheBakingPan.
• SetFunctiontoWARM
3
.Onlythebottomheatingelementwilloperate.
(TheheaterelementswillcycleONandOFFtomaintaintemperature.)
• TurntheTemperatureControlKnob
1
to the desired temperature or 175°.
• TurntheTimerKnob
4
to the desired time.*
Cleaning Your Countertop Oven
1. Before cleaning your OSTER
®
countertop oven, unplug it and allow it to cool.
2. To clean, wipe with damp cloth.
DO NOT IMMERSE IN WATER!
Make sure to use only mild, soapy water. Abrasive cleaners, scrubbing brushes and
chemical cleaners will damage the
unit. Empty crumb tray frequently to avoid
accumulation
of crumbs.
Ovenracksaredishwashersafe(top of dishwasher only).
Storing Your Countertop Oven
Allow the appliance to cool completely before storing. If storing the countertop oven
for long periods of time, make certain that the countertop oven is clean and free
of food particles. Store the countertop oven in a dry location such as on a table or
countertoporcupboardshelf.Otherthantherecommendedcleaning,nofurtheruser
maintenance should be necessary.
WARNING: Cooked food can be very hot. Handle with care.
Do not leave countertop oven unattended.
Using Your
Countertop Oven
Temperature
Setting
Power Light
Function Setting
Timer/Toast
Setting
1
2
3
4

P
roblem
P
otentIal
C
auSe
S
olutIon
Overcooked/
Undercooked Foods Incorrect temperature or
time setting Youmayhavetoadjustthetimeand
temperature to desired taste. To set the
timer for less than 20 minutes, turn the
timer past the 20-minute mark to engage
timer switch and then turn it back to
desired time.
Because your countertop oven is
smaller than your regular oven, it will
heat up faster and generally cook in
shorter periods of time.
Rack placement Referto“PositioningRack”Section,
Page English-4. Rack may need to be
adjusted to accommodate food type.
Burnt Smell First Use It is recommended to heat countertop
oven to 450º for approximately 15
minutes to eliminate any manufacturing
residue that may remain after shipping.
Food build-up inside oven, on
heating elements or in crumb
tray.
Referto“CleaningYourCountertop
Oven”Section,PageEnglish-6.
Ovendoesnot
turnON
Unit is unplugged Plug the countertop oven into a 120-volt
AC electrical outlet.
Timer was not turned past
20 minute mark. Set timer knob and temperature knob to
desired setting. Both must be turned on
to operate the countertop oven.
Onlyoneheating
element is heating up Function setting selection
determines which heating
element will operate.
When toasting, make sure the oven is
not
set to broil setting and temperature
is set at 450º.
Heatingelements
donotstayON
Heatingelementswillcycle
ONandOFFtomaintain
proper heat.
Youmaynotseeelements
glowing.
Be certain that function is as desired.
Helpful Tips / Troubleshooting
English-7 | oster.com English-8 | oster.com
Recipes
Brie and Artichoke Bruschetta
6 (¹⁄³-inch-thick) slices of round country loaf
2 tablespoons balsamic vinegar
6 tablespoons extra virgin olive oil
6 oz. brie
2 (6 ½-oz.) jars marinated artichoke hearts, drained
1 tablespoon chopped fresh mint
1 (2 oz.) piece prosciutto or ham
1 tablespoon chopped fresh basil
1 small red onion, chopped
¼ cup parmesan shavings
1 tablespoon chopped garlic
SetOster®ToasterOventobroilandpre-heat.Arrangebreadinonelayerona
baking pan, then brush tops with 2 tablespoons oil and season with salt and
pepper. Broil until golden brown and transfer to a rack. Spread thin layer of Brie
on toasted bread. Cut artichokes lengthwise into ¼-inch-thick slices and cut
prosciuttointomatchsticks.Heat1tablespoonoilina10-inchheavybottom
skillet on moderately high heat. Add the onions and garlic. Stir frequently until they
become transparent. Add the artichokes and prosciutto, cook the artichokes until
golden (about 4 minutes) then add the balsamic vinegar. Add the basil and mint,
salt and pepper to taste. Spoon the mixture over the toast. Top with Parmesan
and serve immediately.
Honey Mustard Chicken with Spicy Pecan Cornflake Crust
This savory dish is low fat and your kids will love it.
1 cup Dijon mustard
½ cup chopped pecans
1 cup honey
Nonstick pan spray
3 pounds of skinless chicken thighs and/or breasts
Oliveoilfordrizzling
1 teaspoon cayenne pepper
1 18-ounce box cornflake cereal, pulsed in food processor until flakes are crumbs.
Mix the mustard and honey together in a medium shallow bowl. Thoroughly coat
the chicken on both sides. Combine cayenne pepper, cornflakes and pecans in
another shallow bowl. Spray baking pan with nonstick spray and place breasts
in pan. Drizzle top with olive oil. Bake at 375°F for 40 minutes or until chicken
reaches internal temperature of 170°F and is no longer pink in center.

English-9 | oster.com English-10 | oster.com
One Year Limited Warranty
Sunbeam Products, Inc. doing business as Jarden Consumer Solutions or if in Canada, Sunbeam Corporation
(Canada)LimiteddoingbusinessasJardenConsumerSolutions(collectively“JCS”)warrantsthatforaperiodof
one year from the date of purchase, this product will be free from defects in material and workmanship. JCS, at
its option, will repair or replace this product or any component of the product found to be defective during the
warranty period. Replacement will be made with a new or remanufactured product or component. If the product
is no longer available, replacement may be made with a similar product of equal or greater value. This is your
exclusivewarranty.DoNOTattempttorepairoradjustanyelectricalormechanicalfunctionsonthisproduct.
Doing so will void this warranty.
This warranty is valid for the original retail purchaser from the date of initial retail purchase and is not transferable. Keep
the original sales receipt. Proof of purchase is required to obtain warranty performance. JCS dealers, service centers, or
retail stores selling JCS products do not have the right to alter, modify or any way change the terms and conditions of
this warranty.
This warranty does not cover normal wear of parts or damage resulting from any of the following: negligent use or
misuse of the product, use on improper voltage or current, use contrary to the operating instructions, disassembly,
repair or alteration by anyone other than JCS or an authorized JCS service center. Further, the warranty does not cover:
Acts of God, such as fire, flood, hurricanes and tornadoes.
What are the limits on JCS’s Liability?
JCS shall not be liable for any incidental or consequential damages caused by the breach of any express,
implied or statutory warranty or condition.
Except to the extent prohibited by applicable law, any implied warranty or condition of merchantability or
fitness for a particular purpose is limited in duration to the duration of the above warranty.
JCS disclaims all other warranties, conditions or representations, express, implied, statutory or otherwise.
JCS shall not be liable for any damages of any kind resulting from the purchase, use or misuse of, or inability
to use the product including incidental, special, consequential or similar damages or loss of profits, or for any
breach of contract, fundamental or otherwise, or for any claim brought against purchaser by any other party.
Some provinces, states or jurisdictions do not allow the exclusion or limitation of incidental or consequential
damages or limitations on how long an implied warranty lasts, so the above limitations or exclusion may not
apply to you.
This warranty gives you specific legal rights, and you may also have other rights that vary from province to
province, state to state or jurisdiction to jurisdiction.
How To Obtain Warranty Service
In the U.S.A.
If you have any question regarding this warranty or would like to obtain warranty service, please call
1.800.334.0759 and a convenient service center address will be provided to you.
In Canada
If you have any question regarding this warranty or would like to obtain warranty service, please call
1.800.667.8623 and a convenient service center address will be provided to you.
In the U.S.A., this warranty is offered by Sunbeam Products, Inc. doing business as Jarden Consumer Solutions
located in Boca Raton, Florida 33431. In Canada, this warranty is offered by Sunbeam Corporation (Canada)
LimiteddoingbusinessasJardenConsumerSolutions,locatedat20BHerefordStreet,Brampton,Ontario
L6Y0M1.Ifyouhaveanyotherproblemorclaiminconnectionwiththisproduct,pleasewriteourConsumer
Service Department.
PLEASE DO NOT RETURN THIS PRODUCT TO ANY OF THESE
ADDRESSES OR TO THE PLACE OF PURCHASE.
Roasted Turkey Breast with Aromatic Vegetables
1 small turkey breast
2 stalks celery, cut into ¼ inch dice
2 cloves garlic, peeled
1 lemon, halved
1 or 2 sprigs each of fresh rosemary and fresh thyme
Chili powder
1 small onion, cut into ¼ inch dice
Kosher salt and pepper
3 small carrots cut into ¼ inch dice
1 ½ cups chicken broth
PreheatOster®ToasterOvento450°F.Sprinklevegetablesinbottomofan11
inchbakingpanwith1½–2inchessidesandtopwithturkeybreast.Tuckgarlic
and herbs under breast. Squeeze lemon on top of turkey and season with chili
powder, salt and pepper. Cook for 25 minutes. Reduce oven temperature to 325°F
and pour broth into bottom of pan, about 1 inch up the sides of the pan. Continue
cooking until turkey juices run clear and it reaches internal temperature of 180°F.
Mustard and Herb Pork Tenderloin with Roasted Potatoes
1packageporktenderloins,1½–2pounds
5 cloves garlic, peeled and minced
3 tablespoons Dijon Mustard
6smallYukonGoldPotatoes,quartered
3 tablespoons fresh rosemary, stemmed and chopped
2 tablespoons olive oil
3 tablespoons fresh thyme, stemmed
1 teaspoon freshly cracked black pepper,
1 tablespoon Kosher salt, plus additional for potatoes
PreheatOster®ToasterOvento375°F.CoatporkwithDijonMustard.Inasmall
bowl, combine 2 tablespoons of rosemary, 2 tablespoons of thyme, salt, pepper
and garlic. Spread over pork tenderloins and place in a large baking dish that fits
comfortably inside toaster oven. Spread potatoes around pork and drizzle with
olive oil. Sprinkle potatoes with salt and pepper and remaining 1 tablespoon of
rosemary and thyme. Cook for ½ hour or until pork tenderloin is no longer pink in
the center. Remove pork, cover with foil and set aside. Check potatoes by piercing
with fork to see if tender and cook for an additional 15-20 minutes if necessary.

PRECAUCIONES IMPORTANTES
LEA Y GUARDE ESTAS INSTRUCCIONES
Cuando se usen aparatos eléctricos, siempre se deben seguir precauciones básicas
de seguridad, entre las que se incluyen las siguientes:
•LEA TODAS LAS INSTRUCCIONES, LAS ETIQUETAS DEL PRODUCTO Y LAS
ADVERTENCIAS ANTES DE USAR EL HORNO DE MOSTRADOR.
•Notoquelassuperficiescalientes.Siempreutiliceguantesdehornoalmanejarmateriales
calientes y deje que las partes metálicas se enfríen antes de limpiarlas. Deje enfriar bien
el aparato antes de poner o quitar piezas. Siempre utilice las asas del horno cuando lo
mueva.
•Cuandonoseestéusandoelhornodemostradoryantesdelimpiarlo,desenchúfelodel
tomacorriente.Nota:Verifiquequeelhornoestéapagadoantesdedesenchufarlo.
•Paraprotegersecontraelriesgodedescargaeléctrica,nosumerjaelaparatoenaguani
enningúnotrolíquido.
•Siempreesnecesariaunasupervisióndirectacuandoésteocualquieraparatoseuse
cerca de niños. Este aparato no debe ser usado por niños.
•Nouseésteniningúnotroaparatoconuncordónofichagastadosodañados,ni
después de que el aparato no haya funcionado bien, se haya caído o se haya dañado de
alguna forma. Devuelva el aparato al taller de servicio autorizado más cercano, para su
examen,reparación
o ajuste.
•Noutiliceaccesoriosnorecomendadosporelfabricanteyaquepuedenprovocar
incendios, descarga eléctrica o lesiones personales.
•Nolousealairelibreniparafinescomerciales.
•Nouseesteaparatoparaningúnotrofinquenoseaelprevisto.
•Nopermitaqueelcordóncuelguedelbordedeunamesaodeunmostrador,nique
toque superficies calientes.
•Nocoloqueelaparatocercadeunquemadoreléctricoodegascalientenienunhorno
caliente.
•Sedebeemplearextremaprecauciónalusarrecipienteshechosdealgúnmaterialque
no sea metal o vidrio.
•Puedeproducirseunincendiosielhornodemostradorestácubiertooestátocando
materiales inflamables, incluyendo cortinas, colgaduras, paredes, etc. cuando esté
enfuncionamiento.Noguardeningúnartículoencimadelaparatocuandoestéen
funcionamiento.
•Cuandouseelhornodemostrador,colóqueloaunmínimode6pulgadasalejadodela
pared por todos sus lados. Quite los cordones de otros artículos que puedan estar detrás
del horno de mostrador.
•Cuandonoseestéusando,noguardeningúnmaterialenesteaparato,apartedelos
accesorios recomendados por el fabricante.
•Nocoloqueningúnmaterialinflamableenelhorno,comopapel,cartón,plásticoni
cualquier material que pueda prenderse fuego o derretirse.
•Nocubraelhornoconpapeldealuminio.Estoprovocaráunrecalentamientodelaparato.
•Nosedebenintroduciralimentosniutensiliosmetálicosdemasiadograndesenel
aparato, ya que pueden provocar un incendio o el riesgo de descarga eléctrica.
•Nololimpieconestropajosdemetal.Puedenrompersetrozosdelestropajoytocar
piezas eléctricas, con el peligro de que provoquen una descarga eléctrica.
•Al asar a la parrilla, siempre use extremo cuidado cuando retire la bandeja o se deshaga
de la grasa caliente.
EESTE APARATO ES SÓLO PARA
USO DOMÉSTICO
InStruCCIoneS Para elCordón eléCtrICo Corto
Seproporcionauncordóneléctricocortoparareducirelposibleriesgodeengancharse
otropezarconuncordónmáslargo.Sepuedeusaruncordóndealarguesisetiene
cuidado.Siseusauncordóndealargue,laclasificacióneléctricadelcordóndebeser
almenostangrandecomolaclasificacióneléctricadelaparato.Elcordóndealarguese
debe colocar de manera que no cuelgue del mostrador o de la mesa en donde los niños
puedan tirar del mismo o tropezarse involuntariamente.
Para ProduCtoS ComPradoS Sólo en loS eStadoS unIdoS yen Canadá
Para reducir el riesgo de descarga eléctrica, este aparato tiene una ficha polarizada
(unacuchilladecontactoesmásanchaquelaotra).Estafichasóloencajaenun
tomacorriente polarizado de una forma, si la ficha no encaja perfectamente bien en
eltomacorriente,inviértala.Siaúnnoencajabien,comuníqueseconunelectricista
competente. No intente cambiar la ficha de ninguna forma.
GUARDE ESTAS INSTRUCCIONES
Español-1 | oster.com Español-2 | oster.com
•Paraapagaresteaparato,coloquetodosloscontrolesenlaposicióndeapagado“OFF”.
•Paradesconectar,giretodosloscontrolesalaposiciónapagada(“OFF”)yluegosaquela
ficha del tomacorriente.

Español-3 | oster.com Español-4 | oster.com
Preparándose para usar el horno para tablero de cocina por
primera vez
Sivaausarelhornoparatableroporprimeravez,porfavorasegúreseque:
•Retirecualquieretiquetadelasuperficiedelhorno
•Abralapuertadelhornoyretiretododocumentoopapelimpresodelinteriordelhorno
•Limpielarejilla,lafuenteylabandejaconaguacaliente,unpocodelíquidolavaplatosyuna
esponja que no sea abrasiva o una tela para limpiar.
NOSUMERJAELCUERPODELAUNIDADENAGUA
•Sequelaunidadminuciosamenteantesdeusar
•Seleccioneunaubicaciónparaelhornodetablero.Laubicacióndebeserenunárea
abiertasobreuntableroplanodondeelcordónpuedaalcanzareltomacorriente.
•Enchufeelhornodetableroenuntomacorrienteeléctricode120voltiosAC.
Los elementos de calefacción están diseñados para trabajar eficientemente y mantener
una temperatura precisa. Puede que usted no vea que los elementos se iluminan, sin
embargo estos están trabajando correctamente.
POR FAVOR NOTE – Durante la operación inicial, puede que usted detecte un
ligero olor o humo. No se preocupe, esto es normal. Fije la temperatura a 450º
y deje que el horno se caliente por unos 15 minutos para permitir que el olor o
humo se disipen.
INFORMACIÓN GENERAL
Consejo para la Posición de Marcador de tiempo/ Color de tostada
Para fijar el marcador por menos de 20 minutos, SIEMPRE gire el marcador
pasada la marca de 20 minutos para activar el interruptor del marcador y luego gírelo
de vuelta hacia el tiempo deseado.
Elementos de calefacción
LoselementosdecalefacciónsuperioreinferiorIránenciclosdeAPAGADOaENCENDIDO
paramantenerlatemperaturadeseada.Puedequenovealoselementosdecalefacción
iluminarse.
Ubicando la rejilla
El horno tiene tres posiciones para la rejilla para
acomodar una amplia variedad de comidas.
Laposicióndelarejilladependerádeltamañodel
alimento y del dorado deseado.
Antes de retirar la rejilla deje que la unidad se enfríe
PORFAVORNOTE:Paramejoresresultadosdepizza
otostada,coloquelarejillaenlaposicióncentral.
Retirando la comida
Siempre abra la puerta completamente y retire la comida con cuidado usando
un guante para horno.
Bandeja para hornear y rejilla para asar
(Algunos modelos solamente)
Úselas para
todas sus necesidades de hornear, asar o cocinar a la parilla.
Luz interior
(Algunos modelos solamente)
Ilumina la cámara del horno cuando está en uso.
Aprendiendo acerca de su
Horno para tablero de cocina
Rejilla de alambre
desmontable
El horno
cuenta con una rejilla
desmontable con tres
posiciones para acomodar
una variedad de comidas.
1Posición de temperatura
Ajusta la perilla del
termostato a la temperatura
deseada.
Bandeja
de migas
desmontable
Se jala hacia
fuera para fácil
limpieza.
Puerta de vidrio
Le permite ver la
comida cocinándose.
Tres posiciones
para la rejilla
4Posición para Marcador
de tiempo/Color de
tostada
Ajusta la perilla al tiempo
deseado.
Posición de temperatura
Luz de corriente
Posición de función
Posición de Marcador de
tiempo/ tostada
1
2
3
4
3
Posición de función
Seleccionelafunciónde
coccióngirandolaperillaala
posicióndeseada.
2
Luz de corriente
Indica que el horno está
enchufado y que el marcador
de tiempo está fijado para
empezar a calentar.

Español-5 | oster.com Español-6 | oster.com
Función de Tostada
NOTA–Cadatipodepanrequierededistintas
posiciones. Los panes más blancos y los
waflesrequiereunaposiciónmasclara.Los
panes más oscuros y las tortitas (muffins y
muffins Ingleses) requieren de posiciones más
oscuras.
Acomode el alimento sobre la rejilla de
alambre.
• FijelafunciónaToast(tostada)
3
.
Amboselementosdecalefacción
operarán.
•Gire la perilla de control de temperatura
alaposición450F/Toast(tostada)
1
.
•Para fijar el marcador de tiempo
4
, SIEMPRE gire el marcador pasada la marca de los
20 minutos para activar el marcador y póngalo de vuelta en la posición de tostada
deseada.
NOTA –LoselementosdecalefacciónsuperioreinferiorIránenciclosdeAPAGADOaENCENDIDO
para mantener la temperatura deseada.
Precalentando el horno
• Fijealafuncióndeseada
3
.
• Girelaperilladecontroldetemperatura
1
alaposicióndeseada.
• Fijelaperilladelmarcadordetiempo
4
al tiempo deseado y deje 7 a 9 minutos hasta
que el horno precaliente.*
Función de Horneado
(Algunos modelos solamente)
• Arrangefoodonthewirerackorinthebakingpan.
• Acomodelacomidasobrelarejilladealambreosobrelabandejaparahorneado
• FijelafunciónaHorneado(Bake)
3
Amboselementosdecalefacciónoperarán
• Girelaperilladecontroldetemperatura
1
alaposicióndeseada
• Fijelaperilladelmarcadordetiempo
4
al tiempo deseado.*
NOTA–LoselementosdecalefacciónsuperioreinferiorIránenciclosdeAPAGADO
aENCENDIDOparamantenerlatemperaturadeseada.
Función de Horneado con Convección
(Algunos modelos solamente)
• Acomodelacomidasobrelarejilladealambreosobrelabandejaparahorneado
• FijelafunciónaHorneadoconConvección(ConvectionBake)
3
. Ambos elementos de
calefacciónoperarán.
• Girelaperilladecontroldetemperatura
1
alaposicióndeseada
• Fijelaperilladelmarcadordetiempo
4
al tiempo deseado.*
NOTA–LoselementosdecalefacciónsuperioreinferiorIránenciclosdeAPAGADO
aENCENDIDOparamantenerlatemperaturadeseada.
* Para fijar el marcador por menos de 20 minutos, SIEMPRE gire el marcador pasada la marca de 20
minutos para activar el interruptor del marcador y luego gírelo de vuelta hacia el tiempo deseado.
Preguntas frecuentes acerca de Horneado con Convección
Que es Convección?
Dentro de su horno para tablero existe un ventilador construido internamente que circula el
aire caliente en la cámara del horno para calentar la comida mejor.
Como ajusto el tiempo para Convección?
Porlogeneral,laConvecciónacortaráeltiempodecocciónenun30%perovaríaconeltipo
decomida.Sesugierequeutiliceuntiempodecocciónmáscortoparacomenzaryluego
añada más tiempo si es necesario.
Cuáles son los mejores tipos de comidas para usar Convección?
Sibienuntiempodecocciónmáscortoessiempredeseable,lascomidashorneadasen
particularobtienenmayoresbeneficiosdelacocciónconconvecciónpuestoqueelaireque
circula mantienen la temperatura del horno consistente todo el tiempo.
Función variable de Asado
• ColoquelarejillaparaAsadodentrodelafuentedelhornoparaformarlaolladeAsado.
• AcomodelacomidasobrelaolladeAsado
• ColoquelaolladeAsadoenlarejilla.
• Cierrelapuertaenlaprimeraranuradejandounapequeñabrechaenlapartedearriba.Esto
asegurará un adecuado flujo de aire durante el asado.
• FijelafunciónaAsado
3
.Soloelelementodecalefacciónsuperioroperará.
• Girelaperilladecontroldetemperatura
1
alaposicióndeseada.
• Fijelaperilladelmarcadordetiempo
4
al tiempo deseado. Déle la vuelta a la comida a
mitad del tiempo de Asado.*
Función de Calentar/Entibiar
NOTA–LafuncióndeCalentar/Entibiaresparacalentarymantenerlacomidacalientedespués
delacocción.
• Acomodelacomidasobrelarejilladealambreolabandejadehorneado.
• FijelafunciónaCalentar/Entibiar
3
Soloelelementodecalefaccióninferioroperará.
LoselementosdecalefacciónIránenciclosdeAPAGADOaENCENDIDOparamantenerla
temperatura deseada).
• Girelaperilladecontroldetemperatura
1
alaposicióndeseadao175°.
• Fijelaperilladelmarcadordetiempo
4
al tiempo deseado.*
Limpiando su Horno para tablero de cocina
1.AntesdelimpiarsuHornoparatablerodecocinaOster,desenchúfeloydejeenfriar
2.Paralimpiarpáseleunatelahúmeda.NO SUMERJA EN AGUA!
Asegúresedeusarsolamenteaguaconjabónsuave.Loslimpiadoresabrasivos,escobillaso
limpiadoresquímicosdañarálaunidad.Vacíelabandejademigajasfrecuentementeparaevitar
laacumulacióndemigajas.Lasrejillasdelhornosepuedenlavarenellavaplatos(sólo en la
parte superior).
Almacenando su Horno para tablero de cocina
Deje que el aparato se enfríe por completo antes de almacenar. Si guarda su horno por un largo
tiempo,asegúresedequeelhornoestélimpioylibredepartículasdecomidas.Almaceneel
hornoenunaubicaciónsecacomosobreunamesaotableroorepisaconpuertas.Ademásde
lasrecomendacionesdelimpieza,noserequiereningúnmantenimientoadicionalporpartedel
usuario.
CUIDADO: La comida cocida puede estar muy caliente. Manipúlela con cuidado.
No deje el horno descuidado.
Usando su horno para
tablero de cocina
Posición
de temperatura
Luz de corriente
Posición de
función
Posición de
Marcador de
tiempo/ tostada
1
2
3
4

Español-7 | oster.com Español-8 | oster.com
Cómo guardar el horno de mostrador Recetes
Bruschetta de Brie y Alcachofa
6 rodajas de pan redondo campesino (de ¹ ⁄³-de pulgada de ancho, 0.8 cm)
2 cucharadas de vinagre balsámico
6 cucharadas de aceite de oliva extra virgen
6 onzas de queso Brie
2 frascos (de 6 ½ onzas) de corazones de alcachofas marinados escurridos
1 cucharada de menta fresca picada
1 cucharada de albahaca fresca picada
1rodajadeprosciuttoojamón(2onzas)
1 cucharada de ajo picado
¼ de taza de queso parmesano rayado
1 cebolla pequeña picada
FijeelhornotostadorOster®a“broil”(asar)yprecaliente.Arregleelpanenuna
capa en un molde para hornear, luego unte los lados de arriba con dos cucharadas
deaceitedeolivaysazoneconsalypimienta.Horneehastaquequedencolor
marróndoradoypasealarejilla.UnteunacapaligeradequesoBrieenelpan
tostado. Corte las alcachofas a lo largo en rodajas de ¼ de pulgada (0.6 cm) de
ancho y corte el prosciutto en tiras. Caliente 1 cucharada de aceite en una sartén
de 10 pulgadas (25 cm) de fondo pesado a fuego medio alto. Añada la cebolla y el
ajo. Mueva frecuentemente hasta que queden transparentes. Añada las alcachofas
y el prosciutto, cocine las alcachofas hasta que estén doradas (por unos 4
minutos) y luego añada el vinagre balsámico. Añada la albahaca y la menta, sal y
pimienta al gusto. Sirva la mezcla sobre las tostadas. Cubra con queso parmesano
y sirva inmediatamente.
Pollo a la miel y mostaza con capa picante de pecanas y hojuelas
de maíz
Este plato salado es bajo en grasa y les encantara a sus niños
1tazademostazaDijón
½ taza de pecanas picadas
1 taza de miel
Spray para molde anti-adherente
3 libras de muslos de pollo y/o pechugas sin piel
Aceite de oliva para rociar
1 cucharadita de pimienta de cayena
1 caja de cereal de hojuelas de maíz de 18 onzas, picado en el procesador hasta
que quede en migas
Mezclelamostazaylamieljuntasenuntazónmedianopocohondo.Cubra
el pollo completamente por ambos lados. Combine la pimienta de cayena, las
hojuelasdemaízylaspecanasenotrotazónmedianopocohondo.Rocíeel
molde para hornear anti-adherente con el aceite en spray y coloque las presas de
polloenelmolde.Rocíeporencimaconaceitedeoliva.Horneea375°Fpor40
minutos o hasta que el pollo alcance una temperatura interna de 170°F y que no
esté rosado en el centro.
P
roblema
P
oSIble
C
auSa
S
oluCIón
Alimentos demasiado
o no suficientemente
cocidos
Graduaciónincorrectade
temperatura o de tiempo Puede que tenga que ajustar el tiempo
y la temperatura a su gusto. Para fijar
el marcador de tiempo por menos de
20 minutos, gire el marcador pasada la
marca de los 20 minutos para activar
el interruptor del marcador y luego
regréselo al tiempo deseado.
Debido a que su horno de mostrador es
más pequeño que su horno normal, se
calentará más rápidamente y, en general,
cocinará en períodos de tiempo más
cortos.
Colocacióndelarejilla Consultelasección“Cómocolocarla
rejilla”enlapágina6deltextoespañol.
Puede que tenga que regular la rejilla
segúneltipodealimento.
Oloraquemado Primer uso Se recomienda que caliente el horno de
mostrador a 450 por aproximadamente
unos 15 minutos para eliminar cualquier
residuodefabricaciónquepuedehaberse
quedado después del embarque.
Acumulacióndecomida
dentro del horno, en los
elementos calentadores o
en la bandeja de migas.
Consultelasección“Cómolimpiarel
hornodemostrador”enlapágina6del
texto español.
El horno no se
enciende El aparato está
desenchufado. Enchufe el horno de mostrador en un
tomacorriente de 120 voltios de CA.
El contador de tiempo no se
girópasandolamarcade20
minutos.
Gire la perilla del contador de tiempo y
laperilladetemperaturaalagraduación
deseada. Ambas deben estar en la
posiciónencendidaparaquefuncioneel
horno de mostrador.
Sólosecalientaun
elemento calentador Laseleccióndegraduación
delafuncióndetermina
qué elemento calentador
funcionará.
Cuando tueste, verifique que el horno
noestéenlagraduacióndedeasarala
parrilla(“broil”).
Los elementos
calentadores
no permanecen
encendidos
Los elementos calentadores
se encenderán y se
apagarán alternadamente
para mantener el calor
adecuado.
Puede que no vea que los
elementos se iluminan.
Asegúresedequesehayaseleccionado
lafuncióndeseada.

Garantía limitada de 1 año
Sunbeam Products, Inc. operando bajo el nombre de Jarden Consumer Solutions, o en Canadá, Sunbeam
Corporation (Canada) Limited operando bajo el nombre de Jarden Consumer Solutions, (en forma
conjunta,“JCS”),garantizaqueporunperíododeunañoapartirdelafechadecompra,esteproducto
estarálibrededefectosdematerialesymanodeobra.JCS,asuelección,repararáoreemplazaráeste
producto o cualquier componente del mismo que presente defectos durante el período de garantía. El
reemplazo se realizará por un producto o componente nuevo o reparado. Si el producto ya no estuviera
disponible, se lo reemplazará por un producto similar de valor igual o superior. Ésta es su garantía
exclusiva.Nointenterepararoajustarningunafuncióneléctricaomecánicadeesteproducto.Alhacerlo
elimínará ésta garantía.
La garantía es válida para el comprador minorista original a partir de la fecha de compra inicial y la misma no
es transferible. Conserve el recibo de compra original. Para solicitar servicio en garantía se requiere presentar
un recibo de compra. Los agentes y centros de servicio de JCS o las tiendas minoristas que venden productos
deJCSnotienenderechoaalterar,modificarnicambiardeningúnotromodolostérminosylascondiciones
de esta garantía.
Esta garantía no cubre el desgaste normal de las piezas ni los daños que se produzcan como resultado de
uso negligente o mal uso del producto, uso de voltaje incorrecto o corriente inapropiada, uso contrario a
lasinstruccionesoperativas,ydesarme,reparaciónoalteraciónporpartedeunterceroajenoaJCSoaun
Centro de Servicio autorizado por JCS. Asimismo, la garantía no cubre actos fortuitos tales como incendios,
inundaciones, huracanes y tornados.
¿Cuál es el límite de responsabilidad de JCS?
JCS no será responsable de daños incidentales o emergentes causados por el incumplimiento de alguna
garantíaocondiciónexpresa,implícitaolegal.
Exceptoenlamedidaenqueloprohíbalaleyaplicable,cualquiergarantíaocondiciónimplícitade
comerciabilidadoaptitudparaunfindeterminadoselimita,encuantoasuduración,alplazodelagarantía
antes mencionada.
JCS queda exenta de toda otra garantías, condiciones o manifestaciones, expresa, implícita, legal o de
cualquier otra naturaleza.
JCSnoseráresponsabledeningúntipodedañoqueresultedelacompra,usoomalusodelproducto,opor
la imposibilidad de usar el producto, incluidos los daños incidentales, especiales, emergentes o similares, o
lapérdidadeganancias,nideningúnincumplimientocontractual,seadeunaobligaciónesencialodeotra
naturaleza,nideningúnreclamoiniciadocontraelcompradorporuntercero.
Algunasprovincias,estadosojurisdiccionesnopermitenlaexclusiónolimitacióndelosdañosincidentales
oemergentesnilaslimitacionesaladuracióndelasgarantíasimplícitas,demodoqueesposiblequela
exclusiónolaslimitacionesantesmencionadasnoseapliquenensucaso.
Esta garantía le otorga derechos legales específicos y es posible que usted tenga otros derechos que varían
deunestado,provinciaojurisdicciónaotro.
Cómo solicitar el servicio en garantía
En los Estados Unidos
Si tiene alguna pregunta sobre esta garantía o desea recibir servicio de garantía, llame al 1.800.334.0759 y
podráobtenerladireccióndelcentrodeservicioqueleresultemásconveniente.
En Canadá
Si tiene alguna pregunta sobre esta garantía o desea recibir servicio de garantía, llame al 1.800.667.8623 y
podráobtenerladireccióndelcentrodeservicioqueleresultemásconveniente.
En los Estados Unidos, esta garantía es ofrecida por Sunbeam Products, Inc. operando bajo el nombre de
JardenConsumerSolutions,BocaRatón,Florida33431.EnCanadá,estagarantíaesofrecidaporSunbeam
Corporation(Canada)LimitedoperandobajoelnombredeJardenConsumerSolutions,20BHerefordStreet,
Brampton,OntarioL6Y0M1.Siustedtieneotroproblemaoreclamoenconexiónconesteproducto,porfavor
escriba al Departamento de Servicio al Consumidor.
POR FAVOR NO DEVUELVA ESTE PRODUCTO A NINGUNA DE ESTAS DIRECCIONES NI
AL LUGAR DE COMPRA.
Pechuga de Pavo asada con vegetales aromáticos
1 pechuga de pavo pequeña
2 tallos de apio, cortados en cubitos ¼ de pulgada (0.6cm)
2 dientes de ajo pelados
1limón,cortadoporlamitad
1 o 2 ramitos de romero y tomillo frescos
Chili en polvo
1 cebolla pequeña, cortada en cubitos ¼ de pulgada (0.6cm)
Sal Kosher y pimienta
3 zanahorias pequeñas, cortadas en cubitos ¼ de pulgada (0.6cm)
1 ½ taza de caldo de gallina
PrecalienteelhornotostadorOster®a 450°F. Esparza los vegetales al fondo de un
molde para hornear de 11 pulgadas (28 cm) por 1 ½ a 2 pulgadas (3.5 a 5 cm)
de alto y ponga encima la pechuga de pavo. Meta el ajo y las hierbas debajo de la
pechuga.Exprimaellimónsobreelpavoysazoneconchilienpolvo,salypimienta.
Cocine por 25 minutos. Baje la temperatura del horno a 325°F y vierta el caldo
al fondo del molde, hasta que llegue a 1 pulgada (2.5cm) a los lados del molde.
Continúecocinando,hastaqueeljugodelpavoseveatransparenteyalcanceuna
temperatura interna de 180°F.
Chuletas de cerdo a la mostaza y hierbas con papas asadas
1 paquete de filetes de cerdo, 1 ½ - 2 libras
5 dientes de ajo, pelados y molidos
3cucharadasdeMostazaDijón
6papaspequeñasYukónGold,encuartos
3 cucharadas de romero fresco, cocido al vapor y picado
2 cucharadas de aceite de oliva
3 cucharadas de tomillo fresco, cocido al vapor
1 cucharadita de pimienta fresca molida
1 cucharada de sal Kosher, y un adicional para las papas
PrecalienteelhornotostadorOster®a375°F.CubraelcerdoconlamostazaDijón.
Enuntazónpequeño,combine2cucharadasderomero,2cucharadasdetomillo,
sal, pimienta y ajos. Esparza sobre las chuletas de cerdo y coloque en un molde
grande para hornear que entre fácilmente en el horno. Esparza las papas alrededor
del cerdo y rocíe el aceite de oliva. Espolvoree sal, pimienta y la cucharada restante
de romero y tomillo sobre las papas. Cocine por ½ hora o hasta que las chuletas
de cerdo no estén rosadas en el centro. Retire el cerdo, cubra con papel aluminio
y deje aparte. Pinche las papas con un tenedor para verificar si están suaves y
cocine por 15 a 20 minutos adicionales si es necesario.
Español-9 | oster.com
Table of contents
Languages:
Other Oster Oven manuals

Oster
Oster TSSTTVFDXL2 User manual

Oster
Oster TSSTTVDGXL User manual

Oster
Oster 6059 User manual

Oster
Oster TSSTTVF815 User manual

Oster
Oster TSSTTVVGS1-049 User manual

Oster
Oster TSSTTVDG01 Assembly instructions

Oster
Oster TSSTTVF8GA User manual

Oster
Oster TSSTTVCG02 User manual

Oster
Oster TSSTTV7118 User manual

Oster
Oster 6293 User manual

Oster
Oster TSSTTV15LTR User manual

Oster
Oster CounterForms 6292 User manual

Oster
Oster TSSTTVLC60L User manual

Oster
Oster TSSTTVVG01 User manual

Oster
Oster TSSTTVXXLL-049 User manual

Oster
Oster 6235 User manual

Oster
Oster 6206 User manual

Oster
Oster TSSTTVRB04 User manual

Oster
Oster TSSTTVXLDG User manual

Oster
Oster TSSTTVDGXL User manual