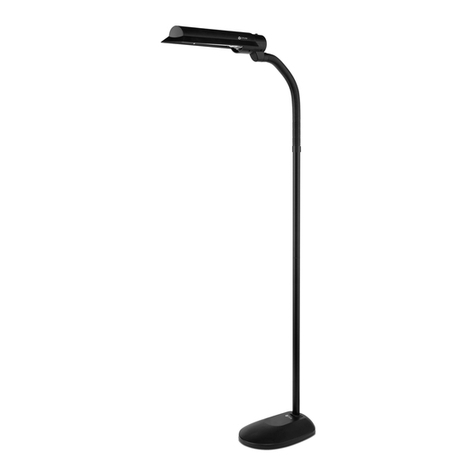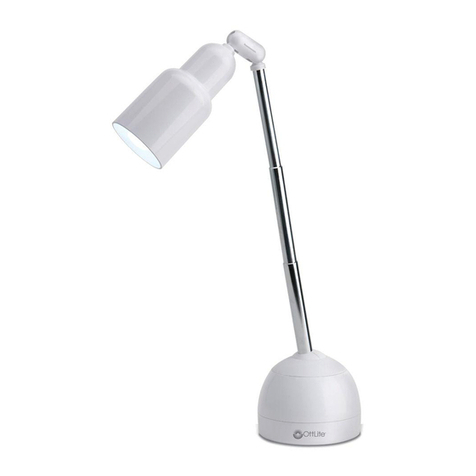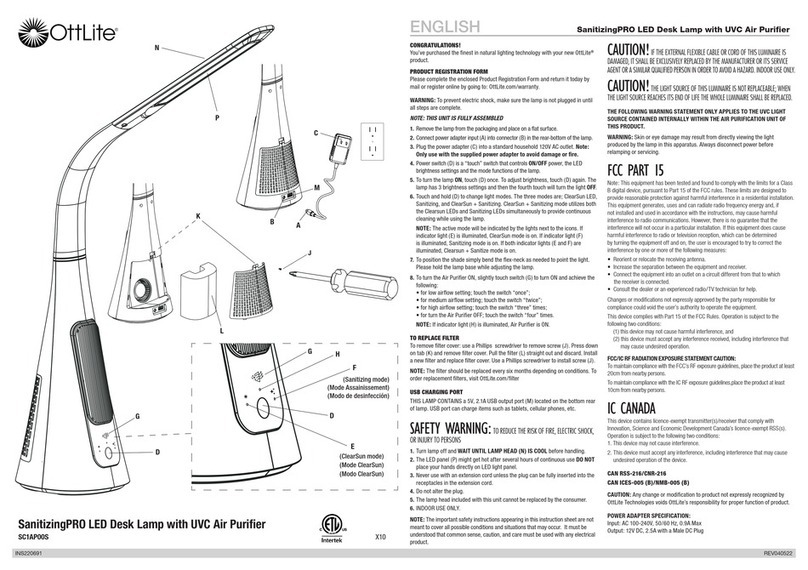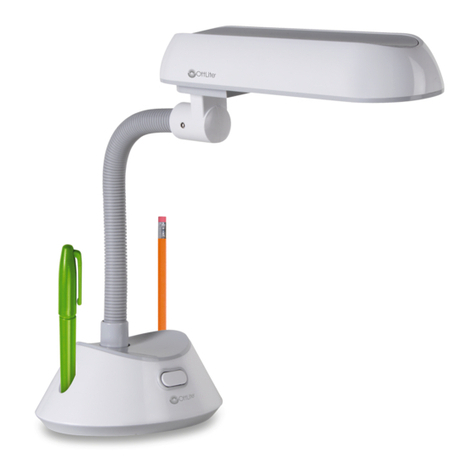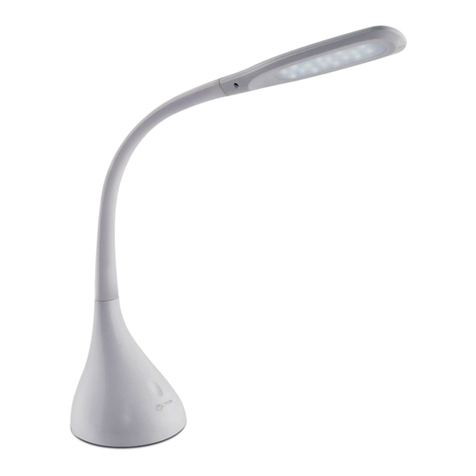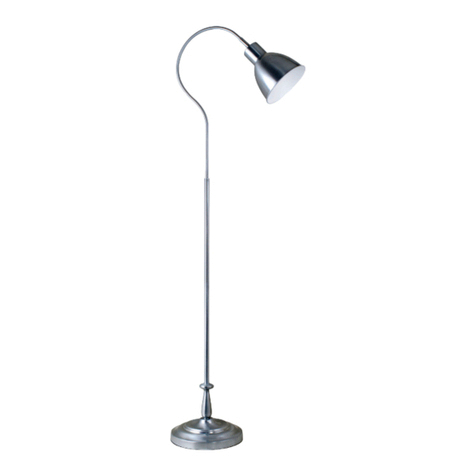
EspaÑol Lámpara de mesa EastmanFranÇais Lampe de table Eastman
INS-16-0292 REV120816
FÉLICITATIONS!
Vous avez fait l’achat de la plus innovatrice technologie naturelle et de
renom en éclairage avec votre produit OttLite®.
FORMULAIRE D’ENREGISTREMENT DE PRODUIT
Compléter le formulaire d’enregistrement qui est inclus pour votre
produit et nous le retourner dès aujourd’hui par le retour du courrier, ou
enregistrez-vous en ligne en allant à : www.warranty.ottlite.com
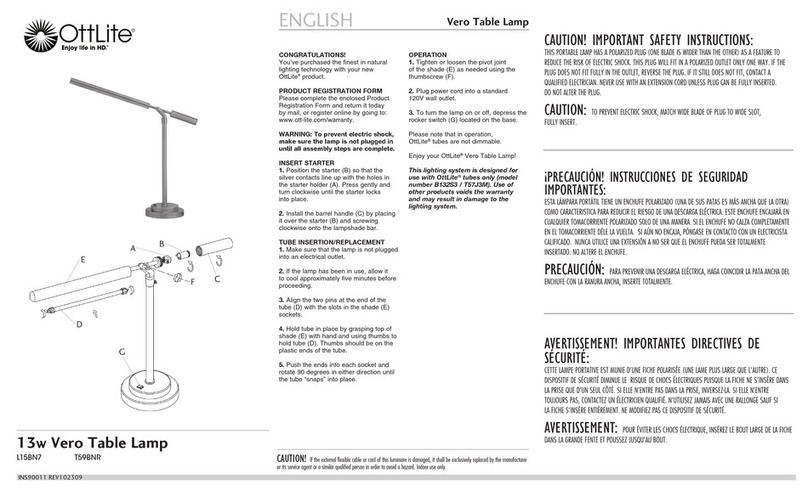
ASSEMBLAGE DE LA LAMPE
AVERTISSEMENT: Pour éviter les chocs électriques, assurez-vous que
la lampe ne soit pas branchée avant d’avoir effectué toutes les étapes
de montage.
Cette lampe comprend une ampoule DEL OttLite®à lumière naturelle
du jour
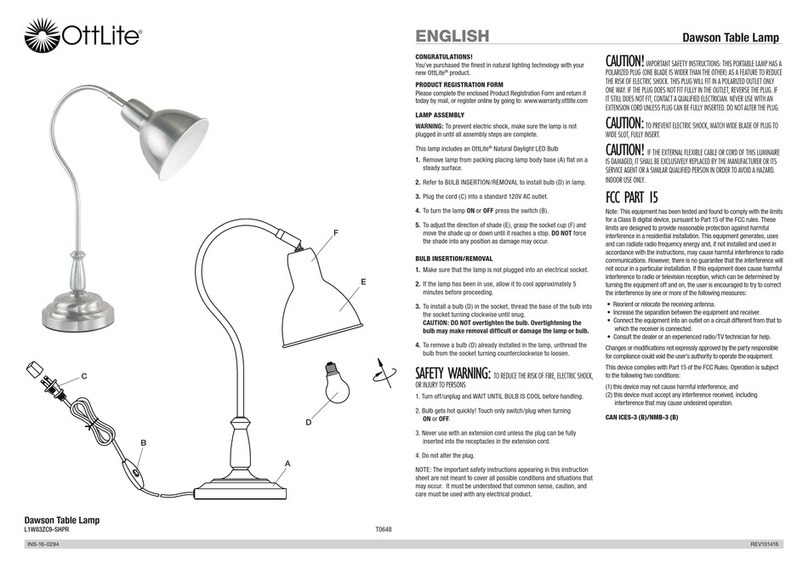
1. Retirer la lampe de son empaquetage et placer la base (A) sur
une surface plane.
2. Se référer à INSERTION/DÉMONTAGE DE L’AMPOULE pour
installer l’ampoule (E) dans la lampe.
3. Branchez le cordon (C) d’alimentation dans une prise murale
standard de 120 V.
4. Pour régler la hauteur et l’angle de l’abat-jour (D), tourner les vis
à serrage à main (F, G, H) dans le sens antihoraire. Ajuster l’abat-
jour (D) à la hauteur et l’angle désirés puis serrer les vis à serrage
à main (F, G, H) en tournant dans le sens horaire. NE PAS TROP
SERRER, car cela endommagera le filetage.
5. Pour allumer et éteindre la lampe, appuyez sur l’interrupteur (B).
INSERTIONREMPLACEMENT DE L’AMPOULE
1. Assurez-vous que la lampe n’est pas branchée dans une prise de
courant électrique.
2. Si la lampe a été utilisée, laissez-la refroidir pendant environ
5 minutes avant de continuer.
3. Pour installer une ampoule (E) dans la douille, visser la base de
l’ampoule dans le culot de la douille en tournant dans le sens des
aiguilles d’une montre jusqu’à ce qu’elle soit bien en place.
ATTENTION : NE PAS trop serrer l’ampoule. Une ampoule trop
serrée vous empêcherait de l’enlever facilement ou risquerait
d’endommager la lampe ou l’ampoule.
4. Pour retirer une ampoule (E) déjà installée dans la lampe,
dévisser l’ampoule de la douille en tournant dans le sens contraire
des aiguilles d’une montre jusqu’à ce qu’elle soit dégagée.
AVERTISSEMENT : EN VUE DE RÉDUIRE LES RISQUES D’INCENDIE, DE
CHOC ÉLECTRIQUE OU DE BLESSURE CORPORELLE :
1. Éteindre/débrancher la lampe et ATTENDRE QUE L’AMPOULE DE
LAMPE REFROIDISSE avant de la manipuler.
2. L’ampoule devient chaude très rapidement! Ne toucher qu’à
l’interrupteur ou à la fiche au moment de mettre SOUS tension ou
HORS tension.
3. Ne jamais utiliser avec une rallonge à moins que la fiche puisse être
entièrement insérée dans la prise de la rallonge.
4. Ne pas modifier les broches de la fiche.
REMARQUE : Le but des consignes de sécurité contenues dans ce
feuillet d’instructions n’est pas de couvrir toutes les conditions possibles
et toutes les situations pouvant survenir. Il est entendu que bon sens,
prudence et diligence doivent être utilisés avec tout produit électrique
AVERTISSEMENT! IMPORTANTES DIRECTIVES DE SÉCURITÉ: CETTE
LAMPE PORTATIVE EST MUNIE D’UNE FICHE POLARISÉE (UNE LAME PLUS LARGE QUE
L’AUTRE). CE DISPOSITIF DE SÉCURITÉ DIMINUE LE RISQUE DE CHOCS ÉLECTRIQUES
PUISQUE LA FICHE NE S’INSÈRE DANS LA PRISE QUE D’UN SEUL CÔTÉ. SI ELLE
N’ENTRE PAS DANS LA PRISE, INVERSEZ-LA. SI ELLE N’ENTRE TOUJOURS PAS,
CONTACTEZ UN ÉLECTRICIEN QUALIFIÉ. N’UTILISEZ JAMAIS AVEC UNE RALLONGE SAUF
SI LA FICHE S’INSÈRE ENTIÈREMENT. NE MODIFIEZ PAS CE DISPOSITIF DE SÉCURITÉ.
AVERTISSEMENT: POUR ÉVITER LES CHOCS ÉLECTRIQUE, INSÉREZ LE
BOUT LARGE DE LA FICHE DANS LA GRANDE FENTE ET POUSSEZ JUSQU’AU BOUT.
ATTENTION! SI LE CÂBLE OU LE CORDON SOUPLE EXTERNE DE CE
LAMPADAIRE EST ENDOMMAGÉ, CELUI-CI DOIT ÊTRE REMPLACÉ EXCLUSIVE-MENT
PAR LE FABRICANT, SON AGENT DE SERVICE OU TOUTE PERSONNE COMPÉTENTE AFIN
D’ÉVITER TOUT DANGER. POUR USAGE À L’INTÉRIEUR SEULEMENT.
SECTION 15 DES RÈGLEMENTS DE LA FCC
Remarque : Ce matériel a été testé et a été déclaré conforme aux limites
en vigueur concernant les équipements numériques de catégorie B, en
vertu du paragraphe 15 de la réglementation FCC. Ces limites visent à
assurer une protection raisonnable contre tout brouillage nuisible dans
une installation résidentielle. Ce matériel produit, consomme et peut
émettre une énergie de radiofréquence et, s’il n’est pas installé et utilisé
conformément aux directives qui l’accompagnent, il peut entraîner
un brouillage nuisible des communications radio. Cependant, nous
ne garantissons pas l’absence de brouillage dans une installation en
particulier. Si, après avoir effectué une vérification en mettant l’appareil
hors tension puis sous tension, l’utilisateur s’aperçoit que ce matériel
provoque un brouillage nuisible à la réception des signaux de radio ou de
télévision, il lui faudra essayer de corriger ce brouillage en prenant une ou
plusieurs des mesures ci-dessous :
• Réorienter ou repositionner l’antenne de réception.
• Augmenter la distance entre l’appareil et le récepteur.
• Brancher le matériel dans une prise électrique située sur un circuit
différent de celui du récepteur.
• Consulter le distributeur ou un technicien radio/télévision expérimenté
pour obtenir de l’aide.
Des changements ou modifications qui ne sont pas expressément
approuvés par la partie responsable de la conformité pourraient annuler
l’autorité de l’utilisateur de faire fonctionner l’équipement.
Cet appareil est conforme aux exigences de la Section 15 des règles de
la Commission fédérale des communications (FCC). Son utilisation est
assujettie aux deux conditions suivantes :
(1) Cet appareil ne doit pas causer d’interférences nuisibles, et
(2) cet appareil doit accepter toute interférence reçue, y compris les
interférences pouvant entraîner son dysfonctionnement.
CAN ICES-3 (B)/NMB-3 (B)
¡FELICITACIONES!
Usted acaba de adquirir la mejor tecnología de iluminación natural con
su nuevo producto OttLite®.
FORMULARIO DE REGISTRO
Por favor, llene el Formulario de Registro de Producto anexo y envíelo
por correo hoy mismo, o regístrese en línea visitando:
www.OttLite.com/warranty
ENSAMBLAJE DE LÁMPARA
ADVERTENCIA: Para prevenir un choque eléctrico, cerciórese de que
la lámpara no se conecte hasta que se complete el ensamblaje y todos
los pasos.
Esta lámpara incluye un bombillo LED OttLite®Natural Daylight
1. Remueva la lámpara del embalaje y coloque la base (A) sobre una
superficie estable.
2. Consulte INSTALACIÓN/REMOCIÓN DEL BOMBILLO para instalar
el bombillo (E) en la lámpara.
3. Enchufe la lámpara en un tomacorriente estándar de 120 voltios.
4. Para ajustar la altura y el ángulo de la pantalla (D), gire los tornillos
de mariposa (F, G, H) en sentido contrario a las manecillas del
reloj. Ajuste la pantalla (D) a la altura y con el ángulo deseados,
luego apriete los tornillos de mariposa (F, G, H) en dirección de las
manecillas del reloj. NO LO APRIETE DEMASIADO, porque podría
dañar la rosca.
5. Para encender o apagar la lámpara (ON/OFF) presione
el interruptor (B).
INSTALACIÓN/REEMPLAZO DE BOMBILLO
1. Asegúrese que la lámpara no está conectada a un tomacorriente.
2. Si la lámpara ha estado en uso, permita que se enfríe durante
aproximadamente 5 minutos antes de proceder.
3. Para instalar el bombillo (E) en el portalámpara, enrosque la
base del bombillo dentro del portalámpara en la dirección de las
manecillas del reloj hasta que quede ajustado.
ADVERTENCIA: NO ajuste demasiado el bombillo, porque
puede ser difícil retirarlo después o podría dañar la lámpara o
el bombillo.
4. Para retirar el bombillo (E) de la lámpara, desenrósquelo del
portalámpara girando en la dirección contraria a las manecillas
del reloj.
ADVERTENCIA - PARA DISMINUIR EL PELIGRO DE INCENDIOS,
ELECTROCUCIÓN, O LESIONES:
1. Apague/desenchufe la lámpara y ESPERE A QUE EL BOMBILLO DE
LA LÁMPARA SE ENFRÍE antes de tocarlo.
2. ¡El bombillo se calienta muy rápidamente! Toque únicamente el
enchufe o el interruptor para ENCENDER o APAGAR la lámpara.
3. No se utilice jamás con una extensión a menos que el enchufe
pueda insertarse completamente en las ranuras de la extensión.
4. No modifique o altere el enchufe.
AVISO: Las importantes medidas de seguridad que figuran en
esta hoja de instrucciones no tienen como objetivo cubrir todas las
circunstancias posibles y todas las situaciones que puedan suceder.
Debe entenderse que el sentido común, la prudencia, y el cuidado
deben imperar.
¡PRECAUCIÓN! INSTRUCCIONES DE SEGURIDAD IMPORTANTES: ESTA
LÁMPARA PORTÁTIL TIENE UN ENCHUFE POLARIZADO (UNA DE SUS PATAS ES MÁS
ANCHA QUE LA OTRA) COMO CARACTERISTICA PARA REDUCIR EL RIESGO DE UNA
DESCARGA ELÉCTRICA. ESTE ENCHUFE ENCAJARÁ EN CUALQUIER TOMACORRIENTE
POLARIZADO SOLO DE UNA MANERA. SI EL ENCHUFE NO CALZA COMPLETAMENTE EN
EL TOMACORRIENTE DÉLE LA VUELTA. SI AÚN NO ENCAJA, PÓNGASE EN CONTACTO
CON UN ELECTRICISTA CALIFICADO. NUNCA UTILICE UNA EXTENSIÓN A NO SER QUE
EL ENCHUFE PUEDA SER TOTALMENTE INSERTADO. NO ALTERE EL ENCHUFE.
PRECAUCIÓN: PARA PREVENIR UNA DESCARGA ELÉCTRICA, HAGA
COINCIDIR LA PATA ANCHA DEL ENCHUFE CON LA RANURA ANCHA, INSERTE
TOTALMENTE.
¡PRECAUCIÓN! SI EL CABLE O CORDÓN FLEXIBLE EXTERNO DE ESTA
LUMINARIA ESTÁ DAÑADO, DEBE SER EXCLUSIVAMENTE REEMPLAZADO POR EL
FABRICANTE O SU AGENTE DE SERVICIO O UNA PERSONA CALIFICADA SIMILAR A FIN
DE EVITAR UN RIESGO. SÓLO PARA USO EN INTERIORES.
PARTE 15 DE LA FCC
Nota: Este equipo ha sido evaluado y cumple con las limitaciones
aplicables a un aparato digital Clase B, según la Parte 15 de las reglas
de la FCC. Estas limitaciones fueron concebidas para ofrecer un nivel
razonable de protección contra interferencias dañinas en instalaciones
residenciales. Este equipo genera, utiliza, y emana energía radioeléctrica
y, si no se instala y utiliza de acuerdo con las instrucciones provistas,
puede interferir negativamente con comunicaciones por radio. Sin
embargo, no hay garantía alguna de que no ocurrirán interferencias en
una instalación en particular. Si esta unidad genera interferencia en la
recepción de radio o televisión, la cual puede determinarse enciendo y
apagando la unidad, se insta al usuario a corregir dicha interferencia
siguiendo uno o más de los siguientes pasos:
• Cambie la orientación de o mueva la antena receptora.
• Aumente la distancia entre el equipo y el receptor.
• Conecte el equipo en una toma que esté en un circuito distinto a aquel
en el cual está conectado el receptor.
• Consulte con el vendedor o con un técnico de radio y TV experimentado.
Los cambios o modificaciones no aprobados expresamente por la parte
responsable del cumplimiento podrían invalidar la autorización del usuario
para utilizar el equipo.
Este dispositivo cumple con la Parte 15 de las normas de la FCC. Su
operación está sujeta a las dos condiciones siguientes:
(1) este dispositivo no puede causar interferencia perjudicial, y
(2) este dispositivo debe aceptar cualquier interferencia recibida, incluso
aquella interferencia que pueda ocasionar un funcionamiento no deseado.
CAN ICES-3 (B)/NMB-3 (B)
