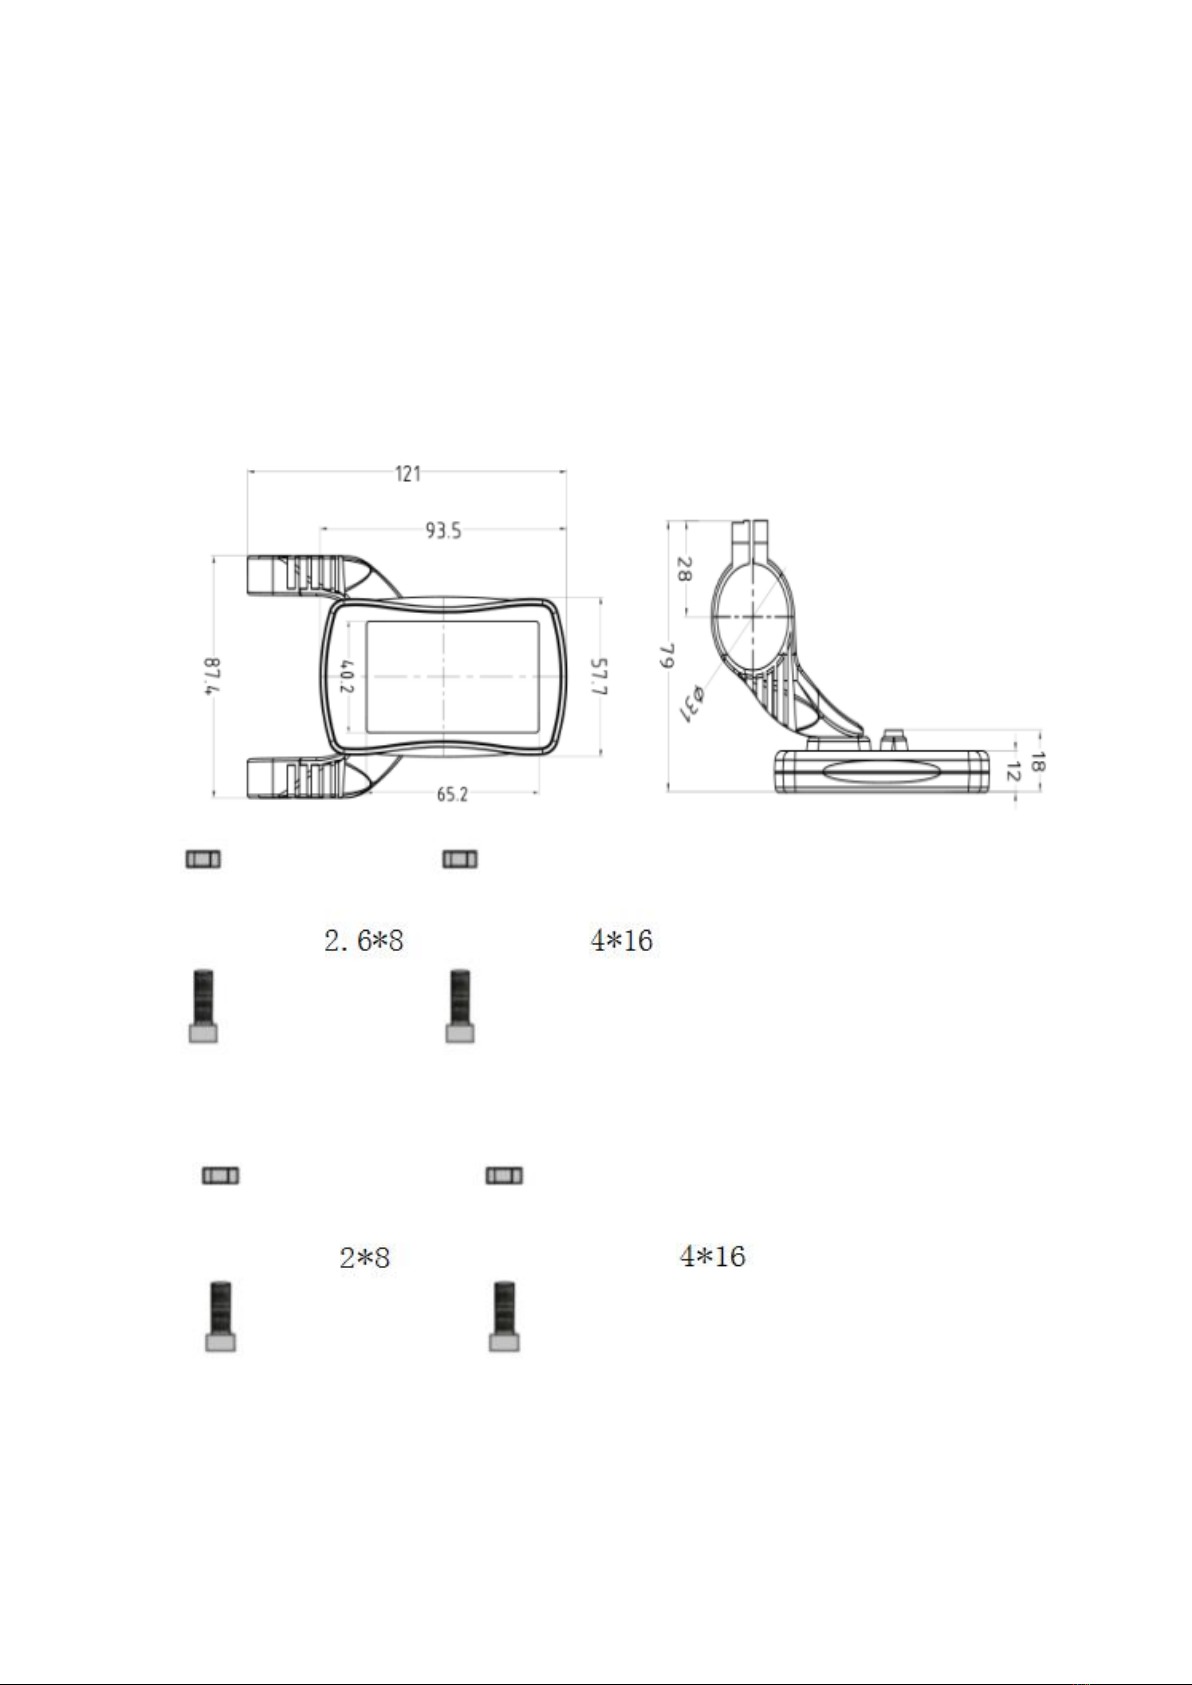
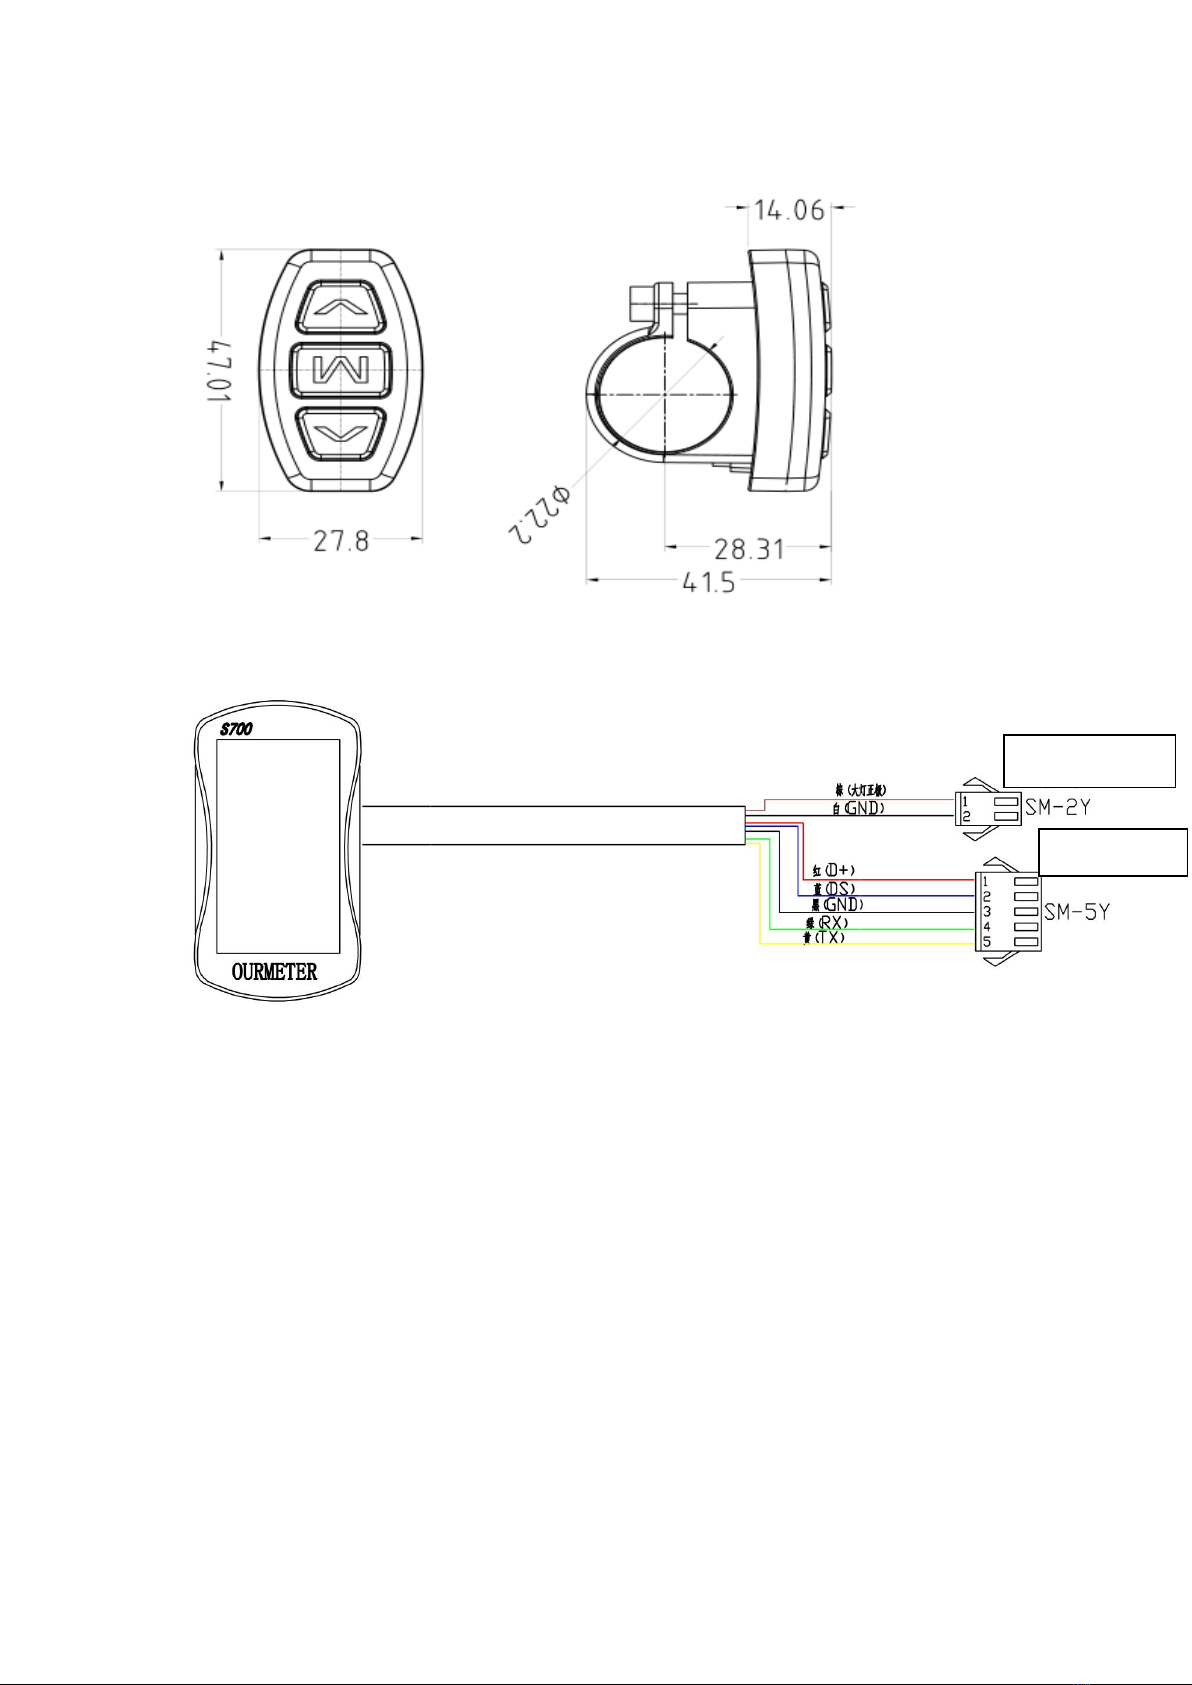
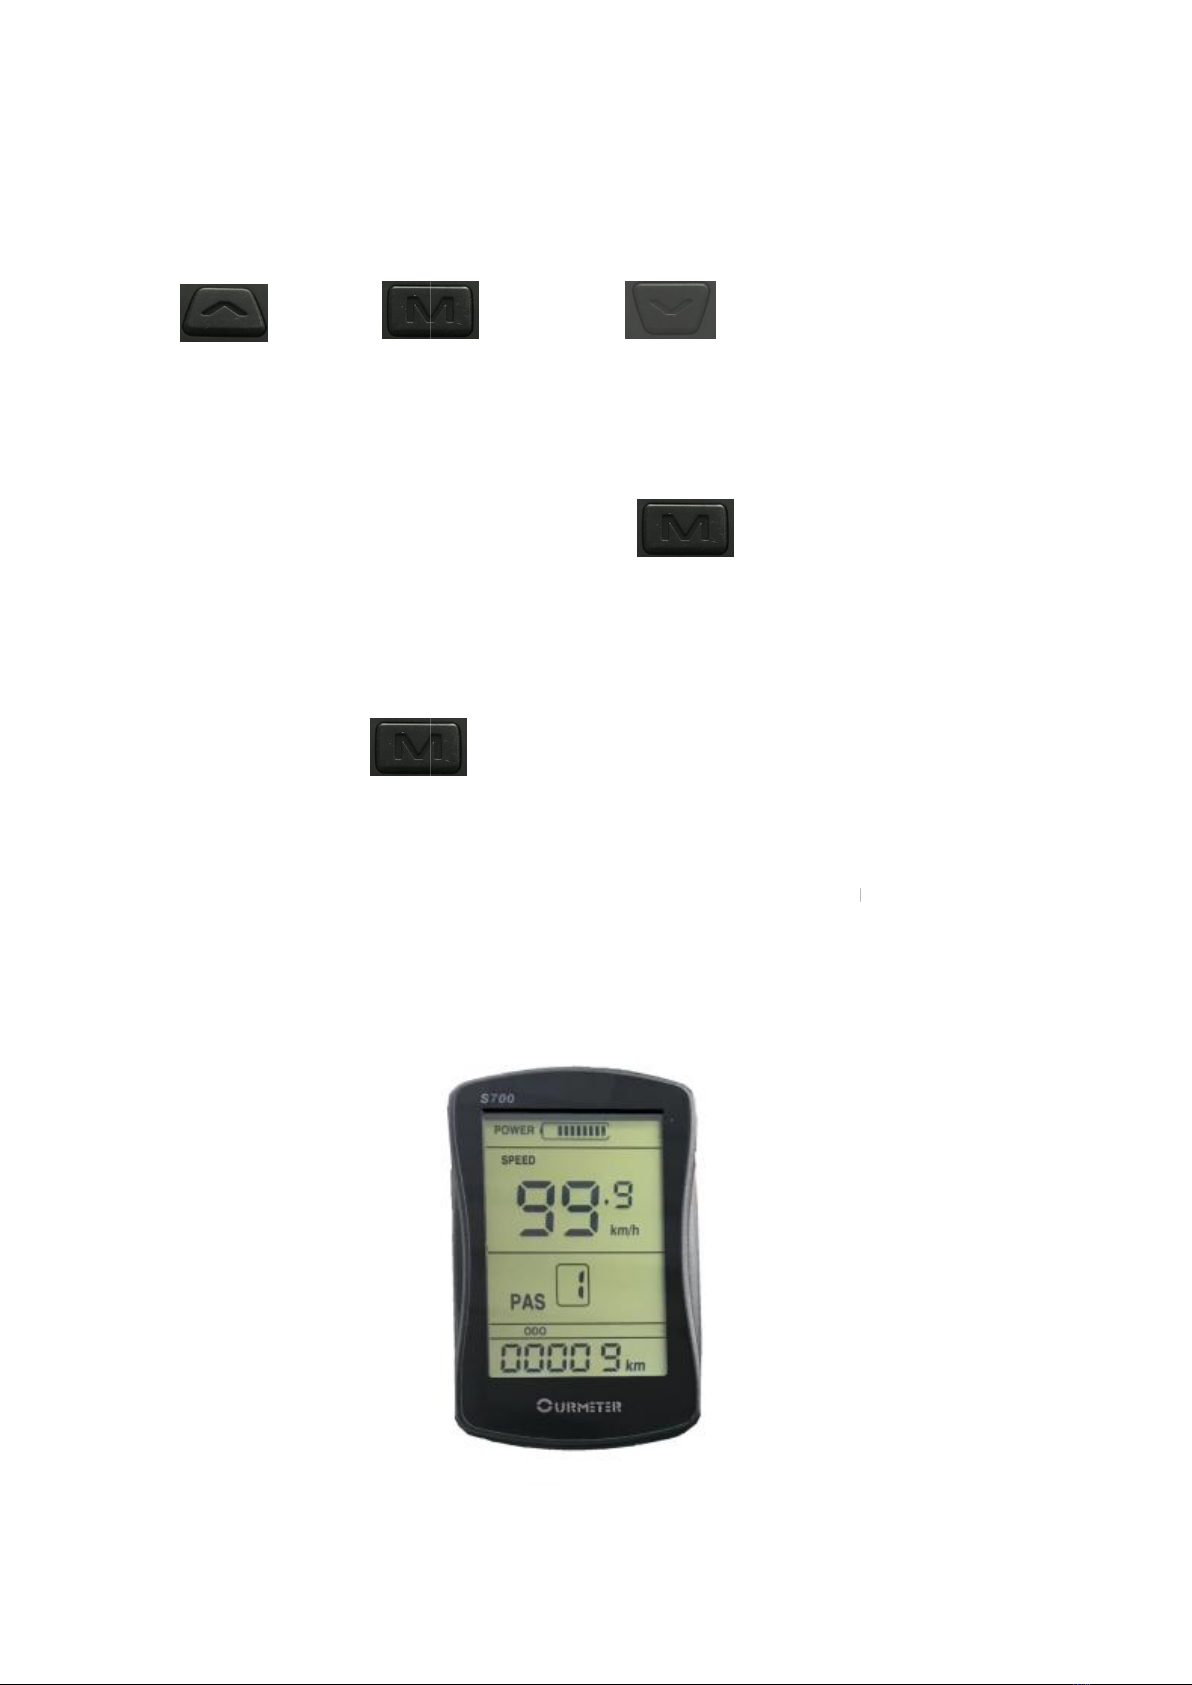
4. Press button definition
LCD-
S700 uses independent press button, in total threebuttons:
“UP”、
5.
1) Power ON/OFF
When the power is off, Long press
seconds ,
screen will display all contents and start to normal
working mode, and controller will be turned on
on, Long press
be powered off,
and controller will be turned
operation both on bike and display during 10minutes(time could be
set), the display will turn off automatically,
consumption for both display and cont
6
4. Press button definition
S700 uses independent press button, in total threebuttons:
“MODE”、 “DOWN
When the power is off, Long press
( MODE
)
screen will display all contents and start to normal
working mode, and controller will be turned on
( MODE) during 3 seconds
,
and controller will be turned
off
。
operation both on bike and display during 10minutes(time could be
set), the display will turn off automatically,
in this case, no power
consumption for both display and cont
roller.
S700 uses independent press button, in total threebuttons:
during 3
screen will display all contents and start to normal
screen will
If no any
operation both on bike and display during 10minutes(time could be
in this case, no power