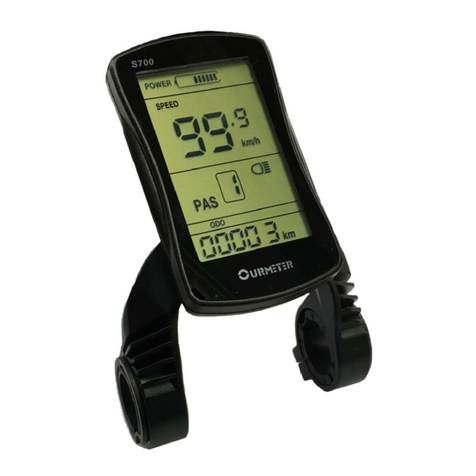
Ourmeter LD-S700 User manual

OurmeterIntelligent Technology(Changzhou)Co.,Ltd
The user
manual
LD-S700 special instrument for
lithium-assisted electric vehicle
Address: 3rd Floor, Building 4, No. 226, West
Yellow River Road, Xinbei District, Changzhou
City, Jiangsu Province
Fax: 0519-83510215
Website:
www.ourmeter.cn
Omid Intelligent Technology
(Changzhou) Co., Ltd

dire
ctor
y
Introduction......
4
1. The figure and appearance, size... 5
1) main material and color... 5
2) The external dimension and installation dimension of
the instrument (unit: mm).......... 5
3) Graphical size and mounting size of external keys (unit:
mm)...... 5
4) the wiring diagram... 6
5) physical installation diagram... 7
2. Summary of product introduction and
function... 7
1) Adopt two-way communication protocol and
external three-way keys to make the operation
convenient and quick for customers.
. 7
2) speed display... 7
3) kilometers/miles shows... 7
4) intelligent power show... 7
5) the headlight control... 7
6) backlight brightness level 3 to adjust... 7
7) 5 midst control... 8
8) mileage show... 8
9) fault code hinting... 8
10) 6 km power to implement mode... 8
11) parameter Settings... 8
3. The liquid crystal display content and
instructions... 8

1

1) power show... 8
2) speed mode... 9
3) the speed value show... 9
4) 6 km power for show... 9
5) gear show... 9
6) headlight show... 9
7) mileage pattern... 9
8) riding time... 9
9) error code display... 9
4. Define external buttons... 9
5. Operation method and function
instruction........................ 9
1) start-up and shutdown... 9
2) speed mode switches... 10
3) Mileage mode, ride time, error code switch...........
11
4) power gear choices... 12
5) headlight switch... 13
6) 6KM promotion (walking mode)................... 13
6. System parameter Settings... 14
1) backlight brightness... 15
2) metric/inch... 15
3) instrument support working voltage... 16
2

4) sleep time... 16
5) power gear... 17
6) wheel diameter selection... 18
7) speed magnetic steel number... 18
8) speed adjusting... 19
9) zero start, nonzero startup Settings... 19
The driving mode of 10) set... 20
11) power sensitivity setting... 21
12) power set start strength... 21
13) Set type of power assist magnetic steel
plate........................ 22
14) controller current-limiting value set... 23
15) controller under voltage values show...
23
16) accumulated mileage reset... 24
17) to restore factory Settings... 24
7. The instrument specifications... 25
8. Error code definition... 25
9. Use note... 26
The common problems and solutions... 27
11. Quality commitment and warranty range...
27
12. Version changes... 27
3

pref
ace
Dear users, in order to make you use the LCD-S700
liquid crystal display meter correctly, please read
the user manual and relevant precautions carefully
before use. We will help you to understand and be
familiar with the functions of the instrument in the
most concise language, guide you how to operate the
instrument, how to set the system parameters, how to
achieve the best matching state of the motor,
controller and instrument, and improve the electric
vehicle control performance. The content of this
manual covers the installation, operation, system
parameter setting and correct use method of the
instrument, so as to help you solve the problems and
doubts in the actual use.

4

1. Outline
drawing and
dimensions
1) Main material and
color
LD-S700 instrument shell and external keys are mainly made of
ABS material, and the liquid crystal transparent window is acrylic.
2) Instrument dimensions and installation
dimensions (unit: mm)
3) Graphical size and mounting size of external keys
(unit: mm)
5

4) Wiring
diagram
Red line: Power
positive VCC Blue
line: Electric lock
DS Black line: Power
negative GND Green
line: Data receiving
line RX Yellow line:
Data sending line TX
Brown line: Headlight
positive DD White
line: Headlight

negative GND
Note: The specific wiring mode and wire
color can be customized according to
customer requirements.
6

5) Physical
installation diagram
Fix the LCD display part of the instrument and the
external button on the handlebar of the electric
vehicle, and adjust the appropriate viewing Angle. In
the case of power failure of the vehicle, connect the
instrument connector with the controller adapter.
Turn on the power, and the electric vehicle and meter
enter the positive
The instrument is
installed in normal
operating state.
2. Product introduction
and function overview
1) Adopt two-way communication protocol and external three-way
keys to make the operation convenient and quick for customers.
2) Speed display: including real-time SPEED, maximum SPEED,
MAX SPEED, average SPEED AVG SPEED
3) Km/ mile display: set the display of Km/h and miles Mph
according to customers' habits.
4) Intelligent power display: real-time display of

the current power of the battery.
5) Headlight control: turn on and off the headlights
through external keys.
6) Backlight brightness level 3 adjustment: according to the
customer's habit to set the backlight brightness, 1
7

Level 3 is the
darkest and level
3 is the brightest.
7) 5 gear control: according to customer needs can be selected
through the external button power gear 0~5, of which 0 is
neutral no power (the general default is 5).
8) Mileage display: it can display cumulative mileage ODO, single mileage
Trip and cycling time.
9) Fault code prompt: see the definition of error
code and Attached Table 1.
10)6KM assisted promotion mode: display cruise WALK in 6KM assisted
promotion mode.
11) Parameter setting: various parameters can be set through the
setting interface, including gear position, wheel diameter,
speed limit, etc.
3. Liquid crystal display
content and instructions

1) Electric quantity display: 10 stages of electric quantity
indicator, 8 can be set according to customer demand

Voltage
value.
2) Speed mode: AVG Speed, Max Speed,
Real-time SPEED.
3) Speed value display: display speed value, Km/h Km/h, MPH
miles /h.
4) 6KM power promotion display: display cruise WALK in 6KM power
promotion mode.
5) Gear display: display the current power gear, 0~5, where 0 is
the neutral helplessness.
6) Headlight display: it is displayed when
the headlight and backlight are turned on.
7) Mileage mode: it is divided into single mileage Trip
and cumulative mileage ODO.
8) Riding time: Display the
riding time.
9) Error code display: display the sign ERRO and error code when a
fault is detected.
4. Definition of external keys
LD-S700 adopts the instrument liquid crystal display part and the
external three-way key design structure form, the communication
between the two is connected by the bottom lead.
5. Operation method and
function instruction 1) Power
on and power off
Long press when
the meter is off
Key (MODE) for 3 seconds,
the instrument is fully
displayed and combined
The key is provided with
three keys, respectively
with a figure
Key to replace the
text "UP",
Key to replace the
text "MODE",
Key instead of the
word "DOWN".

9

(MODE) for 3 seconds, the meter power off, and the
controller power off. If you are not riding for 10
minutes (time can be set by the user) and the meter is
not operated, the meter will automatically turn off
the power. In the off state, the power consumption of
the meter and controller is zero.
The instrument boot display
interface is shown in Figure
1.
2) Speed mode
switching
Real-time SPEED → maximum SPEED → average SPEED
(AVGSPEED).
The display interfaces of speed mode and cycling
time are shown in Figure 2, Figure 3 and Figure 4.
Long press the key and the key can be switched speed
display information, circular display
Start working, turn on the controller power; Long
press the key while on

10

3) Mileage mode, cycling time, error code
switch
Cycle display single mileage (Trip) → accumulated
mileage (ODO) → cycling time
Time→ error code ERR.
11
Short press the button to switch the display of
mileage mode, cycling time, error code,

The switching mode display interface is shown
in Figure 5, Figure 6, Figure 7 and Figure 8.
4) power gear
selection
Power, the lowest 1 gear, the highest 5 gear, the
default is 1 gear when the meter is turned on.
Zero is the gap. As shown in
Figure 9 and Figure 10.
12
Short press the key or key, switch the power gear,
change the motor power
Table of contents
Other Ourmeter Bicycle Accessories manuals