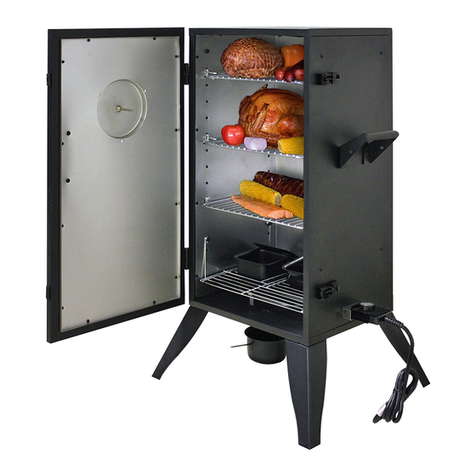
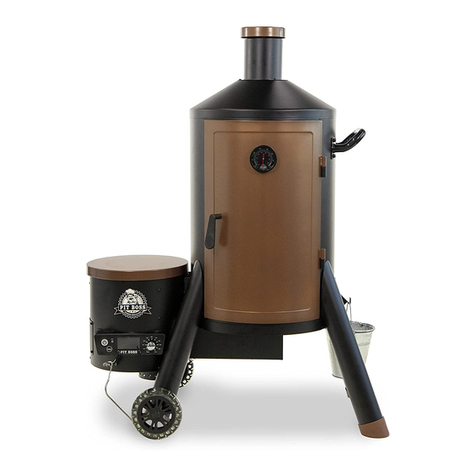
Outdoor Gourmet FSOGBG3201 Owner's manual

Please keep this instruction manual for future reference
Assembly Instructions & User’s Manual
Heavy-Gauge Vertical Smoker
ITEM# FSOGBG3201
READ INSTRUCTION MANUAL BEFORE ATTEMPTING TO ASSEMBLE OR
OPERATE THIS PRODUCT.
Adult assembly required.
Keep screws and parts out of reach of children.
Customer Service: (888) 909-3888, 7:30 am to 4:30 pm PST
Monday - Friday
Customer Service: (888) 922-2336 7:00 am to 12:00 am CST (daily)
Live Chat at: www.academy.com
Email: [email protected]
(Made in China)
Warning:
--------------------------------------OR-------------------------------------
Joe Oakes 9/23/20 (Update to cover
hours of operation)

Table of Contents
Safety Warnings…………………………………………………………………………2-3
Exploded View…………………………………………………………...........................4
Parts and Tools………...........................................................................................5-6
Assembly Instructions…………………………………………………......................7-21
Preparation For Use & Lighting Instructions…………........................................22-23
Proper Care & Maintenace………………………………………………….................29
Warranty Information…………………………………………………..........................30
Note: Before beginning assembly of product, make sure all parts are present.
Compare parts with package content list and hardware contents. If any part is
missing or damaged do not attempt to assemble the unit. Contact customer
service for replacement parts.
Operating Instructions…………………………………………………....................24-28
After Use Safety…………………………………………………..................................29
1

Safety Warnings
IMPORTANT SAFETY WARNINGS
WE WANT YOU TO ASSEMBLE AND USE YOUR GRILL AS SAFELY AS POSSIBLE.
THE PURPOSE OF THIS SAFETY ALERT SYMBOL IS TO ATTRACT YOUR ATTENTION TO
WHEN YOU SEE THE SAFETY ALERT SYMBOL, PAY CLOSE ATTENTION TO THE INFORMATION
WHICH FOLLOWS!
READ ALL SAFETY WARNINGS AND INSTRUCTIONS CAREFULLY
BEFORE ASSEMBLING AND OPERATING YOUR GRILL.
2QO\XVHWKLVJULOORQDKDUGOHYHOQRQFRPEXVWLEOHVWDEOHVXUIDFHFRQFUHWHJURXQGHWFFDSDEOHRIVXSSRUWLQJWKH
ZHLJKWRIWKHJULOO1HYHUXVHRQZRRGHQRURWKHUVXUIDFHWKDWFRXOGEXUQ
3URSHUFOHDUDQFHRIIHHWEHWZHHQWKHJULOODQGFRPEXVWLEOHPDWHULDOEXVKHVWUHHVZRRGHQGHFNVIHQFHV
EXLOGLQJVHWFRUFRQVWUXFWLRQVKRXOGEHPDLQWDLQHGDWDOOWLPHVZKHQJULOOLVLQXVH'RQRWSODFHJULOOXQGHUDURRI
RYHUKDQJRURWKHUHQFORVHGDUHD
)RURXWGRRUXVHRQO\'RQRWRSHUDWHJULOOLQGRRUVRULQDQHQFORVHGDUHD
)RUKRXVHKROGXVHRQO\'RQRWXVHWKLVJULOOIRURWKHUWKDQLWVLQWHQGHGSXUSRVH
:HUHFRPPHQGWKHXVHRID&KDUFRDO&KLPQH\6WDUWHUWRDYRLGWKHGDQJHUVDVVRFLDWHGZLWKFKDUFRDOOLJKWLQJIOXLG
,I\RXFKRRVHWRXVHFKDUFRDOOLJKWLQJIOXLGRQO\XVHOLJKWLQJIOXLGDSSURYHGIRUOLJKWLQJFKDUFRDO&DUHIXOO\UHDG
PDQXIDFWXUHU·VZDUQLQJVDQGLQVWUXFWLRQVRQWKHFKDUFRDOOLJKWLQJIOXLGDQGFKDUFRDOSULRUWRWKHXVHRIWKHLUSURGXFW
6WRUHFKDUFRDOOLJKWLQJIOXLGVDIHO\DZD\IURPJULOO
:KHQXVLQJFKDUFRDOOLJKWLQJIOXLGDOORZFKDUFRDOWREXUQZLWKJULOOOLGDQGGRRURSHQXQWLOFRYHUHGZLWKDOLJKWDVK
DSSUR[LPDWHO\PLQXWHV7KLVZLOODOORZFKDUFRDOOLJKWLQJIOXLGWREXUQRII)DLOXUHWRGRWKLVFRXOGWUDSIXPHVIURP
FKDUFRDOOLJKWLQJIOXLGLQJULOODQGPD\UHVXOWLQDIODVKILUHRUH[SORVLRQZKHQOLGLVRSHQHG
'RQRWXVHJDVROLQHNHURVHQHRUDOFRKROIRUOLJKWLQJFKDUFRDO8VHRIDQ\RIWKHVHRUVLPLODUSURGXFWVFRXOGFDXVHDQ
H[SORVLRQSRVVLEO\OHDGLQJWRVHYHUHERGLO\LQMXU\
1HYHUDGGFKDUFRDOOLJKWLQJIOXLGWRKRWRUHYHQZDUPFRDOVDVIODVKEDFNPD\RFFXUFDXVLQJVHYHUHEXUQV
3ODFHJULOOLQDQDUHDZKHUHFKLOGUHQDQGSHWVFDQQRWFRPHLQWRFRQWDFWZLWKXQLW&ORVHVXSHUYLVLRQLVQHFHVVDU\
ZKHQJULOOLVLQXVH
'RQRWOHDYHJULOOXQDWWHQGHGZKHQLQXVH
:KHQDGGLQJFKDUFRDODQGRUZRRGXVHH[WUHPHFDXWLRQDQGIROORZLQVWUXFWLRQVLQ´$GGLQJ&KDUFRDO:RRG'XULQJ
&RRNLQJµVHFWLRQRIWKLVPDQXDO
'RQRWVWRUHRUXVHJULOOQHDUJDVROLQHRURWKHUIODPPDEOHOLTXLGVJDVHVRUZKHUHIODPPDEOHYDSRUVPD\EHSUHVHQW
'RQRWVWRUHOLJKWHUIOXLGRURWKHUIODPPDEOHOLTXLGVRUPDWHULDOXQGHUWKHJULOO
*ULOOLVKRWZKHQLQXVH7RDYRLGEXUQV
'2127DWWHPSWWRPRYHWKHJULOO
%UDFHJULOOVRWKHXQLWGRHVQRWDFFLGHQWDOO\PRYH
:HDUSURWHFWLYHJORYHVRURYHQPLWWV
'2127WRXFKDQ\KRWJULOOVXUIDFHV
'2127ZHDUORRVHFORWKLQJRUDOORZKDLUWRFRPHLQFRQWDFWZLWKJULOO
WARNING
POSSIBLE HAZARDS AS YOU ASSEMBLE AND USE YOUR GRILL.

Safety Warnings
&KHFNJUHDVHOHYHOLQJUHDVHFXSRIWHQDQGHPSW\RUFKDQJHZKHQIXOO8VHH[WUHPHFDXWLRQDVWKHVPRNHUJUHDVH
FXSDQGLWVFRQWHQWVZLOOEHKRW
:KHQJULOOLQJJUHDVHIURPPHDWPD\GULSLQWRWKHFKDUFRDODQGFDXVHDJUHDVHILUH,IWKLVVKRXOGKDSSHQFORVHOLGWR
VXIIRFDWHWKHIODPH'RQRWXVHZDWHUWRH[WLQJXLVKJUHDVHILUHV
8VHFDXWLRQVLQFHIODPHVFDQIODUHXSZKHQIUHVKDLUVXGGHQO\FRPHVLQFRQWDFWZLWKILUH:KHQRSHQLQJWKHOLGNHHS
KDQGVIDFHDQGERG\DVDIHGLVWDQFHIURPKRWVWHDPDQGIODPHIODUHXSV
'RQRWH[FHHGDWHPSHUDWXUHRI)'RQRWDOORZFKDUFRDODQGRUZRRGWRUHVWRQWKHZDOOVRIILUHER['RLQJVRZLOO
JUHDWO\UHGXFHWKHOLIHRIWKHPHWDODQGILQLVKRI\RXUJULOO
8VHFDXWLRQZKHQDVVHPEOLQJDQGRSHUDWLQJ\RXUJULOOWRDYRLGVFUDSHVRUFXWVIURPVKDUSHGJHVRIPHWDOSDUWV8VH
FDXWLRQZKHQUHDFKLQJLQWRRUXQGHUJULOO
:KHQRSHQLQJOLGPDNHVXUHLWLVSXVKHGDOOWKHZD\RSHQ,IOLGLVQRWIXOO\RSHQLWFRXOGIDOOEDFNWRDFORVHGSRVLWLRQ
DQGFDXVHERGLO\LQMXU\
,QZLQG\ZHDWKHUSODFHJULOOLQDQRXWGRRUDUHDWKDWLVSURWHFWHGIURPWKHZLQG
&ORVHOLGGRRUDQGVPRNHVWDFNWRVXIIRFDWHIODPH
1HYHUOHDYHFRDOVDQGDVKHVLQJULOOXQDWWHQGHG%HIRUHJULOOFDQEHOHIWXQDWWHQGHGUHPDLQLQJFRDOVDQGDVKHVPXVW
EHUHPRYHGIURPJULOO8VHFDXWLRQWRSURWHFW\RXUVHOIDQGSURSHUW\&DUHIXOO\SODFHUHPDLQLQJFRDOVDQGDVKHVLQD
QRQFRPEXVWLEOHPHWDOFRQWDLQHUDQGVDWXUDWHFRPSOHWHO\ZLWKZDWHU$OORZFRDOVDQGZDWHUWRUHPDLQLQPHWDO
FRQWDLQHUKRXUVSULRUWRGLVSRVLQJ
([WLQJXLVKHGFRDOVDQGDVKHVVKRXOGEHSODFHGDVDIHGLVWDQFHIURPDOOVWUXFWXUHVDQGFRPEXVWLEOHPDWHULDOV
:LWKDJDUGHQKRVHFRPSOHWHO\ZHWWKHVXUIDFHEHQHDWKDQGDURXQGJULOOWRH[WLQJXLVKDQ\DVKHVFRDOVRUHPEHUV
ZKLFKPD\KDYHIDOOHQGXULQJWKHFRRNLQJRUFOHDQLQJSURFHVV
$IWHUHDFKXVHFOHDQWKHJULOOWKRURXJKO\DQGDSSO\DOLJKWFRDWRIYHJHWDEOHRLOWRLQWHULRUWRSUHYHQWUXVWLQJ&RYHUWKH
JULOOWRSURWHFWLWIURPH[FHVVLYHUXVWLQJ
8VHFDXWLRQZKHQOLIWLQJRUPRYLQJJULOOWRSUHYHQWVWUDLQVDQGEDFNLQMXULHV
:HDGYLVHWKDWDILUHH[WLQJXLVKHUEHRQKDQG5HIHUWR\RXUORFDODXWKRULW\WRGHWHUPLQHSURSHUVL]HDQGW\SHRIILUH
H[WLQJXLVKHU
6WRUHWKHJULOORXWRIUHDFKRIFKLOGUHQDQGLQDGU\ORFDWLRQZKHQQRWLQXVH
'RQRWDWWHPSWWRVHUYLFHJULOORWKHUWKDQQRUPDOPDLQWHQDQFHDVH[SODLQHGLQ´$IWHU8VH6DIHW\µDQG´3URSHU&DUH
0DLQWHQDQFHµVHFWLRQVRIWKLVPDQXDO
5HPRYHDOOVWLFNHUVDQGODEHOVEHIRUHILUVWXVH
3URSHUO\GLVSRVHRIDOOSDFNDJLQJPDWHULDO
USE CAUTION AND COMMON SENSE WHEN OPERATING YOUR GRILL.
FAILURE TO ADHERE TO SAFETY WARNING AND GUIDELINES IN THIS MANUAL COULD RESULT
IN BODILY INJURY OR PROPERTY DAMAGE.
SAVE THIS MANUAL FOR FUTURE REFERENCE.
WARNING
3
WARNING:
This product can expose you to chemicals including lead, which is known to the State of
California to cause cancer, and carbon monoxide, which is known to the State of California to
cause birth defects or other reproductive harm. For more information, go to:
www.P65Warnings.ca.gov.

Exploded View
1
2
3
4
7
9
8
10
13
14
15
16
18
17
19
20
21
22
23
24
25
26
27
28
29
30
31
33
34
32
35
36
11
5
6
4

Part List
Smoke Stack Damper
Smoke Stack
Meat Hook Rack
Smoking Chamber
Temperature Gauge
Door Handle
Firebox bracket
Side Handle
Bottle Opener
Water Access Door
Water Pan Support
Grease Cup Holder
Leg
Wheel Axle
Ash Drawer
Air Vent
Air Vent Handle
Ash Drawer Handle
Firebox Base
Firebox Top
Firebox Lid Handle
Firebox Charcoal Grate
1
2
3
4
6
7
8
9
10
11
12
13
14
15
1
1
1
1
1
1
1
2
2
1
1
1
1
1
Part # Description Picture Qty
19
21
22
23
24
25
26
27
28
29
31
33
1
1
1
1
1
1
1
1
1
1
Part # Description Picture Qty
35 Firebox Gasket-Long 2
Firebox Crossover
Firebox Crossover Bracket
Wheel
5Smoking Chamber Door 1
Wheel Bracket
S Shape Hook
16 4
17 Cooking Grate 5
Water Pan
18
1
Grease Cup
20 1
1
1
Firebox Lid Stop
30 1
Firebox Lid
32 1
Firebox Cooking Grate
34 2
36 Firebox Gasket-Short 2
5

Hardware
Hardware # Description
M6 x 12 Bolt 32AA
Picture Qty
M5 x 12 Bolt 4
BB
Flat Washer 1CC
M6 x 30 Bolt
Spring Washer
4DD
M6 x 45 Bolt 3EE
M6 Nut (Black) 10
FF
M12 Lock Nut 2GG
M5 Nut 4HH
M6 Lock Nut (Silver) 1II
JJ 2
Tools Required
Phillips Head Screwdriver
(Not included)
Adjustable Wrench
(Not included)
KK Cap Nut (pre-assembled) 1
LL Damper Spring (pre-assembled) 1
6

NOTE: With the help of a friend, turn the smoking
chamber upside down to begin assembly.
Remove door (#5) from smoking chamber (#4) by
removing bolt and washer from bottom door hinge
and lifting hinge pins from hinge holes. Set bolts
and washers aside for step 21.
Step 1
r. Lay
bly area.
Step 1
Assembly Instructions
Choose a good, cleared assembly area and get a friend to help you put your smoker together. Lay
cardboard down to protect smoker finish and assembly area.
5
4
Attach legs (#22) to the smoking chamber (#)4 using
(6) M6 x 12 bolts (AA).
Step 2
AA M6 x 12 Bolt
Hardware Used
6pcs
Step 2
4
22
AA
7

Assembly Instructions
Attach firebox bracket (#11) to wheel bracket (#15)
using (2) M6 x 12 bolts (AA) and (2) M6 nuts (FF).
Note: Do not tighten bolts until step 10 finished.
Step 3
Hardware Used
FF M6 Nut 2pcs
Step 3
10
4
AA FF
AA M6 x 12 Bolt 2pcs
Step 4
11 15
23
15
EE
GG
Attach wheel bracket (#15) to the bottom of smoking
chamber (#4) using (3) M6 x 45bolts (EE).
Insert wheel axle (#23) through hole in the wheel
bracket (#15). Place wheels (#10) on the ends of the
wheel alex (#23) and secure with (2) M12 lock nuts
(GG).
Note: With the help of a friend, turn the smoking
chamber into upright position after this step finished.
Set it aside for step 9..
Step 4
Hardware Used
GG M12 Lock Nut 2pcs
EE M6 x 45 Bolt 3pcs
8

Assembly Instructions
Attach firebox lid stop (#30) to firebox top (#29) using
(1) M6 x 12 bolt (AA) and (1) M6 nut (FF).
Step 5
Attach firebox base (#28), firebox gaskets-long (#35)
and firebox gaskets-short (#36) to firebox top (#29)
using (6) M6 x 12 bolts (AA).
Step 6
AA M6 x 12 Bolt
Hardware Used
1pc
Hardware Used
AA M6 x 12 Bolt 6pcs
Step 5
Step 6
FF
29
30
AA
FF M6 Nut 1pc
28
29
36
35
AA
Note: The long gaskets (with holes) should be at the
front and back of firebox, and the short gaskets are
on left side and right side of firebox.
9

Assembly Instructions
Install firebox crossover brackets (#9) to firebox
assembly using (4) M6 x 12 bolts (AA).
Step 8
AA M6 x 12 Bolt
Hardware Used
4pcs
Step 8
AA
9
firebox assembly
Install firebox crossover (#8) to firebox assembly
using (4) M6 x12 bolts (AA).
Step 7
Hardware Used
AA M6 x 12 Bolt 4pcs
Step 7
8
AA
firebox assembly
10

Assembly Instructions
Attach firebox assembly onto smoker assembly
using (4) M6 x 12 bolts as figure shown.
Note: Do not tighten bolts until step 10 finished.
Step 9
Hardware Used
Step 9
AA M6 x 12 Bolt 4pcs
AA
firebox assembly
Fix firebox assembly to wheel bracket (#15) using
(1) flat washer (CC) and (1) M6 x 12 bolt (AA) as
figure shown.
Note: Tighten the bolts on firebox crossover brackets
and on firebox bracket.
Step 10
Hardware Used
Step 10
AA M6 x 12 Bolt 1pc 15
firebox assembly
CC Flat Washer 1pc
AA
CC
11

Assembly Instructions
Step 11
AA M6 x 12 Bolt
Hardware Used
1pc
Step 11
Step 12
FF M6 Nut (Black) 1pc
II M6 Lock Nut 1pc
Attach air vent (#25) to ash drawer (#24) using (1) M6
x 12 bolt (AA) and (1) M6 lock nut (II).
Insert air vent handle (#26) into ash drawer (#24) and
air vent (#25) locking by (1) M6 nut (black) (FF).
Note: While making above installations, insure air vent
handle pass through the bottom opening with curve
slot on ash drawer, and air vent handle locate on the
right side to make sure you can completely open/close
air vent in use
Curve slot on ash drawer
bottom opening
26 24
AA
FF
II
25
Attach ash drawer handle (#27) to ash drawer (#24)
using (2) M5 x 12 bolts (BB) and (2) M5 nuts (HH).
Step 12
BB M5 x 12 Bolt
Hardware Used
2pcs
HH M5 Nut 2pcs
24
27
HH
BB
12

Assembly Instructions
Step 13
Insert ash drawer assembly into firebox assembly as
figure shown.
Step 14
Step 13
Step 14
firebox assembly
3
2
Install meat hooks rack (#3) onto smoke stack (#2).
Hold in place while performing step 17.
13

Assembly Instructions
Step 16 Step 16
Remove pre-attached cap nut (KK) and spring (LL)
from smoke stack (#2). Then attach smok stack
damper (#1) to smoke stack (#2) using spring (LL)
and cap nut (KK). 1
2 4
KK
LL
Step 15
Attach smoke stack assembly to smoking chamber
(#4) using (3) M6 x 12 bolts (AA).
Step 15
4
AA
AA M6 x 12 Bolt
Hardware Used
3pcs
14

Assembly Instructions
Step 17
Place grease cup (#20) in grease cup holder (#21).
Insert prongs of grease cup holder into holes in the
smoker assembly legs as figure shown.
20
21
Step 17
Attach side handle (#12) to the smoking chamber (#4)
using (4) M6 x 30 bolts (DD) and (4) M6 nuts (FF).
Step 18
DD M6 x 30 Bolt
Hardware Used
4pcs
Step 18
12
4
DD
FF M6 Nut 4pcs
15

Assembly Instructions
13
4
BB
HH
Attach bottle opener (#13) to the smoking chamber
(#4) using (2) M5 x 12 bolts (BB) and (2) M5 nuts
(HH).
Step 19
BB M5 x 12 Bolt
Hardware Used
2pcs
Step 19
HH M5 Nut 2pcs
Step 20
Hang (4) S shape hooks (#16) to side handle (#12)
as figure shown.
16
12
Step 20
16

Assembly Instructions
Attach smoking chamber door (#5) by sliding hinge
pins into hinges.
Secure with washer and bolt that were removed in
step 1.
Step 21
Step 22
Remove hex nut and two washers from door handle
(#7). Insert door handle (#7) through hole in door and
secure with two washers and hex nut.
Step 21
Step 22
5
7
17

Assembly Instructions
Step 23
Step 24
Step 23
Step 24
32
31
FF JJ
Attach firebox lid handle (#31) to firebox top (#32)
using (2) spring washers (JJ) and (2) M6 nuts (black)
(FF) as figure shown.
32
29
Remove one bolt and washer from firebox lid hinge.
Then, attach firebox lid (#32) to firebox top (#29) by
sliding hinge pins into hinge holes. Secure with one
bolt and washer as figure shown.
JJ Spring washer
Hardware Used
2pcs
FF M6 Nut (Black) 2pcs
18

Assembly Instructions
Screw temperature gauge (#6) fully into lid. Slightly
unscrew temperature gauge until gauge is in an
upright position. Use pre-attached nut to lock into
place.
Step 25 Step 25
6
Step 26 14 4
Attach water access door (#14) to the back of the
smoking chamber (#4).
Step 26
19
This manual suits for next models
1
Table of contents
Other Outdoor Gourmet Smoker manuals
Popular Smoker manuals by other brands

Masterbuilt
Masterbuilt 20076716 manual

Gourmia
Gourmia GPS-650 user manual

Mayer Barbecue
Mayer Barbecue RAUCHA MS-300 PRO Assembly instructions

ProBBQ
ProBBQ Amigo instruction manual

Great Outdoors Grill Company
Great Outdoors Grill Company Smoky Mountain Series 32934 Assembly and owner's manual

Hark
Hark HK0537 owner's manual

Mustang
Mustang 316212 manual

Masterbuilt
Masterbuilt Sportsman Elite 20076115 Assembly, care & use manual

Cookshack
Cookshack SM160 manual

Southern Pride
Southern Pride SC-100 Owner's instruction manual

J&R MANUFACTURING
J&R MANUFACTURING ROTISSERIE Operation and service manual

Southern Pride
Southern Pride SPK-700-SL Specification sheet