BEFORE LIGHTING
GETTING STARTED
A) The smoker should be placed on a level, heat proof, non-combustible surface away from buildings and out of general
traffic path. The smoker is for outdoor use only and not recommended for use on outdoor carpeted surfaces.
B) Remove the lid and center bucket assembly before lighting the charcoal briquettes. Acedemy recommends you to use
the charcoal briquettes. Lump charcoal or heat beads are not recommended.
Never use charcoal saturated with charcoal lighter fluid
. Failure to follow this warning may result in serious
bodily injury, death, or fire, causing damage to property.
C) Ensure that ashes have been removed from bottom bowl and that the charcoal grate and charcoal bowl are in place.
D) Open all vents on the bottom of the bowl.
A) Fill charcoal bowl with the amount of charcoal and light using a long-neck lighter or matches.
Never use charcoal saturated with charcoal lighter fluid. Failure to follow this warning may result in serious
bodily injury, death, or fire, causing damage to property.
B) Add 2-3 chunks of dry hardwood on top of the hot coals. More can be added if you prefer a stronger smoke flavor.
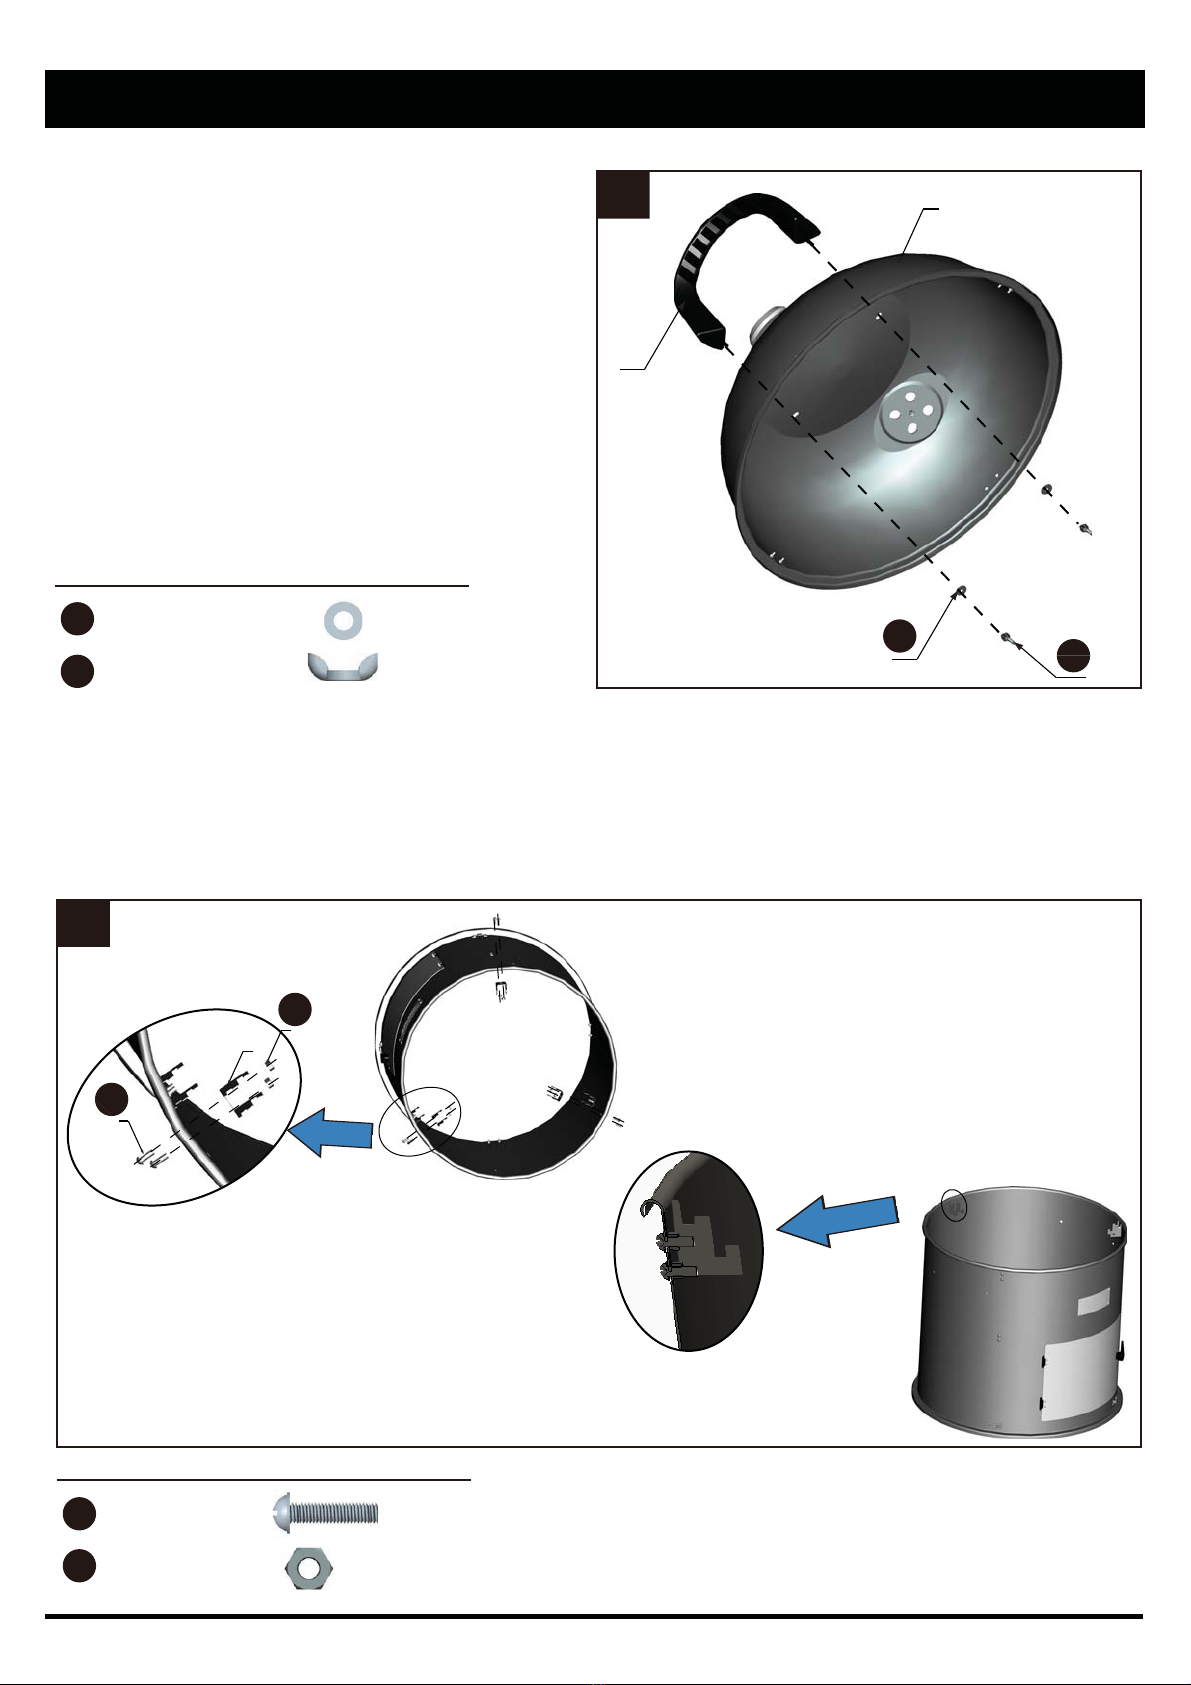
A) Place the center bucket assembly on the bottom bowl assembly . Place the water pan in position on the lower
support brackets in the center bucket assembly.
B) Using an appropriate container, fill the water pan to capacity. Position the lower cooking grate directly above the water
pan.
WARNING: Do not spill any water into the hot coals. This can cause steam and ash to rise and could cause
serious bodily injury or death.
C) If you are cooking on both the upper and lower cooking grates, place food to be smoked on the lower grate first.
Position the upper grate on the center bucket upper support brackets and place food to be smoked on the upper grate.
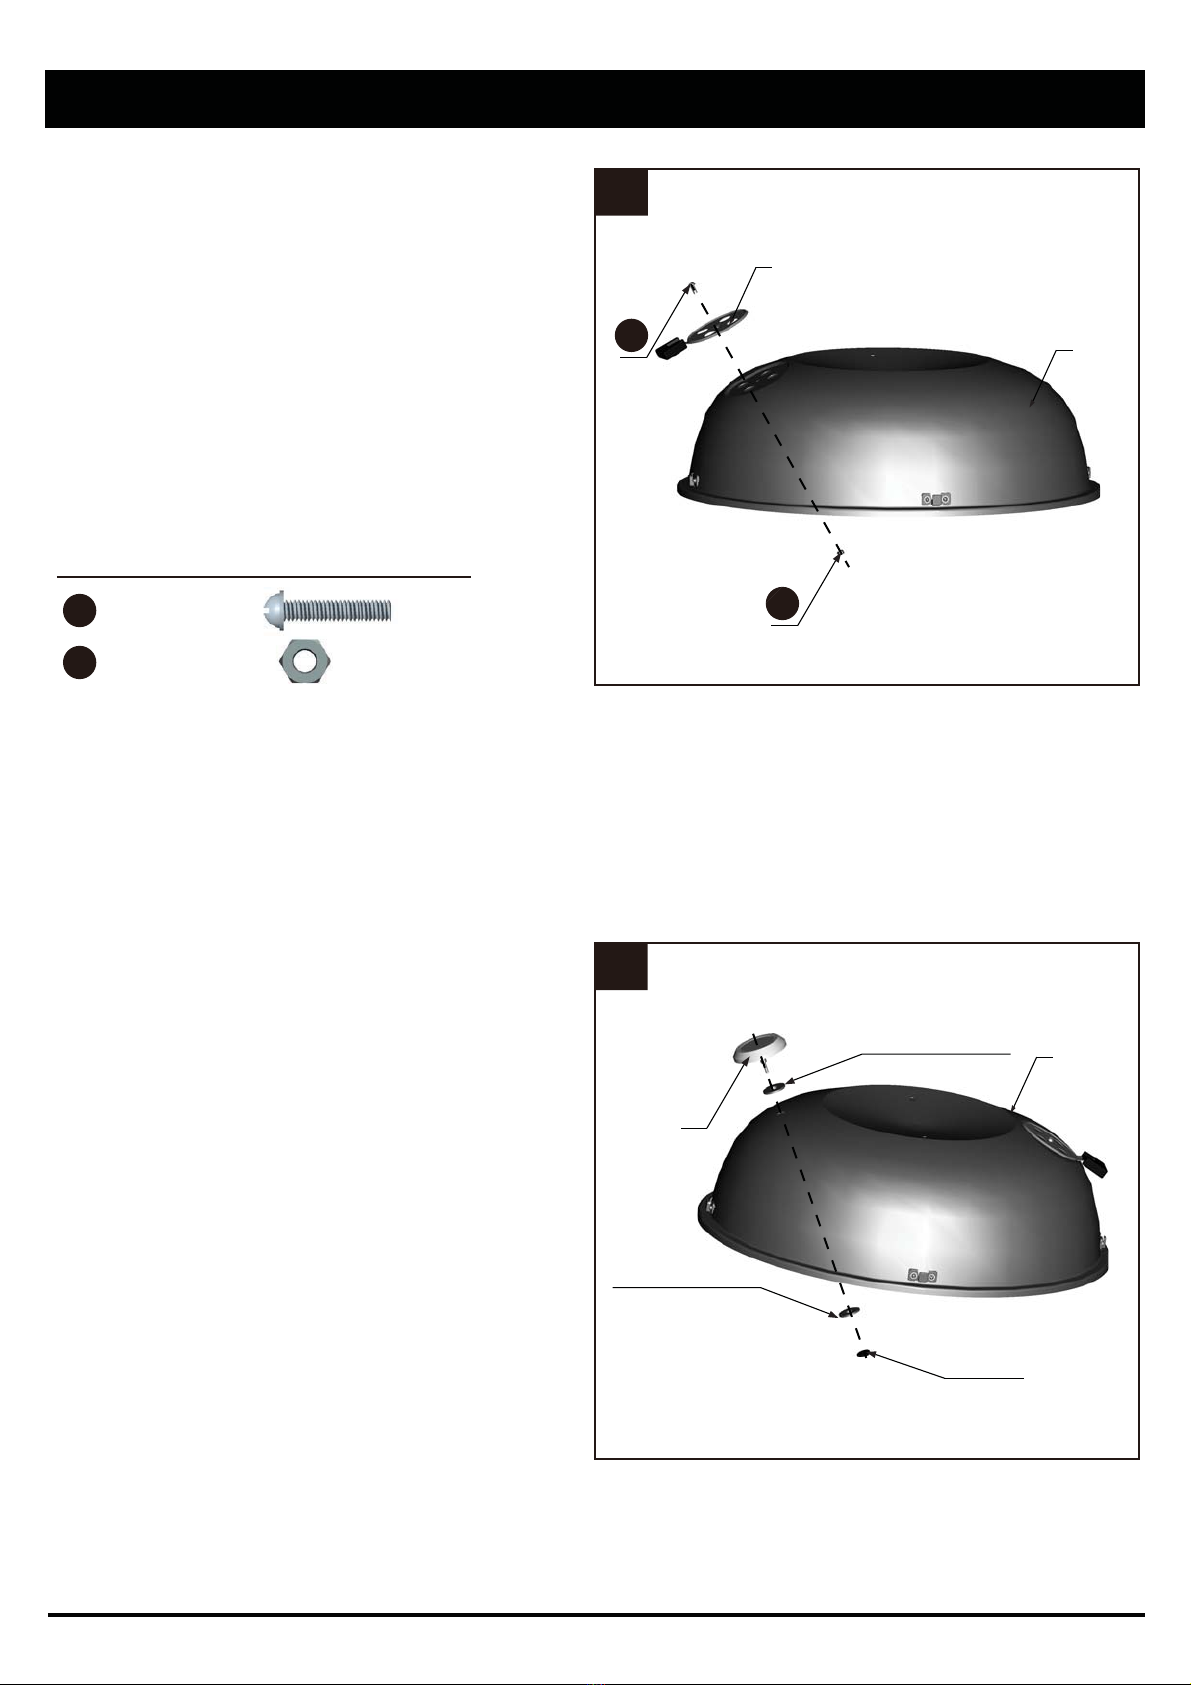
D) Pick up the lid by the handle, place it on top of the center bucket assembly and open the vent on the lid .
E) The vents are used to regulate heat within the smoker. Opening vents increases temperature and closing vents
decreases temperatures.
WARNING: Always use protective mitts or gloves to protect hands and forearms. Failure to follow this warning
may result in serious bodily injury or death.
F) The smoker is working properly when internal temperature is between 170 and 250 degrees or in “ideal” range on built
in thermometer. Increased internal temperatures can be achieved if your smoker is placed away from strong breezes.
If, after a minimum of 45 minutes the smoker has not reached “ideal” range, open the door to allow more air to the fire.
Once the smoker has reached the “ideal” range, close the door and avoid opening it again for each time it is opened,
cooking time will be prolonged an additional 15 minutes.
G) Meats that require more than 4 hours of cooking time to reach doneness may require additional water and charcoal. If
the temperature inside the smoker drops below “ideal” range, add more charcoal through the door with long handled
tongs. The initial amount of hot water added (4 quarts) should last 4-6 hours. After 4-6 hours, check water level and add
more hot water as necessary.
H) Performance of the smoker is dependent on ambient temperature and wind conditions. With temperatures below 60°F
and winds of 5 miles per hour or more, the smoker can lose a significant amount of heat and it may not be possible to
raise internal temperature of meat high enough to cook it in a reasonable time.
I) After removing food from the smoker, put lid back on and allow smoker to stand at least 24 hours or until all fire is
completely extinguished. Do not attempt removal of charcoal and water pans until completely cooled down. This can take
as long as 48 hours. Be certain all fire is extinguished before proceeding. Discard foil lining and any residue from water
pan as well as foil lining and charcoal residue from charcoal pan. Wash the whole smoker with sudsy water. Reassemble
clean smoker, spray the inside body with nonstick vegetable spray, cover and store.
Note: Do not use water to extinguish the coals as it may damage the porcelain-enamel finish.
LIGHTING INSTRUCTIONS
SMOKING INSTRUCTIONS
4