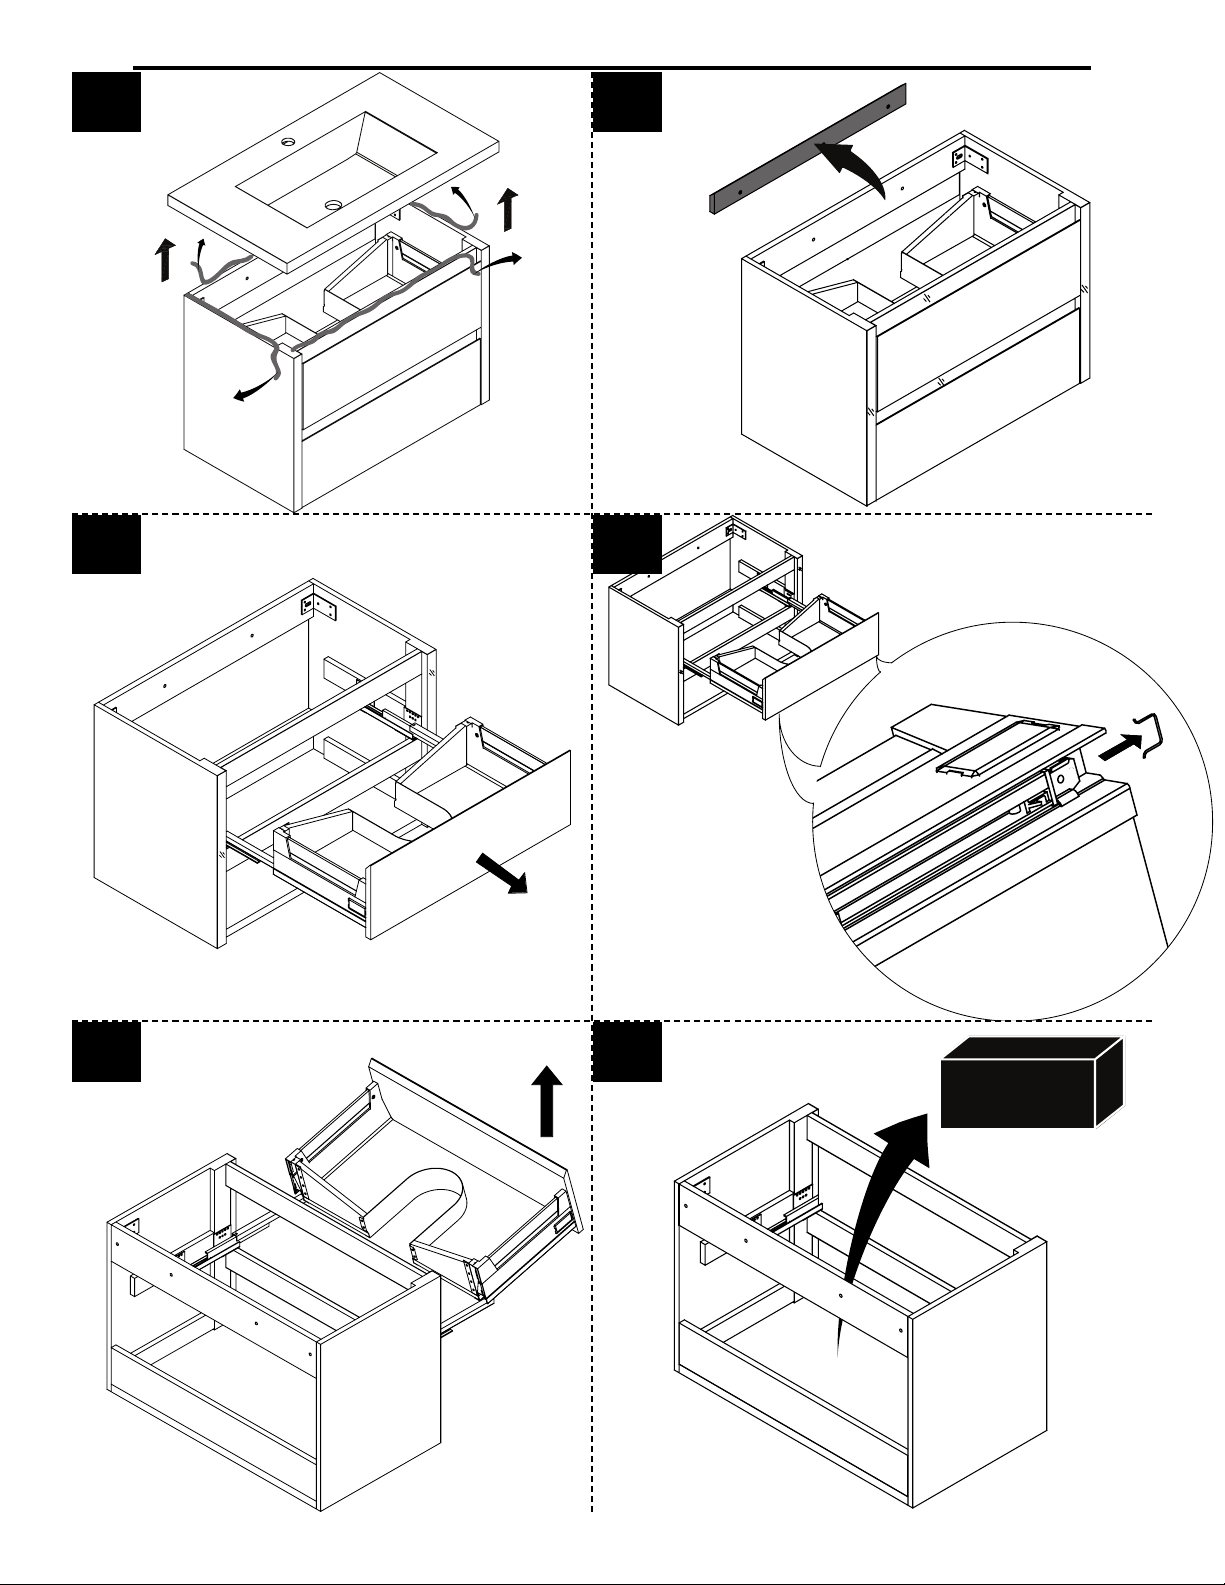
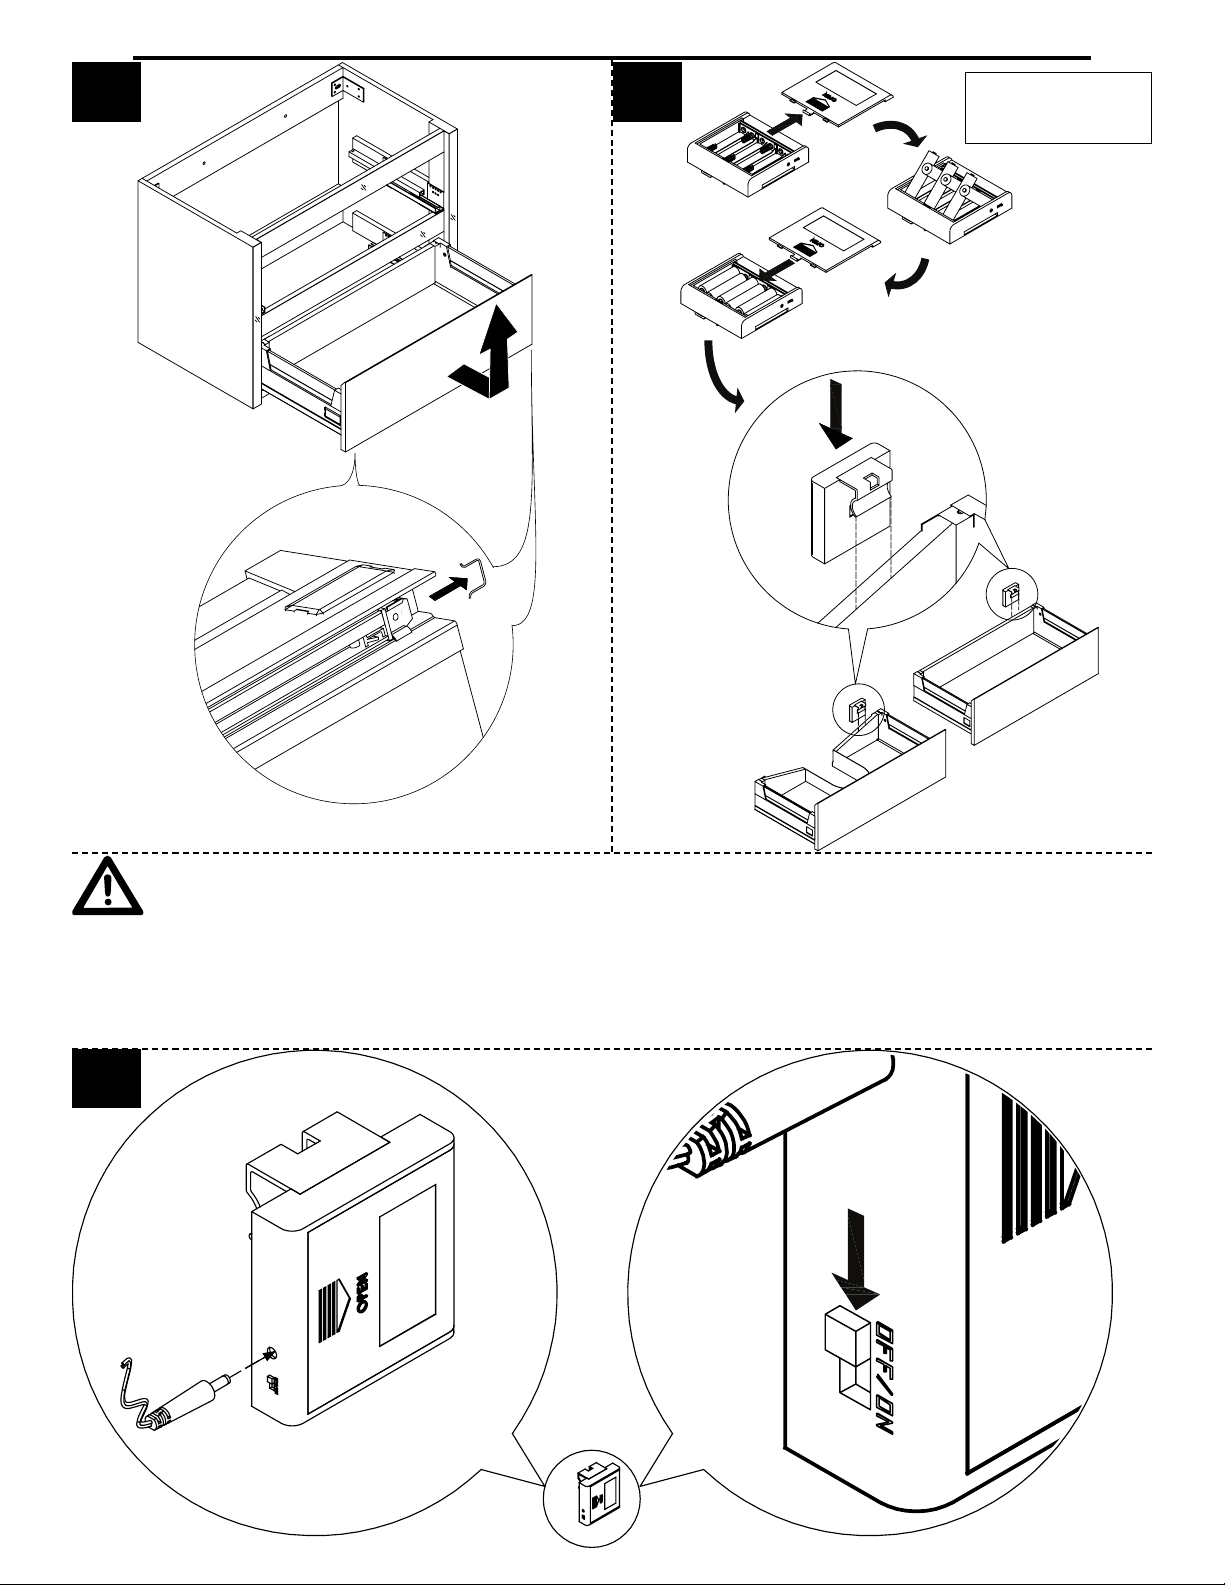
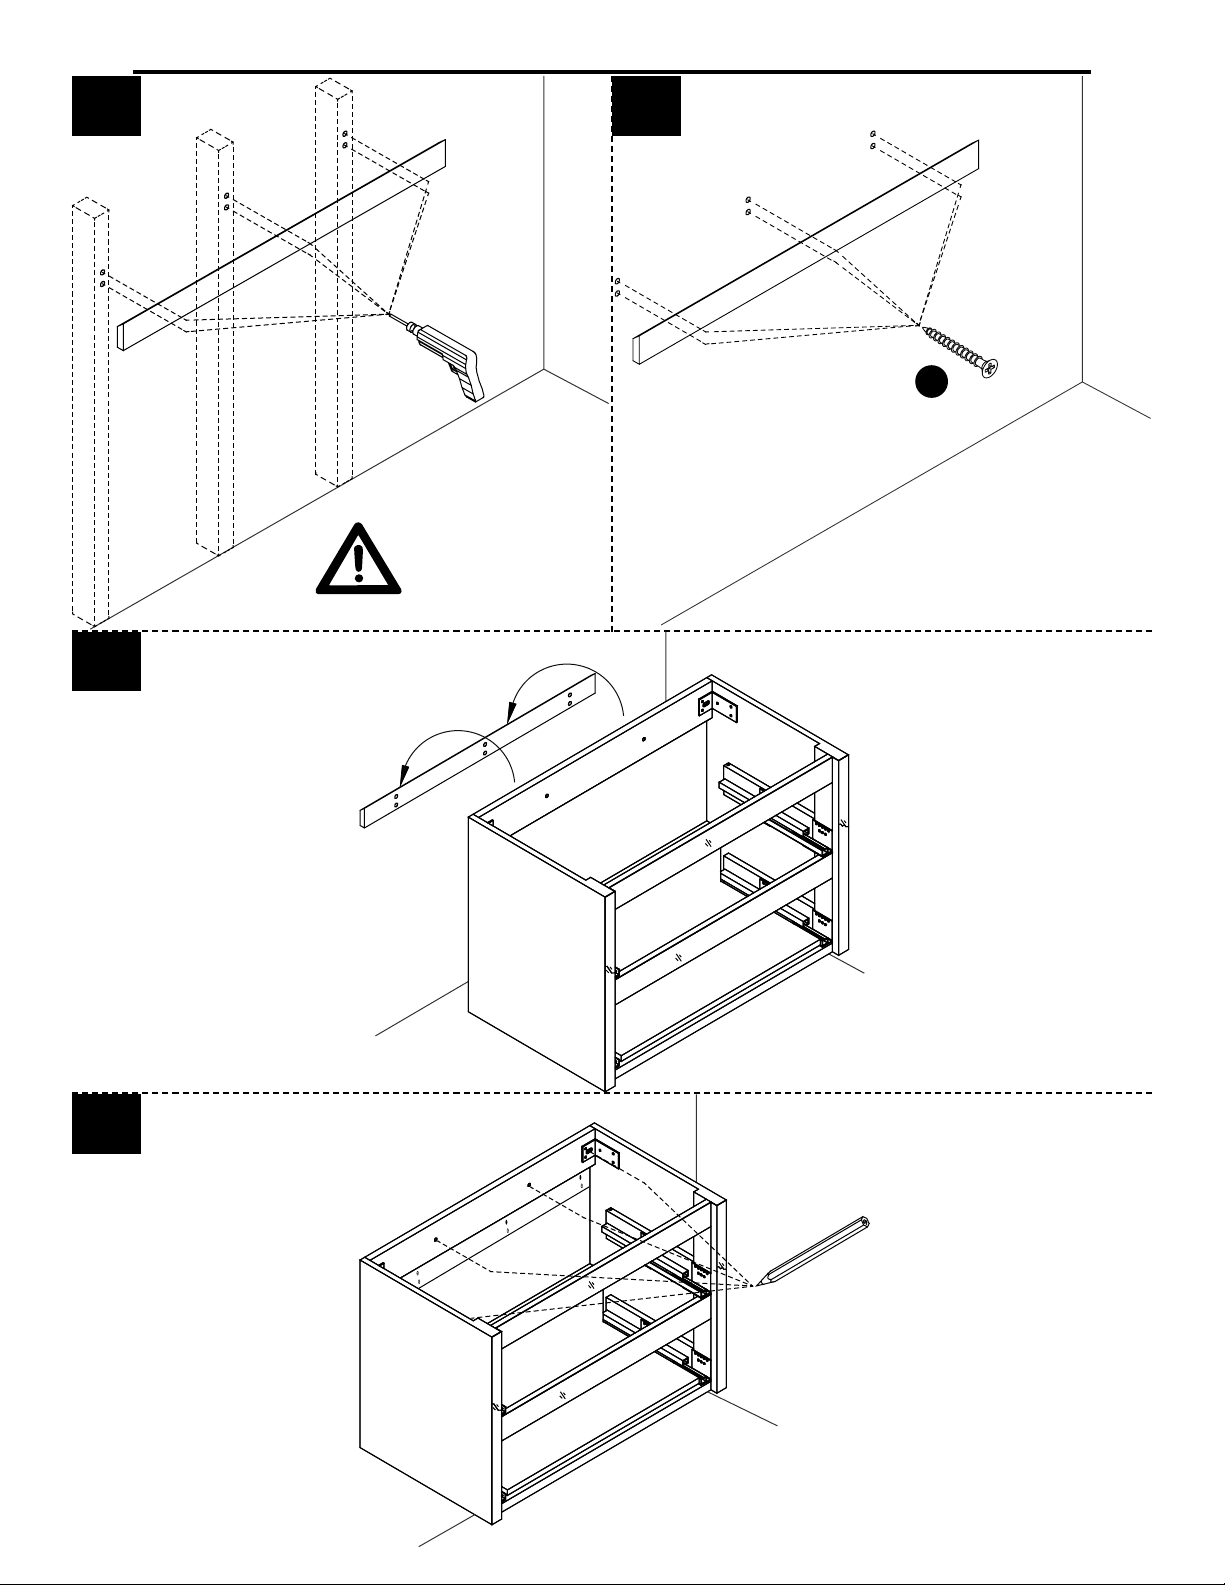
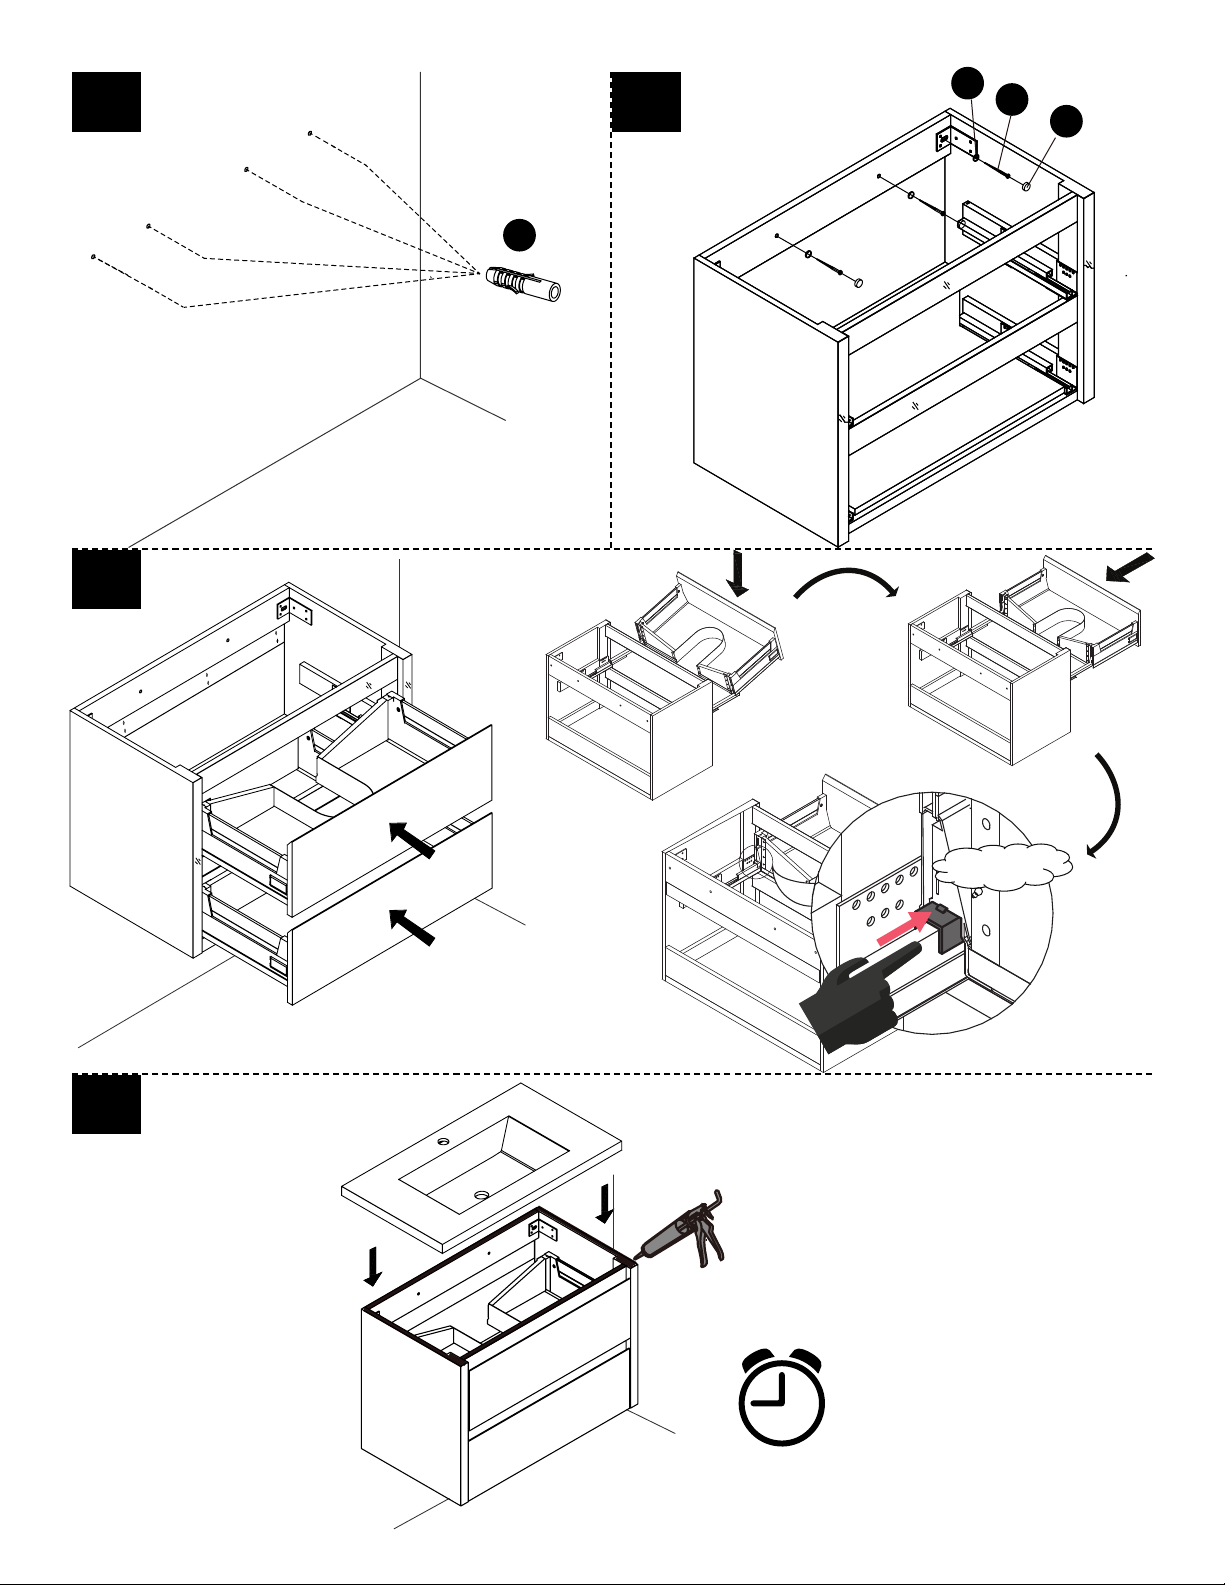
OVE LEO 32 User manual
Other OVE Indoor Furnishing manuals


Popular Indoor Furnishing manuals by other brands

Homelegance
Homelegance California 1662PEK-1CK Assembly instruction

Osmond Ergonomics
Osmond Ergonomics FLO instructions

overstock
overstock MF286255 Assembly instructions

Sonoma
Sonoma 160-801 Assembly instructions

BOLERO
BOLERO Wicker Side Chair CF158 Care Instructions

Coaster
Coaster 4799N Assembly instructions

Stor-It-All
Stor-It-All WS39MP Assembly/installation instructions

Lexicon
Lexicon 194840161868 Assembly instruction

Next
Next AMELIA NEW 462947 Assembly instructions

impekk
impekk Manual II Assembly And Instructions

Elements
Elements Ember Nightstand CEB700NSE Assembly instructions

JWA
JWA CARY 68429 Assembly instruction