PAGE 2
TABLE OF CONTENT
TABLE DES MATIÈRES
TABLA DE CONTENIDOS
TABLE OF CONTENT ........................................2
SAFETY INFORMATION ....................................3
POWER OUTLET................................................4
PART LIST ..........................................................5
TOOLS REQUIRED (not supplied) ...................5
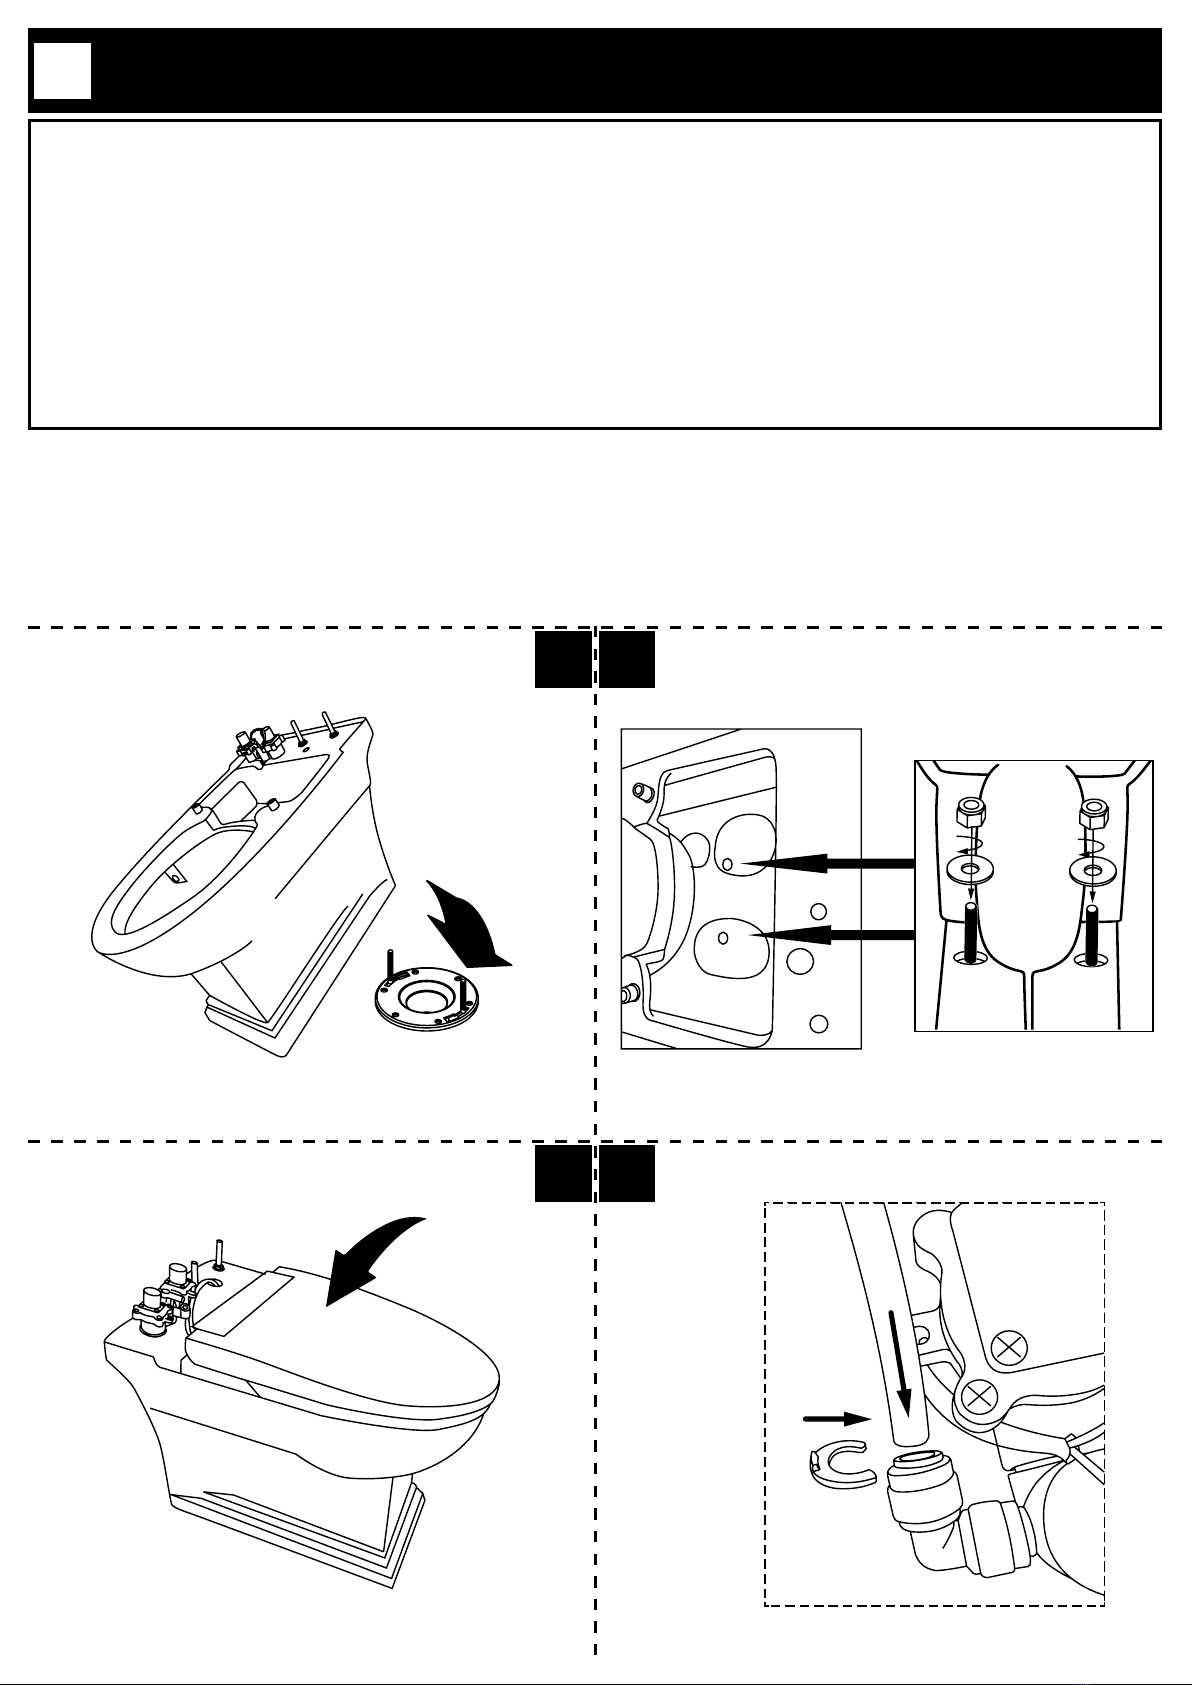
INSTALLATION...................................................7
BATTERY USAGE SAFETY GUIDELINES ......11
BATTERIES INSTALLATION............................11
FIRST TIME USE GUIDELINES .......................13
REMOTE CONTROL PAIRING.........................14
SIDE KEYPAD CONTROLS DESCRIPTION....15
REMOTE CONTROL DESCRIPTION...............16
AUDIO SIGNALS..............................................20
FEATURES .......................................................21
INTELLIGENT FEATURES...............................23
CLEANING THE FILTER ..................................25
LONG TERM STORAGE ..................................26
BATTERY MAINTENANCE ..............................26
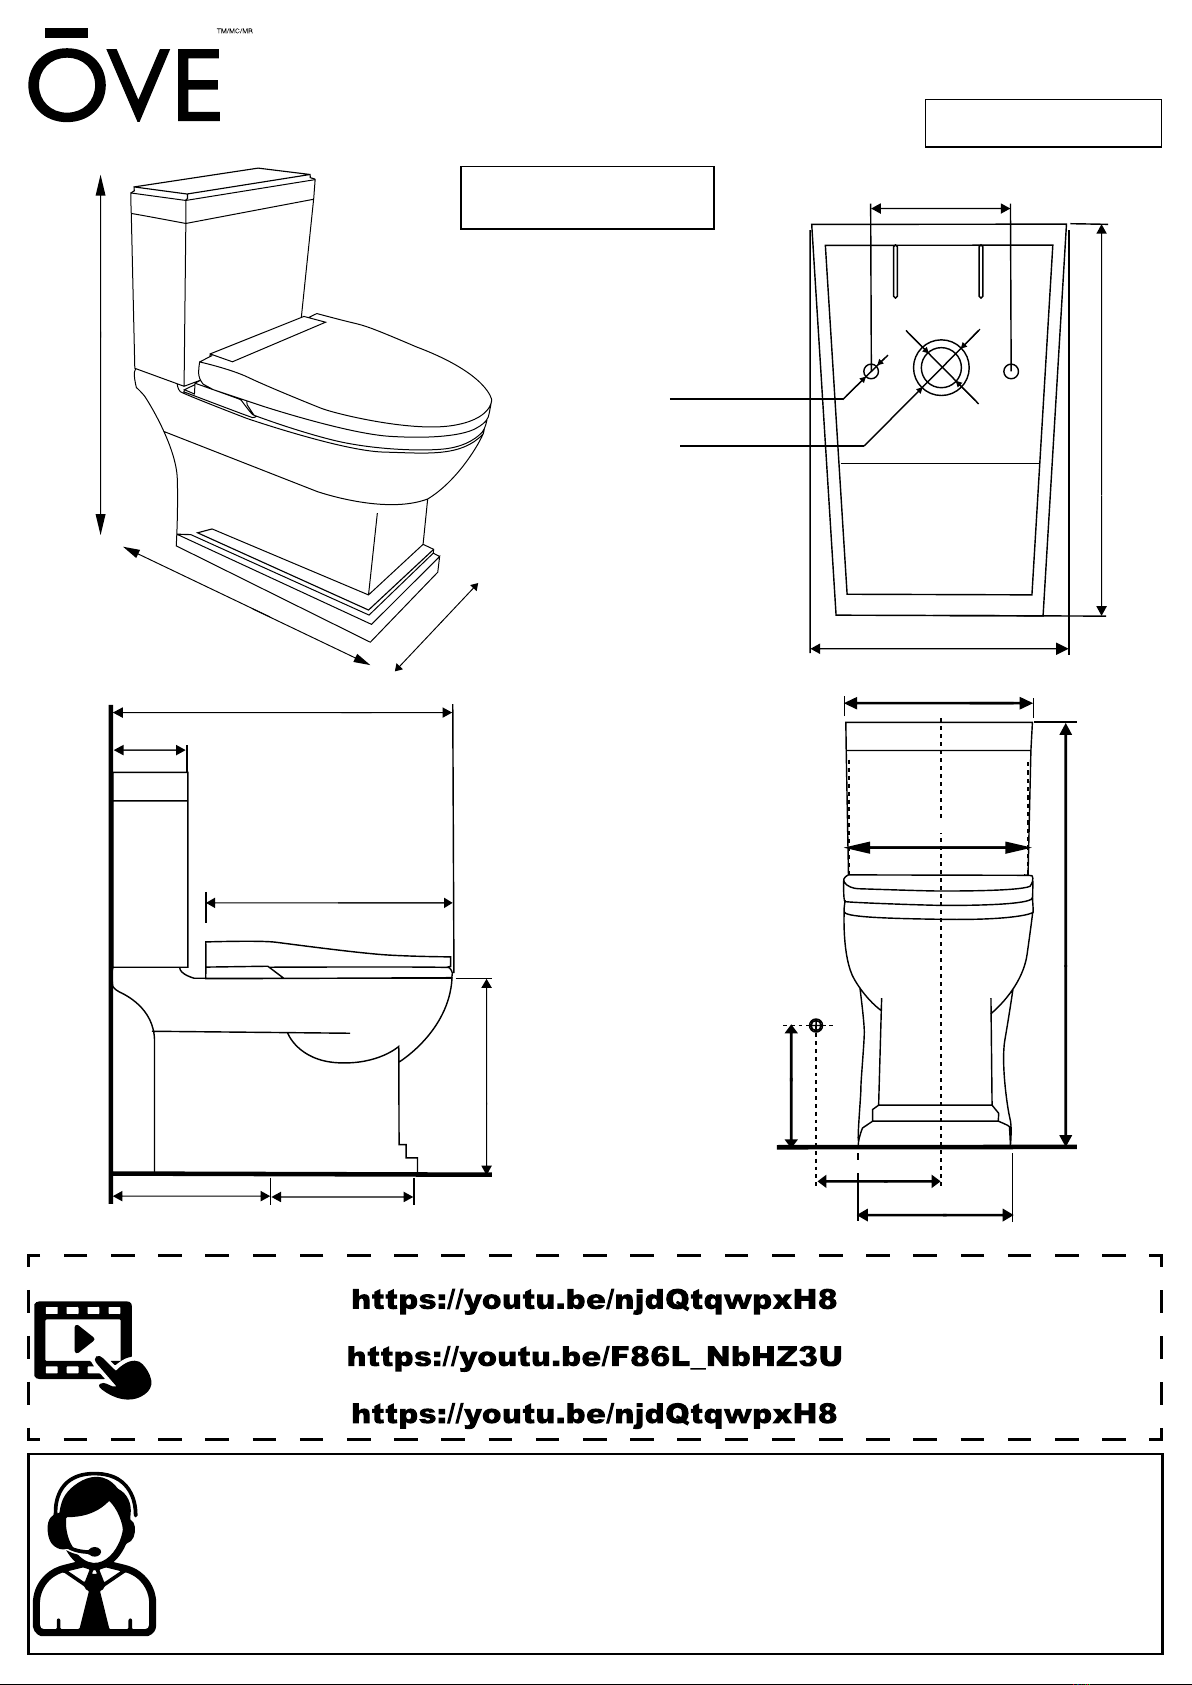
SPECIFICATION SHEET..................................27
INSTALLATION PICTURE................................28
MAINTENANCE AND CARE ............................29
LIMITED PRODUCT WARRANTY....................29
TABLE DES MATIÈRES .....................................2
INFORMATION SUR LA SÉCURITÉ..................3
PRISE DE COURANT.........................................4
LISTE DES PIÈCES............................................5
OUTILS REQUIS (non fournis)..........................5
INSTALLATION...................................................7
CONSIGNES DE SÉCURITÉ POUR
L’UTILISATION DE LA BATTERIE ..................11
INSTALLATION DES PILES ............................11
DIRECTIVES D’UTILISATION POUR LA
PREMIÈRE FOIS .............................................13
COUPLAGE À DISTANCE ..............................14
DESCRIPTION DES COMMANDES DU
CLAVIER LATÉRAL .........................................15
DESCRIPTION DE LA TÉLÉCOMMANDE .....16
SIGNAUX AUDIO .............................................20
CARACTÉRISTIQUES......................................21
FONCTIONS INTELLIGENTES .......................23
NETTOYAGE DU FILTRE .................................25
ENTREPOSAGE À LONG TERME ..................26
ENTRETIEN DES BATTERIES.........................26
FEUILLE DE SPÉCIFICATIONS.......................27
IMAGE DE MONTAGE......................................28
ENTRETIEN ET MAINTENANCE.....................30
GARANTIE LIMITÉE DU PRODUIT .................30
TABLA DE CONTENIDOS..................................2
INFORMACIÓN DE SEGURIDAD ......................3
TOMA DE CORRIENTE......................................4
LISTA DE PIEZAS...............................................5
HERRAMIENTAS NECESARIAS (no incluido) ..
.............................................................................5
INSTALACIÓN ....................................................7
PAUTAS DE SEGURIDAD PARA EL USO DE
LA BATERÍA ....................................................11
INSTALACIÓN DE BATERÍAS .........................11
PAUTAS PARA EL USO POR PRIMERA VEZ.13
EMPAREJAMIENTO DEL MANDO A
DISTANCIA .......................................................14
DESCRIPCIÓN DE LOS CONTROLES DEL
TECLADO LATERAL........................................15
DESCRIPCIÓN DEL MANDO A DISTANCIA ...16
SEÑALES DE AUDIO .......................................20
CARACTERÍSTICAS ........................................21
CARACTERÍSTICAS INTELIGENTES.............23
LIMPIEZA DEL FILTRO ....................................25
ALMACENAMIENTO PROLONGADO.............26
MANTENIMIENTO DE BATERÍAS...................26
HOJA DE ESPECIFICACIONES ......................27
IMAGEN DE INSTALACIÓN.............................28
MANTENIMIENTO Y CUIDADO .......................31
GARANTÍA LIMITADA DEL PRODUCTO ........31