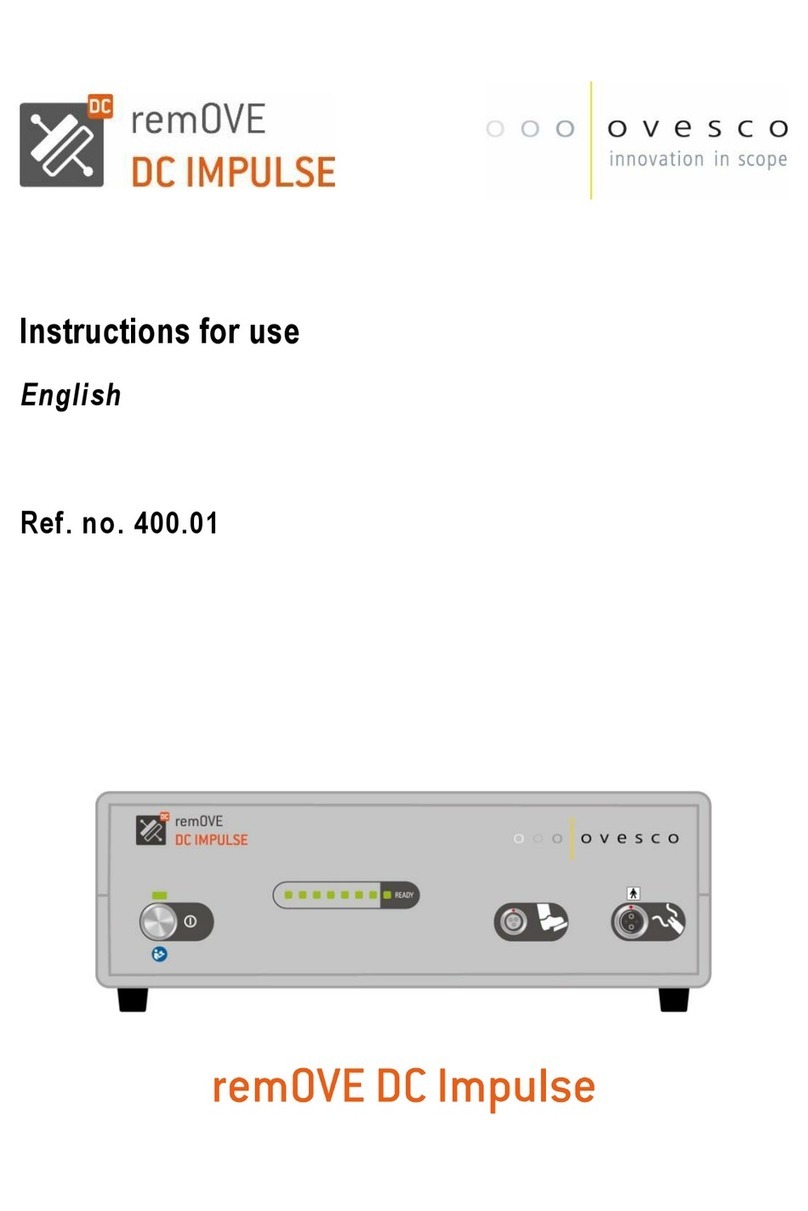
Ovesco remOVE DC Impulse User manual

Instructions for use
English
Ref. No. 400.01
remOVE DC IMPULSE

Contents
1About this document ............................................................................4
2Components.........................................................................................5
3Accessories / replacement parts ..........................................................6
4Description...........................................................................................6
5Intended use / indication ......................................................................7
6Contraindications .................................................................................8
7Complications.......................................................................................8
8Warnings / precautions.........................................................................9
9Components and products required for use.......................................11
10 Preparation.........................................................................................12
11 Use of product....................................................................................14
12 Mode of operation..............................................................................17
13 Error message....................................................................................18
14 Cleaning and disinfection...................................................................18
15 Transport and shipping / storage........................................................20
16 Maintenance / repair ..........................................................................21
17 Disposal .............................................................................................23
18 Operating conditions ..........................................................................23
19 Specifications.....................................................................................23
20 Electromagnetic compatibility (EMC) .................................................25
21 Warranty.............................................................................................28
22 Symbols .............................................................................................29
Appendix 1 ..................................................................................................30

4 / 32
Instructions for use
remOVE DC Impulse 400.01
English; Version 08 | 2019-04-24
1 About this document
These instructions for use refer to the following product:
Product
Manufacturer
remOVE DC Impulse
Ref. No. 400.01
Version 1.XX
Ovesco Endoscopy AG
Friedrich-Miescher-Straße 9
72076 Tuebingen
Germany
The instructions for use are part of the product.
When using the instructions for use, please observe the following:
1. Read the instructions for use carefully before first use of the product. Before
first use, users should fully understand how the product works, how to handle
the product and which possible risks are connected to use of the product.
2. Store the instructions for use in a place accessible to medical staff.
3. Pass on the instructions for use to every subsequent owner or user of the
product.
4. Update the instructions for use according to all amendments and revisions
issued by the manufacturer.
These instructions for use include proprietary information subject to copyright law.
It is not permitted to duplicate this document or portions of this document by pho-
tocopying or other means of replication without prior written consent by the manu-
facturer of the product.
The manufacturer assesses the right to alter the contents of these instructions for
use without prior notice. Due to continuous further development of the product, it is
possible that technical specifications and figures in this document are not up-to-
date.
Maintenance and repair may only be performed by the manufacturer or by any per-
son or persons authorized by the manufacturer. Unauthorized opening or perfor-
mance of services by any non-authorized person or persons voids the warranty and
the manufacturer’s liability with regards to operational safety.

English; Version 08 | 2019-04-24
remOVE DC Impulse 400.01
Instructions for use
5 / 32
The manufacturer’s warranty does not cover primary or secondary damage and
defects resulting from improper or unreasonable use or maintenance, especially
resulting from failure to follow the instructions for use.
1.1 Symbols and labels
The warning symbols used in these instructions for use depict the following hazard
levels.
Symbol
Hazard level
Meaning
WARNING
Failure to observe this warning notice may
result in injury to users and patients.
INFORMATION
Particularly important contents to be taken
into account when using the product.
2 Components
A
remOVE DC Impulse
B
Foot-activated switch with connector cable
C
DC cord
D
Power cord
Test instrument for electrical tests
Figure 1: Components of the remOVE DC Impulse (Ref. No. 400.01)

6 / 32
Instructions for use
remOVE DC Impulse 400.01
English; Version 08 | 2019-04-24
3 Accessories / replacement parts
Please only use original parts or parts certified by the manufacturer as compatible
with the remOVE DC Impulse as accessories or replacement parts. Otherwise
safety and functionality cannot be guaranteed.
The following accessories / replacement parts for the remOVE DC Impulse may be
ordered separately:
Accessory / replacement part
Max. length
Ref. no.
Foot-activated switch with connector cable
2 m
400.03
DC cord
2 m
400.04
Power cord*
2.5 m
400.10.XX
Test instrument for electrical tests**
2.2 m
810101
* When ordering the power cord, please note the country of use.
** The test instrument must be only used during electrical testing. –Non-sterile. –
Not suitable for patient cases.
The remOVE DC Cutter Set 12 / 14 (Ref. no. 400.02.01 / 400.02.02) is not included
with the remOVE DC Impulse and has to be ordered separately:
Product
Ref. no.
remOVE DC Cutter Set 12 / 14 (remOVE
DC Cutter, remOVE SecureCap 12 / 14,
remOVE Grasper, remOVE Shield)
400.02.01 / 400.02.02
4 Description
1
ON/OFF switch
2
ON/OFF display
3
Status display: charge of battery / ready for use / error
4
Connection foot-activated switch
5
Connection DC cord
Figure 2: Front view of the remOVE DC Impulse

English; Version 08 | 2019-04-24
remOVE DC Impulse 400.01
Instructions for use
7 / 32
6
Name plate
7
Connection to power supply
8
Fuse
Figure 3: Rear view of the remOVE DC Impulse
Figure 4: Name plate of remOVE DC Impulse
5 Intended use / indication
The remOVE DC Impulse is a medical electrical device for fragmentation of OTSC®
and FTRD®clips made by Ovesco Endoscopy AG for the digestive tract.
Clips produced by Ovesco Endoscopy AG are:
Product
Ref. No.
OTSC®System Set
100.01, 100.02, 100.03, 100.04, 100.05, 100.06,
100.07, 100.08, 100.09, 100.10, 100.11, 100.12,
100.13, 100.14, 100.27, 100.28, 100.29, 100.30,
100.31, 100.50
FTRD®System Set
200.70, 200.72, 200.76
OTSC®Proctology
200.60

8 / 32
Instructions for use
remOVE DC Impulse 400.01
English; Version 08 | 2019-04-24
It is not permitted to use the remOVE DC Impulse outside of its intended use as
specified above. Using the remOVE DC Impulse for fragmentation of objects other
than the products specified above may lead to defects and damages to the remOVE
DC Impulse, destruction of the remOVE DC Cutter and permanent bonding of
remOVE DC Cutter to the object.
6 Contraindications
The remOVE DC Impulse must not be used if flexible endoscopic procedures
and/or the fragmentation and removal of an OTSC or FTRD clip manufactured by
Ovesco are contraindicated. Fragmentation and removal of a clip are also contra-
indicated as long as the clinical effect of the clip is still required.
7 Complications
The complications listed beloware possible when using the product for its intended
purpose.
Damage to the tissue in the digestive tract, particularly:
- Thermal damage to the wall of the respective digestive organ
- Haemorrhages resulting from damage
- Perforations; these may also become apparent after medical intervention
- According to the official definition in the current standard, the following pas-
sage can generally be applied to all medical electrical equipment: “Even the
lowest current presents the risk of triggering ventricular fibrillation” (IEC
60601-1, section 8.7.3, A.14).

English; Version 08 | 2019-04-24
remOVE DC Impulse 400.01
Instructions for use
9 / 32
8 Warnings / precautions
Multiple use of the remOVE DC Impulse
The remOVE DC Impulse is designed for multiple use. In doing so,
special cleaning measures and storage conditions are to be observed
(see chapter 14 and section 15.3).
Damage to the remOVE DC Impulse
Prior to using the remOVE DC Impulse, please check that all components are
present and that there are no defects. Incomplete or faulty components must be
replaced immediately. Faulty or missing components may result in the product
malfunctioning. For example, flawed insulation on power supply lines may lead
to electrocution of the patient and/or user.
Use of the device in the hospital environment
The characteristics of this device determined by emissions allow its use in hos-
pitals (CISPR 11, class A). When used in a home environment (for which class
B is usually required according to CISPR 11), this device may not offer sufficient
protection from radio services. If necessary, the user must take corrective
measures such as conversion or realignment of the device.
Use in the vicinity of active HF surgery devices
Do not use in the vicinity of active HF surgery devices. Active HF surgery devices
may not be used when the pulse current is in use.
Use in the vicinity of electrical devices
Use of the remOVE DC Impulse in the immediate vicinity of or
stacked on other electrical devices should be avoided as this may
lead to malfunctioning.
Use of the accessories provided
The use of components, transducers (mains adapters) and cables other than
those specified or provided by the manufacturer of this device can result in in-
creased transient electromagnetic emissions or reduced electromagnetic im-
munity of the devices and lead to malfunctioning.
Use in the vicinity of HF communication devices
Portable HF communication devices (e.g. mobile phones, devices with radio
function), including their accessories such as aerial leads and external aerials,
should be at least 30 cm away from the components indicated by the manufac-
turer and the cables of the remOVEsystem. Failure to complymay lead to a drop
in product performance.
MRI compatibility of the remOVE DC Impulse
The remOVE DC Impulse is not MRI compatible. It must not be used in an MRI
environment.

10 / 32
Instructions for use
remOVE DC Impulse 400.01
English; Version 08 | 2019-04-24
Ignition and/or explosion of flammable gases e.g. due to high oxygen concentra-
tion in or outside of the digestive tract are possible during use due to sparking.
Before use, ensure that no flammable gases/materials are in reach of the device
and/or application point.
Electrical conductive cables/parts must not be close or touch the remOVE DC
Cutter. Defective lines can cause an electric shock to patient/user.
All clip fragments must be removed from the patient's body. If sharp-edged clip
fragments are left behind, they could cause damage to the organs in the digestive
tract or other abdominal organs. This damage may also become apparent after
medical intervention.
Partially cut and/or truncated clips may no longer fulfil their intended purpose if
left in the patient's body. These clips can also break apart, resulting in sharp-
edged clip fragments which could cause damage to the organs of the digestive
tract or other abdominal organs. This damage may also become apparent after
medical intervention.
Neuromuscular irritation is highly unlikely during application due to the physical
mechanism of action and the technical design of the remOVE System, however it
cannot be completely ruled out as a matter of principle. When application takes
place in the oesophagus there is always a residual risk of neuromuscular irrita-
tion, particularly of the heart muscle. Likewise, interference with active cardiac im-
plants cannot be completely ruled out. Please note the following before use in the
oesophagus:
- Clinically relevant disturbances of the electrolyte balance, particularly
hypokalemia, should be compensated for. A cardiologist should be con-
sulted if necessary.
- For patients with an implantable cardioverter defibrillator (ICD) a cardiolo-
gist must be consulted and it must be considered to disconnect the ICD
with monitoring the patient for the duration of the procedure.
Applied parts and generator are not protected against defibrillation. Remove in-
strument before using a defibrillator on the patient.

English; Version 08 | 2019-04-24
remOVE DC Impulse 400.01
Instructions for use
11 / 32
9 Components and products required for use
The remOVE DC Impulse may only be used in conjunction with manufacturer-
approved accessories and products as detailed in the instructions for use.
The use of accessories, cables and transducers, other than those the remOVE DC
Impulse was designed for, can significantly increase emissions and reduce
immunity of the remOVE DC Impulse against interference.
E
remOVE DC Impulse incl. accessories
Ref. No. 400.01
F
remOVE DC Cutter Set 12 / 14 (remOVE DC
Cutter, remOVE SecureCap 12 / 14, remOVE
Grasper, remOVE Shield)
Ref. No. 400.02.01/
400.02.02
Figure 5: Products required for use

12 / 32
Instructions for use
remOVE DC Impulse 400.01
English; Version 08 | 2019-04-24
10 Preparation
Additional devices to be connected to medical electric devices have to be in com-
pliance with IEC or ISO norms. Additionally, all configurations have to be in com-
pliance with normative requirements for medical systems (see IEC 60601-1-1 or
Section 16 of the third revision of IEC 60601-1, respectively). The person or per-
sons who connect additional devices to medical electric devices are system con-
figurators and are thus responsible for ensuring that the system is in compliance
with the normative requirements for systems. Be advised that local law takes prec-
edence over the normative requirements detailed above.
When setting up the remOVE DC Impulse please make sure that the user has clear,
unobstructed line of sight to the status display.
When setting up the remOVE DC Impulse please make sure that environmental
factors do not impair the user’s perception of acoustic signals generated by the
remOVE DC Impulse.
Do not connect the remOVE DC Impulse to the power supply unless a protective
earthing conductor is present in order to avoid electrocution.
Before use of product please follow the steps detailed below:
1. Place the device on a stable surface in sufficient distance to the wall, ensuring
that the device can immediately be disconnected from power supply if neces-
sary.
2. Connect the power cord to the remOVE DC Impulse and connect the power
cord to the power supply.
3. Connect the foot-activated switch and the DC cord to the remOVE DC Impulse.
4. Connect the remOVE DC Cutter to the DC cord.
In order to connect the remOVE DC Cutter with the DC cord, align the two
markings (red and white dot) on both devices in such a way that the white dot
on the plug of the remOVE DC Cutter and the red dot on the plug of the DC
cord are opposite to each other, see figure below.
Figure 6: left: remOVE DC Cutter; right: DC cord
5. Activate the remOVE DC Impulse by pressing the ON/OFF switch. The
ON/OFF switch lights up to indicate that the device is activated.

English; Version 08 | 2019-04-24
remOVE DC Impulse 400.01
Instructions for use
13 / 32
The status display indicates the charge of the remOVE DC Impulse through
green flashing LEDs.
Figure 7: Status display indicates charge during charging phase by flashing
green LEDs corresponding to the charge level
If the remOVE DC Impulse has not been in use for more than two days, the
internal energy storage is fully charged over a time period of about 10
minutes. If the remOVE DC Impulse has been in use in the past two days, the
device might charge faster.
Successful completion of charging cycle is indicated through three short
acoustic signals in quick succession. The status display indicates operational
readiness through emitting constant green light from all eight LEDs.
Figure 8: Status display indicates operational readiness through emitting
constant green light from all eight LEDs
6. As soon as all eight green LEDs are constantly on, the remOVE DC Impulse
is ready for use.

14 / 32
Instructions for use
remOVE DC Impulse 400.01
English; Version 08 | 2019-04-24
11 Use of product
The user has to make sure that set-up, assembly and use of the remOVE DC
Impulse, all accessories and endoscopic instruments are carried out in ac-
cordance with the respective instructions for use.
Always use a DC cord to connect the remOVE DC Cutter to the remOVE DC
Impulse. Proper operational characteristics of the product are no longer guar-
anteed if making a direct connection without a DC cord or a connection using
several DC cords. This may also lead to damage of the remOVE DC Impulse.
Make sure the clip can be removed. If the clip is deeply embedded superficial
tissue removal may be necessary to bare the clip.
When retrieving the clip fragments, ensure that the clip fragment is completely
inside the remOVE SecureCap. The protruding sharp-edged parts of a clip
fragment can result in damage to the organs in the digestive tract.
Perforations can also arise subsequently after intervention.
When inserting and removing the remOVE DC Cutter, check that neither the
endoscope nor the remOVE DC Cutter have been damaged, e.g. through
kinking the instrument hose.
Winding the remOVE DC Cutter too tightly can lead to bending of instrument
tip. Bending can make positioning/contacting the clip difficult during use.
Check that the remOVE Shield is affixed to the lens before the cutting process
and keep a minimum distance of 30-40 mm between the endoscope tip and
the clip during the cutting process. The endoscope tip can be damaged by
sparking during the cutting process. Affixing the remOVE Shield to the lens
and maintaining the maximum possible distance between the endoscope tip
and instrument tip reduce the risk of damage.
Note that the instrument tip of the remOVE DC Cutter can heat up to 130 °C
during the cutting process. Moving the instrument tip immediately after use
can lead to superficial burns to the skin.
Use of the remOVE DC Cutter in a CO2atmosphere may reduce the
effectiveness of the clip fragmentation.
Even if the product is used as intended, secondary effects may occur. For this
reason, Ovesco products should only be used by persons who are qualified
and trained to use the product for its intended purpose.

English; Version 08 | 2019-04-24
remOVE DC Impulse 400.01
Instructions for use
15 / 32
Make sure that the foot-activated switch is not permanently pressed. A single
DC pulse is only triggered when the foot-activated switch is pressed during
an acoustic contact signal. Permanent activation of the foot-activated switch
may cause unintended triggering of a DC pulse.
When removing material residue from the instrument tip through a DC pulse,
the instrument tip must be shielded from patient, user and any third parties
because sparks might occur.
If user suffers from red-green color blindness, make sure that the user
understands the status display.
For use of the product, the following steps have to be observed:
1. Guide the endoscope to the clip to be removed.
2. Insert the remOVE DC Cutter through the working channel and establish
contact with the clip. A continuous audible signal indicates sufficient elec-
trical contact with the clip.
3. When a continuous audible signal appears, trigger the cutting process by
pressing one time on the foot switch. The audible signal stops and the
status display flashes green for about six seconds when the cutting pro-
cess is complete. Afterwards, the audible signal sounds three times and
the status display shows that it is ready for use.
To make clip removal easier, the clip should ideally be cut at two spots
on opposite sides of the row of teeth.
Figure 9: Spots on the clip for fragmentation: Make first cut at (1), and sec-
ond cut on the opposite side (2)
After the cutting process, residues of the clip material can get caught at
the instrument tip of the remOVE DC Cutter and create a permanent con-
nection between the electrodes. This is indicated by a constant audible
signal without clip contact. The remains can be removed by applying a

16 / 32
Instructions for use
remOVE DC Impulse 400.01
English; Version 08 | 2019-04-24
new DC pulse. It is recommended to withdraw the remOVE DC Cutter
from the endoscope first and remove the remains by pressing on the foot
switch to trigger a DC pulse. As this can lead to sparking, patients, users
or third parties must be shielded from the instrument tip.
4. Verify that the clip is successfully fragmented at two spots by checking
the endoscopic image.
5. Remove the endoscope and place the remOVE SecureCap on the endo-
scope tip. Guide the endoscope with the fitted remOVE SecureCap to the
clip fragments.
6. Use the remOVE Grasper to pull the clip fragment into the remOVE Se-
cureCap and retrieve it from the body. Hold the clip fragment firmly with
the forceps when withdrawing the endoscope (Fig. 10). Repeat this pro-
cedure for the second clip fragment or, if necessary, for further clip frag-
ments.
Figure 10: Clip fragment with remOVE Grasper in the remOVE SecureCap
7. Turn off the remOVE DC Impulse by pressing the ON/OFF switch.

English; Version 08 | 2019-04-24
remOVE DC Impulse 400.01
Instructions for use
17 / 32
12 Mode of operation
The remOVE DC Impulse is designed to send an electrical direct current pulse of
typically IS= 155 A for the duration of 60 ms through the bipolar, endoscopic
instrument remOVE DC Cutter.
This DC pulse flows through the clip segment the remOVE DC Cutter is estab-
lishing contact with, resulting in localized melting of the clip material.
Figure 11: Left: Establishment of contact between clip segment and remOVE DC
Cutter. Right: Cross-section of clip segment to be cut (b) and marking of current
path ISbetween electrodes (a)
The remOVE DC Impulse is equipped with internal energy storage, allowing the
device to generate a DC pulse without additional load on the power supply. This
internal energy storage is charged before the remOVE DC Impulse generates the
DC pulse.
The remOVE DC Impulse is designed to ensure that a direct current pulse can
only be generated when sufficient contact with a segment of the clip is estab-
lished. Sufficient contact is indicated through an acoustic signal.
Should contact break off between the remOVE DC Cutter and the clip during the
application of a DC pulse, the output of the remOVE DC Impulse will be deac-
tivated within less than 500 µs. Breaking-off of contact might occur, for example,
if one or both electrodes lose contact with the clip due to successful clip fragmen-
tation.
During a DC pulse, the voltage drop between the electrodes of the remOVE DC
Cutter is between 1.3 V and 2.0 V. During loss of contact, short-term (max. 500
µs) voltage spikes max. 22 V may occur. These spikes might be transferred into
the tissue if both electrodes of the remOVE DC Cutter are in contact with tissue.

18 / 32
Instructions for use
remOVE DC Impulse 400.01
English; Version 08 | 2019-04-24
13 Error message
The remOVE DC Impulse is equipped with a failure detection system. Technical
failures are indicated via the status display. Failure detection is implemented to
ensure user/patient safety.
If a failure message occurs, the device casing may not be opened. Life-threatening
electrocution could occur.
If a failure message occurs, the device may no longer be used in order to ensure
the safety of users and/or patients. If a failure occurs, all eight LEDs of the status
display are flashing orange, see figure below.
Figure 12: Status display flashes orange during failure message.
If a failure message is displayed by the remOVE DC Impulse, acoustic contact de-
tection between instrument and clip is deactivated. A DC pulse can no longer be
generated, and the internal energy storage of the remOVE DC Impulse can no
longer be recharged.
In the case of failure messageor malfunctioning of the device, please contact man-
ufacturer.
14 Cleaning and disinfection
As part of your responsibility to ensure hygiene and cleanliness of all product com-
ponents during use, please make sure that only suitable devices and procedures
validated specifically for this product are used for cleaning and disinfection of the
product. Please follow the respective local and/or national legislation as well as
hygiene regulations pertaining to medical practices or hospitals.

English; Version 08 | 2019-04-24
remOVE DC Impulse 400.01
Instructions for use
19 / 32
14.1 Wipe disinfection
For cleaning surfaces of the device, please use approved cleaning/disinfection sup-
plies and only in accordance with instructions by the respective manufacturer. Ob-
serve specifications regarding concentration, temperature and exposure time.
Apply alcohol-based cleaning/disinfection agent. Do not use benzyl-alcohol-based
and/or any other agents because it can cause damages to the remOVE DC Impulse
materials.
14.2 Instructions
1. Prepare the cleaning/disinfectant agent per the manufacturer’s guidelines.
2. Wipe down the equipment using a cloth with surface disinfectant. Clean gross
contamination first and then uniformly treat all the surfaces.
3. Wipe the surfaces ensuring that they are uniformly treated. Comply with the
action time of the disinfectant specified by the manufacturer.
4. Wet a sponge or cloth in clean water and wipe off the cleaning/disinfection
agent.
5. Dry the device using a clean, lint-free cloth.
6. Check by visual inspection all surfaces of the equipment. If soil remains visible,
repeat the entire cleaning/disinfection procedure.
14.3 Safety Instructions
Before cleaning the remOVE DC Impulse, disconnect the device from the power
supply.
Do not use flammable or explosive cleaning or disinfecting solutions. Make sure no
fluids enter the device casing.Non-compliance may result in burning hazard and/or
electrocution.
Only clean and disinfect the product manually. Do not sterilize the product under
any circumstances.

20 / 32
Instructions for use
remOVE DC Impulse 400.01
English; Version 08 | 2019-04-24
15 Transport and shipping / storage
15.1 Transport and shipping
Perform surface disinfection and properly package device for shipping. Add an-
other form of packaging, to avoid bacterial contamination and infections once you
leave the hospital.
Be advised to transport / ship the remOVE DC Impulse in its original, undamaged
packaging.
Make sure the packagingis not damaged and/or wet. Otherwise, the device might
get damaged during transport / shipping, which may lead to malfunction during
the next use. This, in turn, may endanger the user/patient.
When transporting / shipping the device, makesure to follow the respective terms
of transport.
15.2 Storage
If the remOVE DC Impulse is not stored properly, customer claims may not be
considered. Improper storage may also lead to malfunction, which may endanger
the user/patient.
It is recommended to store the remOVE DC Impulse in its undamaged original
packaging.
It is recommended to thoroughly clean the remOVE DC Impulse before storing it.
Do not expose the remOVE DC Impulse to direct or indirect sunlight or other types
of UV radiation.
Do not store the remOVE DC Impulse in the vicinity of chemicals, disinfectants
and/or sources of radioactive radiation.
Do not place heavy objects on top of the remOVE DC Impulse or its packaging.
Make sure to store the remOVE DC Impulse in a dry and clean space, ensuring
appropriate storage conditions.
Other manuals for remOVE DC Impulse
1
Table of contents
Other Ovesco Medical Equipment manuals
Popular Medical Equipment manuals by other brands

FujiFilm
FujiFilm FCR CAPSULA X Service manual

Dr. Honle
Dr. Honle Dermalight 80 UV-B-311 nm operating instructions

Otto Bock
Otto Bock 4R44-L Instructions for use

Moog
Moog Infinity Orange Operator's manual

Orliman
Orliman OP1152 INSTRUCTIONS FOR USE AND PRESERVATION

Orliman
Orliman BOXIA AB10-BG INSTRUCTIONS FOR USE AND PRESERVATION