OVO Jade X User manual

Jade X Full Service Guide
Rebuild, Service, and Bleed

2 3JADE X FULL SERVICE
SERVICE OVERVIEW
This manual will guide you step by step performing a full service to your
Jade X. Please follow each instruction carefully to achieve the best and
safest results.
*Always wear your safety gear while working on suspension products.
We care about you, make sure you wear your safety glasses and
protective gloves while servicing DVO Suspension Products.
WARNING: We recommend that you have your DVO suspension serviced by a qualied bicycle mechanic. Servicing DVO
suspension requires knowledge of suspension components, as well as the use of specialized tools and lubricants/fluids.
Failure to follow the procedures outlined in this service manual may cause damage to your component and void the
warranty.
WARNING: Always use genuine DVO parts and proper service methods when maintaining your DVO Suspension product.
Improper service, or use of aftermarket replacement parts with DVO Suspension may cause the product to malfunction,
resulting in SERIOUS INJURY OR DEATH.
WARNING: Modication, improper service, or use of aftermarket replacement parts with DVO Suspension may cause the
product to malfunction, resulting in SERIOUS INJURY OR DEATH. DO NOT modify any part of a fork or shock, including the
fork brace (lower leg cross brace), crown, steerer, upper and lower leg tubes, or internal parts, except as instructed herein.
Any unauthorized modication may void the warranty, and may cause failure or the fork or shock, resulting in SERIOUS
INJURY OR DEATH.
Tools Needed For Service:
• Allen Key Set
• Shaft Clamps
• Vice
• Adjustable Wrench
• 24mm socket
• Torque Wrench
• Kniplex or Pliers
• Pick
• Valve Core Remover
Fluids & Cleaner Needed For Service:
• Safety Glasses
• Clean, Lint Free Rag
• 2.5 wt suspension oil. (no maxima)
• Suspension Cleaner or Alcohol
• Shock Pump
• Loctite 242 BLUE
Recommended Service Interval:
• Full Service .......................100 Hours of Ride Time
WEAR SAFETY GEAR!

4 5JADE X FULL SERVICE
A Disassembly
CAUTION - EYE HAZARD
4.
5.
6.3.
2.
1.
Thread on a valve puller tool and push
the bladder cap downward.
This allows access to the retainer clip.
Use a small pick to remove the clip.
Thread the valve core puller tool back
onto the bladder cap and pull back to
remove the bladder.
Remove the air valve and set aside.
Release air pressure from the bladder.
Use a valve core removal tool to un-
thread the air valve.
Prepare your shock for service. Remove
the spring and clean thoroughly.
Remove the air cap from the bladder
reservoir.

6 7JADE X FULL SERVICE
10.
11.
12.9.
8.
7.
Fully remove the shaft assembly and set
aside in a clean area.
Drain the oil from the shock body and
housing.
Use a 4mm allen key to loosen the
compression unit end cap from the
reservoir.
Fully un-thread the seal head and remove
the shaft assembly.
Fix the head of the shock into a vice.
Using a 24mm open end wrench to
loosen the seal head.
Completely remove the bladder and
bladder cap from the reservoir.

8 9JADE X FULL SERVICE
18.
17.
16.13.
14.
15.
Remove the o-ring from the upper eyelet
as shown.
Remove the alignment pin from the
housing as shown.
Fix the shaft in 14mm shaft clamps with
the rebound adjuster facing outward.
This will give clearance to prevent
damage.
Use a 16mm socket or adjustable wrench
to loosen the piston bolt.
Fully un-thread the cap and set aside.
Use a knipex or similar tool and clamp
the 10mm nut on the compression
assembly. Use this to pull the assembly
out of the housing.
Use a 3mm allen key to loosen the
housing bolts and remove from the upper
eyelet.

10 11JADE X FULL SERVICE
24.21.
23.20.
22.19.
Clean the damper body thoroughly with
suspension clean.
Remove the piston assembly from the
shaft.
Clean the piston group thoroughly with
suspension clean. Set aside.
Remove the seal head and bottom out
bumper from the shaft.
Get your Jade X rebuild kit ready.
Part Number: 191-9010
Use a 2mm allen key to remove the bleed
screw from the upper housing.

12 13JADE X FULL SERVICE
30.
29.
28.25.
26.
27.
Time to disassemble the piston bolt
group. Start by removing the backing
plate.
Remove the compression shims and the
piston.
Install the seal head onto the shaft in the
direction shown.
Install the bottom out bumper back onto
the shaft in the direction shown.
Apply a thin layer of slikoleum grease to
inner lip of the dust seal.
Apply a thin layer of slikoleum grease to
top part of the shaft. Apply over the
rebound port as well.
B Rebuild and Clean
14 15JADE X FULL SERVICE
36.
35.
34.31.
32.
33.
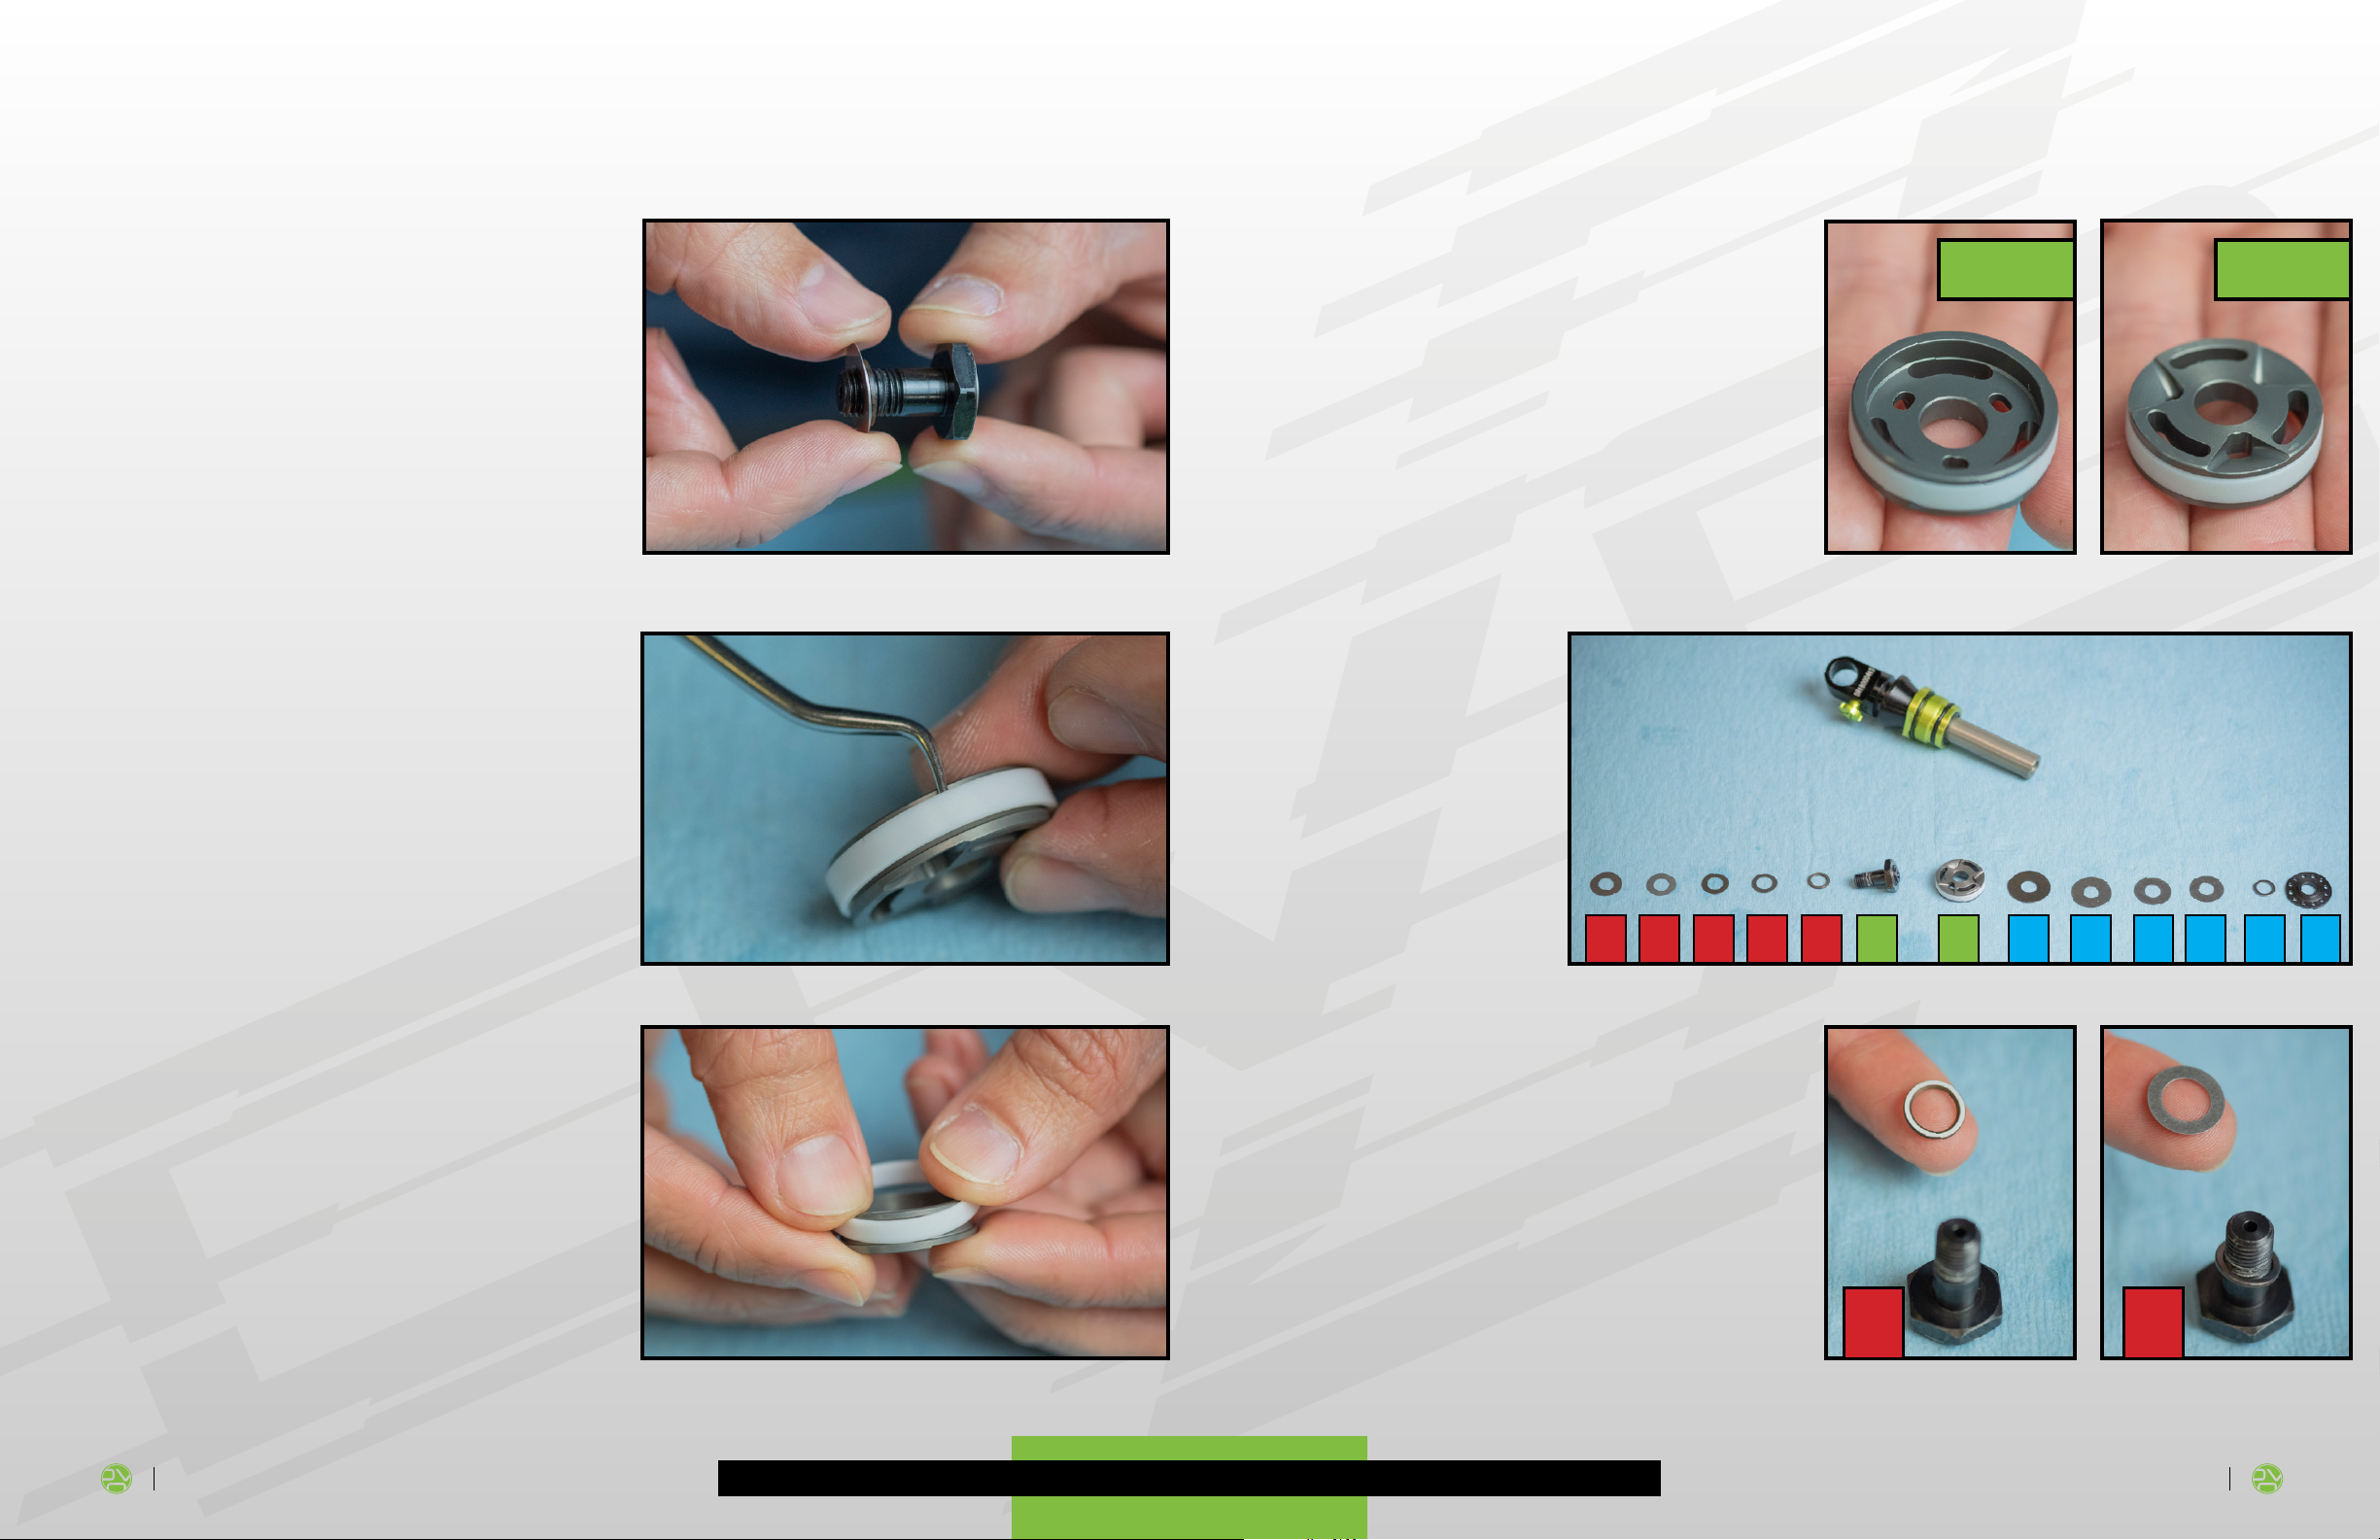
Take note of the piston direction.
From left to right,
this is the order of
the shims. Rebound
shims are in red,
compression in blue.
Install the 11mm clamp shim rst, then
the 13mm shim.
Install the new glide-ring onto the piston.
Use a small pick to remove the glide-ring
from the piston.
Remove the rebound side shims and set
aside.
16
mm
11
mm 13
mm
15
mm 14
mm 13
mm 11
mm 22
mm 20
mm 18
mm 18
mm 11
mm
Bolt Piston Back
Plate
Rebound
Side
Compression
Side
16 17JADE X FULL SERVICE
37. 40.
38. 41.
39. 42.
The rst compression shim is a 22mm
then 20mm.
Add the two 18mm shims to the stack.
Finish the compression side with the
11mm clamp shim.
At this point, the assembly should look
like this. Note, the piston orientation
should look like this.
The last shim on the rebound side is
16mm. Then place the piston in the
direction shown.
Install the 14mm and 15mm shim.
14
mm 15
mm
16
mm
22
mm
18
mm
20
mm
18
mm
11
mm

18 19JADE X FULL SERVICE
43. 46.
44. 47.
45. 48.
If you look in the rebound port, you can
see the needle through the window. The
needle should be in the open position.
Apply a thin layer of blue Loctite to the
threads of the piston bolt.
Use a torque wrench to tighten the piston
bolt group to the shaft.
Tighten to 15Nm
Open the rebound fully.
Counter-clockwise rotations will open the
rebound.
The flat side of the plate should be facing
upward as shown.
Note the orientation of the plate. There is
an inner lip of the plate that should face
the clamp shim.
Open PositionClosed Position
Table of contents


