OWL OAKWORKS Vitrectomy RecoverySeated Support User manual

Vitrectomy Recovery
Seated Support
INSTRUCTION MANUAL
OAKWORKS®
Brought to you by
OAKWORKS LEASING™, INC

Crescent
Pillow
Face Rest
Platform
Cam
Locks
Cam
Locks
Arm Rest
Pad
Knobs
Crescent
Pillow
3-Pad Face Plate
(attached to
3-Pad Pillow)
Sternum Pad, Crescent Pillow
w/Flannel Cover,
3-Pad Pillow w/Flannel Covers
& Instructional Video
Arm Rest
/Desk
Chest Pad
Seat Pad
Seat
Support
Seat
Tube
“Z” Clip
Cable
Wheels
Knobs
Knee Pads
Front Feet
QuickLock™Face
Rest
pg 2
Product Description
QuickLock™
Face Rest Close-up:
Ease
OAKWORKS®supports face-down recovery without sacrificing
the basic things you can enjoy. Make the time you are awake
as comfortable as possible with the Seated Support System*.
This uniquely relaxing, face-down support system alleviates
the muscle strain throughout your spine and shoulders that is
associated with face-down positioning.
The adjustable height arm rest/desk allows you, with your
doctor’s approval, to write, watch TV, do crafts and eat. You
can join your family and friends to eat or chat and meet your
doctor’s post-operative care instructions comfortably.
Let OAKWORKS®put you at
Seated Support System™

pg 3
How to Use the Seated Support System:
Setting Up Your Seated Support:
• Lean your chair forward and lift the back of the seat until the
chair is fully open. (Fig. 1)
• Sit on the chair with your knees on the knee pads and your
chest on the chest pad. Are you comfortable? If so, proceed to
the Arm Rest/Desk Set-up Instructions. If you aren’t comfortable,
you can adjust the seat angle and the height of the chair.
The Cable System adjusts the chair height:
- To change the cable setting, pull the chest pad back
toward the seat slightly to relax the tension on the
cable and then remove the “Z” clip. (Fig 2)
- Insert the “Z” clip into a higher or lower hole depending
on your comfort. Most patients are comfortable with the
“Z” clip in the third or fourth hole from the bottom.
Higher settings position you higher and more vertical.
Lower settings position you lower and more horizontal.
(Fig.3)
- After you have placed the “Z”clip in the appropriate hole,
pull back on the seat tube until the cable has no slack.
Make sure the “Z” clip is parallel to the tube.
The Push Button on the seat tube adjusts the seat angle
and height: (Fig. 4)
- In a good basic position, the back of the seat will be higher
than the front. (Fig.5)
- Lumbar strain can be reduced by raising the seat height
one or two holes.
-To change the seat angle, push in the button on the seat
tube while raising or lowering the seat.
•Try sitting on the chair again. Adjust as specified above until
you are comfortable.
Fig. 1
Fig. 2
Fig. 3
Fig. 4
Fig. 5
Use Instructions

How to Use the Seated Support System (cont):
Setting Up the Arm Rest/ Desk:
• The Arm Rest/Desk is designed to be both a desk and a
comfortable rest for your forearms. (Fig. 6)
Please DO NOT push against the desk to lift yourself out
of the chair. The desk will not support your full weight.
• Release the cam lock and lengthen the strap by releasing
the clip. (Fig. 7)
• Lift or lower the Arm Rest/Desk until your forearms rest
comfortably on the pad and your shoulders are slightly
rounded. (Fig. 8)
•When you have found the position that you find comfortable,
lock the cam lock and tighten the strap by pulling on the end.
For watching TV, release the cam lock, angle the desk
down and lock the cam. (Fig. 9)
•The pad is held on by velcro straps and can easily be removed
or repositioned.
Face Rest Set-up:
• Remove the knobs from the package and hand tighten them to
the frame. Note: 4 knobs are provided; only 2 are required for
assembly. (see the QuickLock™Face Rest Close-up under the
Product Description Section for proper placement).
• If the cam locks on the face rest are on the side of your
strongest hand, proceed to the next step. Otherwise, you can turn
the face rest around by making the following adjustments.
- Open the face rest cam locks and loosen the knobs on the
Seated Support Frame that hold the face rest in place.
- Remove the Face Rest Cushion from the Face Rest Frame.
- Slide the face rest dowels from the chair’s connector tubes
and turn the Face Rest Frame over so that the cam locks
are on the side of your strongest hand when you are seated
on the frame. (Fig. 10)
Use Instructions (cont)
Fig. 6
Fig. 7
Fig. 8
Fig. 9
Fig. 10
Strap
pg 4

Face Rest Set-up (cont):
-Replace the Face Rest Cushion on the QuickLock™Face
Rest Frame.
Note: The Crescent Face Cushion can also be adjusted for larger
or smaller faces by flexing the ends of the crescent pad closer
together or farther apart. Hold the cushion in the desired
position and place it on the Velcro®brand hook & loop fasteners
of the face plate to secure the adjusted position.
- Slide the face rest dowels into the chair’s connector tubes
on the Seated Support Frame.
- Hand-tighten the knobs to hold the face rest in place.
NOTE: Please make sure that the teeth on the cam locks
are meshed between each other. Do not allow the teeth
to grind against each other.
You are now ready to proceed with custom fitting the Face
Rest to suit you comfortably.
• Sit on the chair.
• Release the cam locks (Fig. 11) and loosen the knobs. (Fig. 12)
•Hold onto the face rest on the Velcro® brand hook & loop
fasteners on the sides of the U-tube. (Fig. 13)
•Pull the face rest toward you until your forehead rests
comfortably on the cushion and tilt your head until you are
looking straight down at the floor. (Fig. 14)
• Lock the cam locks (Fig. 15) and tighten the knobs.
Please do not over tighten as too much force may cause
stripping. Be sure that the teeth on the cam locks are meshed
between each other. Do not allow the teeth to grind against
each other.
Setting-Up and Using the 3-Pad Face Cushion:
•Take the Crescent Face Cushion off the QuickLock™Face Rest
Platform by pulling it off the Velcro®brand hook & loop fasteners.
• Place the 3-Pad face Rest Plate onto the platform. It will attach on
the Velcro®brand hook & loop fasteners. (Fig. 16)
Fig. 11
Fig. 12
Fig. 13
Fig. 14
Fig. 15
Fig. 16 pg 5
Velcro™

pg 6
Setting-Up and Using the 3-Pad face Rest Cushion (cont.):
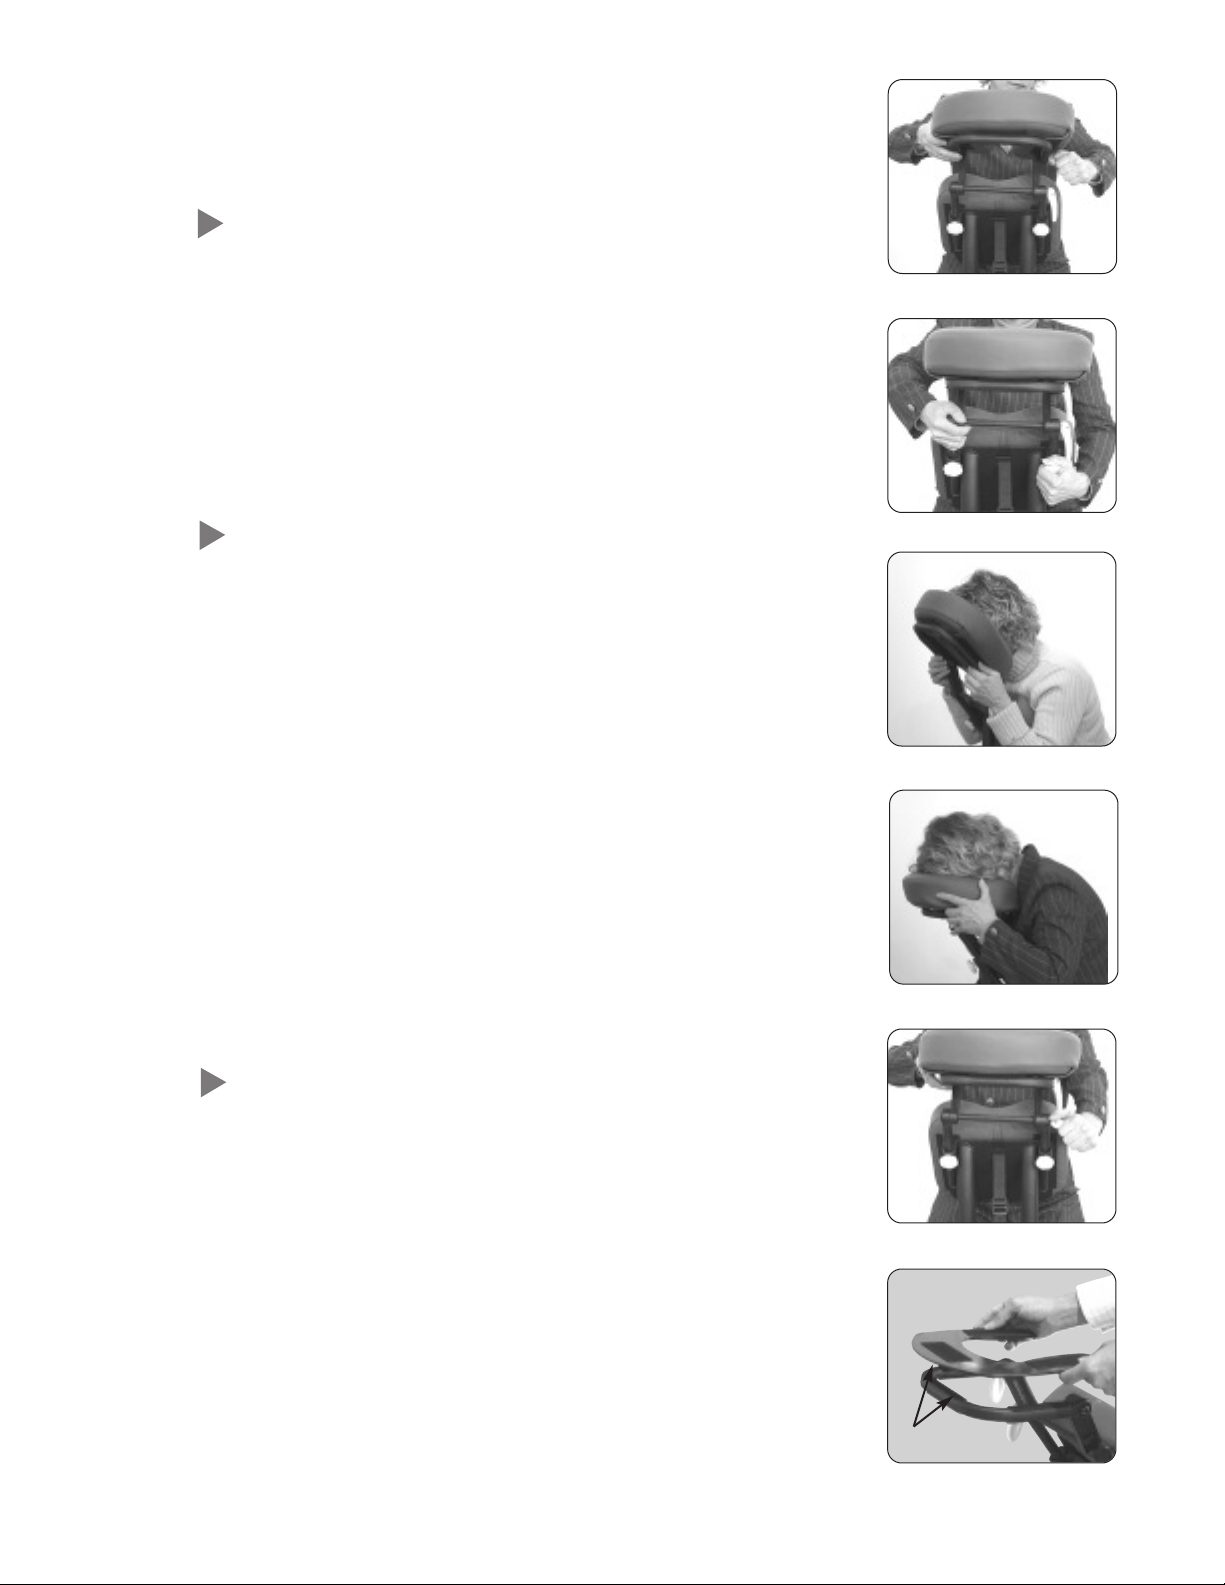
• Attach the larger of the 3 cushion pads (the Forehead Pad) at the
top of the plate with the Velcro® brand hook & loop fasteners. (Fig 18)
• Take the 2 Cheek Pads and hold them up to your face where they
are comfortable. Be sure that they are not in the way of your glasses
or any eye patch or bandage. (Fig.18)
• Still holding the cheek cushions to your face, lean forward onto
the face rest until the cushions are in contact with the Velcro®
brand hook & loop fasteners on the plastic face plate. (Fig. 19)
There should be plenty of space for your glasses to rest
comfortably on your face, out of the way of the cushions with
cheeks and forehead completely supported in the correct face-
down position. (Fig. 20)
Additional Tips for Comfortable Positioning During Your
Face-Down Recovery:
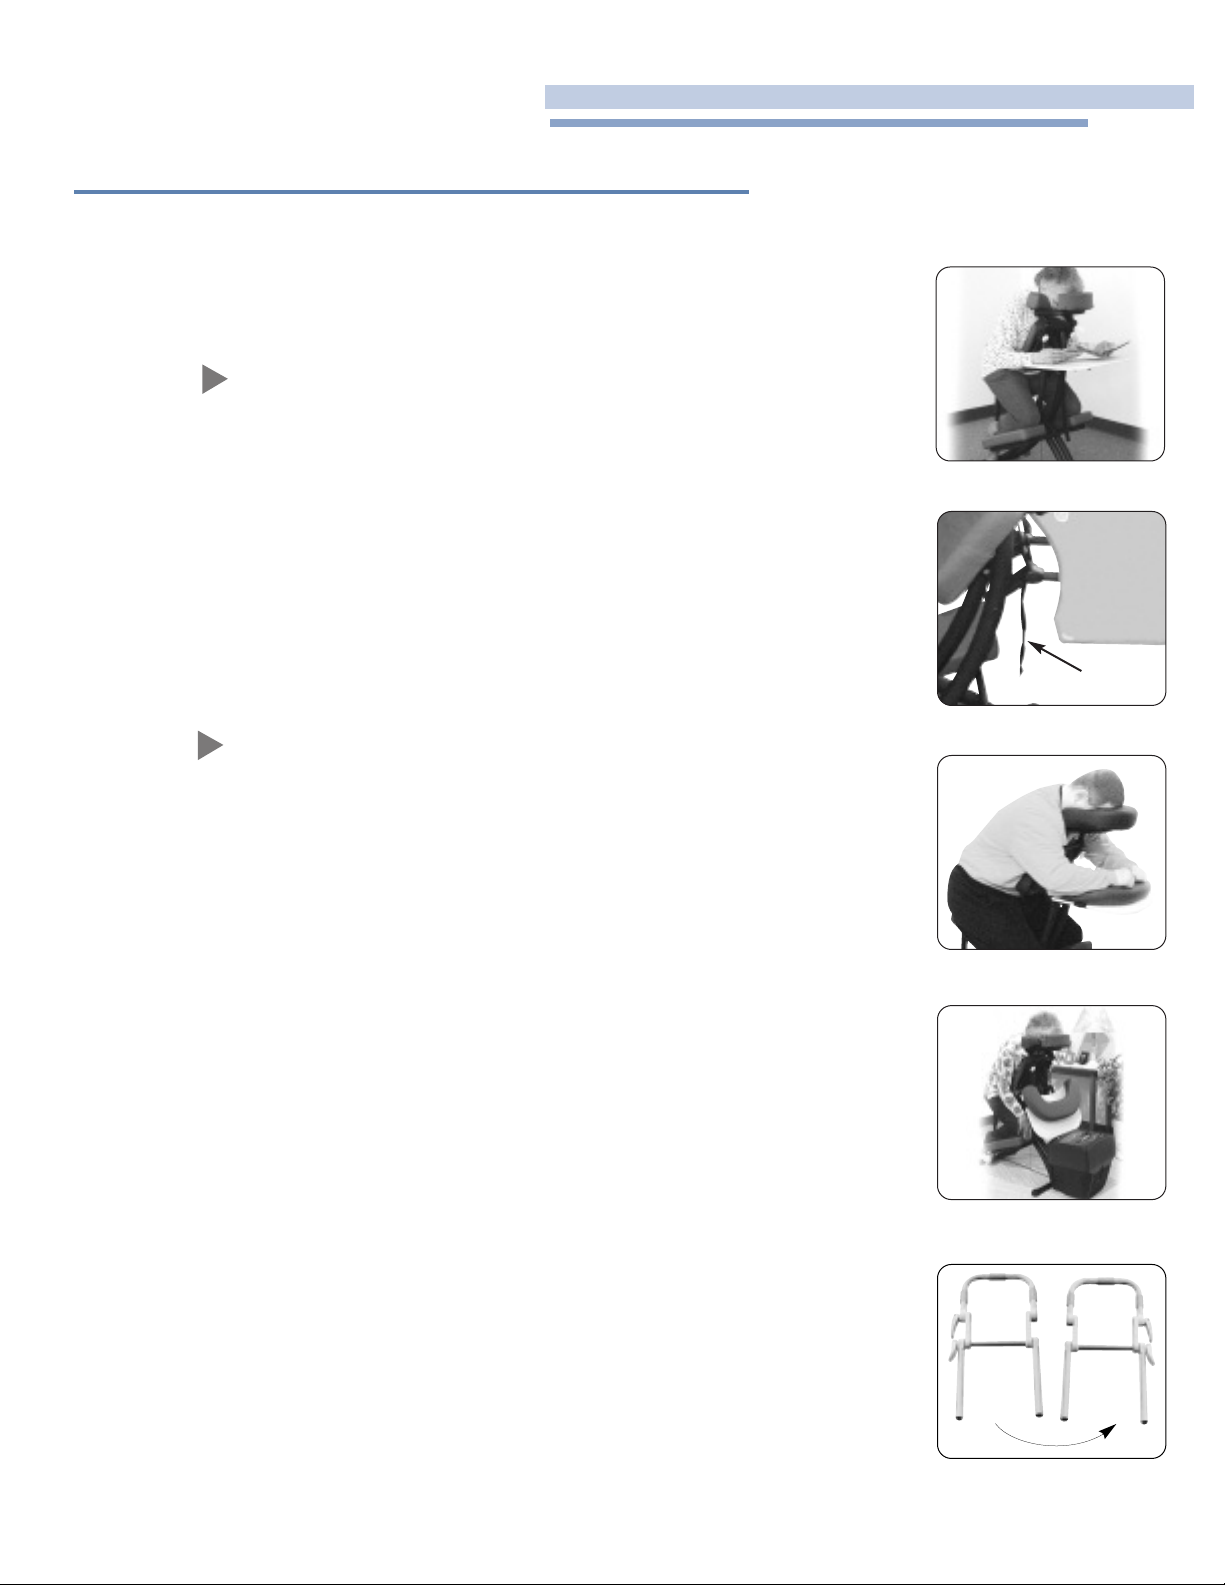
•Short, heavy-set or large breasted patients will be more
comfortable with the face rest pulled towards them directly
over the chest pad. (Fig. 21)
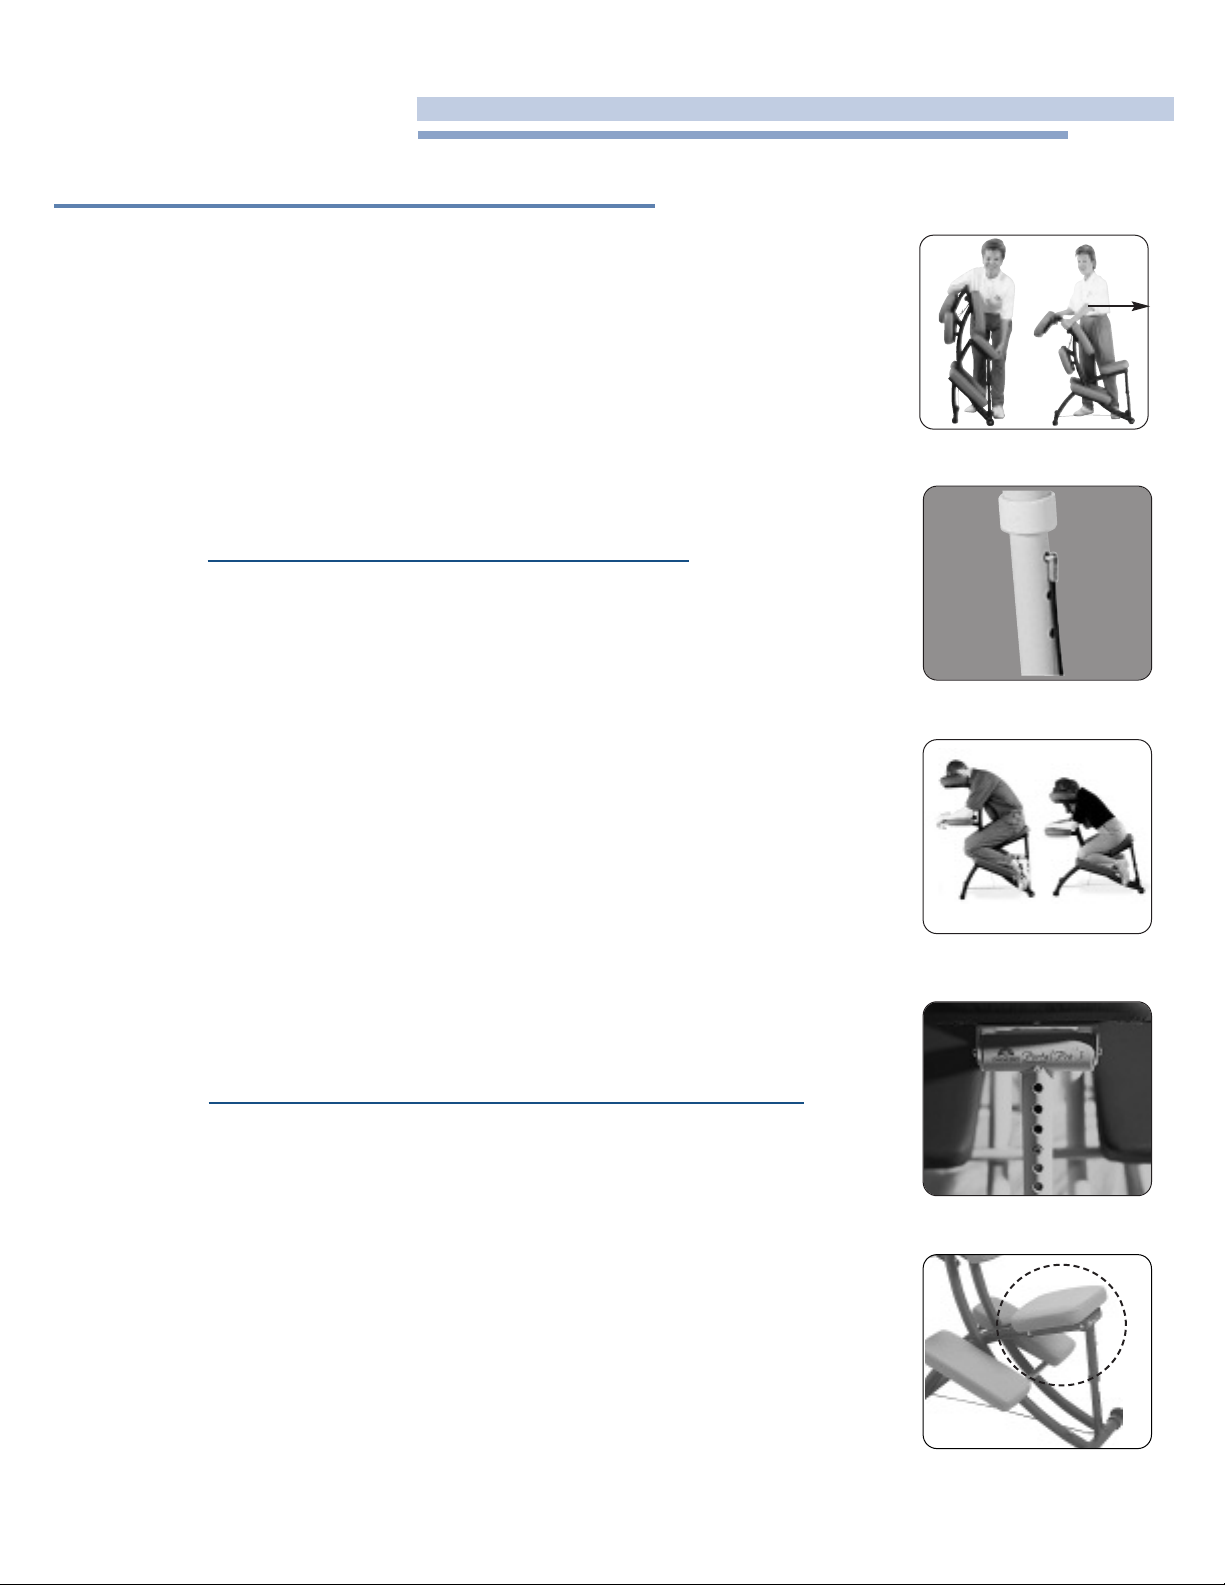
• To relieve tension or pain in the lumbar region, raise the
angle of the seat by using the seat tube button.
• A higher seat height will help patients having trouble getting
up to the face rest and is adjusted with the cable.
•To reduce knee flex, raise the seat and the chair height.
•The sternum pad works especially well when positioned
vertically for large- breasted patients. (Fig. 22) Another
position found comfortable for larger patients is to position
the sternum pad horizontally with the ridge just below the
breast area. The pad is used in place of the chest pad and
is held in place with Velcro™ brand hook & loop fasteners.
•Chest Pad adjustments are easy. The Velcro™brand hook & loop
fasteners allow you to move the pad up or down, and to turn it
sideways. Find the position that is most comfortable for you.
Use Instructions (cont)
How to Use the Seated Support System (cont):
Fig. 21
Fig. 22
Fig. 18
Fig. 19
Fig. 20

pg 7
Fig. 26
Fig. 27
BackSide
of MajikView™
Front Side of
MajikView™
Short Leg
Reflecting Mirror
MajikView™
Mirror Close-up:
Viewing Mirror
Fig. 23
Fig. 24
Fig. 25
Towards
Patient
• Place the mirror so that the back of the MajikView™is facing
towards you. The proper position of the mirror should then be
with the short leg resting on the Arm Rest/Desk and the reflecting
mirror in the upright position and pointing away from you. (Fig. 23)
• While looking down from above the MajikView™, look directly
into the viewing mirror to see objects directly in front of you. (Fig. 24)
• Adjust the MajikView™by positioning it on the desk where it
provides comfortable viewing without strain. (Fig. 25)
•Use a book or pillow to position the mirror to accommodate viewing
objects that are higher than the Arm Rest/Desk. (Fig. 26)
• Release the Arm Rest cam lock and the strap to fold down the
Arm Rest/Desk. Lock the cam.
• Release the face rest cam locks and loosen the knobs; fold
down the face rest and relock the cams and tighten the knobs.
• Make sure the push button on the seat tube is in the third hole
from the bottom. Lean the chair forward and pushing the seat.
• Use the spacer bar on the face rest as a handle for moving
the chair. Stand behind the seat and grab the spacer bar. Pull
it towards you. The chair will fold. Push the seat to lock it in
the folded position. The wheels will roll on any surface. (Fig. 27)
How to Use the MajikView™Mirror:
Folding Your Seated Support:

All parts of the Seated Support can be cleaned
using a mild detergent or Green Windex. A
diluted 1/100 bleach solution for disinfecting
can be used. Dry the equipment immediately
to remove excess cleaning solution. Using
strong cleaners that contain alcohol, acetone,
higher concentrations of bleach can shorten
the life of the fabric or discolor it.
Returning a Rental Unit:
When the doctor has informed you that you
no longer need to maintain the face down
position, you simply follow the Equipment
Return Instructions included on the yellow
laminated card that is attached to the unit.
Use the included checklist to be sure all items
are accounted for and returned.
Cleaning
Accessories
pg 8
Part no. 6498 rev. 0205
Fig. 30 Fig. 31
Fig. 32
ButterflyCushion™: (Fig. 30)
• Excellent prone pelvic support
• Aids in the comfort of large-breasted women
• Supports sternum, shoulders and ribcage
Fleece Cover for the Crescent Face Cushion:
(Fig. 31)
• Provides warmth and comfort
Additional Flannel Covers: (Fig. 32)
•May be ordered for convenient use when included
covers are being cleaned
* QuickLock™ Face Rest: U.S. Patent #5,177,823
OAKWORKS LEASING™, INC
923 E. Wellspring Rd., New Freedom, PA 17349
800-916-4592 717-235-6807 FAX: 717-227-3133
www.owleasing.com
Table of contents
Popular Mobility Aid manuals by other brands

Thuasne
Thuasne W2230 User instruction booklet

Vermeiren
Vermeiren Kate user manual

human care
human care Fellow Classic RECONDITIONING MANUAL

Drive DeVilbiss Healthcare
Drive DeVilbiss Healthcare GRAND XL Instructions for use

WeWALK
WeWALK SMARTCANE user manual

BIOS LIVING
BIOS LIVING 56120 instruction manual

Direct Healthcare Group
Direct Healthcare Group Bure XL Technical manual

Kegel
Kegel FLEX 17-5801 Operator's manual

Nippon
Nippon Mini Seika Braille Display user manual

Invacare
Invacare H140 user manual

CareCo
CareCo Breeze 8 User's setup guide

COMPASS HEALTH
COMPASS HEALTH PROBASICS BARIATRIC COMMODE BSB24C manual