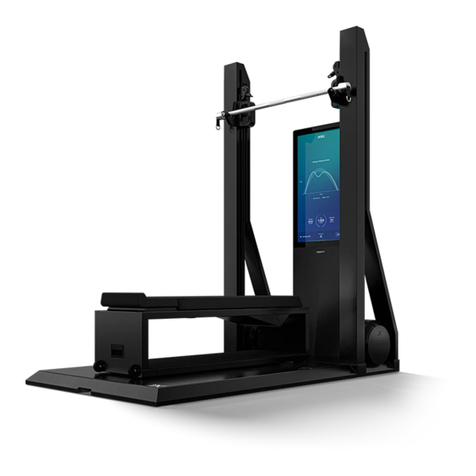
OXEFIT XS1 User manual

USER MANUAL
v 2.2

TABLE OF CONTENTS XS1 USER MANUAL
SAFETY 3-4
SAFETY INFORMATION 3
USER REQUIREMENTS 3
USER HEIGHT
USER WEIGHT
USER AGE
XS1 SAFETY FEATURES 3
BAR TILT
STALL DETECTION
INSPECT YOUR XS1 4
XS1 DIAGRAM 4
NOTICES 4
SPECIFICATIONS 5
DEVICE MEASUREMENTS 5
WITH THE DECK FOLDED DOWN
WITH THE DECK FOLDED UP
BENCH MEASUREMENTS 5
STRENGTH BENCH
MULTIFUNCTION BENCH
DEVICE WEIGHT 5
TECHNOLOGY 5
CONNECTION
CAMERA
SOUND
INSTALLATION REQUIREMENTS 5
LOCATION REQUIREMENTS 5
ENVIRONMENTAL REQUIREMENTS 5
OPERATING RELATIVE HUMIDITY
OPERATING TEMPERATURE
STORAGE TEMPERATURE
ELECTRICAL OUTLET REQUIREMENTS 5
INTERNET REQUIREMENTS 5
MOBILE APP 6-7
THE OXEFIT APP 6
DOWNLOADING THE APP 6
HOME 6
EXPLORE 6
CREATE A CUSTOM WORKOUT
EDIT A CUSTOM WORKOUT
DELETE A CUSTOM WORKOUT
SCHEDULE A WORKOUT
EDIT/UNSCHEDULE A SCHEDULED WORKOUT
JOIN A PROGRAM
ACTIVITY 7
WORKOUT SUMMARY
EXERCISE SUMMARY
YOU 7
ADD USER PROFILES (*ADMIN)
REMOVE USER PROFILES (*ADMIN)
UPDATE USER PERMISSION TO ADMIN (*ADMIN)
SETTING UP 8-10
UNFOLDING THE DECK 8
FOLDING THE DECK (OPTIONAL)
STABILIZER LEGS
ADJUSTING SLIDE POSITION 9
ACCESSING DECK CONNECTION 9
BENCHES 9
STRENGTH BENCH
MULTIFUNCTION BENCH
SETTING UP THE MULTIFUNCTION BENCH 9
LOCKING THE SLIDING SEAT 9
2
UNLOCKING THE SLIDING SEAT 9
ACCESSING THE FOOT STIRRUPS 9
CONNECTING ACCESSORIES 10
BARBELL
HAND GRIPS
ROPE
WAIST HARNESS
ANKLE STRAPS
SKICROSS HANDLES
MULTIFUNCTION BAR
SWIM PADDLES
ADJUSTABLE PADDLE
ROWING BAR
OXEDOT
GETTING STARTED 11
01. PLUGGING IN & POWERING ON 11
02. INITIALIZATION PROCESS 11
03. CONNECTING TO THE INTERNET 11
04. XS1 ORIENTATION 11
05. LINKING YOUR ACCOUNT 11
UNLINKING YOUR ACCOUNT
06. SETTING UP A PASSCODE 11
INACTIVITY MODES 12
SLEEP MODE 12
MOTOR IDLE MODE 12
PRETENSION SEQUENCE
SCREEN SAVER MODE 12
THE INTERFACE 12-16
HOME PAGE 12
EXPLORE PAGE 12
PROGRAMS
TEAM WORKOUTS
QUICK START 12
EXPLORE EXERCISES
START FREESTYLE
ADVANCED TRAINING FEATURES 13-14
BALANCE METER
VIRTUAL SPOTTER
STRENGTH TRAINING MODES
CARDIO TRAINING MODES
ACTIVE STRENGTH WORKOUT SCREEN 15
ACTIVE CARDIO WORKOUT SCREEN 16
EXERCISE IN PROGRESS 16
AFTER-USE 17
VIEW PROGRESS & ACTIVITY 17
PREPARING THE XS1 FOR INACTIVITY 17
POWERING DOWN THE XS1 17
INTRODUCTION THE XS1
WARRANTY &
SUPPORT
CARE &
MAINTENANCE
WARRANTY 18
LIMITED WARRANTY 18
HOW TO OBTAIN WARRANTY SERVICE 18
EXTENDED WARRANTY - OXECARE 18
SUPPORT 19
CONTACT US 19
CARE & MAINTENANCE 17
CLEANING 17
SOFTWARE MAINTENANCE 17
PREVENTATIVE MAINTENANCE 17
DAILY
WEEKLY
MONTHLY

SAFETY INFORMATION USER REQUIREMENTS
XS1 SAFETY FEATURES
Please read all instructions, safety information, and
warnings before using your XS1. It is the responsibility
of the owner to ensure that all XS1 users are aware of
warnings, precautions, and safety requirements. Fail-
ure to follow instructions and safety precautions in
this manual can result in severe injury or death.
Improper use of this equipment may result in inju-
ry or death. OxeFit is not responsible for injury, acci-
dents, or damage caused by the misuse of the equip-
ment.
The XS1 is not intended to diagnose, treat, cure, or
prevent medical disorders or conditions. Consult with
your medical provider before starting a new workout
plan.
Injuries may result if exercising improperly or exces-
sively. All individuals should consult a medical provid-
er prior to commencing an exercise program. If you
feel faint, dizzy, or experience pain during exercise
activities, stop exercising immediately and consult a
physician.
Keep loose clothing, shoelaces, long hair, and acces-
sories away from moving parts when the equipment
is in use. Keep all observers, especially children and
pets, away from moving cables and pulleys. Ensure
others do not touch the machine when in use.
The XS1 is for the use of individuals ages 18 and up.
Keep individuals under the age of 16 away from the
machine. If approved in advance by a physician, indi-
viduals ages 16 - 18 may use the XS1 under direct adult
supervision. An adult should review all safety instruc-
tions with the minor prior to use. The XS1 contains
parts, components, and functions that could cause
severe injury or death. The XS1 is designed for use by
only one person at a time. You are responsible for the
safety of any children and other persons you allow to
use your XS1.
See USER REQUIREMENTS on page 3.
Be cautious when stepping onto and off of the plat-
form. Please wear appropriate non-slip footwear. DO
NOT dismount from the device while the cables are
loaded. Press the UNLOAD button to reduce the ten-
sion on the cables.
Use reasonable care and safety precautions while us-
ing the XS1, including resting, hydrating, and modify-
ing any exercise as needed.
Ensure safety by following the XS1 instructions on
maintenance and inspection. Perform regular care
and maintenance (see CARE & MAINTENANCE on
page 17) for optimal performance and longevity of the
device. Discontinue use and contact OxeFit Support
if the device is making unusual noises. Always power
down and unplug the device before cleaning.
does not approve may void the warranty. DO NOT
attempt to repair the XS1 on your own, as this could
affect its operation. Please contact OxeFit Support
immediately for repairs and replacements.
Never use any accessories or equipment other than
ones provided or approved by OxeFit, including
dumbbells, weight plates, bands, chains, bars, or oth-
er means to increase the resistance force.
The XS1 is for indoor use only in a climate-controlled
environment. DO NOT store the device outdoors, near
water, or in high humidity.
CAUTION: Read and follow all precautions and in-
structions in this manual before using this equip-
ment. Keep this manual for future reference.
USER HEIGHT
MINIMUM: 4’ 2”
USER WEIGHT
105 lbs - 300 lbs / 48 kg - 136 kg
USER AGE
MINIMUM: 18 YEARS
The XS1 has monitoring features to detect unsafe bar-
bell movements.
BAR TILT
If the bar rapidly tilts while being lifted, the XS1 will
unload the tension immediately.
STALL DETECTION
If there is no movement at the bottom of your range
detected for 15 seconds at any portion of a lift during
an exercise, Stall Detection will unload the tension,
and the set will end immediately.
SAFETY XS1 USER MANUAL 3

4
INSPECT YOUR XS1
XS1 DIAGRAM
NOTICES
Familiarize yourself with the XS1 by reviewing each part of the device, ensuring that each part is in safe operating
conditions.
See XS1 DIAGRAM on page 4.
DO NOT use the device if it is damaged or contains worn or broken parts. Use only replacement parts supplied by
OxeFit.
MAINTAIN LABELS AND NAMEPLATES: Do not remove labels for any reason. Each label contains important informa-
tion. Familiarize yourself with all warnings on the XS1 before use. If a warning label is damaged or lost, contact OxeFit
for a replacement immediately. Please read all labels before using your XS1. It is the responsibility of the owner to
ensure that users are aware of all warnings and precautions before use.
MAINTAIN ALL EQUIPMENT: Preventative maintenance is crucial to maintaining the functionality and safety of
this equipment and keeping the equipment in safe operating condition. Failure to conduct preventative care may
cause the equipment to operate hazardously. Equipment must be inspected and maintained at regular intervals.
See CARE & MAINTENANCE on page 17.
A. VERTICAL POSITIONER
(x2)
B. SLIDE CONNECTION &
CABLE (x2)
C. SPEAKER (x2)
D. 32” TOUCHSCREEN
E. FORCE PLATE
F. MICROPHONE
G. SLIDE HANDLE/RACK
HOOK (x2)
H. DECK CONNECTION (x2)
I. FOLDABLE DECK
J. DECK HANDLE
*(x2) Located on both right
and left sides of the XS1
This device is designed to comply with Part 15
of the FCC Rules.
Operation is subject to the following two con-
ditions:
(1) This device may not cause harmful interfer-
ence, and (2) this device must accept any inter-
ference received, including interference that
may cause undesired operation.
Contains:
FCC ID: SH6MDBT42Q
Contains:
IC ID: 8017A-MDBT42Q
SAFETY | NOTICES XS1 USER MANUAL 4
FIGURE 1
A
B
C
D
E
F
G
H
I
J

DEVICE MEASUREMENTS
TECHNOLOGY
DEVICE WEIGHT
BENCH MEASUREMENTS
ELECTRICAL OUTLET
REQUIREMENTS
LOCATION REQUIREMENTS
ENVIRONMENTAL
REQUIREMENTS INTERNET REQUIREMENTS
WITH THE DECK FOLDED DOWN
45.5” wide x 80” deep x 81.5” tall
WITH THE DECK FOLDED UP
45.5” wide x 21.5” deep x 81.5” tall
STRENGTH BENCH
41.3” long x 19” wide x 17.7” tall
MULTIFUNCTION BENCH
53” long x 16” wide x 15” tall
300 lbs
CONNECTION
WiFi 802.11a/b/g/n/ac
Compatible with MU-MIMO
Bluetooth 4.2
CAMERA
Front-facing camera
The XS1 requires at least 4 inches of space behind the
unit. The entire set-up space should be at least 6’ x
8.5’.
Due to the sensitivity of the electronics, the XS1 sys-
tem must be installed in a climate-controlled envi-
The XS1 cannot be installed outdoors, and the warran-
ty does not cover devices that are placed outdoors or
in locations that do not comply with OxeFit’s location
and operating environmental requirements.
OPERATING RELATIVE HUMIDITY
20% to 70% non-condensing
OPERATING TEMPERATURE
50ºF to 85ºF (10ºC to 30ºC)
STORAGE TEMPERATURE
-13ºF to 113ºF (-25ºC to 45ºC)
The XS1 requires a standard (120 VAC, 60 Hz), ground-
ed, three-pronged outlet. If your XS1 requires an ex-
tension cord, ensure it is rated for at least 12A. Failure
to provide these electrical requirements may void
your warranty.
The XS1 requires a strong continuous connection to
wireless internet in order to access the advanced fea-
tures and programs on the device. The XS1 operates
best when connected to a 5GHz WiFi network.
You can connect to the internet using WiFi that has
a minimum download speed of 15 MBs and a mini-
mum upload speed of 5 MBs, but higher speeds are
recommended.
The XS1 only supports WPA2 encryption. The use of
WiFi extenders is not recommended as these devices
the WiFi signal is not strong in the planned XS1 loca-
tion, the use of a mesh network is recommended to
improve the coverage. The XS1 does not support the
use of Eero routers.
SPECIFICATIONS | INSTALLATION REQUIREMENTS XS1 USER MANUAL4
SOUND
Stereo 2x10W sound
Single-channel microphone
Bluetooth Audio Connect
5

6MOBILE APP XS1 USER MANUAL
DOWNLOADING THE APP
THE OXEFIT APP
EXPLORE
HOME
The OxeFit app enables individuals and organizations
to view workout activity and history, schedule classes,
browse workouts, create custom workouts, and man-
It is recommended to activate your OxeFit account
when OxeFit Support sends an email with activation
instructions. This email will be sent near your XS1 de-
livery date. Please activate your account prior to down-
loading the app.
Download the OxeFit app to your mobile device.
NOTE: The OxeFit app is not available for some mobile
devices.
• Support [Android] OS 8.0 or higher (minimum 2
GB RAM Size)
• Support [iPhone] iOS 12.0 or later
• Support [iPod touch] iOs 12.0 or later
• Support [Mac] macOS 11.0 or later and Mac with
Apply M1 chip or later
View your activity, scheduled workouts, programs, and
more from the Home page. Select workouts based on
-
ommendations.
Explore exercises by navigating to the Explore tab at
the bottom of the screen. Browse by classes, programs,
trainers, workouts, exercises, and custom workouts.
-
erences, select Show Results in the lower right corner
of the screen.
Use the steps below when on the OxeFit mobile app
Explore page:
CREATE A CUSTOM WORKOUT
1. Select Custom from the top menu.
2. Tap Create New Workout if there are no custom
workouts listed or the plus icon in the bottom
right corner if there are custom workouts listed.
3. Name and build your workout by adding blocks
and exercises within the blocks.
4. Select Save at the bottom of the page when you
have added all of your desired blocks and exer-
cises.
The workout will appear on the XS1 Home screen in the
My Workouts rail when you schedule it.
EDIT A CUSTOM WORKOUT
1. Select the custom workout you intend to edit.
2. Tap Edit Structure to edit the workout.
3. Use the list below to edit your workout:
• Tap the exercise name to edit the exercise.
• Remove blocks by selecting the three dots in the
top right corner, followed by Delete Standalone
Block.
• Delete exercises by swiping left on the exercise
name, followed by Delete.
• Change the order of exercises by holding down
and dragging the two vertical lines near the ex-
ercise name.
DELETE A CUSTOM WORKOUT
1. Select the custom workout you intend to delete
from the Explore page of the OxeFit app.
2. Select the three dots in the top right corner of
the screen to delete a workout from your library
and calendar.
SCHEDULE A WORKOUT
1. Select the workout you intend to schedule.
2. Tap Schedule.
3. Select a single date to schedule a workout that
day or select Repeating to create a custom re-
currence.
4. Tap Schedule -
out.
The workout will appear on the XS1 Home screen in
the Scheduled Workouts rail.
EDIT/UNSCHEDULE A SCHEDULED
WORKOUT
1. Select the scheduled workout you intend to
edit/unschedule from the Home page of the
OxeFit app. The workout that is scheduled
next will appear at the top of the Home page.
The following scheduled workouts will appear
in the Upcoming Workouts rail on the Home
page.
2. Select Scheduled.
3. Edit the date or occurrence of the scheduled
workout, then select Save, or select the three
dots in the top right cornet of the screen to
“Clear Selection” or “Unschedule Workout.“
JOIN A PROGRAM
Each user can only be enrolled in one active program
at a time. To start new programs before completing
current programs, pause your current program to
save your progress or leave the program to abandon
your progress.
1. Tap Programs from the top menu.
2. Select the program you want to join.
3. Tap Join Program.
Active programs are indicated by a green dot, and will
be the featured workout on the XS1 Home screen.
EXPLORE (CONTINUED)

MOBILE APP XS1 USER MANUAL 7
YOUACTIVITY
View your saved workouts (save workouts by bookmarking them when browsing) on the You page.
View details of your completed workouts and exercises
from the Activity page. Tap your workout or exercise to
get a thorough overview.
WORKOUT SUMMARY
When viewing a workout, select your exercise within the
workout to view more information and data about each
set. Select the set to get a detailed summary of your per-
formance.
EXERCISE SUMMARY
Select the completed exercise you want to view. All avail-
able data (max or average of left and right) from that ex-
ercise will display on the graph. Tap the legend to specify
which metric you want the graph to emphasize.
You can also view these graphs by selecting your com-
pleted exercise from the Exercise tab on the Explore
page, then View Details in the Your Progress section.
UPDATE USER PERMISSION TO
ADMIN (*ADMIN)
Admin users can update the permissions of de-
fault users to grant them admin user access.
1. From the OxeFamily page, select the pencil
icon for the user you want to update.
2. Use the dropdown arrow to change permis-
sions to Admin.
3. Select Save.
ADD USER PROFILES (*ADMIN)
to the XS1.
1. Select the settings icon in the top right corner.
2. Tap My OxeFamily.
3. Select the plus sign in the Your Family rail.
4. Enter the new user’s email address and select In-
vite User to Join OxeFamily.
5. The new user will receive an email invite. They are
to follow the on-screen instructions to join your
organization.
6. The new user will show as Pending in the OxeFit
app until they accept the invitation. Once accept-
REMOVE USER PROFILES (*ADMIN)
1. If a new user is shown as Pending, select the red
trash icon. If the new user is not shown as Pend-
ing, select the pencil icon near the user’s name,
then select the red trash icon.
2. Tap Remove

8
UNFOLDING THE DECK
1. Ensure no one is near the device, especially children and pets.
2. Unbuckle the straps at the front of the device. See Figure 2.1.
3. Unhook both ends of the deck straps from the latches located
in between the rear support beams of the XS1. See Figure 2.2.
4. Lower the deck using the deck handle located at the end of
the deck.
SETTING UP XS1 USER MANUAL
FIGURE 2.1
FIGURE 2.2
1. Disconnect all accessories from the device and re-
move the bench from the deck.
2. Ensure weight is unloaded and raise both slide han-
dles to their highest position.
3. Close both deck connection doors.
4. Use the deck handle to lift the deck to the UP po-
sition.
5. Hook both ends of the deck straps to the latches lo-
cated in between the rear support beams of the XS1.
See Figure 2.2.
6. After the deck is folded up, buckle the straps togeth-
er at the front of the device. See Figure 2.1.
FOLDING THE DECK (OPTIONAL)
You have the option to fold the deck after use to save space.
WARNING: The system must be powered on and the cables
must have maintenance tension.
STABILIZER LEGS
Two stabilzer legs located under the deck of the XS1 will be visi-
ble once the deck is folded up. The stabilizer legs are to remain
in place after installation.
WARNING: DO NOT remove or adjust the stabilizer legs. Keep
both stabilizer legs fully extended at all times.
8

8 9SETTING UP XS1 USER MANUAL
The XS1 has four connection points for connecting acces-
sories. Two are slide connections located on the vertical
positioner, each support 70 pounds of digital tension (or a
combined weight of 140 pounds). The remaining two are in
the deck and support a combined total of 250 pounds of re-
sistance. See XS1 DIAGRAM on page 4.
ADJUSTING SLIDE POSITION
When using the slide connection and cable, adjust the verti-
cal position of the slide handle to your preference.
WARNING: NEVER adjust the slide position while the
weight is loaded and an exercise is in progress. Always press
UNLOAD before adjusting the vertical position of the slide.
1. Firmly grasp the slide handle and pull the spring-load-
ed pin knob to release the handle. See Figure 3.
FIGURE 3
2. Carefully glide the handle up or down to your desired
position while holding the pull pin out.
3. Release the pull pin into an available hole to lock the
handle in position.
4. Before beginning an exercise, ensure the pull pin is
fully engaged in a locking hole. Verify proper engage-
ment by ensuring the orange band on the pin is not
visible. If the orange band is visible, adjust the slide
handle slightly up and down until the pin is fully en-
gaged.
WARNING: NEVER start an exercise if the orange band is vis-
ible on the locking pin.
ACCESSING DECK CONNECTION
The deck connections are located on the left and right
sides of the force plate. Press the ridged center as you
slide the deck connection doors open.
WARNING: Connect the cable extenders to the deck
cables when performing exercises that cause the deck
cables to rub against the skin.
SETTING UP THE
MULTIFUNCTION BENCH
BENCHES
STRENGTH BENCH (*FOR FLEX PACKAGES
ONLY)
The strength bench is included in the Flex accessory
training activities, such as bench presses and seated
curls.
MULTIFUNCTION BENCH (*FOR FLOW AND
PEAK PACKAGES ONLY)
The multifunction bench is included in the Flow and
Peak accessory packages. It is multifunctional for var-
ious activities, such as strength exercises, rowing activi-
ties, and digital Pilates.
1.
wrench.
2. Position the end of the bench with the long axis
perpendicular to the sliding axis of the bench.
3. Depending on your exercise, bring the foot stir-
rup end of the bench to the center of the deck,
almost to the baseline of the force plate, for exer-
cises that need space away from the vertical po-
sitioners (i.e., canoeing) or position the end of the
bench near the crease at which the deck folds for
exercises that need space near the veritical posi-
tioners (i.e., bench press).
ACCESSING THE FOOT
STIRRUPS
LOCKING THE SLIDING SEAT
UNLOCKING THE SLIDING SEAT
4. Center the bench using the two small lines that
are at the end of the deck.
5. If the bench is hanging off of the deck, push ei-
ther the left or right foot pedal, located at the
bottom of the bench and below the seat, to re-
lease the kickstand.
1. Remove the bench pad.
2. Lift the footplate until it reaches a hard stop.
3. Tighten the center knob to lock the footplate
in place.
4. Secure your feet in the foot stirrups for all row-
ing activities.
1. Remove the bench pad.
2. Slide the seat to your preferred position.
3. Align the center locking pin to the nearest avail-
able hole.
4. Twist the locking knob until the pin is released
and locked into the hole.
1. Pull the locking knob up.
2. Twist the knob a quarter of a turn. The knob
should be outside of the silver inserts and resting
directly on top of the bottom half of the pin.
SETTING UP THE MULTIFUNCTION
BENCH (CONTINUED)

78 10SETTING UP XS1 USER MANUAL
CONNECTING ACCESSORIES
BARBELL
The 14-pound barbell is designed to attach
to both deck connections for exercises
such as bench presses, squats, deadlifts,
curls, and rows.
HAND GRIPS
Each hand grip can be individually at-
tached to any connection point and can
be used to perform single-arm exercises
or combined with another hand grip to
work both arms simultaneously or in an
alternating fashion.
ROPE
The rope can be connected to either slide
connections and used for chops, tricep ex-
tension, and certain row exercises.
WAIST HARNESS
The waist harness has two connection
rings that can be attached to the deck or
slide connections.
ANKLE STRAPS
The ankle straps attach to the slide con-
nections when they are completely low-
ered and are used for leg workouts, includ-
ing abduction and adduction movements.
SKICROSS HANDLES
The SkiCross handles connect to both slide
connections for SkiCross.
MULTIFUNCTION BAR
The multifunction bar weighs three
pounds and can be used for lat pulldowns
and rowing from the slide connections.
SWIM PADDLES (*FOR FLOW AND
PEAK PACKAGES ONLY)
Connect each swim paddle to the slide con-
loop of each paddle to use for SurfSwim.
ADJUSTABLE PADDLE (*FOR
FLOW AND PEAK PACKAGES ONLY)
When extended, the adjustable paddle is
used for paddleboarding exercises or can be
shortened for canoeing and attaches to the
slide connection.
ROWING BAR (*FOR FLOW AND
PEAK PACKAGES ONLY)
The rowing bar has a central connection
point and attaches to the slide connection.
OXEDOT
The OxeDot is a wireless control device that
can load and unload the system. It connects
automatically to the XS1. Press and hold the
OxeDot for at least one second to start and
load the exercise. Press the button again to
unload the exericse.
Scan the QR code below to access the Oxe-
Dot Accessory Guide and learn more about
the OxeDot.

FIGURE 4
01. PLUGGING IN &
POWERING ON
05. LINKING YOUR ACCOUNT
(CONTINUED)
02. INITIALIZATION PROCESS
(CONTINUED)
05. LINKING YOUR ACCOUNT
02. INITIALIZATION
PROCESS
06. SETTING UP A PASSCODE
CAUTION: Before using the XS1, familiarize yourself
with the guidelines to ensure you are safely operat-
ing the equipment:
• Only one person is permitted to operate the XS1
at a time.
• Stay on the deck while performing an exercise.
• Only use accessories that have been approved
by OxeFit.
• Keep children and pets away from the XS1.
1. Plug the power cord into a standard 120 VAC
outlet.
2. Power on your XS1 using the power switch lo-
cated on the back of the device. See Figure 4.
WARNING: DO NOT step on the force plate or place
any objects on the force plate when you power on the
device. Wait until the XS1 logo appears on the screen
before stepping onto the force plate.
Follow the on-screen instructions to set up a 4-digit
device passcode. This code will unlock your XS1 after
it enters lock screen mode and screen saver mode.
Then, set up a 4-digit admin passcode. This code will
prevent other users from changing sensitive settings
on your device.
GETTING STARTED XS1 USER MANUAL
1. Tap the “Get Started” button.
2. Select your time zone, then Continue.
1. Select your WiFi Network.
2. Enter the network password using the on-
screen keyboard.
3. Press Connect to continue.
Watch the introductory video to learn about the
XS1 and its features before operation.
1. Press Play Orientation to start the video.
2. After watching the video, select the check-
box to accept the acknowledgment.
3. Press Continue.
You must have an OxeFit account to access the
advanced features and programs on the device.
This step is required to register the device and
must be performed before using your XS1 for the
first time. If you do not know your credentials,
tap Contact Support at the bottom of the XS1
screen and follow the on-screen instructions.
1. Scan the QR code using your mobile device.
2. Follow the on-screen prompts on your mobile de-
vice to link your account to the XS1.
04. XS1 ORIENTATION
UNLINKING YOUR ACCOUNT
(OPTIONAL)
Use the steps below to unlink your account
from your XS1. CAUTION: This process will
erase all content and settings from the ac-
count that is being unlinked, and the XS1
will revert to factory mode.
1. Navigate to the drop-down menu in
the top right corner of the screen.
2. Select Settings.
3. View your serial number by selecting
About Your XS1, and write your serial
number down for step 7.
4. Select Unlink Account. NOTE: The ac-
count listed in this panel will be the
account you need to log into for step 5.
5. Verify your identity by scanning the
QR code on the XS1 screen with your
mobile device. Sign in to your account
and enter the 9-digit code to autho-
rize your device.
6. Select the checkbox to confirm that
you want to unlink your account.
7. Notify support@oxefit.com with the
serial number that was disconnected.
03. CONNECTING TO THE
INTERNET
11

12
QUICK START
EXPLORE EXERCISES
To access the exercise library, select Explore Exercises.
Choose your exercise, then review the exercise details
to learn more about the workout and determine which
accessories will be used. Select Start Exercise to begin.
START FREESTYLE
To access Freestyle, select Start Freestyle. De-
pending on your XS1 subscription, select an activity
from the top of the screen. Adjust the parameters
to your preference. Select Start Exercise to begin.
SLEEP MODE
SCREEN SAVER MODE
MOTOR IDLE MODE
This process will ready the XS1 cables for use. After entering
the device passcode, ensure the cables can be fully drawn
into the device. Refrain from touching the cables and se-
lect Begin Pretension Sequence. Allow the device a few
seconds to pretension the cables. This process will need to
be repeated each time the XS1 wakes from the sleep state.
PRETENSION SEQUENCE
HOME PAGE
EXPLORE PAGE
View your workout progress and access featured work-
outs and activity presets on the XS1 Home page.
Use the OxeFit moble app (see MOBILE APP on pag-
es 6-7) to design custom workouts, schedule workouts,
and join programs. Custom workouts will appear in the
My Workouts rail, scheduled workouts will appear in the
Schedule Workouts rail on the home page when either
are created.
Access an array of programs, workouts, and class-
es on the XS1 Explore page. Browse by trainer-led
After you choose your preferred workout or exercise,
review the exercise details to learn more about the
workout and determine which accessories will be
used. Select Start Workout or Start Exercise to begin.
PROGRAMS
Programs are trainer-led workouts programs that in-
clude a recommended schedule to help you stay on
track towards your goals.
Each user can only be enrolled in one active program at
a time. To start a new program before completing your
current one, pause your program to save your progress
or leave your program to abandon your progress.
NOTE: Programs are unavailable for Kiosk guest users.
TEAM WORKOUTS
You have the option to partake in team workouts and
take turns completing an exercise on your XS1. Team
Workouts can have up to 5 users, including yourself, in
one workout.
Select users from your OxeFamily or add guests, but
guest data will not be saved. Simply tap Start Team
Workout when you have selected your preferred work-
out to begin.
NOTE: Team workouts are unavailable for trainer-led
workouts or freesyle workouts.
INACTIVITY MODES | THE INTERFACE XS1 USER MANUAL8
When the XS1 is powered on but inactive after four min-
utes, excluding during active workouts, the system will en-
ter sleep mode.
NOTE:-
utes.
During active workouts, the device will enter sleep mode
after 11 minutes of inactivity.
This mode will take you back to the XS1 logo screen. To
wake your device, simply tap anywhere on the touchscreen
and enter the device passcode.
an idle state.
The cables will undergo pretension when prompted either
by touchscreen interaction, force plate interaction, or cable
activity.
WARNING: DO NOT handle the cables during the preten-
sion sequence.
When the XS1 is powered on but inactive after one hour, the
screen will black out for screen saver mode.
Screen saver mode ends any in-progress exercises. Exit
screen saver mode by tapping anywhere on the touch-
screen and entering the device passcode.

12 13THE INTERFACE XS1 USER MANUAL
Optimize your XS1 experience with the advanced train-
ing features, such as the Balance Meter, Virtual Spotter,
and the Advanced Training Modes.
BALANCE METER
The force plate is the rectangular inset embedded at the
front of the deck. It is approximately 30” wide and 18”
deep.
The balance meter measures balance and weight distri-
bution. When conducting lifts, such as squats or dead-
lifts, stand on the force plate with both feet centered and
equally spaced. When the balance meter is turned on,
you will see real-time feedback of your center of balance.
For the balance meter to function properly, ensure that
it is clear of any objects or persons during power-up.
See INITIALIZATION PROCESS on page 11.
VIRTUAL SPOTTER
The XS1 has an advanced feature known as virtual spot-
ter. This feature must be turned on in order to use it
during an exercise. Like a real spotter, the virtual spotter
will assist you when you are unable to continue to move
the cables at the bottom range of motion.
ADVANCED TRAINING FEATURES
FIGURE 5
There are two different virtual spotter modes that you
can choose:
Gradual and Instant.
GRADUAL
When a struggle is detected during an exercise, grad-
ual mode will progressively reduce the tension by up
to 20 pounds until your lift is moving again. The origi-
nal load will resume during next rep.
INSTANT
When a struggle is detected during an exercise, in-
stant mode will unload all tension and end your set.
STRENGTH TRAINING MODES
Training modes maximize your strength training.
There are six modes for strength training on the XS1:
Overload, Chains, Burnout, Perturbation, Adaptive,
and Reactive.
modes by selecting Advanced Settings in your work-
out, located near the lower right side of the active
screen when the weight is unloaded.
For freestyle exercises, access the training modes
when you set up your movement.
Within an exercise, change the training mode by un-
loading the weight and selecting Advanced Settings,
located near the lower right side of the active user
screen.
NOTE: Unloading will end the set. Ensure Advanced
Settings have been adjusted prior to loading an ex-
ercise.
OVERLOAD
Overload increases the resistance during a selected
phase of a rep. A rep has two different phases: Con-
centric and Eccentric.
CONCENTRIC PHASE
Concentric phase is essentially when the muscles
shorten. It is when you pull the cables out against the
resistance of the device or, in traditional weight lifting,
raise the weight.
ECCENTRIC PHASE
Eccentric phase is essentially when the muscles
lengthen. It is when you release the cables back into
the device or, in traditional weight lifting, lower the
weight.
When in Overload mode, the concentric weight will
apply during the concentric phase of your motion. The
eccentric weight will apply during the eccentric phase
of your motion. If you stop moving during the exercise,
the system will default to the concentric phase and
will only return to the eccentric phase if you start an
eccentric motion.
CHAINS
Chains increase the resistance throughout the range
of motion. At the minimum range of motion, there will
be no additional weight. The chain weight will be slow-
ly applied with your motions. The full chain weight will
be applied at your maximum range of motion.
BURNOUT
Burnout increases or decreases the weight with
each rep of a set. The weight will adjust with each
rep unless the weight is higher than the maxi-
mum weight or lower than the minimum weight.
PERTURBATION
Perturbation creates randomized impulses of force
on the cables. Perturbation intensity is the rela-
tive strength of the random impulse — the higher
the number, the greater the force impulse applied.

THE INTERFACE XS1 USER MANUAL 14
ADVANCED TRAINING FEATURES (CONTINUED)
ADAPTIVE
Find your optimal load with the adaptive training
mode. Set the load to an amount you can easily lift. If
your velocity is smooth and consistent, the load will in-
crease with each rep until the system has determined
you have reached your optimal load. Once you have
reached your optimal load, the load will stay at that
amount until you end your set.
TIP: After loading your exercise, tap the data dial to
change the data value from power to velocity. Velocity
data will help you visualize your speed for adaptive
stength training.
REACTIVE
Reactive training mode helps you maintain a con-
centric speed during strength training exercises. Set
a target concentric speed and a starting load. During
each rep, the system will increase your load if you
exceed your target speed. If you are below your target,
the system will reduce the speed.
TIP: After loading your exercise, tap the data dial to
change the data value from power to velocity. Velocity
data will help you visualize your speed for reactive
strength training.
CARDIO TRAINING MODES
Training modes maximize your cardio exercises.
There are three modes for cardio exercises on the XS1:
Steadystate, Intervals, and Hills.
by selecting Advanced Settings in your workout, locat-
ed near the lower right side of the active screen when
the weight is unloaded.
For freestyle exercises, access the training modes when
you set up your activity.
Change the training mode within an exercise by un-
loading the weight and selecting Advanced Settings,
located near the lower right side of the active user
screen.
STEADYSTATE
Steadystate maintains a constance resistance.
INTERVALS
Intervals increase and decrease resistance based on the
working resistance and the resting resistance settings.
WORKING INTERVAL LENGTH
Working interval length for intervals is the duration in sec-
onds of working intervals.
WORK-TO-REST RATIO
Work-to-rest ratio is the repeated application of working
resistance followed by resting resistance. The duration of
each resistance setting will be dependent upon the ratio
level (beginner, intermediate, and advanced).
BEGINNER (1:2)
Working resistance will be applied for the full dura-
tion of the working interval length.
Resting resistance will be applied for double the du-
ration of the working interval length.
Example: If you set the working interval length to 30
seconds, the working resistance will last for 30 sec-
onds, followed by the resting resistance for 60 sec-
onds.
INTERMEDIATE (1:1)
Working resistance will be applied for the full dura-
tion of the working interval length.
Resting resistance will be applied for the full duration
of the working interval length.
Example: If you set the working interval length to 30
seconds, the working resistance will last for 30 sec-
onds, followed by the resting resistance for 30 sec-
onds.
ADVANCED (2:1)
Working resistance will be applied for the full
duration of the working interval length.
Resting resistance will be applied for half the
duration of the working interval length.
Example: If you set the working interval length
to 30 seconds, the working resistance will last
for 30 seconds, followed by the resting resis-
tance for 15 seconds.
HILLS
Hills gradually increase and quickly decrease resis-
tance based on the working resistance and the rest-
ing resistance settings.
WORKING INTERVAL LENGTH
Working interval length for hills is the duration in
seconds of how long it will take the resistance to
gradually increase to the working resistance. Once
at the top of the hill, the resistance will return back
to the resting resistance to begin the cycle again.

THE INTERFACE XS1 USER MANUAL 15
ACTIVE STRENGTH WORKOUT SCREEN
EXERCISE NAME &
NUMBER OF SET
REP COUNT
Number of completed
repetitions produced
during each exercise set.
MAX POWER/VELOCITY PER
REP
The maximum power/velocity
during the current rep.
AVERAGE POWER/
VELOCITY
The average power/ve-
locity of the set.
CURRENT POWER/
VELOCITY
The current power/ve-
locity of the set.
NOTE: Tap this value to
toggle between power
and velocity values.
CURRENT LOAD OF
WEIGHT
This will adjust as you
exercise based on advanced
training modes and if the
exercise is paused.
DESIRED BASE WEIGHT
SLIDE/DECK INDICATOR
END WORKOUT OR
CHANGE EXERCISE/NEXT
EXERCISE
RANGE OF MOTION
The position of the bars indicate
where you are in range of motion.
The system will
automatically determine your
range of motion while you exer-
cise. NOTE: It may take the system
one or two reps to learn your
movement.
INSTANTANEOUS
POWER/VELOCITY RING
This ring will indicate the
instantaneous power/ve-
locity relative to the max
power during the set.
INCREASE/DECREASE WEIGHT
Increase (+) / decrease (-) weight
before an exercise set or during
your workout.
UNLOAD WEIGHT
Data recording begins once
LOAD is selected. Data re-
cording ends once UNLOAD is
selected.
FIGURE 6

16
ACTIVE CARDIO WORKOUT SCREEN
THE INTERFACE XS1 USER MANUAL
EXERCISE NAME
PACE
DISTANCE IN METERS
ELAPSED TIME
CURRENT RESISTANCE
This will adjust as you exercise
based on training modes and if
the exercise is paused.
DESIRED BASE
RESISTANCE
STROKE RATE
AVERAGE PACE
SLIDE/DECK INDICATOR
& TRAINING MODE
END WORKOUT OR
CHANGE EXERCISE/NEXT
EXERCISE
POWER PRODUCTION
Green stroke represents
current stroke production.
Blue stroke represents pre-
vious stroke production.
INSTANTANEOUS
PACE RING
INCREASE/DECREASE RESISTANCE
Increase (+) / decrease (-) resistance
before an exercise set or during your
workout.
UNLOAD RESISTANCE
Data recording begins once
LOAD is selected. Data
recording ends once UNLOAD
is selected.
FIGURE 7
EXERCISE IN PROGRESS
While an exericse is in progress, the system wil moni-
tor your motion and decrease the load depending on
your inactivity, ensuring your saftey while operating
the XS1 and promoting hardware protection.
PAUSE MODE
When the XS1 detects no movememnt for 15 seconds
while strength exercises are in progress, the loaded
weight will decrease to 5 pounds or until you can be-
gin movement again. The weight will reload to the
desired base weight once movement is detected.
After 45 seconds of inactivity, the weight will unload
and the set will end.
Pause mode applies to all exercises, except barbell
exercises.
STALL MODE FOR BARBELL EXERCISES
The XS1 will monitor your motion during barbell ex-
ercises. If you stop for more than 5 seconds in the
bottom portion of your range of motion or if you stop
moving for more than 15 seconds at any part of your
range of motion, the system will unload and end the
set.
EXERCISE TIMEOUT
For strength exercises, the system will unload and
end the set if there is no cable activity for 45 seconds.
For cardio exercises, the system will unload and end
the set after 120 seconds of inactivity.

AFTER-USE | CARE & MAINTENANCE XS1 USER MANUAL 17
PREPARING THE XS1 FOR
INACTIVITY
POWERING DOWN THE XS1
After completing your workouts, view your progress
and activity on the XS1.
home screen.
Under the Progress section, view a summary of the
current week’s workouts. The data in the Muscle
Balance rail and the Activities rail accounts for your
overall progress on the XS1. The Milestones rail shows
your overall progress in gray and your current week’s
progress in green.
The Activity section displays a general overview of
your previously performed workouts.
For your safety and the longevity of your device, re-
move all accessories and the bench from the XS1
when the device is not in use.
When an accessory remains attached to the device,
the system may detect false activity by mistaking the
weight of the accessory as force applied by you. Any
false activity will force the idle mode to quit prema-
turely, causing the cable motors to restart.
The power switch is located at the back of the device.
After your workout, there is no need to power down
your device because the XS1 is designed to go into
sleep mode, protecting the system while remaining
available for software upgrades.
Only shut down your XS1 in the event in which you
need to power cycle the device for troubleshooting
purposes.
Turn the power switch to the OFF position to power
down the XS1.
CAUTION: DO NOT rapidly shut down and power on
your device. Wait at least two minutes before power-
ing your device back on after shutting down.
VIEW PROGRESS & ACTIVITY CLEANING
SOFTWARE MAINTENANCE
Keeping your XS1 unit clean is essential for ensur-
ing proper operating conditions of your equipment.
Proper care and cleaning will extend the life of your
equipment and reduce premature aging and wear.
CAUTION: Always shut down and unplug the XS1 be-
fore cleaning.
• Accessories should be wiped down after use
and cleaned daily with a mild soap and water
mix or an approved antibacterial cleaner.
• The padded upholstery of the strength and
multifunction bench should be cleaned after
each use with a mild soap and water mix or a
non-abrasive, gentle antibacterial cleaner.
• The main frame of the device should be
cleaned weekly with a mild soap and water
mix and damp cloth or a gentle antibacterial
cleaner to remove all dust and accumulated
contaminants.
• Gently wipe the touchscreen with a clean, soft,
and dry cloth.
CAUTION: DO NOT use cleaners that contain solvents,
alcohol, or abrasives.
When an update is ready to be installed on your de-
vice, the XS1 will notify you.
Ensure your device is connected to the internet for
all software updates. Tap Update Now for all required
updates or you may select Skip to install optional up-
dates later. Tap the blue looping arrow in the top right
corner of the screen to install skipped updates.
You can view the current software version of your
XS1 by navigating to the drop-down menu in the top
right corner, selecting Settings, followed by About
your XS1.
PREVENTATIVE MAINTENANCE
Preventative maintenance is crucial to maintaining this
equipment’s functionality and safety. Visual inspections
of your XS1 unit will ensure a safe environment and
promote awareness of any potential issues that may re-
quire maintenance prior to equipment failure. Contact
OxeFit Support immediately for replacement parts.
CAUTION: DO NOT have opened beverages on or near
the XS1.
DAILY
• Verify that the slide handles can be raised and
lowered smoothly. As the handles move, listen for
unusual sounds. Report any abnormalities to sup-
port immediately.
• Inspect carabiners to verify that the latches are
working properly and are damaged-free.
WEEKLY
• Cables should be inspected for damage, includ-
ing fraying, abrasion, signs of wear, twisting, or
excessive rubbing on pulleys.
If you notice any signs of issues or abnormalities, dis-
continue use and contact OxeFit Support immediately.
MONTHLY
• Inspect all accessories for wear or damage, and
replace them as needed.
• Inspect upholstery for wear or damage, and re-
place them as needed.
• Inspect pulleys for integrity, cracking, or rubbing
caused by excessive wear. Any incidents of wear
should elicit immediate replacement of the dam-
aged pulley.

WARRANTY XS1 USER MANUAL
LIMITED WARRANTY
At OxeFit, we stand by our superior quality and product
design. As a valued member of our community, your sat-
isfaction is our priority. We offer a full one (1) year limit-
-
ment, such as the XP1 or XS1 (collectively, the “Product”).
-
gal rights, and you may also have other rights, which
vary from State to State. Please note that we reserve
the right to change the Limited Warranty at any time.
If, for any reason, you are having any problems with your
Product, please reference our support email listed on
page 19, so we can help. The following parts and compo-
nents of the Product are warranted as described:
• HD Touchscreen – Twelve (12) Month Warranty: Ox-
eFit warrants the touchscreen against defects in
workmanship and materials for a period of twelve
(12) months from your original delivery date.
• Frame – Thirty-six (36) Month Warranty: OxeFit
warrants the Product platform frame (exclud-
ing any moving parts attached to the structural
frame) against defects for a period of three (3)
years from the date of original delivery to you.
• Moving and Electrical Components – Twelve (12)
Month Warranty: OxeFit warrants the components
and some original parts of the Product against
defects for a period of twelve (12) months from
your original delivery date.
• Labor – Twelve (12) Month Warranty: OxeFit will
cover the labor cost for reasonable repair or
replacement of components and equipment that
OxeFit determines to be defective for a period
of twelve (12) months from your original delivery
date. In the event OxeFit determines that repair is
not possible, OxeFit will replace your equipment.
HOW TO OBTAIN
WARRANTY SERVICE
EXTENDED WARRANTY -
OXECARE
EXCLUSIONS AND LIMITATIONS
Who is covered?
The original purchaser of the Product is covered by the
Limited Warranty (including, if applicable, the use of
OxeFit parts and accessories) and is not transferable or
assignable to any other party.
What is covered?
OxeFit covers manufacturer’s defects that arise in
the Product or warranted components within the
applicable Limited Warranty time period described in
the Warranty section. Any replacement components
are warranted for the remainder of the original existing
Limited Warranty period. Under the Limited Warranty,
OxeFit reserves the right to substitute material of equal
quality if identical materials are not available at the time
of service. The replacement of the product under the
terms of the Limited Warranty in no way extends the
applicable warranty period. In the event repair is not
possible, OxeFit will replace your equipment.
What is NOT covered?
The Limited Warranty does not cover any damages
due to (i) transportation of any kind after installation;
(ii) storage; (iii) improper use; (iv) failure to follow the
product instructions (including the safety instructions)
-
cations; (vi) unauthorized repair; or (vii) external causes
such as accidents, abuse, environmental damages, or
other actions or events beyond our reasonable control.
The Limited Warranty also does not apply to damages
due to normal wear and tear. You must maintain the
Product, including the cables and other components,
by inspecting your Product regularly for any damage,
loose parts, or other signs of wear and tear that could
cause breakdowns or component failures.
See also PREVENTATIVE MAINTENANCE on page 17.
OxeFit does not warrant that the operation of the
Product will be uninterrupted or error-free concerning
software sold or embedded within the device. The
annual software subscription renewal covers software,
portal, and application support and assistance. Please
contact us through our support request or email.
To be eligible for service under this Limited Warran-
ty, you must contact OxeFit Support. If you discover
any nonconformity or defect, contact OxeFit Support
immediately. You will need to provide OxeFit with the
serial number of your XP1 or XS1 and the dated receipt
or other proof of purchase that indicates the date
warranty period.
OxeFit will repair any XP1 or XS1 equipment that proves
defective in materials or workmanship during your
warranty coverage period. In the event repair is not
possible, OxeFit will replace your equipment.
Under this Warranty, OxeFit reserves the right to
substitute material of equal or better quality if identical
materials are not available at the time of service. The
replacement of the product under the terms of the
Warranty in no way extends the warranty period.
Scan the QR code below to view the details of OxeCare,
the extended warranty for the XS1 and the XP1.
18

SUPPORT XS1 USER MANUAL
SUPPORT
If an error with your XS1 occurs, attempt to power cy-
cle the device.
Turn off the XS1 for at least two minutes, then turn the
system back on using the power switch located at the
back of the device.
CONTACT US
If you are experiencing an installation that requires
assistance or a product issue that is preventing you
from using your XS1, please contact us.
We are available Monday through Friday during busi-
ness hours.
Email us at or scan the QR code
below to access our support page.
19

www.OxeFit.com
© 2023 OxeFit, Inc. All Rights Reserved.
Other manuals for XS1
1
Table of contents
Other OXEFIT Fitness Equipment manuals
Popular Fitness Equipment manuals by other brands

Gold's Gym
Gold's Gym XR18 user manual

ParaBody
ParaBody Serious Steel 827104 Assembly instructions

Taiqi Fitness Equipment
Taiqi Fitness Equipment YD-1008A instructions

Insight Fitness
Insight Fitness DA009 owner's manual

Deltech Fitness
Deltech Fitness DF930 Assembly guide

G3
G3 Onyx installation instructions