Ozito DMC-1000U User manual

B
AR
P
S
I
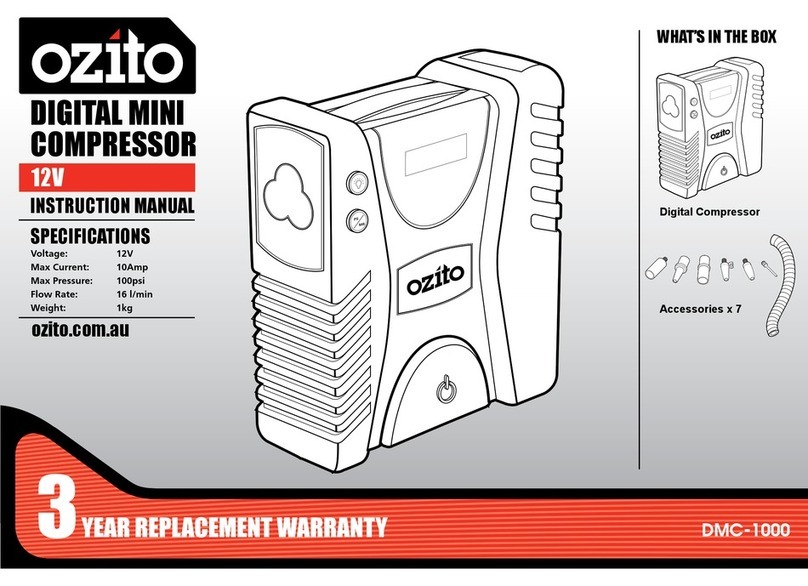
DIGITAL MINI
COMPRESSOR
12V
ORIGINAL INSTRUCTIONS
SPECIFICATIONS
Voltage: 12V
Max Current: 10Amp
Max Pressure: 100psi
Flow Rate: 16 l/min
Weight: 1kg
DMC-1000U
WHAT’S IN THE BOX
ozito-diy.co.uk
Digital Compressor
Accessories x 7
B
A
R
P
S
I
WARRANTY
OZITO UK Unit 9 Stadium Court, Wirral International Business Park, Plantation Road, Bromborough, Wirral, CH62 3QG 0716
Allofourproductsundergostrictqualitycheckstoensurethattheyreach
youinperfectcondition.Intheunlikelyeventthatyourdevicedevelopsa
fault,pleasecontactourservicedepartmentattheaddressshownonthis
guaranteecard.Youcanalsocontactusbytelephoneusingthecustomer
servicenumbershown.Pleasenotethefollowingtermsunderwhich
guaranteeclaimscanbemade:
1.Thesewarrantytermsregulateadditionalwarrantyservices,whichthe
manufacturermentionedbelowpromisestobuyersofitsnewproducts
inadditiontotheirstatutoryguaranteeclaimsarenotaffectedbythis
guarantee.Ourguaranteeisfreeofchargetoyou.
2.Thewarrantyservicesonlycoversdefectsduetomaterialor
manufacturingfaultsonaproductwhichyouhaveboughtfromthe
manufacturermentionedbelowarelimitedtoeithertherecticationofsaid
defectsontheproductorthereplacementoftheproduct,whicheverwe
prefer.
Pleasenotethatourdevicesarenotdesignedforuseincommercial,trade
orprofessionalapplications.Aguaranteecontractwillnotbecreatedifthe
devicehasbeenusedbycommercial,tradeorindustrialbusinessorhas
beenexposedtosimilarstressesduringtheguaranteeperiod.
3.Thefollowingarenotcoveredbyourguarantee:
-Damagetothedevicecausedbyafailuretofollowtheassembly
instructionsorduetoincorrectinstallation,afailuretofollowtheoperating
instructions(forexampleconnectingittoanincorrectmainsvoltageor
currenttype)orafailuretofollowthemaintenanceandsafetyinstructions
orbyexposingthedevicetoabnormalenvironmentalconditionsorbylack
ofcareandmaintenance.
-Damagetothedevicecausedbyabuseorincorrectuse(forexample
overloadingthedeviceortheuseorunapprovedtoolsoraccessories),
ingressofforeignbodiesintothedevice(suchassand,stonesordust,
transportdamage),theuseofforceordamagecausedbyexternalforces
(forexamplebydroppingit).
-Damagetothedeviceorpartsofthedevicecausedbynormalornatural
wearortearorbynormaluseofthedevice.
4.YourProductisguaranteedforaperiodof36monthsfromtheoriginal
dateofpurchaseandisintendedforDIY(DoItYourself)useonly.Lithium
Ionbatteriesandchargersarecoveredbya12monthwarranty.Warranty
excludesconsumableparts.Guaranteeclaimsshouldbesubmitted
beforetheendoftheguaranteeperiodwithintwoweeksofthedefect
beingnoticed.Noguaranteeclaimswillbeacceptedaftertheendofthe
guaranteeperiod.Theoriginalguaranteeperiodremainsapplicabletothe
deviceevenifrepairsarecarriedoutorpartsarereplaced.Insuchcases,
theworkperformedorpartsttedwillnotresultinanextensionofthe
guaranteeperiod,andnonewguaranteewillbecomeactiveforthework
performedorpartstted.Thisalsoappliesifanon-siteserviceisused.
INORDERTOMAKEACLAIMUNDERTHISWARRANTYYOUMUST
RETURNTHEPRODUCTTOTHEPLACEOFPURCHASEWITHYOUR
REGISTERRECEIPT.
Pleaserefertotherestrictionsofthiswarrantyconcerningwearingparts,
consumablesandmissingpartsassetoutintheserviceinformationin
theseoperatinginstructions.
CUSTOMERSERVICEHELPLINE
GB:01512944488
IRL:1850882711
Ozito-diy.co.uk

ONLINE MANUAL
ScanthisQRCodewithyour
mobiledevicetotakeyouto
theonlinemanual.
B
AR
P
S
I
1 LEDLight
2 LightButton
3 PSI/BARButton
4 DigitalPressureGauge
5 CarryHandle
6 On/OffButton
7 SideCompartment
8 AirHose
9 12VSocket
10HighVolumeHose
11AdaptorStorage
12HighVolumeAirOutlet
FRONT VIEW
BACK / BASE VIEW
ACCESSORIES
KNOW YOUR PRODUCT
1. ADAPTors
SETUP & PREPARATION
13 HighPressureAdaptor
14 MediumAdaptor
15 LargeAdaptor
16 GeneralPurposeAdaptors
17 BallAdaptor
Removing Adaptors
Side Compartment
Base Compartment
1 Toopenthesidecompartment,
slidethedoorup.Lowerthe
doortoexposetheadaptors.
1 Turntheunitoversoyoucan
seethebase.
2 Remove the
requiredadaptor.
2 The 3 adaptors and
airhosecannowbe
removed.
3 Toclosethesidecompartment
raisethedoorandslidedown
tosecure.
Thecompressorunithas7adaptorstoallowarangeoffunctions.All
theadaptorsaresecuredineitherthecompartmentonthesideor
base.
WARNING: ENSURE THE TOOL IS SWITCHED OFF AND
DISCONNECTED FROM THE POWER SUPPLY BEFORE
PERFORMING ANY OF THE FOLLOWING STEPS.
1 2 3 4 5
6 7
8 9 10
11
12
13
14
15
16
17

3. ConTrols
Light Button
PSI / BAR Button
1 ToturntheLEDlighton,press
thelightbuttonin.
1 Toswitchbetweenthetwo
pressureunits,pressthePSI/
BARbutton.
2 ToturntheLEDlightoff,press
thelightbuttonagain.
Note: The compressor must be connected to the power for the LED
lighttowork.
Thecompressorhasabuilt-inLEDlightforeaseofuseatnightorina
darkarea.
ThedigitalpressurereadingcanbeswitchbetweenPSIandBARto
matchtherequirementsontheitembeinginated.
Toidentifythecurrentpressureunits,alightwillbeilluminatedonthe
rightsideofthedigitaldisplay.
BA
R
P
S
I
B
A
R
P
S
I
B
A
R
P
S
I
2. sWiTChing on & oFF
Connecting to a 12V outlet
Switching On and Off
1 Roll out the 12V socket from
thebaseoftheunit.
1 Tostarttheaircompressor
pressdowntheon/offbutton
withyourfoot.
Thecompressoristtedwithafootpeddelon/offbuttontoallowease
ofusewhileholdingadaptorsandtheitembeinginated.
2 Connect the 12V
socket to 12V DC
outletwhichcanbe
foundinyourvehicle.
Check car outlet for
sufcentpowerupto
120W.
2 Releasetheon/off
button to stop the
compressor.
BA
R
P
S
I
BA
R
P
S
I
WARNING:COMPRESSED AIR CAN BE DANGEROUS.
NEVER POINT THE OUTLET NOZZLE TOWARDS ANY
PART OF YOUR BODY OR ANOTHER PERSON.
OPERATION

5. inFlATing TYres4. inFlATing
1 Opentheside
compartment and roll
outtheairhose.
3 Attachtheairhose
byscrewingthe
endofthehoseina
clockwisedirection.
5 Uncrewtheairhose
andtightenplastic
capontothetyreair
valve.
2 Connect the 12V
socket to a power
supply.Thecurrent
pressureratingofthe
itemyouareinating
willnowappearon
thedigitaldisplay.
4 Once the pressure
has reached the
desiredrating,
removetheairhose
androllupintothe
sidecompartment.
3 Pressdowntheon/offswitch
toinatethetyretothe
recomendedpressureis
reached.
NOTE:Therequiredpressure
shouldbewrittenontheitem.
1 Attachtherequiredadatorfor
thejob.
NOTE:Seethefollowing
pages to select the correct
adaptors. 2 Unscrewthecaponthetyreair
valve.
4 Followsteps2-3insection3.
“Inating”toinatethetyre.
6 Placetheadaptorsandair
hosebackintothieroriginal
compartments.Disconnectthe
12Vsocket.
BA
R
P
S
I
B
A
R
P
S
I
IMPORTANT: BEFORE CONNECTING OR DISCONNECTING
ACCESSORIES, ALWAYS MAKE SURE THAT THE
COMPRESSOR IS OFF.
WARNING: AVOID INFLATING THE OBJECTS ABOVE
THE RECOMMENDED INFLATION PRESSURE. THIS MAY
LEAD TO DAMAGE AND/OR INJURIES.

7. high VoluMe APPliCATion
DMC-1000U
6. inFlATing sPorTing eQuiPMenT
5 Removetheadaptor
fromtheinated
item.
5 Removetheadaptor
fromtheinated
item.
1 Opentheside
compartment and roll
outtheairhose.
1 Removethehigh
volume hose from
the base of the
compressor and
insertintothehigh
volumeairoutlet.
Theaircompressorisdeisgnedforquickandeasyinationofhighair
volumeobjectssuchasairmatresses,raftsandpooltoys.
3 Insert the connected
adaptorintothe
inatableitem.
3 Insert the connected
adaptorintothe
inatableitem.
4 Followsteps2-3insection3.
“Inating”toinatetheitem.
4 Followsteps2-3insection3.
“Inating”toinatetheitem.
6 Placetheadaptorsandair
hosebackintothieroriginal
compartments.Disconnectthe
12Vsocket.
NOTE:Thesameproccesscanbeusedtoinateballoonsusingthe
generalpurposeadaptorsinsteadoftheballadaptor.
6 Placetheadaptorsandair
hosebackintothieroriginal
compartments.Disconnectthe
12Vsocket.
2 Remove the ball adaptor from
the base of the compressor
and screw onto the end of the
airhose. 2 Attachthedesiredsizeadaptor
fromthesidecompartment.
BA
R
P
S
I
B
A
R
P
S
I

OPERATION
9. TroubleshooTing8. rePlACing Fuse
Problem Cause Solution
The compressor
does not start
Compressor not
connected to the power
Connect the 12V
socket to a 12V DC
outlet
Insufcientsupply
voltage
Tryanother12V
outlet
Fuseneedsreplacing Replace Fuse
The compressor
startsbutthereisno
pressure
Loose hose
connections
Check the
compressedair
hose and adaptor
andreplaceif
necessary
The seals are damaged Check the seals
andhaveany
damaged seals
replacedbya
servicecentre
LEDlightwontturn
on
Compressor not
connected to the power
Plug the 12V socket
intoa12Voutlet
Highvolumeinating
doesnotcompletely
inatetheitem.
Not enough pressure
forhighvolume
ination
Inateusinghigh
pressureairhose
nothighvolume
1 Unscrewthetopofthe12Vsockettoexposethefuse.
The12Vsocketisttedwitha10Afusetoprotecttheaircompressor.If
thecompressorhasstoppedworkingandnolightsorLEDsilluminate,
thefusemayneedtobereplaced.
2 Replacethe10Afuseandscrewthetopbackontothe12Vsocket.
WARNING: ENSURE THE TOOL IS SWITCHED OFF AND
DISCONNECTED FROM THE POWER SUPPLY BEFORE
PERFORMING ANY OF THE FOLLOWING STEPS.

10. CleAning & MAinTenAnCe
DESCRIPTION OF SYMBOLS
SPARE PARTS
Cleaning
•KeeptheventilationventsoftheCompressorcleanatalltimes,if
possible,preventforeignmatterfromenteringthevents.
•Aftereachuse,blowairthroughtheCompressorhousingtoensure
itisfreefromalldustparticleswhichmaybuildup.Buildupofdust
particlesmaycausetheCompressortooverheatandfail.
•IftheenclosureoftheCompressorrequirescleaningdonotuse
solventsbutamoistsoftclothonly.Neverletanyliquidgetinsidethe
Compressor;neverimmerseanypartoftheCompressorintoaliquid.
Note:OzitoIndustrieswillnotberesponsibleforanydamageor
injuriescausedbytherepairoftheCompressorbyanunauthorised
personorbymishandlingoftheCompressor.
MAINTENANCE
WARNING: BEFORE CLEANING YOUR COMPRESSOR
OR CARRYING OUT ANY MAINTENANCE PROCEDURE,
ENSURE THE COMPRESSOR IS SWITCHED OFF AND
DISCONNECTED FROM THE POWER SUPPLY.
IMPORTANT: STORE THE COMPRESSOR ONLY IN A DRY
LOCATION WHICH IS NOT ACCESSIBLE TO UNAUTHORISED
PERSONS. ALWAYS STORE UPRIGHT, NEVER TILTED!
WARNING: WAIT UNTIL THE COMPRESSOR HAS
COMPLETELY COOLED DOWN TO PREVENT BURNS.
Warning
Read instruction manual
VVolts WWatts
dc Direct current mA Milliamperes
Indoor use only
Spare parts can be ordered from the Special Orders Desk
at your local Bunnings Warehouse or Homebase store.
For further information, or any parts visit
www.ozito-diy.co.uk or contact Ozito Customer Service:
Great Britain: 0151 294 4488
Ireland: 1850 882711
E-mail: enquires@ozito-diy.co.uk

This appliance is not intended for use by young or inrm persons unless
supervised by a responsible person to ensure that they can use the appliance
safely. Young children should be supervision to ensure that they do not play with
play with the appliance.
• Whenusingthecompressor,ensureyouareparkedinasafe,welllitlocation,off
theroadandwiththehandbrakeengaged.
• EnsureyourpersonalsafetyisnotatriskandneverusetheDigitalMini
Compressorwhilethecarisinmotion.
• Donotplacethehoseendagainstanypartofyourbodywhenturnedon,asthis
mayinfuseairintoyourbloodstreamputtingyourhealthatseriousrisk.
• DonotmakeanyalterationstothisCompressor.Onlyusetheadaptorssupplied
withthisproduct.
• Usethisproductonlyinaccordancewithoperationinstructionsincludedinthis
manual.
• Ifthevehiclefuseifblown,onlyreplacewithidenticalratedfuse.
• Inspecteachpartbeforeuse.Donotuseifbent,broken,melted,burntoriftheunit
appearstobedamaged.
• Checkthetyrepressurebeforeinating.Neverexceedthesuggestedpressureof
theitembeinginated.Ifsuggestedpressureisexceeded,theitembeinginated
mayburst.
• DonotbendorpinchtheairhosewhiletheCompressorisinuse.
• ItisnotsuggestedthattheCompressorworkcontinuouslyformorethan10
minutes.If10minutesofusehasbeenreached,turnitoffandletitcoolfor10
minutesbeforeusingagain.
• IftheCompressorismakingabnormalsoundsoritstemperatureifquitehigh,turn
offthepowerstraightawayandletitcoolforatleast10minutesbeforetryingagain.
ImproperusemayresultindamageoftheCompressor.
• Donotleaveunattendedandoperating.Keepoutofreachofchildren.
• PuttheCompressorinadryplaceifitisnotinuseforanextendedperiodoftime.
• KeeptheCompressorawayfromammableliquidorgas.Donotallowthe
Compressortobecomewet.
• Neverputtheconnectorandadaptorsintoyourmouth,earoreye.Theyarenot
toys.
AIR COMPRESSOR SAFETY WARNINGS
WARNING! Read all safety warnings and all instructions. Failuretofollowthe
warningsandinstructionsmayresultinelectricshock,reand/orseriousinjury.
Save all warnings and instructions for future reference. The term “power tool” in the
warnings refers to your mains-operated (corded) power tool or battery-operated (cordless)
power tool.
1. Work area safety
a. Keep work area clean and well lit.Clutteredordarkareasinviteaccidents.
b.
Do not operate power tools in explosive atmospheres, such as in the presence of ammable
liquids, gases or dust.Powertoolscreatesparkswhichmayignitethedustorfumes.
c. Keep children and bystanders away while operating a power tool.Distractionscancause
youtolosecontrol.
2. Electrical safety
a. Power tool plugs must match the outlet. Never modify the plug in any way.
Do not use any adapter plugs with earthed (grounded) power tools.Unmodiedplugsand
matchingoutletswillreduceriskofelectricshock.
b. Avoid body contact with earthed or grounded surfaces, such as pipes, radiators, ranges
and refrigerators. Thereisanincreasedriskofelectricshockifyourbodyisearthedor
grounded.
c. Do not expose power tools to rain or wet conditions.Waterenteringapowertoolwill
increasetheriskofelectricshock.
d. Do not abuse the cord. Never use the cord for carrying, pulling or unplugging the power
tool. Keep cord away from heat, oil, sharp edges or moving parts. Damaged or entangled
cordsincreasetheriskofelectricshock.
e. When operating a power tool outdoors, use an extension cord suitable for outdoor use.
Useofacordsuitableforoutdoorusereducestheriskofelectricshock.
f. If operating a power tool in a damp location is unavoidable, use a residual current device
(RCD) protected supply.UseofanRCDreducestheriskofelectricshock.
3. Personal safety
a. Stay alert, watch what you are doing and use common sense when operating a power
tool. Do not use a power tool while you are tired or under the inuence of drugs, alcohol
or medication.
Amomentofinattentionwhileoperatingpowertoolsmayresultinseriouspersonalinjury.
b. Use personal protective equipment. Always wear eye protection.Protectiveequipment
suchasdustmask,non-skidsafetyshoes,hardhat,orhearingprotectionusedforappropriate
conditionswillreducepersonalinjuries.
c. Prevent unintentional starting. Ensure the switch is in the off-position before connecting
to power source and/or battery pack, picking up or carrying the tool. Carryingpower
toolswithyourngerontheswitchorenergisingpowertoolsthathavetheswitchoninvites
accidents.
d. Remove any adjusting key or wrench before turning the power tool on.
Awrenchorakeyleftattachedtoarotatingpartofthepowertoolmayresultinpersonalinjury.
e. Do not overreach. Keep proper footing and balance at all times.Thisenablesbettercontrol
ofthepowertoolinunexpectedsituations.
f. Dress properly. Do not wear loose clothing or jewellery. Keep your hair, clothing and gloves
away from moving parts.Looseclothes,jewelleryorlonghaircanbecaughtinmovingparts.
g. If devices are provided for the connection of dust extraction and collection facilities,
ensure these are connected and properly used.Useofdustcollectioncanreducedust-
relatedhazards.
4. Power tool use and care
a. Do not force the power tool. Use the correct power tool for your application. The correct
powertoolwilldothejobbetterandsaferattherateforwhichitwasdesigned.
b. Do not use the power tool if the switch does not turn it on and off.Anypowertoolthat
cannotbecontrolledwiththeswitchisdangerousandmustberepaired.
c. Disconnect the plug from the power source and/or the battery pack from the power tool
before making any adjustments, changing accessories, or storing power tools. Such
preventivesafetymeasuresreducetheriskofstartingthepowertoolaccidentally.
d. Store idle power tools out of the reach of children and do not allow persons unfamiliar
with the power tool or these instructions to operate the power tool. Power tools are
dangerousinthehandsofuntrainedusers.
e. Maintain power tools. Check for misalignment or binding of moving parts, breakage of
parts and any other condition that may affect the power tool’s operation. If damaged,
have the power tool repaired before use.Manyaccidentsarecausedbypoorlymaintained
powertools.
f. Keep cutting tools sharp and clean.Properlymaintainedcuttingtoolswithsharpcutting
edgesarelesslikelytobindandareeasiertocontrol.
g. Use the power tool, accessories and tool bits etc. in accordance with these instructions,
taking into account the working conditions and the work to be performed. Use of the
powertoolforoperationsdifferentfromthoseintendedcouldresultinahazardoussituation.
5. Service
a. Have your power tool serviced by a qualied repair person using only identical
replacement parts. Thiswillensurethatthesafetyofthepowertoolismaintained.
GENERAL POWER TOOL SAFETY WARNINGS-PERSONAL SAFETY
ELECTRICAL SAFETY
WARNING! When using mains-powered tools, basic safety precautions, including the
following, should always be followed to reduce risk of re, electric shock, personal injury
and material damage.
Readthewholemanualcarefullyandmakesureyouknowhowtoswitchthetooloffinanemergency,before
operatingthetool.
Savetheseinstructionsandotherdocumentssuppliedwiththistoolforfuturereference.
Beforeyouconnecttheequipmenttothepowersupplymakesurethatthedataontheratingplateare
identicaltothemainsdata.
Ifthesupplycordisdamaged,itmustbereplacedbyanelectricianorapowertoolrepairerinordertoavoid
ahazard.
size 445 x 210 mm
Danger! - Read the operating instructions to re-
duce the risk of inquiry
The reprinting or reproduction by any other me-
ans, in whole or in part, of documentation and
papers accompanying products is permitted only
with the express consent of the iSC GmbH.
Subject to technical changes
DMC-1000U
GB Additonal operating & safety instructions Digital Mini Compressor
Service information
We have competent service partners in all countries named on the guarantee certicate whose contact
details can also be found on the guarantee certicate. These partners will help you with all service re-
quests such as repairs, spare and wearing part orders or the purchase of consumables.
Please note that the following parts of this product are subject to normal or natural wear and that the
following parts are therefore also required for use as consumables.
Category Example
Wear parts* Adaptors
Consumables*
Missing parts
* Not necessarily included in the scope of delivery!
In the eect of defects or faults, please register the problem on the internet at www.isc-gmbh.info. Plea-
se ensure that you provide a precise description of the problem and answer the following questions in all
cases:
• Did the equipment work at all or was it defective from the beginning?
• Did you notice anything (symptom or defect) prior to the failure?
• What malfunction does the equipment have in your opinion (main symptom)?
Describe this malfunction.
Mayr/Product-ManagementWeichselgartner/General-Manager
- 135 -
explains the following conformity according to EU directives and norms for
the following product
Digital Mini Compressor DMC-1000U (Ozito)
2014/29/EU
2005/32/EC_2009/125/EC
2014/35/EU
X2006/28/EC
2014/30/EU
2014/32/EU
2014/53/EC
2014/68/EU
90/396/EC_2009/142/EC
89/686/EC_96/58/EC
X2011/65/EU
2006/42/EC
Annex IV
Noti ed Body:
Noti ed Body No.:
Reg. No.:
2000/14/EC_2005/88/EC
Annex V
Annex VI
Noise: measured LWA = dB (A); guaranteed LWA = dB (A)
P = KW; L/Ø = cm
Noti ed Body:
2012/46/EU
Emission No.:
Standard references:
Landau/Isar, den 22.07.2016
First CE: 16 Archive-File/Record: NAPR014334
Art.-No.: 44.722.51 I.-No.: 11016 Documents registrar: Robert Gehard
Subject to change without notice Wiesenweg 22, D-94405 Landau/Isar
ISC GmbH · Eschenstraße 6 · D-94405 Landau/Isar
Declaration of conrmity

size 445 x 210 mm
Items supplied
Please check that the article is complete as
specied in the scope of delivery. If parts are
missing, please contact our service center or the
sales outlet where you made your purchase at
the latest within 5 working days after purchasing
the product and upon presentation of a valid bill
of purchase. Also, refer to the warranty table in
the service information at the end of the operating
instructions.
• Open the packaging and take out the equip-
ment with care.
• Remove the packaging material and any
packaging and/or transportation braces (if
available).
• Check to see if all items are supplied.
• Inspect the equipment and accessories for
transport damage.
• If possible, please keep the packaging until
the end of the guarantee period.
Danger!
The equipment and packaging material are
not toys. Do not let children play with plastic
bags, foils or small parts. There is a danger of
swallowing or suocating!
Proper use
The equipment is designed for inating car,
motorcycle and bicycle tires as well as balls and
small air mattresses.
The equipment is to be used only for its prescri-
bed purpose. Any other use is deemed to be a
case of misuse. The user / operator and not the
manufacturer will be liable for any damage or inju-
ries of any kind caused as a result of this.
Please note that our equipment has not been de-
signed for use in commercial, trade or industrial
applications. Our warranty will be voided if the
machine is used in commercial, trade or industrial
businesses or for equivalent purposes.
Technical data
Power Supply:..........................................12V DC
Max. Pressure:..........................................100 psi
Length of connection cable:...............approx. 3 m
Length of air hose: ........................approx. 0.68 m
Flow rate: .................................................16 l/min
Max. current:............................................ 10 Amp
Operating time: ....................................................
.............max. 10 minutes at cycle from 0 to 30 psi
For EU countries only
Never place any electric power tools in your
household refuse.
To comply with European Directive 2012/19/EC
concerning old electric and electronic equipment
and its implementation in national laws, old elec-
tric power tools have to be separated from other
waste and disposed of in an environment-friendly
fashion, e.g. by taking to a recycling depot.
Recycling alternative to the return request:
As an alternative to returning the equipment to
the manufacturer, the owner of the electrical
equipment must make sure that the equipment
is properly disposed of if he no longer wants to
keep the equipment.The old equipment can be
returned to a suitable collection point that will
dispose of the equipment in accordance with the
national recycling and waste disposal regulations.
This does not apply to any accessories or aids
without electrical components supplied with the
old equipment.
Table of contents
Other Ozito Air Compressor manuals

Ozito
Ozito ACP-4025 User manual

Ozito
Ozito SAC-2110 User manual

Ozito
Ozito ACK-0015 User manual

Ozito
Ozito ACP-24151 User manual

Ozito
Ozito ACK-1100 User manual

Ozito
Ozito ACP-2419 User manual

Ozito
Ozito ACP-2420 User manual

Ozito
Ozito AMC-3000 User manual

Ozito
Ozito 40L 2.5HP User manual

Ozito
Ozito OTAC-1570 User manual