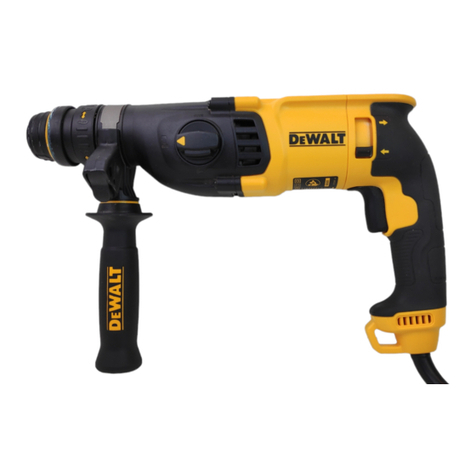
P.I.T. PBH26-C5 User manual


Electric Hammer Drill
1

Electric Hammer Drill
2

Electric Hammer Drill
3
English
Safety Notes
General Power Tool Safety Warnings
WARNING Read all safety warnings
and all instructions.
Failure to follow the warnings and instructions
may result in electric shock, re and/or seri-
ous injury.
Save all warnings and instructions for future
reference.
The term “power tool” in the warnings refers
to your mains-operated(corded) power tool or
battery-operated (cordless) power tool.
Work area safety
►Keep work area clean and well lit. Clut-
tered or dark areas invite accidents.
►Do not operate power tools in explosive
atmospheres, such as in the presence
of flammable liquids, gases or dust.
Power tools create sparks which may ig-
nite the dust or fumes.
►Keep children and bystanders away
while operating a power tool.Distractions
can cause you to lose control.
Electrical safety
►Power tool plugs must match the out-
let. Never modify the plug in any way.
Do not use any adapter plugs with earthed
(grounded) power tools. Unmodied plugs
and matching outlets will reduce risk of
electric shock.
►Avoid body contact with earthed or
grounded surfaces, such as pipes, radi-
ators, ranges and refrigerators. There is
an increased risk of electric shock if your
body is earthed or grounded.
►Do not expose power tools to rain or
wet conditions. Water entering a power
tool will increase the risk of electric shock.
►Do not abuse the cord. Never use the
cord for carrying, pulling or unplugging
the power tool. Keep cord away from
heat, oil, sharp edges or moving parts.
Damaged or entangled cords increase the
risk of electric shock.
►When operating a power tool outdoors,
use an extension cord suitable for
outdoor use. Use of a cord suitable for
outdoor use reduces the risk of electric
shock..
►If operating a power tool in a damp
location is unavoidable, use a residual
current device (RCD) protected supply.
Use of an RCD reduces the risk of electric
shock.
Personal safety
►Stay alert, watch what you are doing
and use common sense when operat-
ing a power tool. Do not use a power tool
while you are tired or under the inuence
of drugs, alcohol or medication. A moment
of inattention while operating power tools
may result in serious personal injury.
►Use personal protective equipment.
Always wear eye protection. Protective
equipment such as dust mask, non-skid
safety shoes, hard hat, or hearing protec-
tion used for appropriate conditions will
reduce personal injuries.
►Prevent unintentional starting. Ensure
connecting to power source and/or
battery pack, picking up or carrying the
tool. Carrying power tools with your nger
on the switch or energizing power tools
that have the switch on invites accidents.
►Remove any adjusting key or wrench
before turning the power tool on. A
wrench or a key left attached to a rotating
part of the power tool may result in person-
al injury.
►Do not overreach. Keep proper footing
and balance at all times. This enables
better control of the power tool in unex-
pected situations.
►Dress properly.Do not wear loose cloth-
ing or jewellery. Keep your hair, clothing
and gloves away from moving parts.Loose
clothes, jewellery or long hair can be
caught in moving parts.
►If devices are provided for the connec-
tion of dust extraction and collection
facilities, ensure these are connected
and properly used. Use of dust collection
can reduce dust related hazards.
►A good knowledge of power tools re-
sulting from frequent use should not
lead to overconfidence and neglect of
power tool safety. One careless action in
a split second can result in serious injury.
►ATTENTION! If an interruption occurs in
the operation of the power tool due to a
complete or partial loss of power or dam-
age to the power control circuit, set the
switch to the O position, making sure it is
not locked (if equipped). Unplug the mains
plug or disconnect the removable battery.
This prevents an uncontrolled restart.

Electric Hammer Drill
4
Power tool use and care
►Do not force the power tool. Use the
correct power tool for your application.
The correct power tool will do the job bet-
ter and safer at the rate for which it was
designed.
►Do not use the power tool if the switch
Any power tool
that cannot be controlled with the switch is
dangerous and must be repaired.
►Disconnect the plug from the power
source and/or the battery pack from the
power tool before making any adjust-
ments, changing accessories, or stor-
ing power tools. Such preventive safety
measures reduce the risk of starting the
power tool accidentally.
►Store idle power tools out of the reach
of children and do not allow persons
unfamiliar with the power tool or these
instructions to operate the power tool.
Power tools are dangerous in the hands of
untrained users.
►Maintain power tools. Check for mis-
alignment or binding of moving parts,
breakage of parts and any other condi-
-
eration. If damaged, have the power tool
repaired before use. Many accidents are
caused by poorly maintained power tools.
►Keep cutting tools sharp and clean.
Properly maintained cutting tools with
sharp cutting edges are less likely to bind
and are easier to control.
►Keep handles and gripping surfaces
dry and clean and free of oil or grease.
Slippery handles and gripping surfaces im-
pede safe handling of the tool and prevent
reliable control in unexpected situations.
►The appliance is not intended for use
by persons (including children) with
reduced physical, sensory or mental
capabilities or lack of experience or
knowledge, unless they are supervised
or instructed to use the appliance by a
person responsible for their safety.
►Use the power tool, accessories and
tool bits etc. in accordance with these
instructions, taking into account the
working conditions and the work to
be per-formed. Use of the power tool for
operations different from those intended
could result in a hazardous situation.
Hammer safety arnings
►Wear ear protectors. Exposure to noise
can cause hearing loss.
►Use auxiliary handle(s), if supplied with
the tool. Loss of control can cause per-
sonal injury.
►Hold power tool by insulated gripping
surfaces, when performing an opera-
tion where the cutting accessory may
contact hidden wiring or its own cord.
Cutting accessory contacting a “live” wire
may make exposed metal parts of the
power tool “live” and could give the opera-
tor an electric shock.
►Use suitable detectors to determine if
utility lines are hidden in the work area
or call the local utility company for as-
sistance. Contact with electric lines can
lead to re and electric shock. Damaging a
gas line can lead to explosion. Penetrating
a water line causes property damage or
may cause an electric shock.
►When working with the machine, always
-
vide for a secure stance. The power tool
is guided more secure with both hands.
►Secure the workpiece. A workpiece
clamped with clamping devices or in a vice
is held more secure than by hand.
►Always wait until the machine has
come to a complete stop before placing
it down. The tool insert can jam and lead
to loss of control over the power tool.
►Make sure the accessory can rotate
freely before turning on the power tool.
When turning on the power tool with a
jammed working tool, large reaction mo-
ments occur.
►-
ry is jammed. Eliminate the cause of the
attachment jam.
►Installing the SDS-plus working tool:
Check the xation by trying to pull out the
working tool
►For drilling without hammering in
wood, metal, ceramics and plastics, as
well as for screwdriving, use tools with-
out SDS-plus (for example drills with a
cylindrical shank). These tools require a
keyless chuck or toothed chuck.
►If the dust cap is damaged, it must be
replaced immediately. The dust cap pre-
vents dust generated during drilling from
entering the chuck. When installing the ac-
cessory, be careful not to damage the dust
cap.
Dust from materials such as lead paints,
certain types of wood, minerals and
Electric Hammer Drill
5
metals,can harm your health and cause
allergic reactions, respiratory problems
pathways and/or cancer. Have asbes-
tos-containing material handled only by
specialists.
- If possible, use a vacuum cleaner suitable
for the material.
- Ventilate the workplace well.
- It is recommended to use a respiratory
mask with a class P2 filter. Observe the
regulations valid in your country for the
materials to be processed.
Avoid accumulation of dust in the work-
place. Dust can be easily ignited.
To save energy, switch on the power tool
only when you are about to use it.
Product description and specifi-
cations
Read all safety warnings and all in-
structions.
Failure to follow the warnings and instructions
may result in electric shock, re and/or seri-
ous injury.
Intended se
The machine is intended for hammer drilling
in concrete, brick and stone. It is also suitable
for drilling without impact in wood(PBH24-C1),
metal, ceramic and plastic. Machines with
electronic control and right/left rotation are
also suitable for screwdriving.
Product features
The numbering of the product features refers
to the illustration of the machine on the graph-
ics page.
1. Chuck SDS-plus
2. Equipment (drill)
3. Dust protection cap
4. Locking sleeve
5. Rotational direction switch
6. Lock-on button for On/O switch
7. On/O switch
8. Mode switch
9. Mode switch lock
10. Depth stop lock
11. Depth stop
12. Auxiliary handle (insulated gripping sur-
face)
13. Handle (insulated gripping surface)
Technical parameter
Model PBH26-C5
Rated voltage 220 V~/50 Hz
Rated output power 1000 W
Rated speed 0-1300 r/min
Impact frequency 0-5300 ipm
Drilling diameter 26 mm (1”)
Impact force 3.2 J
Weight 4.6 kg
Contents of delivery
Electric hammer drill 1 pc
Cement drill 3 pcs
Auxiliary handle 1 pc
Depth delimiter 1 pc
Flat chisel 1 pc
Instruction manual 1 pc
Note
Technical errors and typographical errors
may be made in the text and numerical
designations of the instructions.
Since the product is constantly being
improved, P.I.T. reserves the right to make
changes to the specifications and product
specifications specified here without prior
notice.
Assembly
►Before any work on the machine itself,
pull the mains plug.
Auxiliary Handle
►Operate your machine only with the
auxiliary handle.
Changing the position of the auxiliary han-
The auxiliary handle can be set to any posi-
tion for a secure and low-fatigue working pos-
ture.
- Turn the bottom part of the auxiliary handle
a counterclockwise direction and swivel
the auxiliary handle to the desired position.
Then retighten the bottom part of the aux-
iliary handle by turning in clockwise direc-
tion. Pay attention that the clamping band
of the auxiliary handle is positioned in the
groove on the housing as intended for.
The required drilling depth can be set with the
depth stop.
- Lossen the bolt for the depth stop adjust-
ment and insert the depth stop into the
auxiliary handle. The knurled surface of
the depth stop must face downward.
- Insert the SDS-plus drilling tool to the stop
into the SDS-plus tool holder. Otherwise,
the movability of the SDSplus drilling tool
can lead to incorrect adjustment of the
drilling depth.
- Pull out the depth stop until the distance
between the tip of the drill bit and the tip

Electric Hammer Drill
6
(chromate, wood preservative). Materials
containing asbestos may only be worked by
specialists.
- As far as possible, use a dust extraction
system suitable for the material.
- Provide for good ventilation of the working
place.
- It is recommended to wear a P2 lter-class
respirator.
Observe the relevant regulations in your
country for the materials to be worked.
►Prevent dust accumulation at the work-
place. Dust can easily ignite.
Operation
Starting Operation
►Observe correct mains voltage! The
voltage of the power source must agree
-
plate of the machine.
►To change the operating mode, press the
lock button and turn the mode switch to the
desired position, in which it audibly locks.
Hammer drilling position in con-
crete or natural stone
Position for chiselling
Position for drilling without impact
in wood, metal, ceramic and plastic
as well as for screwdriving
Vario-Lock position for adjustment
of the chiselling position The mode
selector switch does not latch in this
position.
Reversing the rotational direction
The rotational direction switch is used to re-
verse the rotational direction of the machine.
However, this is not possible with the On/O
switch actuated.
To start the machine, press the On/O switch.
To lock the On/O switch, keep it pressed and
additionally push the lock-on button.
To switch off the machine, release the On/
O switch. When the On/O switch is locked,
press it rst and then release it.
Setting the Speed/Impact Rate
The speed/impact rate of the switched on
power tool can be variably adjusted, depend-
ing on how far the On/O switch is pressed.
Light pressure on the On/O switch results in
of the depth stop corresponds with the de-
sired drilling depth.
- Then tighten the bolt for the depth stop ad-
justment to x he depth stop.
Selecting Drill Chucks and Tools
For hammer drilling and chiselling, SDS-plus
tools are required that are inserted in the
SDS-plus drill chuck.
For drilling without impact in wood, metal, ce-
ramic and plastic as well as for screwdriving,
tools without SDS-plus are used (e.g., drill
bits with cylindrical shank). For these tools,
a keyless chuck or a key-type drill chuck are
required.
Changing the Tool
The dust protection cap largely prevents the
entry of drilling dust into the tool holder during
operation. When inserting the tool, take care
that the dust protection cap is not damaged.
►A damaged dust protection cap should
be changed immediately. We recommend
having this carried out by an after-sales
service.
These tools require a keyless or toothed
chuck with an SDS-plus adapter.
-
ure C)
The SDS-plus drill chuck allows for simple
and convenient changing of drilling tools with-
out the use of additional tools.
- Clean and lightly grease the shank end of
the tool.
- Insert the tool in a twisting manner into the
tool holder until it latches itself.
- Check the latching by pulling the tool.
As a requirement of the system, the SDS-plus
drilling tool can move freely. This causes a
certain radial run-out at no-load,
which has no eect on the accuracy of the drill
hole, as the drill bit centres itself upon drilling.
-
ure D)
- Push back the locking sleeve and remove
the tool.
Dust Extraction with the Dust Extraction
Attachment
►Dust from materials such as lead-con-
taining coatings, some wood types,
minerals and metal can be harmful to
Touching or breathing-in the
dust can cause allergic reactions and/or
lead to respiratory infections of the user or
bystanders.
Certain dust, such as oak or beech dust,
is considered carcinogenic, especially in
connection with wood-treatment additives

Electric Hammer Drill
7
low speed/impact rate. Further pressure on
the switch increases the speed/impact rate.
Overload lutch
►If the tool insert becomes caught or
jammed, the drive to the drill spindle is
interrupted. Because of the forces that
occur, always hold the power tool firmly
with both hands and provide for a secure
stance.
►If the power tool jams, switch the ma-
chine off and loosen the tool insert.
When switching the machine on with the
drilling tool jammed, high reaction torques
can occur.
Working Advice
►Before any work on the machine itself,
pull the mains plug.
Changing the Chiselling Position (Vario-Lock)
- Changing the Chiselling Position (Vario-
Lock)
- The chisel can be locked in diiferent posi-
tions. In this manner, the optimum working
position can be set for each application.
- Insert the chisel into the tool holder.
- Turn the mode selector switch to the
“Vario-Lock” position.
- Turn the tool holder to the desired chisel-
ling position.
- Turn the mode selector switch to the “chis-
elling” position. The tool holder is now
locked.
- For chiselling, set the rotation direction to
right rotation.
Maintenance and service
Maintenance and cleaning
Before any manipulation with the power
tool, remove plug from the socket.
To ensure quality and safe operation, keep
the power tool and ventilation slots clean.
If it is necessary to change the cord to
avoid a hazard, contact P.I.T. or an autho-
rized P.I.T. Service Repair of your power
tool
Have it carried out only by qualied personnel
and only with original spare parts. This en-
sures the safety of the power tool.
A list of authorized service centers can be
found on the official website of P.I.T. link:
https://pittools.ru/services/
Storage and transportation
Store the tool in closed rooms with natural
ventilation in the package at air temperature
from 0°C to +50°C and air humidity not more
than 80%. Products can be transported by
any type of closed transport in the manufac-
turer’s packaging or without it, while preserv-
ing the product from mechanical damage and
precipitation. Remove the accessory from the
tool before transport.
Dispose of waste
Damaged power tools, batteries, ac-
cessories and waste packaging mate-
rials must be recycled and reused in
an environmentally friendly manner.
Do not throw power tools and accumulators /
batteries into general household waste!
Product serial number interpreta-
tion serial number
The date of manufacture of the product is
encoded in the serial number printed on the
body of the tool. The rst 2 digits indicate the
year of issue, the next 2 digits indicate the
month.
TERMS OF WARRANTY SERVICE
To customers (users) of warranty service:
1. This warranty certificate is the only docu-
ment that conrms your right to free warranty
service. If this proof is not presented, no
claims will be accepted. Warranty certi cates
cannot be recovered if lost or damaged.
2. It is required to provide a valid and legal
document for purchasing the product. The
document must have the name or seal of the
sales company; at the same time, state the
full model name of the purchased P.I.T. prod-
uct, the serial number on the nameplate of the
fuselage, and the date of purchase, and the
required warranty. The whole machine and its
accessories.
The warranty period:
1. The warranty period of the product is
12months from the date of sale. During the
warranty period, the service department
will eliminate manufacturing defects free of
charge and replace the parts that fail due to
the manufacturer’s fault. In warranty repair, an
equivalent operable product is not provided.
Replaceable parts become the property of the
service provider.
2. The wear degree on the diameter of the
motor rotor commutator is less than 0.4 mm
(except for brushless motor tools), and the
internal damage caused by the quality of the
tool belongs to the warranty.

Electric Hammer Drill
8
The following situations occur during the
warranty period, which is not covered by the
warranty:
1. In the absence of any valid legal documents
(invoices) such as warranty certicates
and warranty cards to prove the date of
purchase.
2.Damage caused by natural wear and
overload. (For example, motor rotor and stator
failure caused by overload, scorching or
melting of the primary winding of the welding
machine transformer, charging or starting the
charging device, melting of internal parts,
burning of electronic circuit boards, etc.)
3.The casing and power cord are
mechanically damaged, as well as damage
caused by corrosive media and high and low
temperature, foreign objects entering the
ventilation network of the motor, and damage
caused by improper storage (corrosion of
metal parts);
4. Damage caused by improper carrying,
transportation and storage by users.
5. Products that are opened, repaired,
replaced or modied by users themselves.
6. Any damage caused by indiscriminate use,
beyond the scope of use of the tool, and
not in accordance with the instructions for
use and maintenance. (see chapter “Safety
Precautions” in the manual);
7. The damage caused by the following
situations is not guaranteed due to improper
use
and non-quality problems:
(1) When the power tool is running at high
speed, use the braking device to forcibly stop
the rotation.
(2) Excessive pressure is applied to the tool
during the use of the tool.
(3) Use the tool outside the scope of its
purpose and capabilities.
(4) Damage caused by the tool working in
a dusty environment for a long time without
timely maintenance of the tool.
(5) Change the rotation direction of the work
head before the tool stops completely.
(6) Shock the battery or charger and replace
the plug of the charger without permission,
causing damage to the battery or charger.
(7) Damage caused by two-stroke gasoline
tools not being fueled in the correct
proportions.
The warranty does not include:
1. Replacement of accessories (accessories
and components) such as batteries, discs,
blades, drills, drills, chucks, chains, sprockets,
collet clamps, guide rails, tension and
fastening elements, dresser heads, grinders
And belt sander base machine, hexagonal
head, etc.;
2. Wearing parts, such as: carbon brushes,
transmission belts, seals, protective covers,
guide rollers, guide rails, rubber seals,
bearings, toothed belts and wheels, shanks,
brake belts, starter ratchets and ropes, piston
rings Wait.
The above accessories are replaced with paid
services during the warranty period;

Перфоратор
9
-
-
Несоблюдение указаний и инструкций по
технике безопасности может стать причи-
ной поражения электрическим током, пожа-
ра и тяжелых травм.
Использованное в настоящих инструкциях
и указаниях понятие «электроинструмент»
распространяется на электроинструмент с
питанием от сети (с сетевым шнуром) и на
аккумуляторный электроинструмент (без
сетевого шнура).
►
Беспорядок или
неосвещенные участки рабочего места
могут привести к несчастным случаям.
►-
-
Электроинструменты искрят,
что может привести к воспламенению
пыли или паров.
►-
-
-
Отвлекшись, Вы можете
потерять контроль над электроинстру-
ментом.
►-
-
-
Неизмененные
штепсельные вилки и подходящие
штепсельные розетки снижают риск по-
ражения электротоком.
►
-
При заземлении Вашего тела повы-
шается риск поражения электротоком.
►
Проникновение воды
в электроинструмент повышает риск по-
ражения электротоком.
►
-
-
-
Поврежденный или
спутанный шнур повышает риск пораже-
ния электротоком.
►
-
Применение пригодного для
работы под открытым небом кабеля
удлинителя снижает риск поражения
электротоком.
►-
-
Применение устройства
защитного отключения снижает риск
электрического поражения.
►
-
-
-
Один момент невнимательно-
сти при работе с электроинструментом
может привести к серьезным травмам.
►-
Использование средств индивидуальной
защиты, как то: защитной маски, обуви
на нескользящей подошве, защитного
шлема или средств защиты органов
слуха, – в зависимости от вида работы
с электроинструментом снижает риск
получения травм.
►
-
-

Перфоратор
10
Удержание пальца на выключателе при-
транспортировке и подключение к сети
питания включенного электроинстру-
мента чревато несчастными случаями.
►
Инструмент или
ключ, находящийся во вращающейся
части электроинструмента, может при-
вести к травмам.
►-
-
-
Благодаря этому Вы
можете лучше контролировать электро-
инструмент в неожиданных ситуациях.
►-
-
Широкая одежда, украшения или
длинные волосы могут быть затянуты
вращающимися частями.
►
-
.
Применение пылеотсоса может снизить
опасность, создаваемую пылью.
►-
-
-
-
Одно
небрежное действие за долю секунды
может привести к серьезным травмам.
►В случае возникновения
перебоя в работе электроинструмента
вследствие полного или частичного
прекращения энергоснабжения или
повреждения цепи управления энерго-
снабжением установите выключатель
в положение Выкл., убедившись, что
он не заблокирован (при его наличии).
Отключите сетевую вилку от розетки
или отсоедините съёмный аккумулятор.
Этим предотвращается неконтролируе-
мый повторный запуск.
-
►
-
С подходящим электро-
инструментом Вы работаете лучше и
надежнее в указанном диапазоне мощ-
ности.
►
Элек-
троинструмент, который не поддается
включению или выключению, опасен и
должен быть отремонтирован.
►-
-
-
Эта
мера предосторожности предотвращает
непреднамеренное включение электро-
инструмента.
►-
-
-
-
Электроинструменты опасны
в руках неопытных лиц.
►-
-
-
-
Плохое обслуживание электроинстру-
ментов является причиной большого
числа несчастных случаев.
►-
Забот-
ливо ухоженные режущие инструменты
с острыми режущими кромками реже
заклиниваются и их легче вести.
►-
Скользкие ручки и поверхности захвата
препятствуют безопасному обращению
с инструментом и не дают надежно
контролировать его в непредвиденных
ситуациях.
►-
-
-

Перфоратор
11
►-
Использование электроинстру-
ментов для непредусмотренных работ
может привести к опасным ситуациям.
-
►-
Воздействие шума может
привести к потере слуха.
►-
Потеря контроля
может привести к телесным поврежде-
ниям.
►
-
-
-
Контакт с находящейся
под напряжением проводкой может
заряжать металлические части электро-
инструмента и приводить к удару элек-
трическим током.
►
-
-
Контакт с электропроводкой может
привести к пожару и поражению элек-
тротоком.Повреждение газопровода
может привести к взрыву.Повреждение
водопровода ведет к нанесению мате-
риального ущерба или может вызвать
поражение электротоком.
►
-
-
Двумя руками Вы работаете
более надежно с электроинструментом.
►Заготовка,
установленная в зажимное приспосо-
бление или в тиски, удерживается более
надежно, чем в Вашей руке.
►-
Рабочий ин-
струмент может заесть, и это может
привести к потере контроля над элек-
троинструментом.
►-
-
При включении электроин-
струмента с заклинившим рабочим
инструментом возникают большие реак-
ционные моменты.
►-
-
Устраните причину заклинивания
рабочего инструмента.
►
SDS-plus: Проверьте фиксацию попыт-
кой вытянуть рабочий инструмент
►-
-
-
-
Для этих ин-
струментов требуется быстрозажимной
патрон или патрон с зубчатым венцом.
►-
-
Колпачок для защиты
от пыли предотвращает проникновение
образующейся при сверлении пыли в
патрон. При установке рабочего инстру-
мента следите за тем, чтобы не повре-
дить колпачок для защиты от пыли.
►
-
-
Поручайте обработку содержащего
асбест материала только специалистам.
- По возможности используйте пригодный
для материала пылесос.
- Хорошо проветривайте рабочее место.
- Рекомендуется пользоваться респира-
торной маской с фильтром класса Р2.
Соблюдайте действующие в Вашей
стране предписания для обрабатывае-
мых материалов.
►-
Пыль может легко воспла-
меняться.
►
-
-

Перфоратор
12
-
Упущения в отношении указаний и инструк-
ций по технике безопасности могут стать
причиной поражения электрическим током,
пожара и тяжелых травм.
Пожалуйста, откройте раскладную страни-
цу с иллюстрациями электроинструмента и
оставляйте ее открытой, пока Вы изучаете
руководство по эксплуатации.
Электроинструмент предназначен для
ударного и безударного сверления отвер-
стий в бетоне, кирпичах и природном кам-
не, а также для долбежных работ.
Нумерация представленных компонентов
выполнена по изображению на странице с
иллюстрациями.
1.Патрон SDS-plus
2.Оснастка (бур)
3.Колпачок для защиты от пыли
4.Фиксирующая гильза
5.Переключатель направления вращения
6.Кнопка фиксирования выключателя
7.Выключатель
8.Переключатель режимов
9.Фиксатор переключателя режимов
10.Фиксатор ограничителя глубины
11.Ограничитель глубины
12.Дополнительная рукоятка (с изолиро-
ванной поверхностью)
13.Рукоятка (с изолированной поверхно-
стью)
PBH26-C5
Номинальные напряже-
ние/частота 220 В / 50 Гц
Номинальная мощность 1000 Вт
Частота вращения 0-1300 об/мин
Частота удара 0-5300 уд/мин
Макс. диаметр бурения
(бетон) 26 мм (1")
Сила удара 3,2 дж
Вес 4,6 кг
Перфоратор 1 шт
Буры 3 шт
Дополнительная рукоятка 1 шт
Ограничитель глубины сверления 1 шт
Плоское долото 1 шт
Инструкция пользователя 1 шт
В тексте и цифровых обозначениях ин-
струкции могут быть допущены техниче-
ские ошибки и опечатки.
Так как изделие постоянно совершенству-
ется, P.I.T. оставляет за собой право на
внесение изменений в указанные здесь
технические характеристики и комплекта-
цию изделия без предварительного уве-
домления.
►
►
Дополнительную рукоятку можно повер-
нуть в любое положение, чтобы обеспечить
возможность безопасной и не утомляющей
работы с инструментом.
- Поверните нижнюю часть ручки допол-
нительной рукоятки против часовой
стрелки и поставьте дополнительную
рукоятку в желаемое положение. После
этого поверните нижнюю часть ручки
дополнительной рукоятки в направле-
нии по часовой стрелке.Следите за тем,
чтобы стягивающая лента дополнитель-
ной рукоятки находилась в предусмо-
тренном пазу корпуса.
С помощью ограничителя глубины можно
установить желаемую глубину сверления.
- Нажмите на кнопку фиксации ограничи-
теля глубины и вставьте ограничитель
в дополнительную рукоятку.Рифление
на ограничителе глубины должно быть
обращено наверх.
- Вставьте рабочий инструмент SDS-plus
до упора в патрон SDS-plus. Смещение
инструмента SDS-plus может привести к
неправильной установке глубины свер-
ления.
- Вытяните ограничитель глубины так,
чтобы расстояние от вершины сверла
до конца ограничителя глубины соответ-
ствовало желаемой глубине сверления.
Для ударного сверления и долбления тре-

Перфоратор
13
предписания для обрабатываемых матери-
алов.
►-
-
С помощью переключателя «Сверление/
Ударное сверление» выберите режим ра-
боты электроинструмента.
Для смены режима работы нажмите
кнопку фиксирования и поверните пере-
ключатель режимов в желаемое поло-
жение, в котором он слышимо фиксиру-
ется.
Положение для ударного сверле-
ния в бетоне или природном кам-
не
Положение для Долбления
Положение
в древесине, металле,керамике и
синтетических материалах, и также
для закручивания/выкручивания
винтов
Положение Vario-Lock для изме-
нения положения зубила В этом
положении переключатель режи-
мов не фиксируется.
-
Переключателем направления вращения
можно изменять направление вращения
патрона. При вжатом выключателе это, од-
нако, невозможно.
- Для включения электроинструмента на-
жмите на выключатель.
- Для фиксирования выключателя при-
держите его нажатым и дополнительно
нажмите кнопку фиксирования.
- Для выключения электроинструмента
отпустите выключатель. При задейство-
ванном фиксаторе сначала нажмите на
выключатель 9 и потом отпустите его.
Вы можете плавно регулировать число
оборотов и ударов включенного электроин-
буются инструменты SDS-plus, которые
крепят в патроне SDS-plus.
Для сверления без удара в древесине,
металле, керамике и синтетическом мате-
риале, а также для заворачивания приме-
няют инструменты без SDS-plus (например,
сверла с цилиндрическим хвостовиком).
Для этих инструментов требуется быстро-
зажимной патрон или патрон с зубчатым
венцом с переходником на SDS-plus.
С помощью патрона SDS-plus Вы можете
просто и удобно сменить рабочий инстру-
мент без применения дополнительного
инструмента.
- Очистите и слегка смажьте вставляе-
мый конец рабочего инструмента.
- Поворачивая, вставьте рабочий инстру-
мент в патрон до автоматического фик-
сирования.
- Проверьте фиксацию попыткой вытя-
нуть рабочий инструмент.
Рабочий инструмент SDS-plus имеет
свободу движения,которая обусловлена
системой. В результате этого на холостом
ходу возникает радиальное биение. Это не
имеет влияния на точность сверления, так
как сверло центрируется автоматически.
- Сдвиньте фиксирующую гильзу назад и
выньте рабочий инструмент из патрона.
► Пыль некоторых материалов, как напр.,
красок с содержанием свинца, неко-
торых сортов древесины,минералов
и металлов, может быть вредной для
здоровья. Прикосновение к пыли и
попадание пыли в дыхательные пути
может вызвать аллергические реакции
и/или заболевания дыхательных путей
оператора или находящегося вблизи
персонала.
Определенные виды пыли, напр., дуба
и бука, считаются канцерогенными,
особенно совместно с присадками для
обработки древесины (хромат, средство
для защиты древесины). Материал с
содержанием асбеста разрешается об-
рабатывать только специалистам.
- По возможности используйте пригодный
для материала пылеотсос.
- Хорошо проветривайте рабочее место.
- Рекомендуется пользоваться респира-
торной маской с фильтром класса Р2.
Соблюдайте действующие в Вашей стране

Перфоратор
14
струмента, сильнее или слабее нажимая
на выключатель.
Легким нажатием на выключатель инстру-
мент включается на низкое число оборотов
и низкое число ударов. С увеличением
силы нажатия число оборотов и ударов
увеличивается.
►-
-
-
►
-
-
-
►
Lock)
Вы можете зафиксировать зубило в поло-
жениях. Благодаря этому Вы можете занять
соответственно оптимальное положение.
- Вставьте зубило в патрон.
- Поверните переключатель режимов в
положение «Vario-Lock»
- Поверните патрон в желаемое положе-
ние зубила.
- Поверните переключатель режимов в
положение «Долбление». Этим фикси-
руется посадочное гнездо.
- Для долбления устанавливайте правое
направление вращения.
-
Если требуется поменять шнур во избежа-
ние опасности обращайтесь на фирму P.I.T
или в авторизованную сервисную мастер-
скую для электроинструментов P.I.T.
Ремонт Вашего электроинструмента
поручайте только квалифицированно-
му персоналу и только с применением
оригинальных запасных частей. Этим
обеспечивается безопасность электро-
инструмента.
Список авторизованных сервисных центров
можно посмотреть на официальном сайте
P.I.T. по ссылке: https://pittools.ru/servises/
Храните инструмент в закрытых помещени-
ях с естественной вентиляцией в упаковке
при температуре воздуха от 0°С до +50°С
и влажности воздуха не более 80%. Транс-
портировать продукцию можно любым
видом закрытого транспорта в упаковке
производителя или без нее с сохранением
изделия от механических повреждений и
атмосферных осадков. Перед транспорти-
ровкой извлеките оснастку из инструмента.
Отслужившие свой срок электроин-
струменты, принадлежности и упа-
ковку следует сдавать на экологи-
чески чистую переработку отходов.
Утилизируйте электроинструмент отдельно
-
Дата изготовления изделия зашифрована в
серийном номере, напечатанном на корпу-
се инструмента. Первые 2 цифры обозна-
чают год выпуска, следующие 2 цифры –
месяц.
-
1.Настоящее гарантийное свидетельство
является единственным документом, под-
тверждающим ваше право на бесплатное
гарантийное обслуживание. Без предъяв-
ления данного свидетельства претензии
не принимаются. В случае утери или порчи
гарантийное свидетельство не восстанав-
ливается.
2. Гарантийный срок указан в гарантийном
сертификате. В течение гарантийного сро-
ка сервисная служба бесплатно устраняет
производственные дефекты и производит
замену деталей, вышедших из строя по
вине изготовителя. На период гарантийного
ремонта эквивалентный исправный инстру-
мент не предоставляется. Заменяемые

Перфоратор
15
детали переходят в собственность служб-
сервиса.
Компания Р.I.Т. не несет ответственности
за вред, который может быть причинен при
работе с электроинструментом.
3.В гарантийный ремонт инструмент при-
нимается в чистом виде, при обязательном
наличии надлежащим образом оформлен-
ных документов: настоящего гарантийного
свидетельства, гарантийного талона, с пол-
ностью заполненными полями, штампом
торговой организации и подписью покупа-
теля.
4.Гарантийный ремонт не производится в
следующих случаях:
- при отсутствии гарантийного свидетель-
ства и гарантийного талона или неправиль-
ном их оформлении;
- степень износа диаметра коллектора
ротора двигателя превышает 0,4 мм (за ис-
ключением инструментов с бесщеточным
двигателем);
- при совместном выходе из строя якоря и
статора электродвигателя, при обугливании
или оплавлении первичной обмотки транс-
форматора сварочного аппарата, заряд-
ного или пуско-зарядного устройства, при
оплавлении внутренних деталей, прожиге
электронных плат и других случаях;
- если гарантийное свидетельство или
талон не принадлежат данному электроин-
струменту или не соответствует установ-
ленному поставщиком образцу;
- по истечении срока гарантии;
- при попытках самостоятельного вскрытия
или ремонта электроинструмента вне га-
рантийной мастерской;
- внесения конструктивных изменений и
смазки инструмента в гарантийный период,
о чем свидетельствуют, например, заломы
на шлицевых частях крепежа корпусных
деталей;
- при использовании электроинструмента
в производственных или иных целях, свя-
занных с получением прибыли, а также при
возникновении неисправностей связанных
с нестабильностью параметров электросе-
ти, превышающих нормы, установленные
ГОСТ;
- при неправильной эксплуатации, исполь-
зованию электроинструмента не по назна-
чению, указанному в инструкции по эксплу-
атации, установки на электроинструмент не
предназначенных заводом-изготовителем
насадок, дополнительных приспособлений
и т.п.;
- при механических повреждениях кор-
пу-са, сетевого шнура и при повреждениях,
вызванных воздействиями агрессивных
средств и высоких и низких температур,
попадании инородных предметов в венти-
ляционные решетки электроинструмента,
а также при повреждениях, наступивших в
результате неправильного хранения (кор-
розия металлических частей);
- при естественном износе деталей элек-
троинструмента, в результате длительной
эксплуатации (определяется по признакам
полной или частичной выработки ресурса,
сильного загрязнения, ржавчины снаружи и
внутри электроинструмента, отработанной
смазки в редукторе);
- при возникновении повреждений в связи
с несоблюдением предусмотренных ин-
струкцией условий эксплуатации (см. главу
«Указание по технике безопасности» в ин-
струкции).
- при повреждении изделия вследствие не-
соблюдения правил хранения и транспор-
тировки;
- при сильном внутреннем загрязнении ин-
струмента;
- при работе с перегрузкой бензоинстру-
мента, изменении цвета чашки и муфты
сцепления в результате перегрева;
- при обрыве шнура стартера при условии
исправности остальных деталей пускового
устройства;
- на все виды работ, выполняемые при пе-
риодическом техническом обслуживании
(регулировки, чистке, замене расходных
материалов и др.);
- на неисправности, возникшие в резуль-
тате нарушения требований и правил
эксплуатации, установленным паспортом
изделия. Например, перегрев изделия,
несоблюдение требований к составу и ка-
честву топливной смеси, повлекших выход
из строя поршневой группы (безусловным
признаком этого является залегание порш-
невого кольца и/или наличие царапин и
потертостей на внутренней поверхности
цилиндра и поверхности поршня, разруше-
ние или оплавление опорных подшипников
шатуна и поршневого пальца);
- на внешние и внутренние загрязнения,
царапины, трещины, повреждения, возник-
шие в процессе эксплуатации или транс-
портировки.
- при работе электроинструментом с пере-
грузкой и заклиниванием оснастки, о чем
свидетельствуют задиры, изменение цвета

Перфоратор
16
от температуры упорных и прижимных
шайб, зажимного патрона, выхода из строя
редуктора.
Профилактическое обслуживание электро-
инструмента (чистка, промывка, смазка,
замена пыльников, поршневых и уплот-
нительных колец) в гарантийный период
является платной услугой.
Срок службы изделия составляет 3 года.
Срок хранения – 2 года. Не рекомендуется
к эксплуатации по истечении 2 лет хране-
ния с даты изготовления, которая указана в
серийном номере на этикетке инструмента,
без предварительной проверки (определе-
ние даты выпуска смотрите ранее в Руко-
водстве пользователя).
О возможных нарушениях, изложенных
выше условий гарантийного обслуживания,
владельцу сообщается после проведения
диагностики в сервисном центре. Владе-
лец инструмента доверяет проведение
диагностики в сервисном центре в свое
отсутствие.
Запрещается эксплуатация электроинстру-
мента при проявлении признаков повы-
шенного нагрева, искрения, а также шума в
редукторной части. Для выяснения причин
неисправности покупателю следует обра-
титься в гарантийную мастерскую.
Неисправности, вызванные несвоевремен-
ной заменой угольных щеток двигателя,
устраняются за счет покупателя.
5.Гарантия не распространяется на:
- сменные принадлежности (аксессуары и
оснастка), например: аккумуляторы, диски,
ножи, сверла, буры, патроны, цепи, звез-
дочки, цанговые зажимы, шины, элементы
натяжения и крепления, головки тримме-
ров, подошвы шлифовальных и ленточных
машин, фильтры, головки шестигранные
сменные насадки и т.п.
- быстроизнашивающиеся детали, напри-
мер: угольные щетки, приводные ремни,
сальники, защитные кожухи, направляю-
щие ролики, направляющие, резиновые
уплотнения, подшипники, зубчатые ремни
и колеса, стволы, ленты тормоза, храпови-
ки и тросы стартеров, поршневые кольца и
т.п.
Замена их в течение гарантийного срока
является платной услугой.
- шнуры питания, в случае повреждения
изоляции. В данном случае потребитель
должен быть уведомлен и ремонт (услуга
платная) должен быть выполнен после
согласия потребителя. Если потребитель
не согласен на замену, то в любом ремон-
теэтого инструмента будет отказано. Факт
отказа должен быть зафиксирован в гаран-
тийном талоне или квитанции сервисного
центра и подписан владельцем.

Electric Hammer Drill
16
P.I.T. WARRANTY CERTIFICATE
Product Name_____________________
Product Serial Number □□□□□□□□□□□
Battery Serial Number □□□□□□□□□□□□□
Charger Serial Number □□□□□□□□□□□□□
Sale Date __________________
Trade Organization Name __________________
Dear customer!
Thank you for purchasing the P.I.T. tool, and we hope that you will be satised with your choice.
In the process of manufacturing the P.I.T. tools pass multilevel quality control, if nevertheless
your product will need maintenance, please contact the authorized P.I.T. service centers.
Attention!
When buying, ask a seller to check the completeness and operability of the tool, to ll out the
Warranty Certicate, the Warranty Card (the boxes shall be lled out by a seller) and to ax the
seal of the trade organization in the Guarantee Certicate and the Warranty Card.
Warranty
By this Warranty Certicate, P.I.T. company guarantees the absence of defects of the production
nature.
In the event any of the above defects are detected during the warranty period, the specialized
P.I.T. service centers shall repair the product and replace the defective spare parts free of
charge.
The warranty period for P.I.T. electric machines is 12 months from the date of sale.
“The warranty maintenance terms acknowledged and accepted. The operability and complete-
ness of the product are checked in my presence. No claims on quality and appearance.”
Buyer’s Signature_______________ Surname (legibly) __________________
Phone ______________
Place of seal

Перфоратор
17
Наименование изделия___________
Серийный номер изделия □□□□□□□□□□□
Серийный номер аккумулятора □□□□□□□□□□□
Серийный номер зарядного устройства □□□□□□□□□□□
Дата продажи «_____» ____________________
Наименование торговой организации
Уважаемый покупатель!
Благодарим Вас за покупку инструмента Р.I.Т. и надеемся, что Вы останетесь довольны
своим выбором.
При необходимости обслуживания Вашего изделия обращайтесь в авторизированные сер-
висные центры Р.I.Т. Все сервисные центры представлены на сайте www.pittools.ru
Внимание!
При покупке требуйте у продавца проверки работоспособности инструмента и его ком-
плектности, а также заполнения гарантийного свидетельства, гарантийного талона (графы
«Заполняются продавцом») и простановки печати торговой организации в гарантийном
свидетельстве и гарантийных талонах.
Гарантия
На основании данного гарантийного свидетельства компания Р.I.Т. гарантирует отсутствие
дефектов производственного характера.
Если в течение гарантийного срока в Вашем изделии обнаружатся указанные дефекты, то
специализированные сервисные центры Р.I.Т. бесплатно отремонтируют изделие и заме-
нят дефектные запасные части.
Гарантийный срок на электроинструменты Р.I.Т. составляет 12 месяцев со дня продажи.
«С условиями гарантийного обслуживания ознакомлен(а). Работоспособность и комплект-
ность изделия проверены в моем присутствии. Претензий к качеству и внешнему виду не
имею».
Подпись покупателя____________________Фамилия(разборчи-
во)________________________
Телефон________________

Electric Hammer Drill
18
Name____________
Serial Number_____
Sale Date ____________20__
Date of Receipt from Repair ____20__
Name____________
Serial Number_____
Sale Date ____________20__
Date of Receipt from Repair ____20__
Name____________
Serial Number_____
Sale Date ____________20__
Date of Receipt from Repair ____20__
Name_______________________________
Serial Number___________
Sale Date ____________20__ Place of Seal
(Filled out by a Seller)
WARRANTY REPAIR CARD
Date of Acceptance for Repair _______20___
Application for Repair ___________________
Customer _____________________________
Phone (Address)________________________
Cause of Application_____________________
Date of Receipt from Repair ____________20__
The Tool is checked in my presence____________
(The Order shall be performed in a Service Center) (Signature)
P.I.T. WARRANTY CARD
Other manuals for PBH26-C5
1
Table of contents
Languages:
Other P.I.T. Drill manuals

P.I.T.
P.I.T. PBH32-C5 User manual

P.I.T.
P.I.T. PSB13-C5 User manual

P.I.T.
P.I.T. PSB16-C User manual

P.I.T.
P.I.T. PBH40-C2 User manual

P.I.T.
P.I.T. PBH24-C2 User manual

P.I.T.
P.I.T. PSB20H-10B User manual

P.I.T.
P.I.T. E-PSR18-D4-A1 User manual

P.I.T.
P.I.T. PBH26-C5 User manual

P.I.T.
P.I.T. PSB13-C4 User manual

P.I.T.
P.I.T. PBH20H-22B/1 User manual