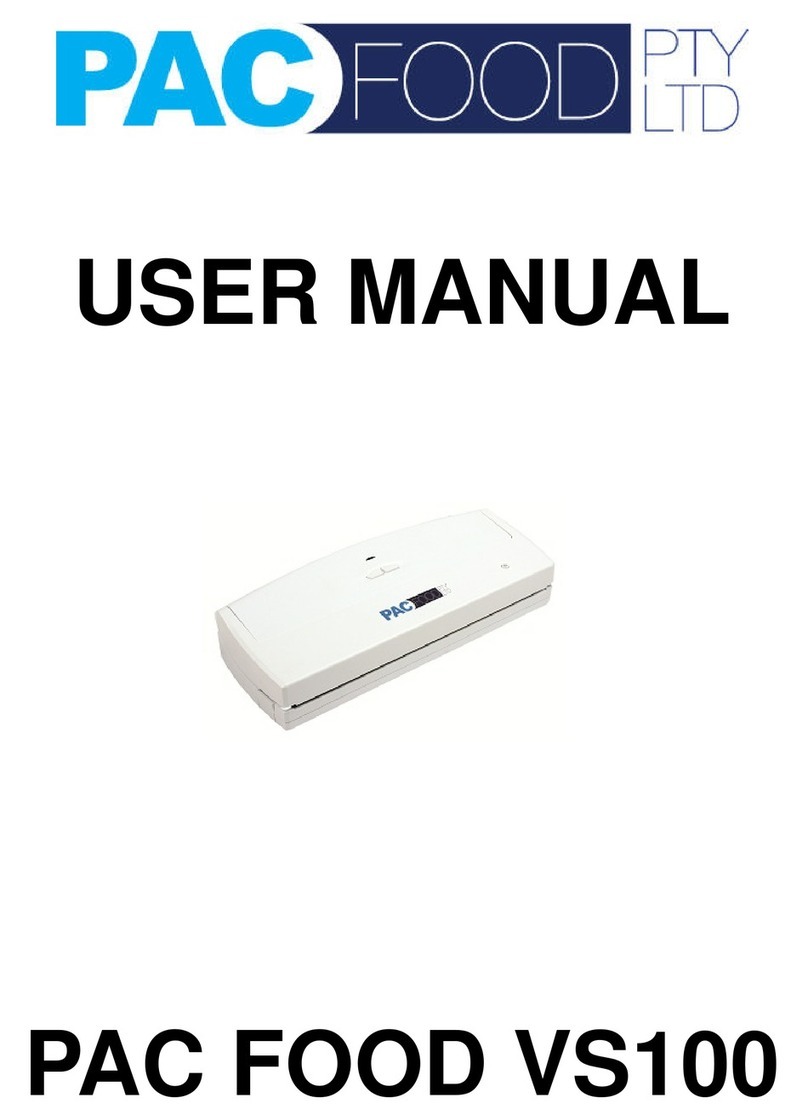
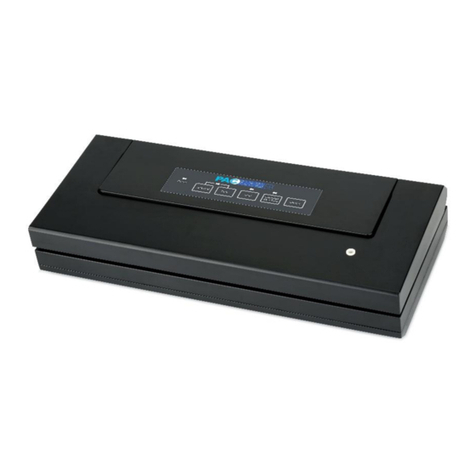
PAC FOOD VS603 User manual

-1-
User Manual
Pac Food Vacuum Sealer
Model: VS 603

-2-
Thank you for purchasing the Pac Food VS603 Vacuum Sealer. You are about to
revolutionize your home with one of the strongest vacuum packaging systems available.
With the help of the VS603 Vacuum Sealer, you will now be able to keep food fresher,
longer in the refrigerator, freezer and pantry. The VS603 effectively removes air and
extends freshness up to five times longer than normal preservation methods. Beyond
that, the VS603 can be used to preserve and organize household items like small toys
and easy-to-lose items. You will soon find your Vacuum Sealer to be so versatile and
convenient; it will never leave your countertop.
By using vacuum bags and canisters, you can significantly extend food life, maintain
food quality, reduce freezer burn, and reduce food waste and costs.
The style of the VS603 is clean and simple with a lightweight, compact design. Its unique
slanted layout design and wide seal area makes it easy to load bags and ensure a
positive seal every time. Only high quality, fully tested and rated components have been
used in the construction to ensure the best performance.
Read and follow all directions for usage and maintenance carefully and you’ll benefit
from years of trouble-free and cost effective vacuum packaging.

-3-
Table of Contents
Vacuum Packaging and Food Safety ......................................4 - 5
Features of the VS603 …… ............................................... 6 - 9
Safety & Maintenance ......................................................10
Operating Instructions ...............................................….1 1 - 1 9
Food Storage & Safety Information ......................................1 9 - 20
Vacuum Packaging Tips ....................................................21
Troubleshooting ........................................................22 - 2 4

-4-
Vacuum Packaging and Food Safety
Vacuum packaging extends the life of foods by removing most of the air from sealed
bags/containers and prevents fresh air escaping into the sealed bags/containers,
thereby reducing oxidation. Vacuum packaging helps preserve flavor and overall quality.
It also helps inhibit the growth of aerobic microorganisms, which can lead to the problems
noted below under certain conditions:
Mould – Mould cannot grow in a low oxygen environment; therefore vacuum packaging
can virtually eliminate it.
Yeast –Results in fermentation, which can be identified by smell and taste. Yeast needs
water, sugar and a moderate temperature to grow. It can also survive with or without air.
Slowing the growth of yeast requires refrigeration, while freezing stops it completely.
Bacteria – Results in an unpleasant odor, discoloration and/or soft or slimy texture.
Under the right conditions, clostridium botulinum (the organism that causes Botulism)
cannot grow without air and cannot be detected by smell or taste. Although it is extremely
rare, it can be very dangerous.
As with any other storage container, it is important to inspect food for spoilage prior to
consuming.
To preserve foods safely, it is important to maintain low temperatures. You can
significantly reduce the growth of microorganisms at temperatures of 4ºC or below.
Freezing at -17ºC does not kill microorganisms, but stops them from growing. For long-
term storage, always freeze perishable foods that have been vacuum packaged.
It is important to note that vacuum packaging cannot reverse the deterioration of foods.
It can only slow down changes in quality. It is difficult to predict how long foods will retain
their top-quality flavor, appearance or texture because it depends on the age and the
condition of the food on the day it was vacuumed packaged.
Note: vacuum packaging is not a substitute for refrigeration or freezing. Any perishable
foods that require refrigeration must still be refrigerated or frozen after vacuum
packaging.

-5-
Preparation Guidelines
Vegetables need to be blanched before vacuum packaging. This process stops the
enzyme action, which leads to loss of flavor, colour and texture. To blanch
vegetables, place them in boiling water or in the microwave until they are cooked,
but still crunchy. Then, immerse the vegetables in cold water to stop the cooking
process. Finally, dry the vegetables on a towel before vacuum packaging.
Cruciferous vegetables (broccoli, sprouts, cabbage, cauliflower, kale, turnips)
naturally emit gases during storage. Therefore, after blanching, they must be stored
in the freezer only

-6-
The Vacuum Sealer Features
Quick Start button
Control Panel
Electrical socket
Hose connector
Quick Seal button
Clear perspex Lid
Handle (Contains Battery Slot)
Seal foam
Chamber seal gasket
Vacuum Chamber tray
Seal wire

-7-
C D E F
A B G H I J
A. Power Indicator Light (Power)
When the power indicator light is on, the machine is ready to work.
B. On/Off Button (On/Off)
When the machine is ready to work, press “On/Off” button, the last seal time appears
on the digital display, the fan starts, and machine is ready for vacuum. If there is no
action for 10 minutes, the digital display and fan will shut down automatically. The
machine can stop working when pressing “On/Off” button. After the cycle is complete,
press “On/Off” button, and then unplug the machine.
C. Auto Vacuum Button (Start)
Press “Start” button, the machine will vacuum and seal automatically. This button is
only for vacuum bag/roll.
Choose Marinate mode, press Start, the machine will start to marinate automatically.
Choose Pulse Vac mode, press Start button, the machine will start to pulse vacuum.

-8-
In order to have a more convenient operation, a Quick-Start button is set on the handle. (This
button has the same function as the Start button in the control panel).
(
NOTE: To achieve this function, please press down on the lid when closing it.)
D. Seal Button (Seal)
1. Press “Seal” button to stop vacuum cycle and instantly seal the bag to prevent
crushing delicate items.
2. Make custom-sized bags
In order to have a more convenient operation, a Quick-Seal button is set on the handle.This
button has the same function as the Seal button in the control panel
(
NOTE: To achieve this function, please press down on the lid when closing it.)
E. Digital Display
1. Displays the vacuum cycle, value will count down from 9 to 0. When it shows 0, vacuum
cycle is finished.
2. Displays the seal time, the seal time can be adjusted and set from 0-6. There is a back-
up memory function to the seal time.
3. When it displays “E”, the machine is in protective status.
F. Seal Time Adjusting Button (“+” or “-”)
Simply adjust the seal time “up” or “down” by using “+” or “-” buttons. When it is adjusted
to 0, the machine will not seal.
G. Marinate Mode (Marinate)
Marinate mode is for repeating the cycle of vacuuming and releasing air into a canister,
allowing foods to get optimum pickle infusion in the least amount of time.
(
NOTE: To achieve this function, please ensure to open the lid.)
H. Accessory Vacuum Button (Accessory)
Only for vacuuming canisters, bottle stoppers and other accessories; press
“Accessory” button, the machine starts the vacuum cycle. After the vacuum cycle,
the machine will stop automatically WITHOUT seal.

-9-
(
NOTE: To achieve this function, please ensure to open the lid.
)
I. Pulse Vacuum Button (Pulse vac)
Use “Pulse” button to prevent crushing delicate items. Press “Pulse”, the machine
will vacuum little by little according to how many times you push the button.
(
NOTE: To achieve this function, please press down on the lid when closing it.
)
J. Impulse seal Button (Impulse seal)
Press Impulse Seal button, the Impulse Seal light is on. The machine enters into Impulse
Seal mode. You can seal the bag by opening and closing the lid now. (This mode is
mainly for the bags which do not need to vacuum)
(
NOTE: To achieve this function, please press down on the lid when closing it.
)
**The machine is equipped with “quick start” and “quick seal” buttons. Please make
sure the 2x batteries AAA)are properly installed before using these hotkeys. If the
function is no longer needed, please remove the battery to prevent power loss.
Technical Data
Voltage:220V-240V~50Hz
Power:450W +5%-10%
Pump Pressure: -28.3”Hg (-958mbar)
Max bag width:300mm (outside measurements)
Pump: dual
Seal wire width:5mm
Size:390x280x136mm
Weight:4.8Kg

-10-
Safety
For your safety, follow these precautions when using your Vacuum Sealer:
▪ Read Owner’s Manual carefully before using the machine for the first time.
▪Do not use the VS603 on wet or hot surfaces, or near a heat source.
▪Do not immerse machine or power cord in water or any other liquid.
▪Plug Vacuum Sealer into grounded power sources only, do not use extension cord.
▪To disconnect, unplug directly from power source. Do not disconnect by pulling on cord.
▪Do not operate appliance with damaged power cord.
▪If the machine is left unused for a long period of time, please remove the batteries from
the handle.
▪Please recycle waste batteries according to waste classification standards, do
not discard them arbitrarily.
▪Only use the Vacuum Sealer for its intended use.
▪Only use micro channel vacuum bags/ rolls, accessories and attachments.
Maintenance
▪Unplug before cleaning.
▪Regularly clean appliance with damp cloth and mild soap to remove crumbs, dust,
debris.
▪Chamber Seal Gasket is removable to clean any liquids that may have escaped
vacuuming process.

-11-
Operating Instructions
Preparations
▪Please insert the 2 x AAA batteries into the battery slot underneath the handle. This will
operate the quick start and quick seal functions.
▪Plug in machine.
▪When the machine is on, the light “Power” will illuminate.
▪Press “On/Off” button, digital display is on, fan starts.
Now the machine is ready for all cycles.
How To Make Bags From Roll
1. Choose roll with suitable width.
2. Put the open end of the roll across the seal wire (please make sure the open end is
across the seal wire); close and press the lid.
3. Press “Seal” button (or the quick-seal button on the handle), seal time will count down
to 0 from default setting, showing on digital display. After this cycle has ended, the
machine will beep.
**Press On/Off button to stop the machine’s working processes.
4. Take out the roll end and check the seal.
NOTE: A positive seal will look “clear” upon inspection. If the seal is spotty, incomplete,
wrinkled, white or milky, please cut the seal and restart the sealing process.
5. After the end is sealed, measure the bag to the size of the item, allowing 4.5cm of
space and cut the roll. Place item in the bag and follow “how to vacuum and seal
with bags”.

-12-
How To Vacuum And Seal With Bags
1. Choose suitable vacuum bag, place item in bag.
2. Allow at least 4.5cm space after item is put in bag for best results.
3. Put the open end of the bag across the chamber seal gasket. Please make sure that
the open end is within the vacuum chamber.
4. Close and press the lid.
5. Press “Start” button, or press Quick-Start button.
6. The machine goes to vacuum cycle. The value in digital display will count down from
9 to 0 (If the pressure does not reach the standard of -20”Hg, the value will stay at
2). During the vacuum process, the value on the digital display will count down from
default setting to 0. Then the machine goes to sealing cycle.
7. After the sealing cycle has ended, the machine will beep.
8. Take out the bag and check the vacuum and seal.
NOTE: A positive seal will look “clear” upon inspection. If the seal is spotty,
incomplete, wrinkled, white or milky, please cut the seal and restart the
sealing process.
9. Please store the vacuum items properly after seal. All perishable foods must be
refrigerated or frozen to prevent spoilage.
10. **Press On/Off button to stop the machine’s working processes. If instant seal is
needed, simply press “Seal” button.

-13-
How To Use “Pulse Vac” Vacuum Function
Since the pressure under the “Pulse” vacuum function is set to be high, sometimes it is
easy to crush some delicate items with high pressure in the vacuum bag. In this case,
you can use the “Pulse” vacuum function to control the vacuum time and pressure, and
prevent from crushing delicate items. When packing some juicy foods, you can also use
this function and prevent liquid being sucked out.
1. Put the items in the bag and then put the open end of the bag across the chamber
seal gasket, please make sure that the open end of the bag is within the vacuum
chamber.
2. close and press the lid.
3. Press the “Pulse vac” button to choose the Pulse vacuum function. Then press Start
button (or the quick-start button on the handle) to start pulse vacuum to reach the
vacuum you need. You can monitor the vacuum bag to decide the pressure.
During this process, you can stop the vacuum by pressing “Start” button; and
press it again to vacuum again.
4. When the pressure reaches what it needs, press “Seal” button to start sealing. The
digital display will show and count down the sealing time to 0. After the sealing cycle
has ended, the machine will beep
. **Press On/Off button to stop the machine’s working processes.
Bag Guidelines
▪Package the freshest foods possible. The VS603 allows you to maintain the food’s
freshness up to five times longer than under normal stored conditions.
▪ Delicate foods, moist foods and foods that need to hold their shape require pre-
freezing. Foods like meat, berries and bread can be frozen for up to 24 hours
without harm of freezer burn. Once food is hard, it is ready to be vacuum packaged.
▪ If packaging fresh meats without pre-freezing, place a folded paper towel in between
the meat and the top of the bag. This will help absorb moisture.
▪ To vacuum liquids like soups, stews and casseroles, pre-freeze in a dish or ice cube

-14-
tray. Once frozen, vacuum package, label and stack in your freezer.
▪ For objects with sharp points or edges (bones, pasta, rice) pad the edges with paper
towels to prevent the bag from puncturing. We recommend our Embossed Micro
Channel bags or rolls for a thicker micron.
▪ Vacuum bags are reusable, boilable and microwavable. We do not recommend
reusing bags.
▪ Vegetables must be blanched before being packaged. Place in boiling water or
microwave until heated through but still crunchy. Vacuum package as normal.
**Do not vacuum package mushrooms or garlic.**
How To Use Your VS603 with Canisters
The VS603 can also be used with canisters. The knob on the top of the lid controls
vacuuming, closes and locks vents inside lid after vacuuming, and opens the vents to
allow air back in the canister and releases the lid to access the contents.
(NOTE: when using the Canister function, the machine lid should be open)
1. Place the items into the canister. Make sure the canister lid is dry and the lid gasket
is without any powder or food debris. Also please allow some space after the items
are put into the canister. And then close the lid.
2. Turn the knob to “Vacuum” position.
3. Connect the hose to the Accessory port on the machine and the port on the canister
lid.
4. Press “Accessory” button, slightly press the canister lid for 3-5 seconds. The machine
starts the vacuum process.
**Press On/Off button to stop the machine’s working processes.
5. After the vacuum cycle, the machine will stop automatically. Remove the hose from
the canister and turn the knob to “Lock” position. Store canister in refrigerator.

-15-
6. To open vacuum canister, twist knob to “Open” position. With proper care, the
canisters may be reused many times.
How To Marinate Foods
There is a special function in the VS603 - the marinate mode, with two options of Quick
Marinate Mode (15mins) and Normal Marinate Mode (27mins). In the marinate mode,
the machine can run two cycles of vacuuming and releasing air to the canister, allowing
foods to get optimum pickle infusion in the least amount of time. Vacuum status keeps
for about 4mins (Quick Marinate Mode)/8mins (Normal Marinate Mode) before releasing
air, between each cycle. When marinate is complete, the machine will beep.
Vacuum canister is a perfect partner to marinating foods. The reason that foods can be
marinated in such a short time is that, it opens the micro-holes of the foods, allowing
pickle infusion very quickly.
Important tips: when using canister for marinating, there should be a knob on the
canister lid. Make sure the canister lid is in “Open” status but NOT
“Vacuum” status when it is in the marinate process.
1. Put items in the canister. Make sure there is no powder or food debris on the canister
lid gasket. Also please allow some space after the items are put into the canister.
And then close the lid.
2. Turn the knob to “Open” position.
3. Connect the hose to the Accessory port on the machine and the port on the canister
lid.
4. Press “Marinate” button, choose the marinate option. Press once for Quick Marinate
Mode, “1” will appear on the digital display; press twice for Normal Marinate Mode,
“2” will appear on the digital displayer.

-16-
** In Quick Marinate Mode, the cycle is about 15mins.
** In Normal Marinate Mode, the cycle is about 27mins. Longer marinate time will make
much perfect marinated foods.
5. Press “Start” button (or the quick-start button on the handle) ,slightly press the
canister lid for 3-5 seconds. When it reaches the pressure, the machine will stop
automatically. Value on the Digital display will count down from 5 to 1, counting down
cycle repeats continually. After 4mins (Quick Marinate Mode) or 8mins (Normal
Marinate Mode), it stops counting, vacuum status is complete.
6. When vacuum status is complete; the canister starts to release air. Value on the Digital
display will count up from 1 to 5. After 30s, it stops counting; releasing air is complete.
7. The machine vacuums the canister again. The above mentioned cycle will run twice.
8.When marinate process is complete, 0 will appear on the digital display, illuminate and
the machine will beep. Turn the canister knob to “Lock” position, remove the hose
from canister. Now the delicacy is ready.
**Press On/Off button to stop the machine’s working processes.

-17-
Canister Guidelines
▪Use only canisters designed for vacuum packaging. Other containers can implode
under the vacuum pressure of the Vacuum Sealer.
▪ Cool liquids in refrigerator before vacuum packaging. Hot foods should be cooled
before vacuum packaging.
▪ Do not freeze vacuum canister. Suggested lowest temperature is -18℃. Too low
(lower than -18℃) or too high (higher than 100℃) temperature will make the
canister materials endure lower pressure or melt.
▪ Hand wash canister lid. Do not put in dishwasher and microwave. The canister
body itself is dishwasher safe and microwave safe. Suggested highest temperature
is 100℃.
▪If liquids are caught in the accessory hose, run warm water through hose. Be sure
hose is not attached to accessory port.
▪Powdered or granulated foods should be covered with a paper towel before
vacuuming to prevent food from traveling into the vacuum mechanism.
▪Vacuum packaging is not a substitute for canning. Perishable foods still need to be
refrigerated or frozen.

-18-
How To Use With Vacuum Bottle Stoppers
The VS603 can vacuum bottles with bottle stoppers. If you cannot finish a bottle of wine
at one time, or you need to preserve a bottle of non-carbonic acid drink, edible oil, a
bottle of juice or any other liquid that is stored in a bottle, you can use the VS603 to
vacuum the bottle with a bottle stopper.
1. Plug the vacuum bottle stopper to the bottle. Please allow at least 2.5cm distance
between the bottom of the stopper and the surface of the liquid.
2. Connect the hose to the accessory port of the machine and the other end to the port
of the bottle stopper.
3. Press “Accessory” button, the machine starts to vacuum.
**Press On/Off button to stop the machine’s working processes.
4. After the vacuum cycle is complete, the machine will stop automatically. Remove the
hose from the stopper.
5. Place the bottle vertically on a level surface. Make sure the liquid does not touch the
stopper.
6. Simply remove the stopper if you want to open the bottle.

-19-
How to Impulse Seal
Sometimes things do not need to be vacuum sealed, they only need to be heat sealed.
So the Impulse Seal mode is added in this machine. When you start the Impulse Seal
mode, you don’t need to press any other buttons. Simply open and close the lid to seal
the bag.
1. Press “+”“ -”button to set the seal time;
2. Press Impulse Seal button, the Impulse Seal light is on. The machine enters into
Impulse Seal mode (if the lid is closed, LED shows C; if the lid is open, LED blinks
& shows the seal time);
3. Put the bag mouth across the seal wire and into the chamber. Close and press the
lid, the machine detects that the lid is closed then enter into Seal mode. The digits
in LED counts down from the preset seal time to 0. The machine will release air,
then beep when the process is finished.
** Press On/Off button to stop the machine’s all working processes. **
4. Open the lid, take out the bag and check if the sealing is good.
5. Repeat the above 3 and 4 to seal other bags. Or press On/Off button to exit this
mode.
(Note: If many bags need to be Impulse Sealed, adjust/shorten the seal time when
needed to avoid overheated or melting the bag)
Food Storage and Safety Information
The VS603 will revolutionize the way you buy and store food. Because vacuum
packaging works to eliminate freezer burn and slow food spoilage, you are now able to
take advantage of buying food in bulk without the threat of food waste.
Vacuum packaging with the VS603 removes up to 90% of the air from the package. This
will help keep food fresher up to 5 times longer than under normal circumstances. Dry
foods like pasta, cereals and flour will stay fresh from start to finish. Plus vacuum

-20-
packaging prevents weevils and other insects from infesting dry goods. Package only
the freshest foods possible.
However, please keep in mind that not all foods benefit from vacuum packaging.
Never vacuum package garlic or fungi like mushrooms. A dangerous chemical
reaction takes place when air is removed, causing these foods to be dangerous if
ingested. Vegetables should be blanched before packaging to kill any enzymes
that may cause deterioration of out-gassing when vacuumed.
Foods
Vacuum Freezer
Storage
Vacuum Fridge
Storage Typical Storage
Fresh Beef &
Veal 1-3 years 1 month 1-2 weeks
Ground Meat 1 year 1 month 1-2 weeks
Fresh Pork 2-3 years 2-4 weeks 1 week
Fresh Fish 2 years 2 weeks 3-4 days
Fresh Poultry 2-3 years 2-4 weeks 1 week
Smoked Meats 3 years 6-12 weeks 2-4 weeks
Fresh Produce,
Blanched
2-3 years 2-4 weeks 1-2 weeks
Fresh Fruits 2-3 years 2 weeks 3-4 days
Hard Cheeses 6 months 6-12 weeks 2-4 days
Sliced Deli Meats
not recommended 6-12 weeks 1-2 weeks
Fresh Pasta 6 months 2-3 weeks 1 week
Table of contents
Other PAC FOOD Kitchen Appliance manuals
Popular Kitchen Appliance manuals by other brands

Russell Hobbs
Russell Hobbs Your Creations 23480 instructions

Margaritaville
Margaritaville MD 3000 Series instruction manual

BonsenKitchen
BonsenKitchen MF3902 Operation instructions

KornKraft
KornKraft Fabula instruction manual

Emeril Lagasse
Emeril Lagasse PIZZA GRILL owner's manual

Scandinavian Appliances
Scandinavian Appliances Norcool Cave 100S manual

Harbor Freight Tools
Harbor Freight Tools 92049 Assembly and operating instructions

Victorio
Victorio VKP1006 instruction manual

Electrolux
Electrolux The Expressionist EFP7300 Instruction book

Miele
Miele H 2265-1 B Operating and installation instructions

Randell
Randell 40048A Operator's manual

Scarlett
Scarlett SC-MC410S22 instruction manual