EnglishDeutsch
 logo
Brands
  1. Home
  2. •
  3. Brands
  4. •
  5. PackshotCreator
  6. •
  7. Digital Imaging Accessories
  8. •
  9. PackshotCreator BUSINESS User manual

PackshotCreator BUSINESS User manual

This manual suits for next models

2

Other PackshotCreator Digital Imaging Accessories manuals

PackshotCreator PackshotStart 360 User manual

PackshotCreator

PackshotCreator PackshotStart 360 User manual

PackshotCreator PackshotCompact Instruction Manual

PackshotCreator

PackshotCreator PackshotCompact Instruction Manual

PackshotCreator R3L Mark II Instruction Manual

PackshotCreator

PackshotCreator R3L Mark II Instruction Manual

Popular Digital Imaging Accessories manuals by other brands

Pretron Technologies VT-666 user manual

Pretron Technologies

Pretron Technologies VT-666 user manual

Sony PCK-LM12 Specifications

Sony

Sony PCK-LM12 Specifications

Sony SPK-HCG operating instructions

Sony

Sony SPK-HCG operating instructions

Kodak dryview 8300 Service manual

Kodak

Kodak dryview 8300 Service manual

Zacuto GH5 Cage quick start guide

Zacuto

Zacuto GH5 Cage quick start guide

Sony ACC-TCV5 operating instructions

Sony

Sony ACC-TCV5 operating instructions

AGFA SelectSet Avantra user guide

AGFA

AGFA SelectSet Avantra user guide

PANAVISION LEE Filters Lee 100 quick start guide

PANAVISION

PANAVISION LEE Filters Lee 100 quick start guide

Sony PCK-LM12 instructions

Sony

Sony PCK-LM12 instructions

Sony STP-XH1 instructions

Sony

Sony STP-XH1 instructions

Sony HVL-IRC operating instructions

Sony

Sony HVL-IRC operating instructions

Angler LEDSB-1818 instructions

Angler

Angler LEDSB-1818 instructions

Rollei Lion Rock Traveler Ball Head Instruction

Rollei

Rollei Lion Rock Traveler Ball Head Instruction

Bresser Y Series Assembly instructions

Bresser

Bresser Y Series Assembly instructions

Sony HVL-IRM operating instructions

Sony

Sony HVL-IRM operating instructions

DREAMGRIP Evolution Series user manual

DREAMGRIP

DREAMGRIP Evolution Series user manual

Miranda Imagestore 2 user manual

Miranda

Miranda Imagestore 2 user manual

Sony ADP-WL1M operating instructions

Sony

Sony ADP-WL1M operating instructions

https://manuals.online logo
https://manuals.online logoBrands
  • About & Mission
  • Contact us
  • Privacy Policy
  • Terms and Conditions

Copyright 2026 Manuals.Online. All Rights Reserved.

QuickStart
PackshotCreator
Installation Manual
3 USB cords
(2 for Mini models)
PackshotCreator software 8 uorescent lamps (6 for Mini models)
- 4 or 2 spares
Compatible
digital camera
Power adapter
White background
for side shots Foam supports for camera
Product stand
(2 for HD versions) Tripod
PackshotCreator
USB lightbox
PackshotCreator
Package Composition
System
requirements
 OS: Windows® ME / 2000 / XP, Windows 7
or Mac OS X 10.6
 (Administrator Account for 2000 and XP)
 CPU: Pentium® or equiv. (1 GHz or higher preferred)
 RAM: Min. 1 GB (2 GB preferred)
 VGA: Min. 1024x768, True color
 Monitor Type: CRT or LCD monitor
 3 USB Ports min., CD ROM Drive
 Internet connection with active email account (optional)
PackshotCreator
installation
Installing the accessories
Assemble and place the product stand inside of the lightbox. See Picture 2.
Step C
Insert the lamps into each corner of the lightbox. Gently turn the lamp until you
hear a click. See Picture.
Step F
Plug one end of the power adapter into the camera and the other end into the
universal power socket located inside of the camera housing. See Picture.
If you are using a PackshotCreator 360, please refer to the O3T Quick Installation
Guide to install the turntable.
Step A
Place the lightbox where you intend to use it.
Note: There should be a power outlet with proper grounding nearby.
Step B
Unscrew the four screws located at the top corners of your PackshotCreator. Pull out
the four diusion plates that cover the lamp receptacles. See Picture 1 and Picture 2.
Step G
Plug the lightbox into a power outlet. See Picture.
Step H
Plug the two USB cords into your computer. See Picture. Check if the switch button
located at the back of the lightbox is set to the “PC Controlled” mode or “I” position.
Picture 1
Picture 1 Picture 2
Picture 2
Find the right foam support for your camera and point the lens through the opening down into the
box. See Picture 1.
The background provided in the package can be put and removed very easily from the back of the
lightbox thanks to a plunger system. Use it for side shots and for creating animations.
Note: A whitebackground is included in the PackshotCreator package. However you can purchase an additional
black background.
Step E
Plug the USB cable connected to the camera into the USB connector
coming from the side of the camera housing.
Step D
Open the camera housing located on the top of the lightbox.
Note: Both the USB cord and the power adapter are provided in the PackshotCreator package.
© Sysnext. All rights reserved.
This material is not to be interpreted as a guarantee of earnings and may not be copied, reproducved, modified, published, uploaded,
posted or distributed in any way, without PackshotCreator’s prior consent.
Contacts:
PackshotCreator / Sysnext
7, rue Henri Rochefort
75017 Paris – France
esupport.packshot-creator.com
For more information please contact www.packshot-creator.com
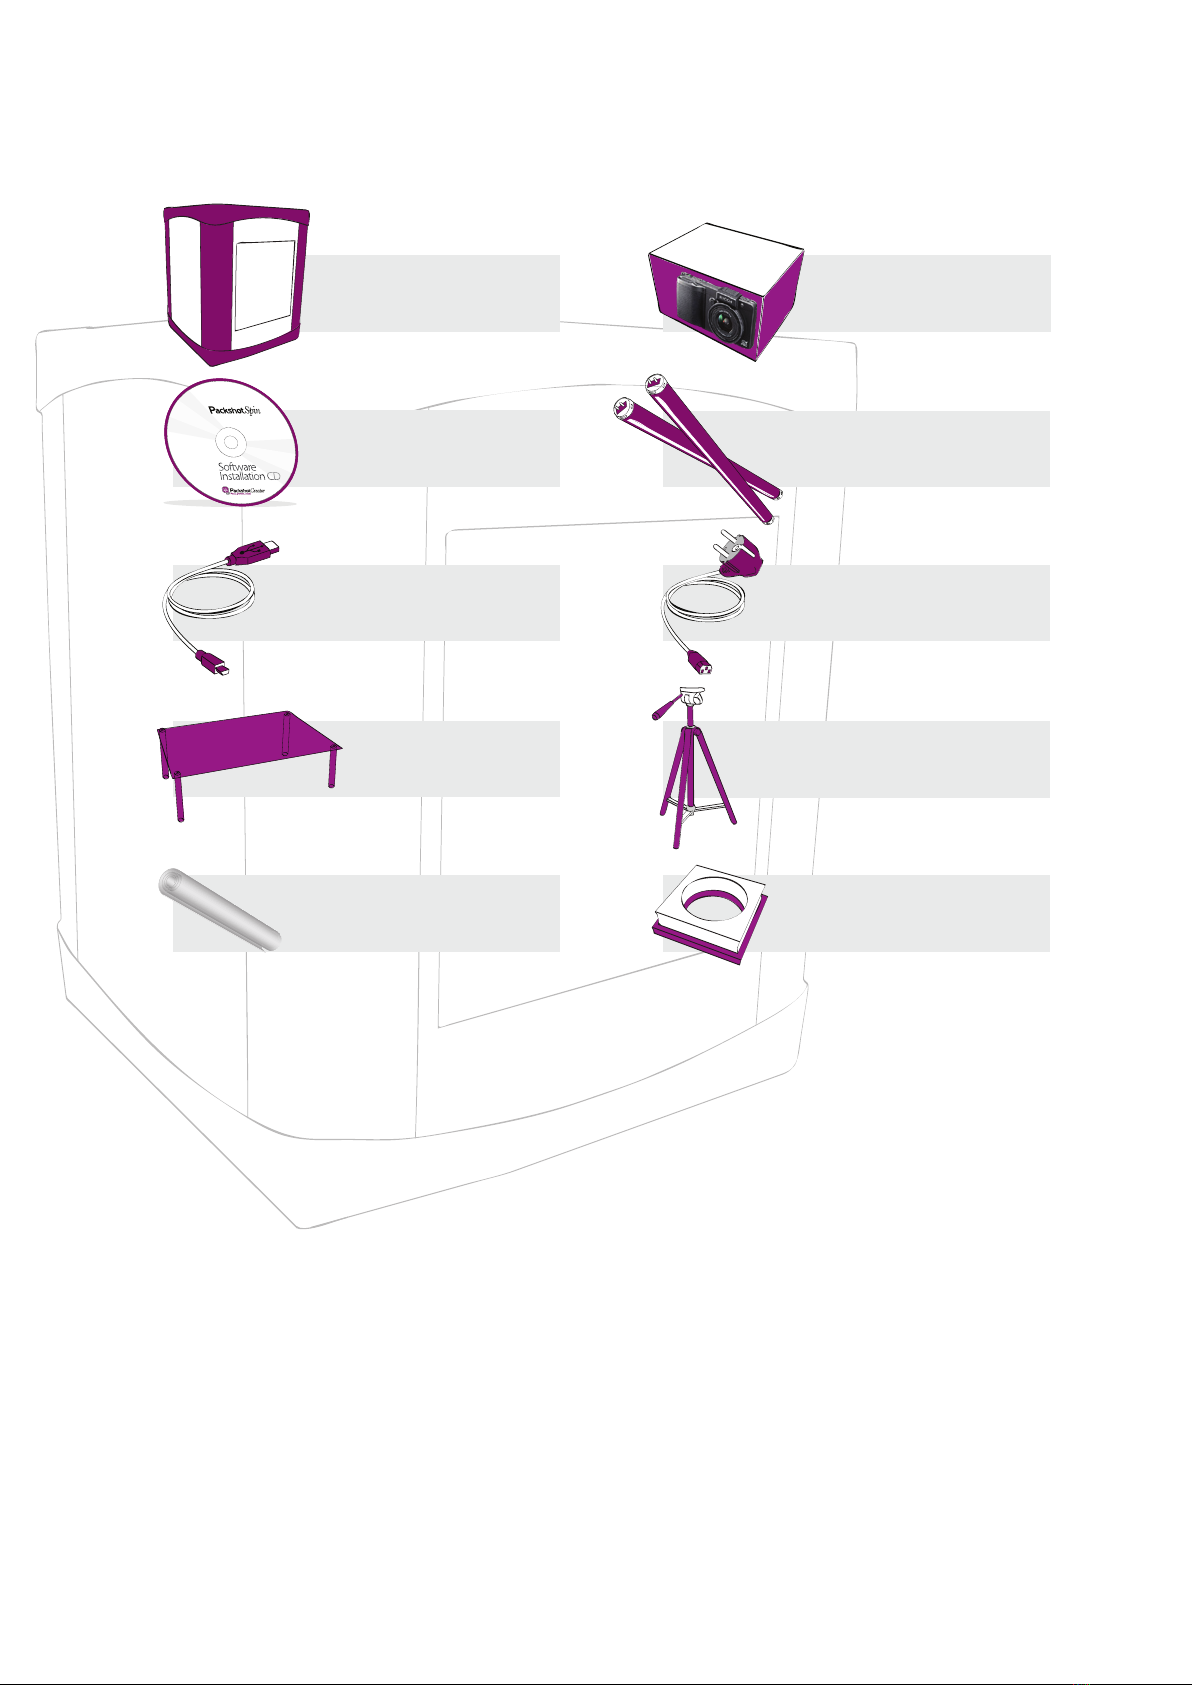
Installing the software
 Insert the PackshotCreator software CD-Rom into your PC. The CD-Rom will ask whether you want to launch an
Installation Wizard or to install the PackshotCreator software straight away. If you are satisfied with the current
installation, you can install the software directly. In this case, just follow the onscreen instructions.
 If your installation is successful, when launching the software, the lightbox and the lamps will turn on.
 A window may appear and ask you to press the power button on your camera to turn it ON. Click on the «Snap» button
to take a picture and check that the camera is connected properly.
 Very important:
When launching the PackshotCreator software, if the message “Please choose which application should receive the
image” appears, select “Cancel” to choose the PackshotCreator software as the application receiving the images.
Camera settings
You will be provided with a preconfigured camera dedicated to the PackshotCreator. However, before using your
PackshotCreator solution, make sure the camera settings are set properly.
For more information about the software, please read the PackshotCreator User Guide included in the software.
If you wish to read tips about photography with the PackshotCreator, please refer to the Photography Tips document
included in the software.
1. Set the camera to the Replaying Mode.
2. Set the «Power Down» function or the “Power Saving”mode to «Off».
3. Set the “Mute”mode to “Off”.