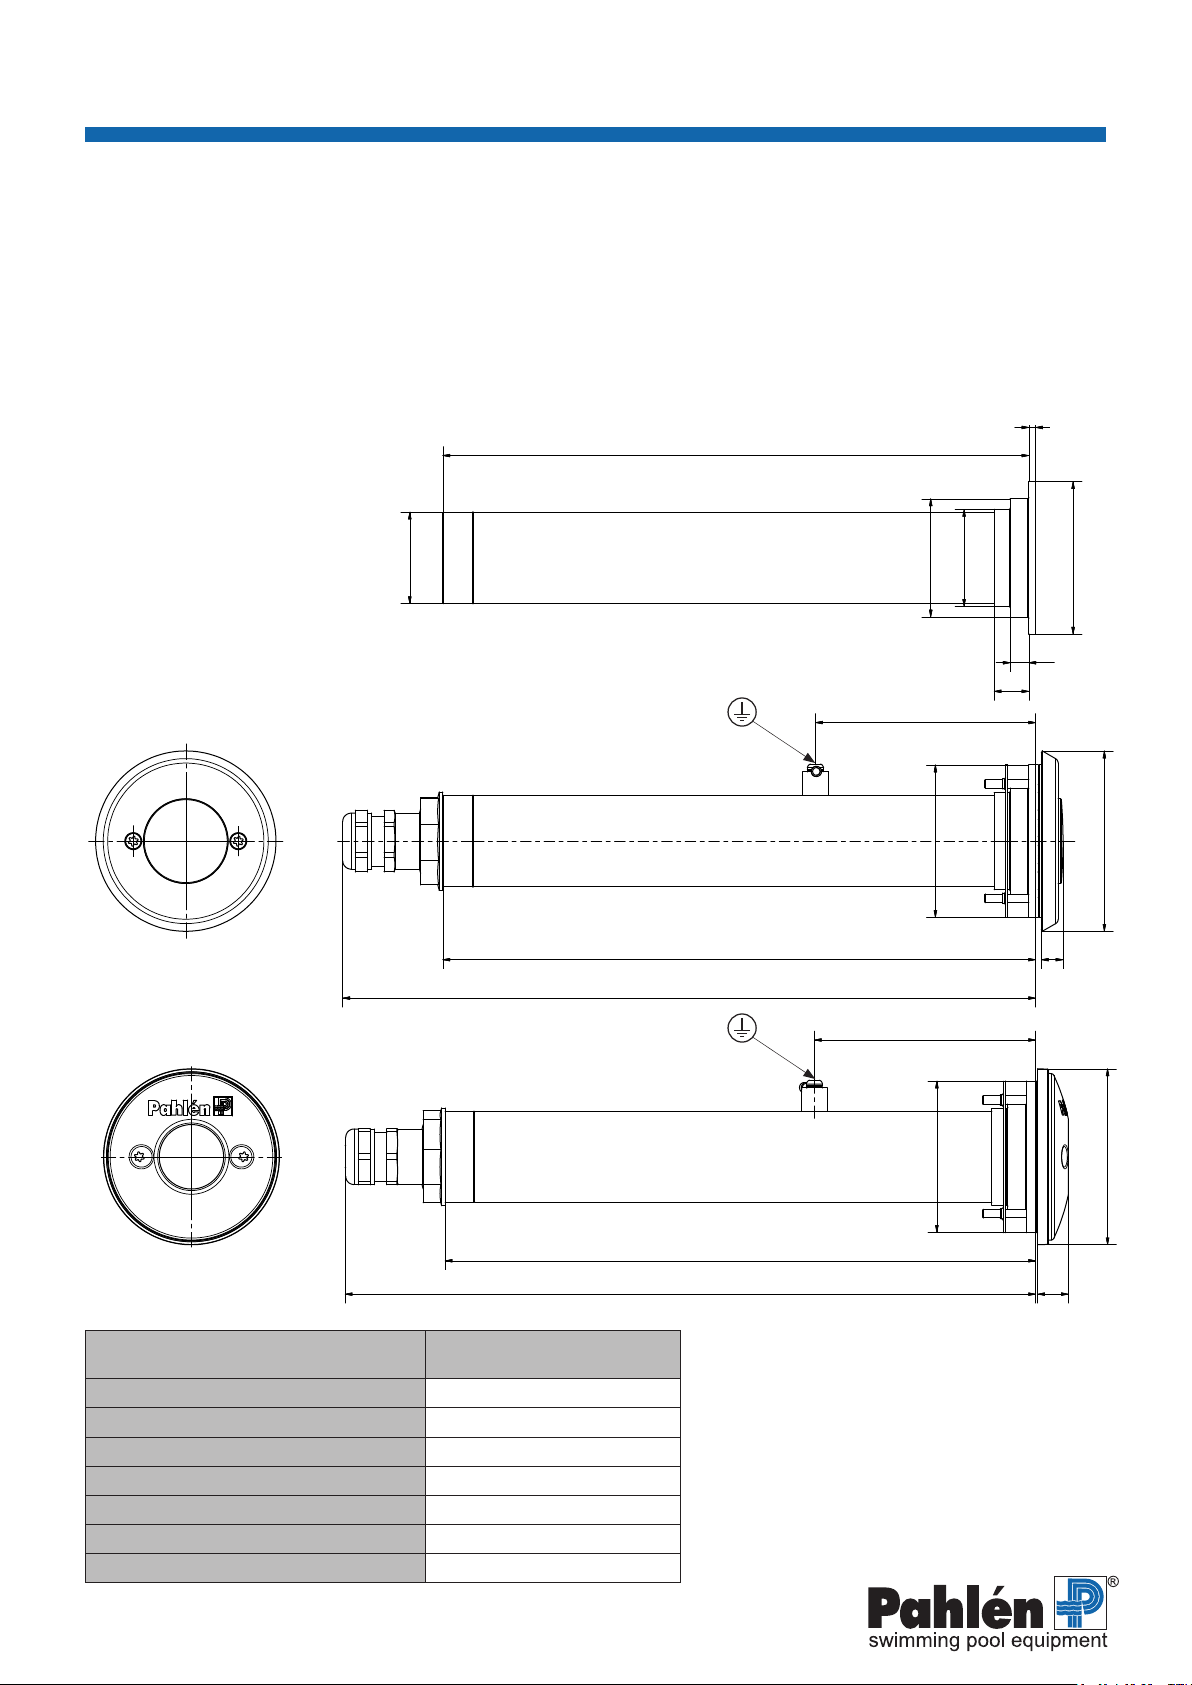
4
Spotlight LED 350 50VS
MA50-17 SE
2020
SVENSKA
12VAC
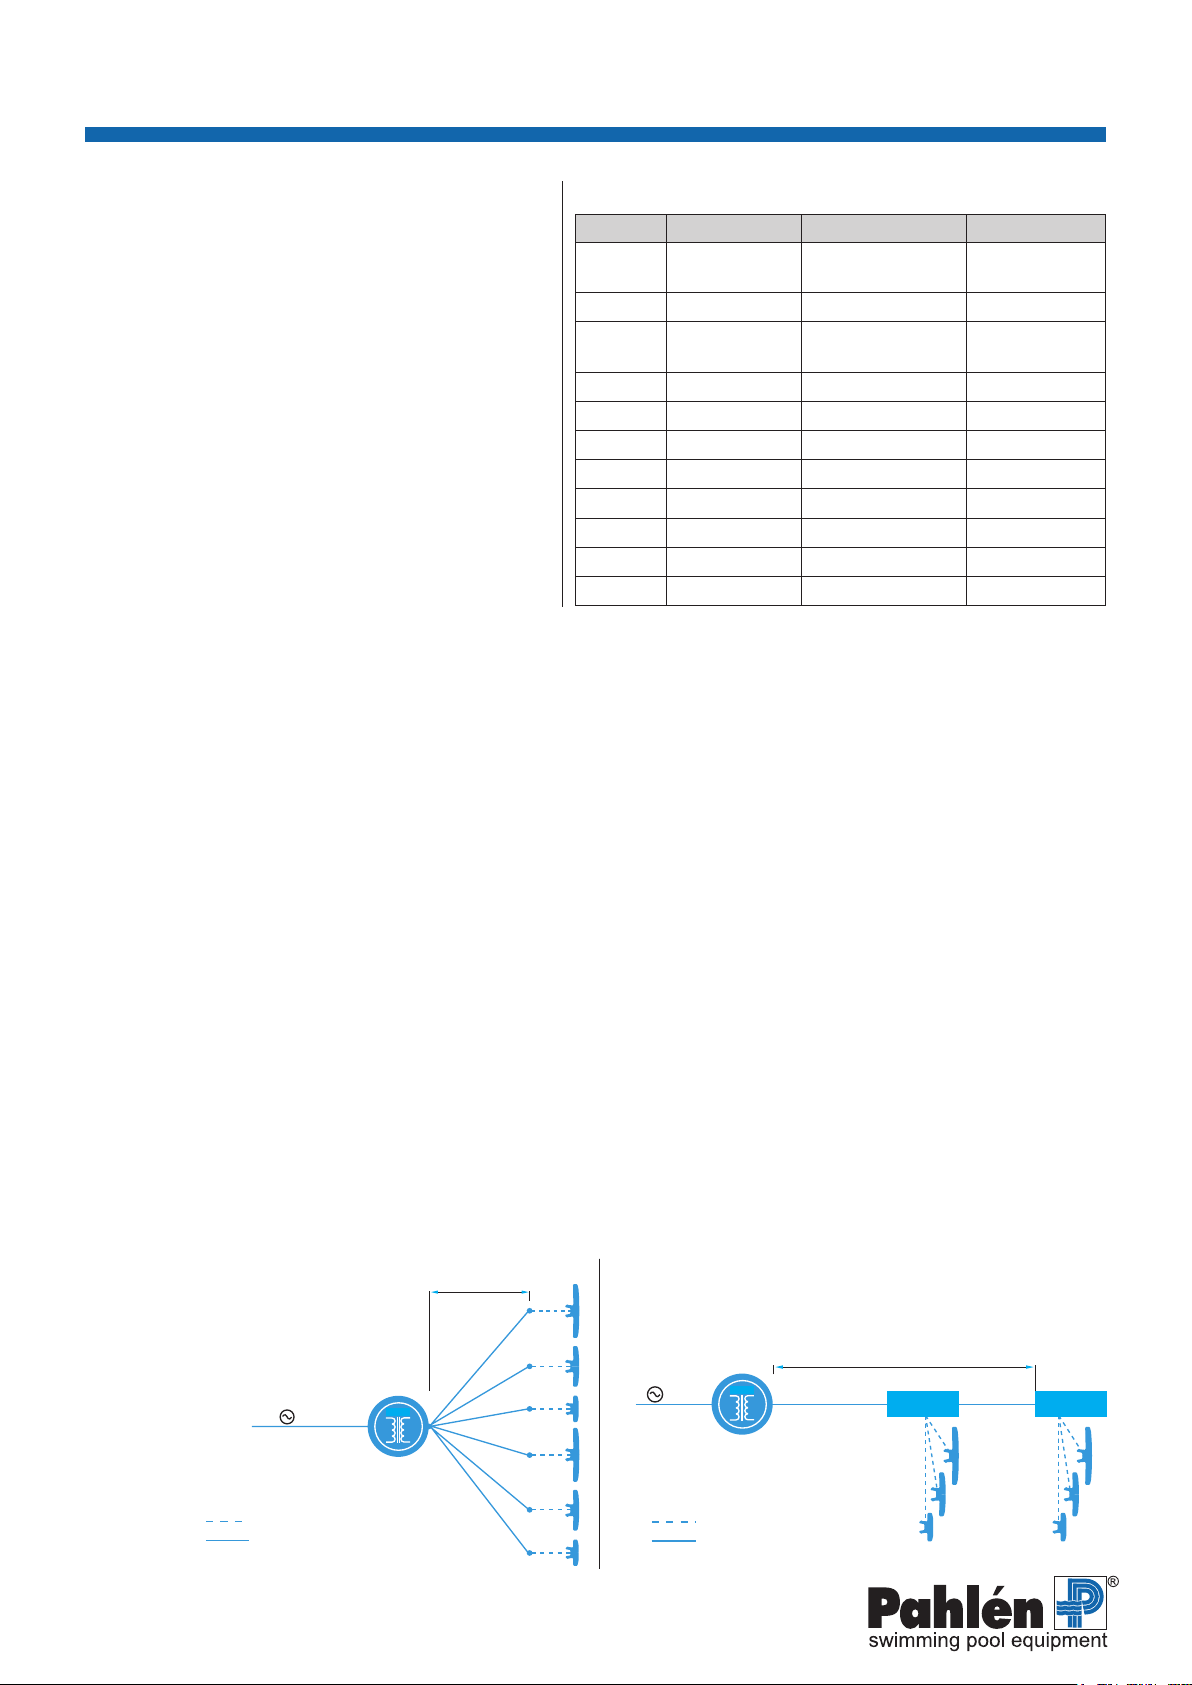
All lamps are connected to the transformer via 1 cable
Wiring instructions Setup 2
page 10 of 20
12VAC
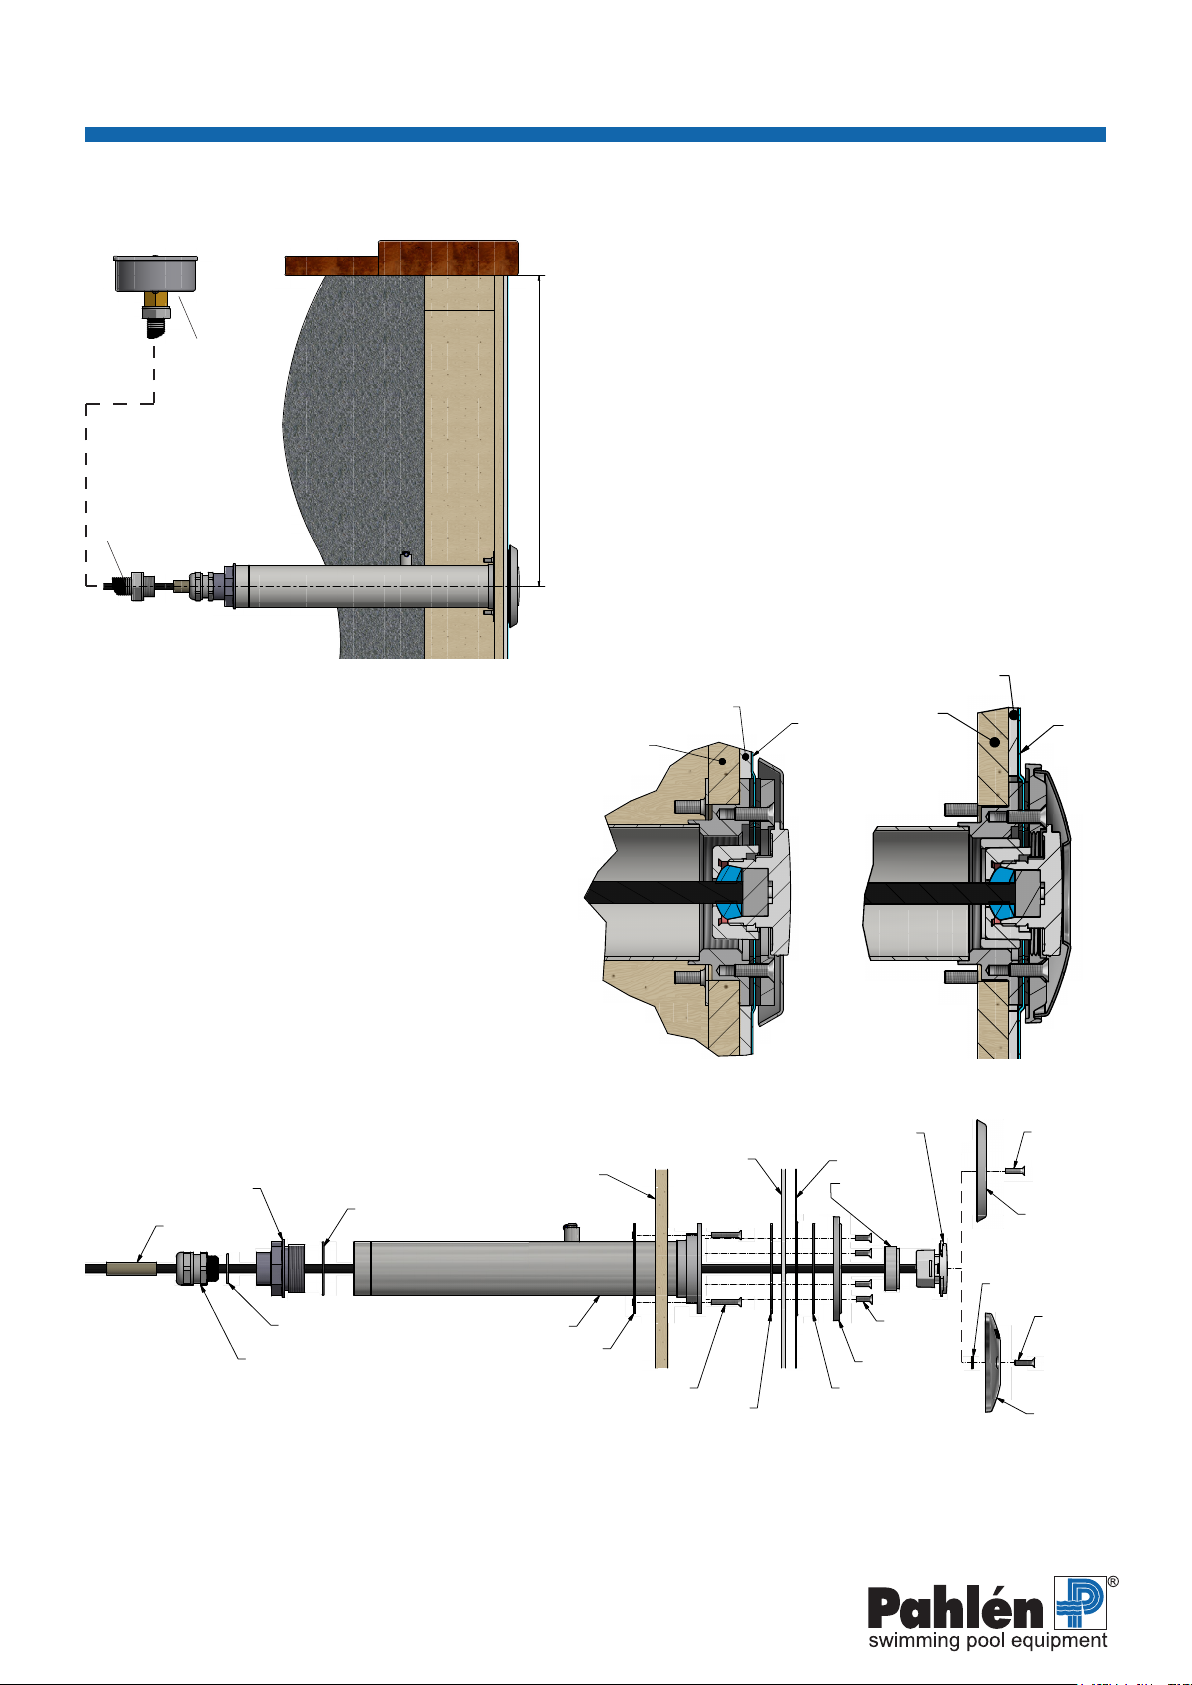
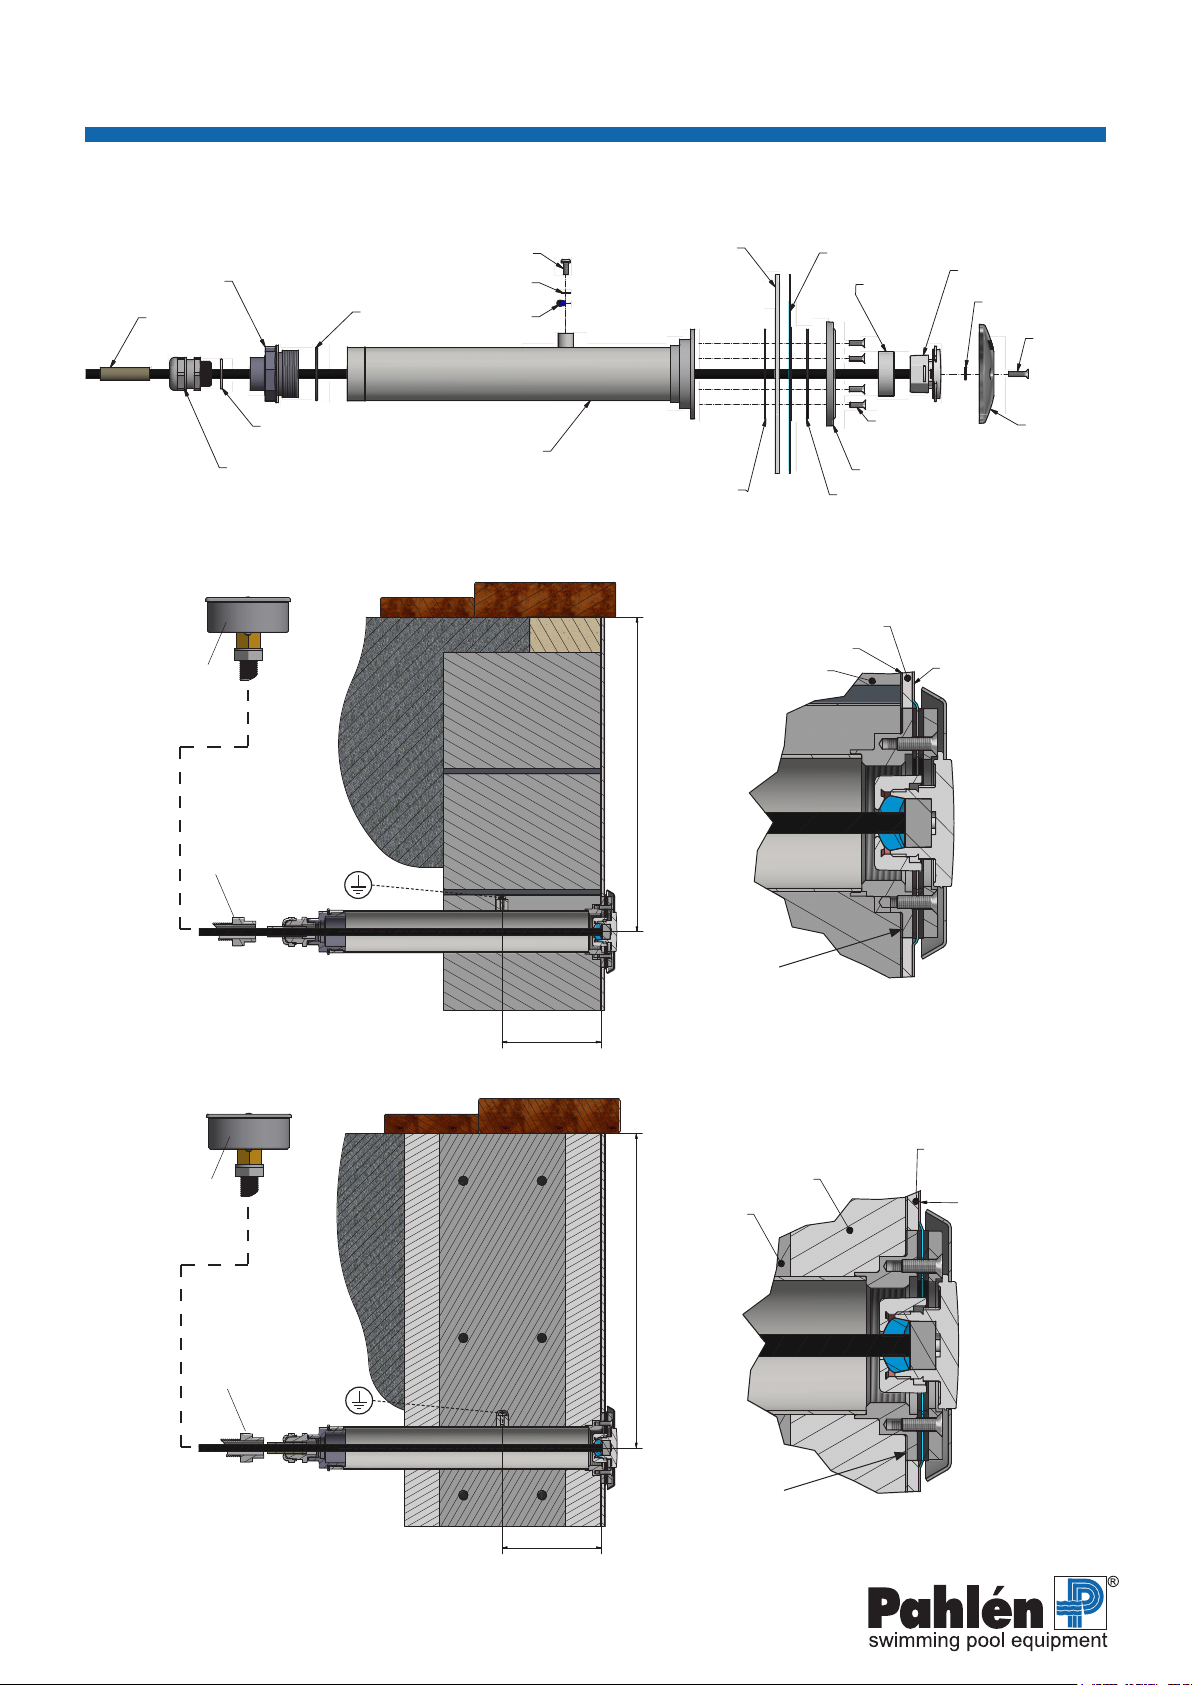
Installation allmänt
Rekommenderatdjupnnsbeskrivetisenareavsnitt.
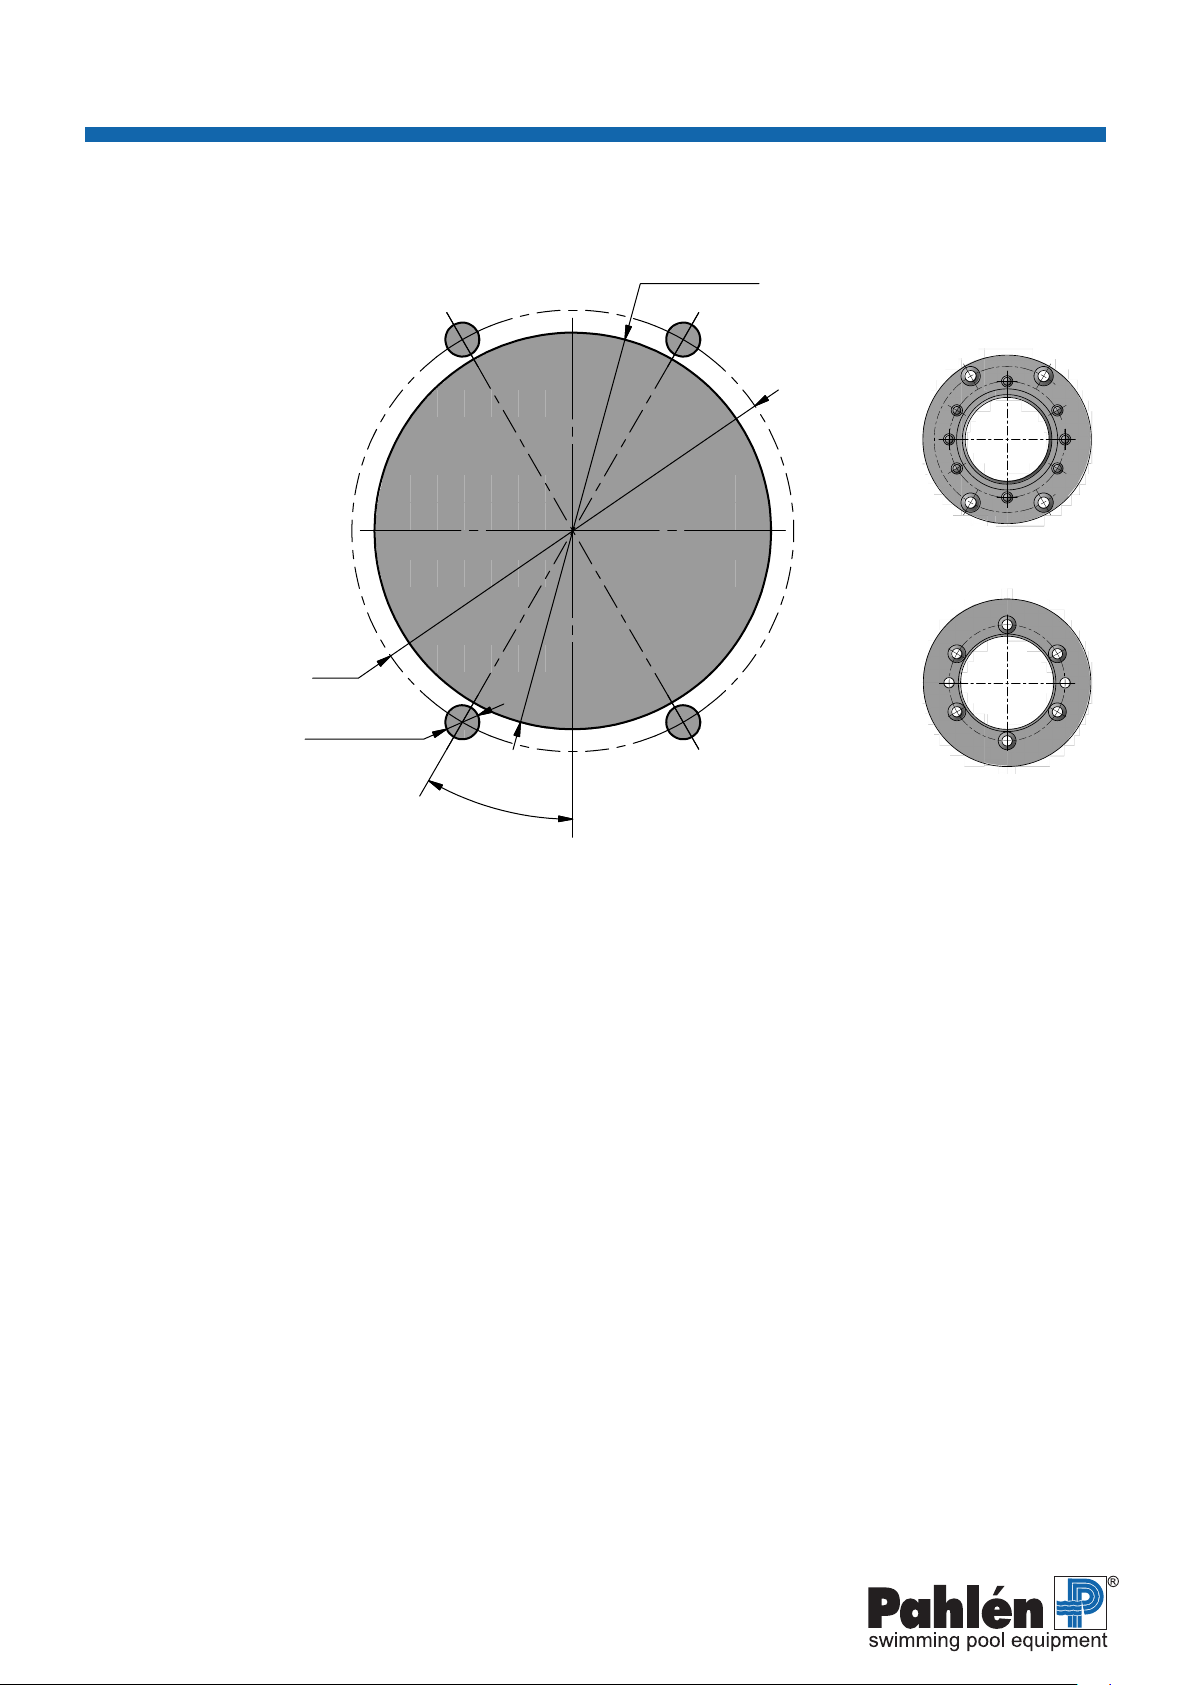
• Armering får aldrig ligga närmare rostfritt material än minst 50 mm i gjutna poolkonstruktioner.
• Elektriska installationer >30V får ej placeras inom 500 mm avstånd från något rostfritt material.
• Vid montering skall rostfria verktyg med rengjorda kontaktytor användas.
• Förvaraprodukternaioriginalförpackningenändatillinstallationenförattundvikareporochäckar.
• Var aktsam vid monteringen så att inte produkten repas.
• Undvik att placera koncentrerad dosering av kemikalier intill rostfria detaljer. Skador kan uppstå vid utebliven poolcirkulation.
Installation el
Beaktalokalaelföreskrifterbeträandekopplingsdosansplacering.
Belysningen skall alltid anslutas via en skyddstransformator 12V AC av ringkärnetyp (se tabell) för att få korrekt funktion och
maximallivslängd.OmeränenRGB-lampainstallerasskalldessakopplastillsammatranformatorochviagemensamström-
brytare för att kunna synkroniseras.
Transformatornseektmåstevarastörreändetsammanlagdavärdetförallalamporna,setabellpånästasida.
Medföljandesladdskaalltidanvändasförinkopplingavlampan.
Om belysningens utvändiga kabelisolering eller innerledare är skadad skall den bytas ut av servicetekniker eller annan behörig
person.
Rekommendationer
Nedanstående rekommendationer angående kabel och inkoppling av lamporna skall följas för att få önskad funktion.
Maximaltochstabiltljusärbaragaranteratifalltvärsnittetpåkabelnärlikamedelleröverstigertabellernasangivnavärden.
Kabellängdernaärberäknademedstörstatänkbaraeektförlustikablarna.
Maxkabellängd
230V AC
Kabel som medföljer lampan
Separat kabel, medföljer ej
Alternativ 1.
Alla lampor kopplas direkt till transformatorn
med separat kabel.
Denna lösning är att föredra när styrenhet
PLP-REMellerPLP-REM300används.
Kopplings-
box
Kopplings-
box
Maxkabellängd
230V AC
Kabel som medföljer lampan
Separat kabel, medföljer ej
Alternativ 2.
Alla lampor kopplas till transformatorn via en matningskabel och
kopplingsbox.
Allmän info
Vattentemperaturenfårinteöverstiga+40ºC.
Vattnet får inte frysa runt lampan.
Lampan måste vara helt nedsänkt i vatten när den tänds.
Rekommenderade värden beträande vattenkvalitet:
Totalklorhalt: max3,5mg/liter(ppm)*
Klorid(salt)halt: max250mg/liter
pH-värde: 7.2–7.6
Alkalinitet: 60-120mg/liter(ppm)
Kalciumhårdhet: 100-300mg/liter(ppm)
Järn: max0,1mg/liter*
Koppar: max0,2mg/liter*
Mangan: max0,05mg/liter*
Fosfor: max0,01mg/liter*
Nitrat: max50mg/liter*
Utanför dessa värden gäller ej produktgarantin
*EnligtEN16713-3
RGB-lampans färglägen:
Program Namn Typ Färg
1. Levande ljus Fast <2000K
mycket varmvit
2. Varmvit Fast 3000K varmvit
3. Neutral vit Fast 5000K netural
vit
4. Kallvit Fast 9500K kallvit
5. Karibisk blå Fast turkos
6. Blå Fast blå
7. Grön Fast grön
8. Röd Fast röd
9. Violett Fast lila
10. Gul dynamisk Långsamväxling skiftande gult
11. Blå dynamisk Snabbväxling skiftande blått