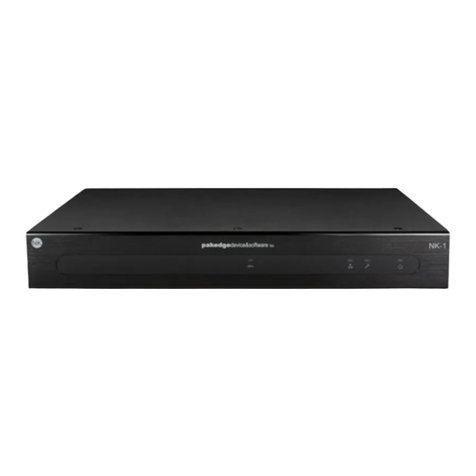
Pakedge NK-1 User manual

NK-1
Wireless Controller with BakPak
User Guide

NK-1 Wireless Controller User Guide
2
Introduction
The popularity and affordability of IP networking has driven audio/video and control networks to
share the same physical wiring with computer networks. However, computer data can tolerate
unpredictable latency in ways that audio-video streaming and control systems cannot.
Sophisticated systems require the same robustness as an enterprise network to ensure that IP-
based controls occur instantly and audio/video packets arrive in time.
Note: If this is your first time installing this product, please read this manual in its entirety.
Customer Service and Technical Support
Pakedge is committed to providing you with exceptional support on all of our products. If you
wish to speak with one of our representatives, you may contact us at:
Customer Service
Email: customerservice@pakedge.com
Phone: 650.385.8701
Technical Support
Email: support@pakedge.com
Phone: 650.385.8703
Visit our website for up-to-date support information at www.pakedge.com.
Please be prepared to provide your product's model and serial number when contacting Pakedge
Support. Your model and serial numbers are printed on a label located on the electronic housing.

NK-1 Wireless Controller User Guide
3
Contents
Introduction....................................................................................................................................................................................... 2
Customer Service and Technical Support...................................................................................................... 2
Contents ............................................................................................................................................................................................. 3
Overview.............................................................................................................................................................................................4
Preparing to install the controller ..........................................................................................................................................4
Installation..........................................................................................................................................................................................4
Configuring the NK-1 through your network router............................................................................................. 5
Configuring the NK-1 directly using a computer.................................................................................................... 5
Running the wizard ....................................................................................................................................................................... 7
NK-1 Home screen..........................................................................................................................................................................9
Managing the network............................................................................................................................................................... 10
Using the Wireless Controller application ....................................................................................................................... 10
Using the Wireless Controller Dashboard .................................................................................................................11
Using AP status widgets .........................................................................................................................................11
Using the Client(s) view..........................................................................................................................................12
Setting up WiFi.......................................................................................................................................................................12
Setting up WiFi for access points......................................................................................................................12
Viewing AP group configurations .....................................................................................................................15
Creating a new AP group configuration ........................................................................................................16
Changing NK-1 system settings .....................................................................................................................................18
Changing login credentials....................................................................................................................................18
Performing NK-1 maintenance.............................................................................................................................19
Updating system firmware....................................................................................................................................19
Viewing and updating license information ................................................................................................. 20
Updating AP firmware........................................................................................................................................... 20
Using advanced WiFi settings........................................................................................................................................21
Planning AP deployment........................................................................................................................................21
Scheduling WiFi availability.................................................................................................................................23
Setting up MAC filtering ....................................................................................................................................... 24
Running a site survey............................................................................................................................................. 24
Changing administration settings....................................................................................................................................... 26
Changing NK-1 system settings ................................................................................................................................... 26
Updating system firmware..............................................................................................................................................27

NK-1 Wireless Controller User Guide
4
Overview
The front panel of the NK-1 has a pair of blue LEDs (HDD and PWR).
See the table below for more information.
Label
Function
Description
HDD
Hard drive activity
When lit, the hard drive is in use
PWR
Power indicator light
When lit, indicates that unit has power
Physical cabling (power, Ethernet, console) is located on the rear panel.
The table below describes each port and its function.
Name
Description
AC Connector
AC110~260V
Power Switch
Provides power to the NK-1
USB
Maintenance
LAN
MDI/MDIX RJ45 interface for connection to the LAN
Maintenance
A Port for maintenance purposes
Console
Local management,115200bps, RJ45 interface
Preparing to install the controller
Installing a wireless controller is similar to installing a network switch. Installing the associated
APs, however, is more complex, so add your APs to the network before logging in to your NK-1
for the first time, and refer to “Planning AP deployment” on page 21.
Tools required:
•Phillips screwdriver (if using rack-mount brackets)
•PC or laptop with Ethernet interface and a web browser (an integrated DB-9 port or USB-
to-Serial adapter may be necessary if you would like to use the console interface)
•Ethernet cable
Installation
•If mounting in a standard 19" AV rack, attach the rack-mount brackets. If not rack-
mounting, make sure that the NK-1 is physically mounted near power and network
connections (for example, a backbone switch or firewall/router).

NK-1 Wireless Controller User Guide
5
Configuring the NK-1 through your network router
If you are using a router that has an internal IP scheme of 192.168.1.x, then you can connect the
controller to an available port on your router or network switch and run the wizard.
1. Connect the controller to power and press the power switch on the rear panel.
2. Connect an Ethernet cable from your router to the NK-1.
3. From a computer connected to this network, open any web browser (Mozilla Firefox
recommended).
4. Go to Step 4 under “Configuring the NK-1 directly using a computer” below.
Configuring the NK-1 directly using a computer
If your router is using an IP scheme other than 192.168.1.xor you want to configure the NK-1
directly using a computer, you can configure the NK-1 directly.
To configure the NK-1 directly using a computer:
1. Connect the controller to power and press the power switch on the rear panel.
2. Connect an Ethernet cable from your computer to the NK-1.
3. Configure the computer with a static IP address of 192.168.1.10 and subnet mask of
255.255.255.0, then open any web browser (Mozilla Firefox is preferred).
4. In the web browser, enter the NK-1's default IP address (192.168.1.240) into the
address bar and press Enter. A webpage appears, prompting you for a username and
password.
5. Enter pakedge as the username and pakedgen for the default password, then click
Login to log in to the web administration portal.

NK-1 Wireless Controller User Guide
6
6. After you have logged into the controller, you will see the Home screen.
Important: The first time you log in, the Setup Wizard starts. Go to “Running the
wizard” on page 7.
7. Click Settings, or click the Home screen’s Settings icon.
8. Enter the correct IP address, subnet mask, default gateway, and DNS information, then
click Save. You can now run the wizard to configure your wireless network.

NK-1 Wireless Controller User Guide
7
Running the wizard
The wizard will discover, manage, and configure your wireless access points, making it a quick
and easy way to set up your wireless network. Note: The wizard must be completed to gain
access to the main controller interface. After completing the wizard for the first time, the option
to run the wizard again will not be available until the system is restored to factory defaults.
To run the wizard:
1. Log in to the NK-1.
The first time you log in, the Setup Wizard starts and displays the number of APs (wireless
access points) it has discovered. Notes: You will not be able to access the Wireless
Controller Dashboard until this wizard is completed. AP Discovery must discover at least
one AP before you continue with the Setup Wizard.
2. If the number of discovered APs does not match the number of APs that are actually
installed, click Continue Discovery to give it time to discover the additional APs. When
you are satisfied with the AP count, go to Step 3.
3. Click Continue Wizard. The wizard’s Welcome screen opens.
4. Click Next. Here you can set up your controller name and IP address, as well as subnet
mask, gateway, and time zone.

NK-1 Wireless Controller User Guide
8
5. To change your login credentials (strongly recommended), click Edit Password or Edit
Security Questions.
6. Click Next. Here you can edit each AP’s location, view each serial number, IP address,
MAC address, channel, and power setting, and select APs for firmware updates.
7. To update an AP’s firmware, select its circle on the right side of the table.
8. Click Next. Here you can set up multiple security profiles for your APs and set up each
radio band’s SSID configuration.
9. Click Complete to finish the wizard and apply the new settings to all connected access
points.
The Wireless Controller Dashboard opens, where you can view CPU and memory usage
and a list of the types of APs installed.
Note: The wizard is disabled after it has completed setup. To run the wizard again, you
must restore the NK-1 to its factory default settings, then log back in to the controller. To
do this, go to the Wireless Controller Dashboard, click System Settings at the top of the
page, click System Settings in the menu that opens, then click Restore Defaults.

NK-1 Wireless Controller User Guide
9
NK-1 Home screen
The Home screen is your jumping-off point for cloud-based network management, wireless
controller setup, NK-1 device settings, and NK-1 firmware management.
System summary—This small table gives you at-a-glance information for the NK-1’s uptime, MAC
address, IP address, and serial number.
Management Agent—This takes you to the BakPak login for full, cloud-based network
management, which allows you to view, configure, and even reboot attached network devices.
Wireless Controller—This takes you to the wireless controller components:
The Dashboard shows widgets for CPU usage, memory usage, AP status, and number of
connected clients. With Clients selected, the Dashboard shows each connected AP’s
settings, and you can give each a descriptive device name.
WiFi Setup lets you select Access Points to view and change each detected AP’s
settings. It also lets you select Configuration to view system configurations and view and
change user configurations.
System Settings lets you view and change NK-1 system settings (including login
credentials and maintenance tasks). Clicking Access Point Settings displays the number
of valid licenses, a list of APs that are controlled by the NK-1, and firmware update status
for each.
Advanced helps you plan your AP deployment, create AP scheduling, set up MAC
filtering, and run a site survey.
Settings—This takes you to your NK-1 device settings page, where you can change the NK-1’s
setup (including IP address and subnet mask) and your login credentials.
Firmware Management—This takes you to a screen where you can update your NK-1’s firmware,
if necessary.

NK-1 Wireless Controller User Guide
10
Restart and Shutdown—Click these to restart or power off the NK-1.
Tip: For quick info about a screen’s settings, click the “information” button. This helpful button
is available in most screens throughout the interface.
Managing the network
The BakPak cloud-based network management system (included) allows you to monitor,
configure, and manage the network and network-connected devices in all of your customers’
sites, all from a single dashboard.
To access BakPak:
1. From the NK-1 Home screen, click Management Agent.
If this is your first time accessing BakPak, the Management Agent Registration screen
opens. If you’ve already set up BakPak with your NK-1 controller, you are brought to
BakPak’s Dashboard.
2. In the Management Agent Registration screen, click Register to BakPak, then follow the
on-screen instructions to set up your account.
3. Refer to the BakPak Cloud Management System User Guide for complete BakPak
instructions.
Using the Wireless Controller
application
In addition to settings configured during the wizard’s setup, you can configure the entire WiFi
network from this application.
To access WiFi settings:
1. From the NK-1’s Home screen, click Wireless Controller.

NK-1 Wireless Controller User Guide
11
The Wireless Controller Dashboard opens.
Using the Wireless Controller Dashboard
The Dashboard displays AP CPU and memory usage, AP status, and the number of clients
connected to each AP.
Using AP status widgets
The AP status widgets are all visible in the basic Dashboard view.
•The Hardware widget shows the CPU and memory usage over time. This information can
be used to monitor the system's performance.
•The AP Status widget shows the detected APs based on status.
•Healthy: APs are managed, configured, and online.
•Offline: APs are no longer being detected by the controller.
•Not configured: APs are detected but a configuration from the controller was not
applied.
•Unmanaged: APs are not managed by the controller due to a license limitation or
being unsupported. Unsupported APs can be APs that are set up in modes other
than Access Point mode (WDS, repeater). If an AP is unmanaged, the controller
will not be able to configure it or perform any actions on it.
•FW out of date: APs are not running the latest firmware.
•The Connected Clients widget displays the APs that are or have been connected to your
wireless network. It also shows the devices per AP and per band (2.4 GHz or 5 GHz) on
each AP, and you can select and deselect which bands to display. You can also use this
section to look at the client's movement from one AP to another.
You have the option to rename and block the client, if needed. To unblock a client, you
will have to go to Advanced > MAC Filtering.

NK-1 Wireless Controller User Guide
12
Using the Client(s) view
The Client(s) view lets you see currently connected WiFi devices and their status. You can also
enter a device name here for easier tracking later.
To view the history of a client device’s connections:
1. In the Wireless Controller Dashboard’s basic view, click Client(s).
The list of clients opens, showing each WiFi-connected device and current status.
2. Click somewhere on the device’s table row. The device’s history list expands, showing
each time the client device connected to the network or moved between APs.
3. To close the list, click anywhere inside the list.
Setting up WiFi
Setting up WiFi for access points
To set up WiFi for the network’s access points:
1. In the Wireless Controller Dashboard, click WiFi Setup, then click Access Points.

NK-1 Wireless Controller User Guide
13
The list of connected access points opens, displaying AP locations, identifiers, and
settings. Here you can scan for APs and organize APs into groups.
AP groups explained
•Pakedge Default group—Unmanaged APs are automatically added to the Pakedge
Default group. An AP is considered unmanaged if you no longer have enough licenses on
the controller or if the AP is running in an unsupported mode such as WDS or repeater.
The only action allowed on an AP in this group is to manage the AP. To do so, expand the
group and click on the arrow pointing left, and you will see a flag option that can be used
to managed an AP.
•Access Points group—The controller automatically discovers and manages APs and adds
them to a group called Access Points when the setup wizard is run.
Creating a new group
Usually one group that includes all the APs is enough, but if you want to apply different
configurations to different APs on the same network, you can by creating a new group, adding
the APs you want to this group, and applying a specific configuration to the group.Note: An AP
cannot belong to two groups at the same time.
Note: Only managed APs can be added to a group.
To create a new group:
1. In the Wireless Controller Dashboard, click WiFi Setup, then click Access Points.
2. Click Add New Group (near the top of the page).

NK-1 Wireless Controller User Guide
14
The Group to add screen opens.
3. Give the group a name, then click to select the APs to add to the new group. (Blue APs
are selected, gray APs are not.)
4. Click Apply. The group is created.
Changing access point and group basic settings
You can change basic settings for AP groups and individual APs from this screen.
To change settings for an AP group:
1. In the Access Points screen, click one of the icons on the right of the group name.
BAND—Toggles a band on and off for the group (Enable/Disable Band),
rejects clients attempting to connect on a particular band (Reject Client),
and enables Multicast Enhancement (Multicast Enhancement).
SET IP—Resets DHCP or changes static IP addresses for group APs. To
refresh DHCP addresses, click
DHCP
. To specify new static IP addresses,
click
IP
, click
Scan for IPs in use
, enter the address to change on the left,
the address to change it to on the right, then click
Apply IP(s)
.
RESET—Resets all APs to factory default settings. Use with caution.
REBOOT—Reboots all APs in the group.
LED—Turns all AP LEDs on or off. To turn the LEDs on or off, select ON or
OFF
, then click
Apply
. When all group APs have LEDs turned on, this icon
is blue. When any of the group APs have LEDs turned off, this icon is gray.

NK-1 Wireless Controller User Guide
15
CONFIGURATION—Edits the AP group. Click a grayed-out AP to add it to
the group, or click a blue AP to remove it from the group, then click
Apply
.
If you want to apply one of the defined configurations (see below), click
the toggle for Do you want to apply/change configuration?, then select an
available configuration.
DELETE—Deletes the AP group.
To change settings for an individual AP:
1. In the Access Points screen, click one of the AP groups to expand it, then click the three-
dot menu icon at the right to open the AP settings menu.
BAND—Toggles a band on and off for the AP (Enable/Disable Band),
rejects clients attempting to connect on a particular band (Reject Client),
and enables Multicast Enhancement (Multicast Enhancement).
SET IP—Resets the DHCP address or changes the static IP address for the
AP. To refresh the DHCP address, click
DHCP
. To specify new static IP
addresses, click
IP
, click
Scan for IPs in use
, enter the address to change
on the left, the address to change it to on the right, then click
Apply IP
.
Flag—Flags an AP for management.
RESET—Resets the AP to factory default settings.
REBOOT—Reboots the AP.
LED—Turns the AP’s LEDs on or off. To turn the LEDs on or off, select ON
or
OFF
, then click
Apply
. When the LEDs are on, this icon is blue.
Viewing AP group configurations
To view AP group configurations:
1. In the Wireless Controller Dashboard, click WiFi Setup, then click Configuration. The
configurations screen opens.
2. Click a configuration to expand its list.
•System Configurations—Includes only the Pakedge Default configuration (read only).
This is a configuration used to indicate what configuration APs will adopt when they
are returned to factory defaults. Click View to see its settings.
•User Configurations—These are the configurations that have been defined by you or
other administrators.

NK-1 Wireless Controller User Guide
16
Creating a new AP group configuration
You can create different configurations to apply to different AP groups. You may have, for
example, a group of APs called “Guest” that includes APs in the guest area, and you would like
the guest to have his own wireless configuration.
To create a new configuration:
1. In the Wireless Controller Dashboard, click WiFi Setup, then click Configuration.
2. Click New Configuration.
The group configuration screen opens.
3. Click SSID Configuration to create and manage SSIDs.
You can create up to eight SSIDs per band by clicking Add New. Each SSID can have its
own security profile and password. You can also enable band steering which, while
enabled, limits the SSIDs to a maximum of eight.
•Enable: Used to enable/disable the SSID from broadcasting. This will not affect the
entire interface, only this one SSID.
•Hide SSID: Used to hide the SSID while still broadcasting. Clients can still connect
to it if previously connected or by entering the SSID name manually.
•Client Isolation: When enabled, clients connected to the same SSID cannot see
each other.
•Security Profile: Acts as the password for this SSID. To create and edit security
profiles, click the Security Profiles tab near the top of the screen.
•ID: If you use VLANs (Pakedge zones), click the ID circle to select the appropriate
VLAN ID for the selected SSID. If the VLAN ID is not default, you can click the grey
circle and enter a VLAN ID manually.
4. Click Guest to define the SSID’s guest network.

NK-1 Wireless Controller User Guide
17
You can set up one guest SSID per band. Please note that guest SSIDs do not depend on
the router settings (such as VLANs). The Guest Network is designed for routers that do
not support VLANs. The Guest Network acts as its own network with no communication
to other SSIDs.
5. Click Advanced to change wireless mode and channel width.
You can modify these settings if the default settings are not working well in the
environment where the system is being set up.
6. Click Radius to set up Radius security.
Radius wireless security can only be used in WX-1-only environments. If you are using
WK-1s or WK-2s, the Radius configuration will not be applied.
7. Click Security Profiles to create a profile that can be applied to SSIDs on your network.
By default, three security profiles are already created: Pakedge Secure, Pakedge Guest,
and Pakedge Open. You can modify these profiles. To create a new profile (if needed),
click Add New Profile.
8. When you complete creating a wireless configuration, click Save/Apply, then enter a
configuration name and select an AP group to apply this configuration to. Tip: If you don’t
select an AP group to apply the configuration to, you can still save it and apply it later.

NK-1 Wireless Controller User Guide
18
Changing NK-1 system settings
You can edit the NK-1’s network settings, time zone, and login credentials, as well as reboot, back
up, and restore the NK-1.
To change NK-1 network settings:
1. In the Wireless Controller Dashboard, click WiFi Setup, then click System Settings. The
System Settings tab opens.
2. Click in any of the fields to change the NK-1 controller name, IP address, subnet mask,
gateway, and time zone, then click Apply Changes.
Changing login credentials
Although the username must stay “pakedge,” you can change the NK-1’s password (for logging
in) and security questions (for password recovery).
To change NK-1 login credentials:
1. In the Wireless Controller Dashboard, click WiFi Setup, then click System Settings. The
System Settings tab opens.
2. To change the password, click Edit Password, follow the on-screen instructions, then click
Update. Note: The password must be at least six characters long.
3. To change the security questions used for password recovery, click Edit Security
Questions, enter the requested information, then click Apply.

NK-1 Wireless Controller User Guide
19
Performing NK-1 maintenance
This System Settings section allows you to back up and restore the wireless controller settings.
You can also reboot the NK-1 and restore it to factory defaults, if necessary. Note: Restoring the
NK-1 to factory defaults does not return the APs to their factory defaults.
To perform NK-1 maintenance:
1. In the Wireless Controller Dashboard, click WiFi Setup, then click System Settings. The
System Settings tab opens.
2. To reboot the controller, click Reboot Controller, then click OK.
3. To back up the current NK-1 configuration, click Backup Configuration, navigate to the
drive and folder you want to save the configuration to, then click Save.
4. To restore an NK-1 configuration that has been backed up, click Restore Configuration,
click Choose File, navigate to the file, then click Upload.
5. To restore the NK-1 to its factory default settings, click Factory Default, then click OK.
Caution: We strongly recommend you back up the configuration before you try restoring
the NK-1 to its factory default settings.
6. To restore the NK-1 to its factory default settings while retaining its LAN settings, click
Factory Default (Keep LAN Settings), then click OK.
Updating system firmware
In the System Settings section, you can update the NK-1’s firmware and view the Wireless
Controller’s firmware version.
To update system firmware:
1. In the Wireless Controller Dashboard, click WiFi Setup, then click System Settings. The
System Settings tab opens.
2. To update the NK-1 firmware from the cloud, click Cloud Update, then click OK to
automatically find and install the latest firmware available from Pakedge.

NK-1 Wireless Controller User Guide
20
3. To update the NK-1 firmware from a firmware file that has been downloaded onto your
computer, click Upload Firmware, click Choose File, navigate to the firmware update file,
then click OK.
Viewing and updating license information
In the Access Point Settings section, you can view and update the NK-1’s license information.
To view and update license information:
1. In the Wireless Controller Dashboard, click WiFi Setup, click System Settings, then click
the Access Point Settings tab. The System Settings tab opens and displays the number
of APs in use, along with the total number of allowed AP licenses.
2. To update your license, click Choose File, select the license file, then click Apply.
Updating AP firmware
You can use this screen to update firmware for all of your connected Pakedge APs.
To update AP firmware:
1. In the Wireless Controller Dashboard, click WiFi Setup, click System Settings, then click
the Access Point Settings tab. The System Settings tab opens and displays APs and their
firmware versions under the Access Point Firmware heading.
2. To update a Pakedge AP’s firmware from the cloud, select each AP to update, click Cloud
Update, then click OK to automatically find and install the latest firmware available from
Pakedge. Note: Whenever the controller is rebooted, it downloads the latest license
information from Pakedge and applies it to the wireless controller.
3. To update an AP’s firmware from a firmware file that has been downloaded onto your
computer, select each AP to update (selected APs must be identical models), click Upload
Firmware, click Choose File, navigate to the firmware update file, then click OK.
Important: The Upload Firmware method should be used only if the wireless controller
does not have an Internet connection for the Cloud Update.
Other manuals for NK-1
2
Table of contents
Other Pakedge Controllers manuals