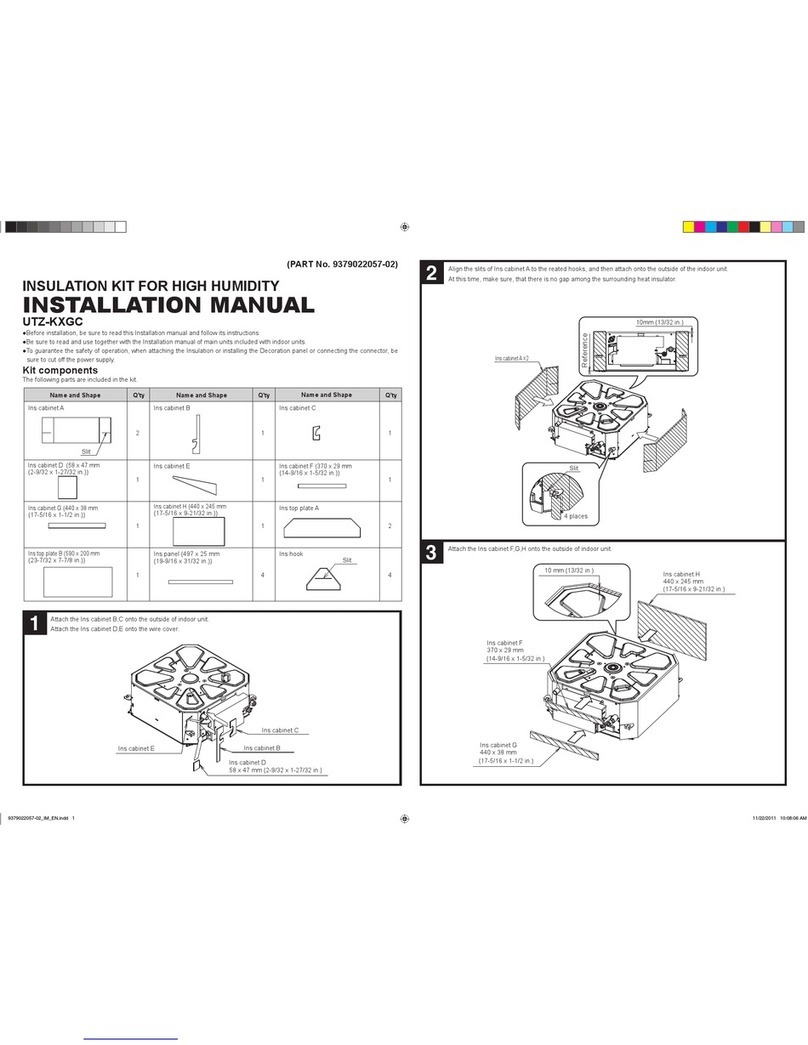
Panasonic nanoe CZ-CNEXU1 User manual

INSTALLATION INSTRUCTIONS
nanoe™ X kit for 4-Way Cassette
Model No. CZ-CNEXU1
Applicable indoor unit : 4-Way Cassette (Type U2)
ACXF60-06970
ENGLISH
Read through the Installation Instructions before you proceed with the installation.
In particular, you will need to read under the “IMPORTANT!” section at the top of the page. ENGLISH
FRANÇAIS
Lisez les instructions d’installation avant de commencer l’installation.
En particulier, vous devez lire la section « IMPORTANT! » en haut de la plage. FRANÇAIS
ESPAÑOL
Lea las Instrucciones de instalación antes de proceder con la instalación del equipo.
En concreto, deberá leer detenidamente la sección “¡IMPORTANTE!” situada al principio de la página.
ESPAÑOL
DEUTSCH
Lesen Sie die Einbauanleitung, bevor Sie mit der Installation beginnen.
Insbesondere die Hinweise im Abschnitt “WICHTIG!” oben auf der Seite müssen unbedingt gelesen werden.
DEUTSCH
ITALIANO
Leggere le Istruzioni di installazione prima di procedere con l’installazione.
Prestare particolare attenzione alla sezione “IMPORTANTE!” all’inizio della pagina. ITALIANO
NEDERLANDS
Lees de installatie-instructies zorgvuldig door voor u begint met de installatie.
U moet vooral het gedeelte waar “BELANGRIJK!” boven staat heel goed lezen.
NEDERLANDS
PORTUGUÊS
Leia cuidadosamente as instruções de instalação antes de prosseguir com a instalação.
Em particular, é necessário ler as informações na secção “IMPORTANTE!” na parte superior da página.
PORTUGUÊS
ΕΛΛΗΝΙΚΆ
Διαβάστε τις Οδηγίες εγκατάστασης πριν συνεχίσετε με την εγκατάσταση.
Συγκεκριμένα, θα χρειαστεί να διαβάσετε την ενότητα «ΣΗΜΑΝΤΙΚΟ!» στο πάνω μέρος της σελίδας.
EΛΛΗΝΙΚΆ
БЪЛГАРСКИ
Прочетете инструкциите за инсталиране преди да продължите синсталирането.
Вчастност, ще трябва да прочетете раздела „ВАЖНО!“ вгорната част на страницата.
БЪЛГАРСКИ
TÜRKÇE
Montaja başlamadan önce tüm Montaj Talimatlarınıokuyun.
Özellikle sayfanın üstünde yer alan “ÖNEMLİ!” başlıklıbölümünü okumanız gerekir. TÜRKÇE
РУССКИЙ
Перед выполнением установки прочтите инструкцию по установке.
Вчастности, вам следует прочесть раздел «ВАЖНО!» вверху страницы.РУССКИЙ
УКРАЇНСЬКА
Перш ніж продовжити встановлення, прочитайте вказівки зі встановлення.
Зокрема, обов’язково прочитайте розділ «ВАЖЛИВО!» вгорі сторінки.
УКРАЇНСЬКА
B.INDONESIA
Bacalah seluruh Petunjuk Pemasangan sebelum Anda melakukan pemasangan.
Secara khusus, Anda perlu membaca bagian “ PENTING! ” di bagian atas halaman
B.INDONESIA
00_290266_All.indb 100_290266_All.indb 1 2017/04/04 16:26:002017/04/04 16:26:00
2
IMPORTANT!
Please Read Before Starting
This air conditioner must be installed by the sales dealer or installer.
This information is provided for use only by authorized persons.
For safe installation and trouble-free operation, you must:
●
Carefully read this instruction booklet before beginning.
●
Follow each installation or repair step exactly as shown.
●
The commercial air conditioning installation shall be in accordance with the National Wiring
Regulations.
●
This product is required to have the remote controller which is adaptable to nanoe™ X function.
●
nanoe™ X kit for 4-Way Cassette is a precision unit. Do not accidentally drop the unit on the
floor. Doing so will cause the unit malfunction or failure.
●
When installation work is completed, check the nanoe™ X connection and confirm if no trouble
occurs. Request the customers to keep this Installation Instructions in their hands.
If re-installation or repairs needed, give this Installation Instructions to the installation technician.
●
Panasonic disclaims all liability for any accidents or damages occurring as a result of installing
the kit using any procedures which are not described in the installation instructions or which do
not use the specified parts. Any malfunctioning or trouble caused by the manner in which the kit
was installed will not be covered by the terms and conditions of the product warranty.
●
Refer to the installation instructions provided with the indoor unit as well.
●
These instructions are all you need for most installation sites and maintenance conditions. If you
require help for a special problem, contact our sales/service outlet or your certified dealer for
additional instructions.
●
Pay close attention to all warning and caution notices given in this manual.
The following symbols used in this manual alert you to potentially dangerous conditions to users,
service personnel or the appliance:
WARNING
This symbol refers to a hazard
or unsafe practice which can
result in severe personal injury
or death.
CAUTION
This symbol refers to a hazard
or unsafe practice which can
result in personal injury or
product or property damage.
Prohibited matters Matters to be observed
00_290266_All.indb 200_290266_All.indb 2 2017/04/04 16:26:012017/04/04 16:26:01

3
ENGLISH
Provide a power outlet to be used exclusively for
each unit, and a power supply disconnect, Earth
Leakage Circuit Breaker (ELCB) or Residual
Current Device (RCD) for overcurrent protection
should be provided in the exclusive line.
Turn off Earth Leakage Circuit Breaker (ELCB)
or Residual Current Device (RCD) of the units
before installation.
Do not disassemble or modify the unit.
Do not use this appliance in a potentially explosive
atmosphere.
Never touch the unit with wet hands.
WARNING
Connect and fix the specified cables for wiring
securely.
Do not allow the connection to be exposed to the
external force of the cables.
Watch your step when working at a higher place.
Do not touch the air inlet or the sharp
aluminum fins of the outdoor unit.
You may get injured.
CAUTIONS
NOTICE
The English text is the original instructions.
Other languages are translation of the original instructions.
00_290266_All.indb 300_290266_All.indb 3 2017/04/04 16:26:012017/04/04 16:26:01

4
Contents
IMPORTANT ...................................................................................... 2
Please Read Before Starting
Component parts.............................................................................. 4
Installation......................................................................................... 5
How to Install nanoe™ X kit for 4-Way Cassette................................ 5
How to Make nanoe™ X Wiring Arrangement.................................... 6
How to Check nanoe™ X Connection................................................ 7
How to Check nanoe™ X Connection (Existing unit) ......................... 8
How to Attach Supplied Label............................................................. 9
Component parts
Part Name Figure Q’ty Remarks
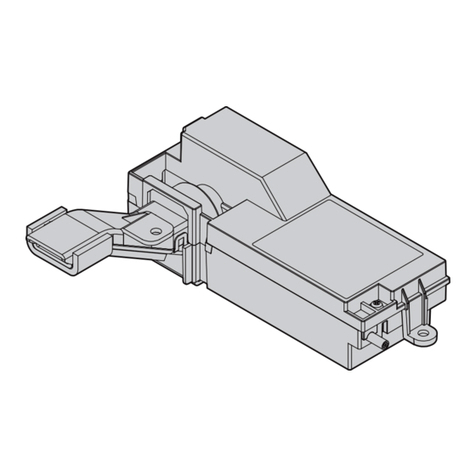
nanoe™ X module 1
nanoe™ X outlet 1
Screw 3
Label
ヵㄉㄊㄔチㄊㄓチㄐㄏㄅㄊㄕㄊㄐㄏㄆㄓチㄊㄏㄐㄓㄑㄐㄓㄕㄆㄔチチㄊㄐㄊㄅㄍチㄑㄓㄐㄅㄖㄕハ
リㄐㄏㄊㄛㄆㄅチㄊㄓチㄈㄆㄏㄆㄓㄕㄆㄅチㄚチチㄅㄆㄗㄊㄆチㄊㄏㄐㄓㄑㄐㄓㄕㄆㄅチ
ㄊㄏチㄕㄉㄆチㄊㄓチㄐㄏㄅㄊㄕㄊㄐㄏㄆㄓチㄅㄆㄕㄊㄗㄕㄆㄔチㄕㄆㄓㄊチㄏㄅ
ㄗㄊㄓㄖㄔㄆㄔチㄊㄏチㄕㄉㄆチㄊㄓネチㄏㄅチㄐㄏチㄔㄖㄓㄇㄆㄔネチㄏㄅチㄊㄏㄉㄊㄊㄕㄔチ
ㄎㄐㄖㄍㄅチㄈㄓㄐㄘㄕㄉチㄐㄏチㄔㄖㄓㄇㄆㄔハ
モㄕㄊㄗㄆチㄔㄖㄔㄕㄏㄆㄔホチㄇㄓㄆㄆチㄓㄅㄊㄍㄔチㄈㄆㄏㄆㄓㄕㄆㄅチㄊㄏチㄔㄊㄕㄖ
チチチチチチチチチチチチチチチチチチチチチチチチチチチチチチチチㄇㄓㄐㄎチㄎㄊㄆㄏㄕチㄊㄓチㄐㄓチㄘㄕㄆㄓ
1
Operating Instructions 1 A5 size
Installation Instructions 1 A5 size
00_290266_All.indb 400_290266_All.indb 4 2017/04/04 16:26:022017/04/04 16:26:02

5
ENGLISH
How to Install nanoe™ X kit for 4-Way Cassette
When installing a new indoor unit, be sure to install the nanoe™ X kit for 4-Way Cassette
before installation of the indoor unit.
(1) Prior to installing the nanoe™ X kit for 4-Way Cassette, remove the following parts from the
indoor unit as shown in the figure below.
1Remove the rubber stopper.
2Remove the insulator.
After installation of the nanoe™ X kit, these two parts will not be used any more.
ŋ
Ō
(2) Attach the nanoe™ X outlet as shown in the figure.
Fix the nanoe™ X outlet with the
supplied screw.
Insert the tip of the nanoe™ X
outlet under the resin.
Installation
00_290266_All.indb 500_290266_All.indb 5 2017/04/04 16:26:022017/04/04 16:26:02

6
How to Install nanoe™ X kit for 4-Way Cassette
(3) Attach the nanoe™ X module to the indoor unit not to cause backlash.
Attach the nanoe™ X module to the indoor unit
so that it can insert into the nanoe™ X outlet.
nanoe™ X module
nanoe™ X outlet
Fix the nanoe™ X module with
the supplied screws (×2).
How to Make nanoe™ X Wiring Arrangement
(1) Make wire routing as shown in the figure below.
(2) Insert the connector into the CN076/NANO.
When closing the lid of electrical component box, take caution the wires should not be caught by
the lid.
Arrange the wires inside
the resin tabs.
Wires
Cross-section A-A
Installation
00_290266_All.indb 600_290266_All.indb 6 2017/04/04 16:26:022017/04/04 16:26:02

7
ENGLISH
How to Check nanoe™ X Connection
Check the nanoe™ X connection in the “Detailed settings” of remote controller.
1. Install the indoor unit as described in the installation instructions attached to the indoor unit.
2. Install the remote controller to the indoor unit which is adaptable to the nanoe™ X function.
3. Connect the power wire provided with the earth leakage circuit breaker to the indoor unit and
supply electricity.
4. With the remote control display blinking “Assigning”, press + +
simultaneously for 4 or more seconds to show the “Maintenance func”.
5. Select “8. Detailed settings” by using / and
press . “Detailed settings” menu is displayed.
6.
With using / , select “Unit no.”, “Code no.” or
“Set data”. Press with showing “ALL” under
“Unit no.”
.
7. With using / , select “9F”
under
“Code no.”.
8. The nanoe™ X operation is normally activated as long as “0000” does not appear under “Set
data”. If “0000” appears, the nanoe™ X connection is not recognized.
<In case of “0000”>
1. Switch Off the earth leakage circuit breaker.
2. Try to unplug the connector of nanoe™ X kit from the PCB. Then plug it in again.
3. Switch On the power of earth leakage circuit breaker again.
4. Check again the above steps 4 to 8. The nanoe™ X operation is normally activated as long
as “0000” does not appear under “Set data”.
If “0000" appears, there is possibly something wrong with the unit.
Contact the dealership you purchased.
00_290266_All.indb 700_290266_All.indb 7 2017/04/04 16:26:032017/04/04 16:26:03

8
Installation
How to Check nanoe™ X Connection (Existing unit)
How to check the connection of nanoe™ X installed at existing indoor unit.
(Remote controller which is adaptable to nanoe™ X function is required.)
1. Switch Off the earth leakage circuit breaker.
2. Install the nanoe™ X kit in the accordance with the following method of the nanoe™ X kit
installation and wiring processing.
3. Switch On the earth leakage circuit breaker.
4. Wait until the remote control display returns to ordinary
mode.
5. Operate the unit in FAN mode.
6. While operating in FAN mode (more than 5 minutes have
elapsed), press + + simultaneously for
4 or more seconds to make “Maintenance func” display.
7. With pressing / , select “13. nanoe” and press . “nanoe” menu appears.
(Unless the nanoe™ X connection is made, will not be displayed.) It is possible to
check each Unit no. whether connected or not. If “Normal” appears, it is available.
8. If it is unable to enter the “nanoe” menu or “Unsupported”, “Faulty connection” or “Not
connected” is displayed, switch Off the earth leakage circuit breaker. Try to unplug the
connector of nanoe™ X kit from the PCB. Then plug it in again.
Once again check the Steps 1 to 6. However, if the same above symptom occurs, there is
something wrong with the kit. Contact the dealership you purchased.
00_290266_All.indb 800_290266_All.indb 8 2017/04/04 16:26:032017/04/04 16:26:03

9
ENGLISH
How to Attach Supplied Label
If the nanoe™ X connection is confirmed, attach the supplied label to the electrical component
box of the indoor unit.
Label
ブ」ヒパ
ㄎㄎ
ヵㄉㄊㄔチㄊㄓチㄐㄏㄅㄊㄕㄊㄐㄏㄆㄓチㄊㄏㄐㄓㄑㄐㄓㄕㄆㄔチチㄊㄐㄊㄅㄍチㄑㄓㄐㄅㄖㄕハ
リㄐㄏㄊㄛㄆㄅチㄊㄓチㄈㄆㄏㄆㄓㄕㄆㄅチㄚチチㄅㄆㄗㄊㄆチㄊㄏㄐㄓㄑㄐㄓㄕㄆㄅチ
ㄊㄏチㄕㄉㄆチㄊㄓチㄐㄏㄅㄊㄕㄊㄐㄏㄆㄓチㄅㄆㄕㄊㄗㄕㄆㄔチㄕㄆㄓㄊチㄏㄅ
ㄗㄊㄓㄖㄔㄆㄔチㄊㄏチㄕㄉㄆチㄊㄓネチㄏㄅチㄐㄏチㄔㄖㄓㄇㄆㄔネチㄏㄅチㄊㄏㄉㄊㄊㄕㄔチ
ㄎㄐㄖㄍㄅチㄈㄓㄐㄘㄕㄉチㄐㄏチㄔㄖㄓㄇㄆㄔハ
モㄕㄊㄗㄆチㄔㄖㄔㄕㄏㄆㄔホチㄇㄓㄆㄆチㄓㄅㄊㄍㄔチㄈㄆㄏㄆㄓㄕㄆㄅチㄊㄏチㄔㄊㄕㄖ
チチチチチチチチチチチチチチチチチチチチチチチチチチチチチチチチㄇㄓㄐㄎチㄎㄊㄆㄏㄕチㄊㄓチㄐㄓチㄘㄕㄆㄓ
00_290266_All.indb 900_290266_All.indb 9 2017/04/04 16:26:032017/04/04 16:26:03

10
IMPORTANT !
Veuillez lire ce qui suit avant de procéder
Ce climatiseur doit être installé par le revendeur ou l’installateur.
Ces informations sont fournies au seul usage des personnes autorisées.
Pour une installation sûre et un fonctionnement sans problème, conformez-vous aux points
suivants :
●Lisez attentivement ce livret d’instructions avant de commencer.
●Procédez à chaque étape de l’installation ou de la réparation exactement comme il est indiqué.
●Ce climatiseur commercial doit être installé conformément aux réglementations nationales
concernant le câblage.
●Ce produit doit être pourvu de la télécommande utilisable avec la fonction nanoe™ X.
●Le kit nanoe™ X pour la cassette 4 voies est un dispositif de grande précision. Évitez de le faire
accidentellement tomber par terre, sous peine de dysfonctionnements ou défaillances de l’unité.
●Une fois l’installation terminée, vérifiez le branchement du kit nanoe™ X et assurez-vous qu’il
n’y a pas de problèmes. Demandez au client de conserver soigneusement ces instructions
d’installation.
Si le climatiseur doit être réparé ou réinstallé, donnez ces instructions d’installation à l’installateur.
●Panasonic décline toute responsabilité en cas d’accidents ou dégâts découlant de l’installation
du kit en suivant des procédures non décrites dans les instructions d’installation ou sans utiliser
les pièces spécifiées. Tout dysfonctionnement ou toute défaillance dus à la façon dont le kit a
été installé ne seront pas couverts par les conditions générales de la garantie du produit.
●Consultez également les instructions d’installation accompagnant l’unité intérieure.
●Ces instructions suffisent à la plupart des sites d’installation et des conditions de maintenance.
En cas de problèmes spécifiques, demandez de l’aide auprès de notre point de vente ou SAV,
ou adressez-vous à un revendeur agréé pour de plus amples consignes.
●Observez scrupuleusement tous les avertissements et toutes les précautions donnés dans ce
mode d’emploi.
Les symboles suivants utilisés dans ce mode d’emploi vous avertissent de conditions
potentiellement dangereuses pour les utilisateurs, le personnel du SAV ou l’appareil :
AVERTISSEMENT
Ce symbole signale un danger
ou une pratique dangereuse
pouvant provoquer des
blessures graves voire
mortelles.
PRÉCAUTION
Ce symbole signale un danger
ou une pratique dangereuse
pouvant provoquer des dégâts
physiques ou matériels.
Actions interdites Points à observer
00_290266_All.indb 1000_290266_All.indb 10 2017/04/04 16:26:042017/04/04 16:26:04

11
FRANÇAIS
Prévoyez une prise électrique à utiliser
exclusivement pour chaque unité, et prévoyez un
dispositif de déconnexion de l’alimentation, un
disjoncteur de fuite à la terre ou un disjoncteur
différentiel pour la protection contre surintensité de
courant dans la ligne exclusive.
Mettez hors tension le disjoncteur de fuite à la
terre ou le disjoncteur différentiel des unités
avant l’installation.
Ne démontez ni ne modifiez l’unité.
N’utilisez pas cet appareil dans une atmosphère
potentiellement explosive.
Ne touchez jamais l’unité avec les mains mouillées.
AVERTISSEMENT
Raccordez et attachez solidement les câbles
spécifiés pour le câblage.
Évitez que la force externe des câbles soit
transmise à la connexion.
Regardez où vous marchez lorsque vous travaillez
en hauteur.
Ne touchez pas l’entrée d’air ou les ailettes en
aluminium mince de l’unité extérieure, sous
peine de vous blesser.
PRÉCAUTION
AVIS
Le texte en anglais correspond aux instructions originales.
Les autres langues sont la traduction des instructions d’origine.
00_290266_All.indb 1100_290266_All.indb 11 2017/04/04 16:26:042017/04/04 16:26:04

12
Table des matières
IMPORTANT .................................................................................... 10
Veuillez lire ce qui suit avant de procéder
Composants.................................................................................... 12
Installation....................................................................................... 13
Méthode d’installation du kit nanoe™ X pour cassette 4 voies ........ 13
Méthode de câblage du kit nanoe™ X ............................................ 14
Méthode de vérification de la connexion du kit nanoe™ X............... 15
Méthode de vérification de la connexion du kit nanoe™ X
(unité déjà en place)......................................................................... 16
Comment coller l’étiquette fournie.................................................... 17
Composants
Nomenclature Figure Qté Remarques
Module nanoe™ X 1
Prise nanoe™ X 1
Vis 3
Étiquette
ヵㄉㄊㄔチㄊㄓチㄐㄏㄅㄊㄕㄊㄐㄏㄆㄓチㄊㄏㄐㄓㄑㄐㄓㄕㄆㄔチチㄊㄐㄊㄅㄍチㄑㄓㄐㄅㄖㄕハ
リㄐㄏㄊㄛㄆㄅチㄊㄓチㄈㄆㄏㄆㄓㄕㄆㄅチㄚチチㄅㄆㄗㄊㄆチㄊㄏㄐㄓㄑㄐㄓㄕㄆㄅチ
ㄊㄏチㄕㄉㄆチㄊㄓチㄐㄏㄅㄊㄕㄊㄐㄏㄆㄓチㄅㄆㄕㄊㄗㄕㄆㄔチㄕㄆㄓㄊチㄏㄅ
ㄗㄊㄓㄖㄔㄆㄔチㄊㄏチㄕㄉㄆチㄊㄓネチㄏㄅチㄐㄏチㄔㄖㄓㄇㄆㄔネチㄏㄅチㄊㄏㄉㄊㄊㄕㄔチ
ㄎㄐㄖㄍㄅチㄈㄓㄐㄘㄕㄉチㄐㄏチㄔㄖㄓㄇㄆㄔハ
モㄕㄊㄗㄆチㄔㄖㄔㄕㄏㄆㄔホチㄇㄓㄆㄆチㄓㄅㄊㄍㄔチㄈㄆㄏㄆㄓㄕㄆㄅチㄊㄏチㄔㄊㄕㄖ
チチチチチチチチチチチチチチチチチチチチチチチチチチチチチチチチㄇㄓㄐㄎチㄎㄊㄆㄏㄕチㄊㄓチㄐㄓチㄘㄕㄆㄓ
1
Mode d’emploi 1 Format A5
Instructions
d’installation 1 Format A5
00_290266_All.indb 1200_290266_All.indb 12 2017/04/04 16:26:042017/04/04 16:26:04

13
FRANÇAIS
Méthode d’installation du kit nanoe™ X pour cassette 4 voies
Si vous installez une nouvelle unité intérieure, il est impératif d’installer le kit nanoe™ X
pour cassette 4 voies avant l’installation de l’unité intérieure.
(1) Avant d’installer le kit nanoe™ X pour cassette 4 voies, retirez les pièces suivantes de l’unité
intérieure comme illustré sur la figure ci-dessous.
1Retirez la butée en caoutchouc.
2Retirez l’isolant.
Après avoir installé le kit nanoe™ X, ces deux pièces ne serviront plus.
ŋ
Ō
(2) Fixez la prise nanoe™ X comme illustré sur la figure.
Fixez la prise nanoe™ X avec la vis
fournie.
Insérez le bout de la prise nanoe™ X
sous la résine.
Installation
00_290266_All.indb 1300_290266_All.indb 13 2017/04/04 16:26:052017/04/04 16:26:05

14
Méthode d’installation du kit nanoe™ X pour cassette 4 voies
(3) Fixez le module nanoe™ X sur l’unité intérieure en évitant de le secouer.
Fixez le module nanoe™ X sur l’unité intérieure de
façon à pouvoir l’insérer dans la prise nanoe™ X.
Module nanoe™ X
Prise nanoe™ X
Fixez le module nanoe™ X
avec les vis fournies (×2).
Méthode de câblage du kit nanoe™ X
(1) Procédez au câblage comme illustré sur la figure ci-dessous.
(2) Insérez le connecteur dans le CN076/NANO.
Faites attention de ne pas coincer les câbles dans le couvercle du boîtier de composants
électriques lorsque vous le refermez.
Disposez les câbles à l’intérieur
des languettes en résine.
Câbles
Coupe transversale A-A
Installation
00_290266_All.indb 1400_290266_All.indb 14 2017/04/04 16:26:052017/04/04 16:26:05

15
FRANÇAIS
Méthode de vérification de la connexion du kit nanoe™ X
Vérifiez la connexion du kit nanoe™ X dans la section « Detailed settings » (Réglages détaillés)
de la télécommande.
1. Installez l’unité intérieure comme décrit dans les instructions d’installation l’accompagnant.
2. Installez la télécommande sur l’unité intérieure utilisable avec la fonction nanoe™ X.
3. Raccordez le câble d’alimentation pourvu du disjoncteur de fuites à la terre sur l’unité
intérieure et branchez-le sur le secteur.
4. Lorsque l’affichage de la télécommande clignote en indiquant « Assigning » (Attribution),
appuyez simultanément sur + + pendant plus de 4 secondes pour afficher
« Maintenance func » (Fonc. entretien).
5. Sélectionnez « 8. Detailed settings » (Réglages détaillés)
avec / et appuyez sur . Le menu
« Detailed settings » (Réglages détaillés) s’affiche.
6.
Avec / , sélectionnez « Unit no. » (N° d’unité),
« Code no. » (N° de code) ou « Set data » (Rég. Données).
Appuyez sur pendant que « ALL » (TOUT) s’affiche
sous « Unit no. » (N° d’unité)
.
7.
Avec / , sélectionnez « 9F » sous « Code no. »
(N° de CODE).
8. L’utilisation de nanoe™ X est normalement activée tant que « 0000 » n’apparaît pas sous
« Set data » (Rég. Données). Si « 0000 » apparaît, cela indique que la connexion nanoe™ X
n’est pas reconnue.
<Dans le cas de « 0000 »>
1. Mettez le disjoncteur de fuites à la terre hors tension.
2. Essayez de débrancher le connecteur du kit nanoe™ X de la PCI. Puis rebranchez-le.
3. Remettez sous tension le disjoncteur de fuites à la terre.
4. Vérifiez à nouveau les étapes 4 à 8. L’utilisation de nanoe™ X est normalement activée tant
que « 0000 » n’apparaît pas sous « Set data » (Rég. Données).
Si « 0000 » apparaît, il y a peut-être un problème avec l’unité.
Adressez-vous au magasin d’achat.
00_290266_All.indb 1500_290266_All.indb 15 2017/04/04 16:26:052017/04/04 16:26:05

16
Installation
Méthode de vérification de la connexion du kit nanoe™ X
(unité déjà en place)
Méthode de vérification de la connexion du kit nanoe™ X installé sur une unité intérieure
existante.
(Une télécommande utilisable avec la fonction nanoe™ X est nécessaire.)
1. Mettez le disjoncteur de fuites à la terre hors tension.
2. Installez le kit nanoe™ X en suivant la méthode d’installation et de câblage du kit nanoe™ X
ci-dessous.
3. Mettez le disjoncteur de fuites à la terre sous tension.
4. Patientez jusqu’à ce que l’affichage de la télécommande
revienne au mode normal.
5. Faites fonctionner l’unité en mode Ventilateur.
6. Pendant le fonctionnement en mode Ventilateur (après
que plus de 5 minutes se sont écoulées), appuyez
simultanément sur + + pendant plus de
4 secondes pour afficher l’écran « Maintenance func »
(Fonc. entretien).
7. Sélectionnez « 13. nanoe » avec / et appuyez sur . Le menu « nanoe »
apparaît. ( ne s’affiche pas tant que la connexion n’est pas établie.) Il est possible
de vérifier si chaque N° d’unité est connecté ou non. Si « Normal » apparaît, il est disponible.
8. S’il s’avère impossible d’accéder au menu « nanoe » ou si « Unsupported » (Non pris
en charge), « Faulty connection » (Branchement défectueux) ou « Not connected » (Pas
connecté) s’affiche, mettez le disjoncteur de fuites à la terre hors tension. Essayez de
débrancher le connecteur du kit nanoe™ X de la PCI. Puis rebranchez-le.
Vérifiez encore une fois les étapes 1 à 6. Toutefois si le problème persiste, cela indique que
le kit présente un défaut. Adressez-vous au magasin d’achat.
00_290266_All.indb 1600_290266_All.indb 16 2017/04/04 16:26:062017/04/04 16:26:06

17
FRANÇAIS
Comment coller l’étiquette fournie
Si la connexion nanoe™ X est confirmée, collez l’étiquette fournie sur le boîtier de composants
électriques de l’unité intérieure.
Étiquette
ブ」ヒパ
ㄎㄎ
ヵㄉㄊㄔチㄊㄓチㄐㄏㄅㄊㄕㄊㄐㄏㄆㄓチㄊㄏㄐㄓㄑㄐㄓㄕㄆㄔチチㄊㄐㄊㄅㄍチㄑㄓㄐㄅㄖㄕハ
リㄐㄏㄊㄛㄆㄅチㄊㄓチㄈㄆㄏㄆㄓㄕㄆㄅチㄚチチㄅㄆㄗㄊㄆチㄊㄏㄐㄓㄑㄐㄓㄕㄆㄅチ
ㄊㄏチㄕㄉㄆチㄊㄓチㄐㄏㄅㄊㄕㄊㄐㄏㄆㄓチㄅㄆㄕㄊㄗㄕㄆㄔチㄕㄆㄓㄊチㄏㄅ
ㄗㄊㄓㄖㄔㄆㄔチㄊㄏチㄕㄉㄆチㄊㄓネチㄏㄅチㄐㄏチㄔㄖㄓㄇㄆㄔネチㄏㄅチㄊㄏㄉㄊㄊㄕㄔチ
ㄎㄐㄖㄍㄅチㄈㄓㄐㄘㄕㄉチㄐㄏチㄔㄖㄓㄇㄆㄔハ
モㄕㄊㄗㄆチㄔㄖㄔㄕㄏㄆㄔホチㄇㄓㄆㄆチㄓㄅㄊㄍㄔチㄈㄆㄏㄆㄓㄕㄆㄅチㄊㄏチㄔㄊㄕㄖ
チチチチチチチチチチチチチチチチチチチチチチチチチチチチチチチチㄇㄓㄐㄎチㄎㄊㄆㄏㄕチㄊㄓチㄐㄓチㄘㄕㄆㄓ
00_290266_All.indb 1700_290266_All.indb 17 2017/04/04 16:26:062017/04/04 16:26:06

18
¡IMPORTANTE!
Lea este manual antes de empezar
El instalador o el distribuidor de ventas deben ser los encargados de instalar este acondicionador
de aire.
Solo personas autorizadas pueden utilizar esta información.
Para una instalación segura y un funcionamiento sin problemas, debe:
●Leer detenidamente este manual de instrucciones antes de comenzar.
●Seguir cada paso de instalación o reparación exactamente de la manera que se indica.
●La instalación del acondicionador de aire comercial debe realizarse de acuerdo con las
normativas de cableado nacionales.
●Este producto resulta necesario para disponer del mando a distancia que se puede adaptar a la
función nanoe™ X.
●El Kit nanoe™ X para cassette de 4 vías es una unidad de precisión. No deje caer la unidad
sobre el suelo de forma accidental. De lo contrario, la unidad podría fallar o presentar problemas
de funcionamiento.
●Cuando el trabajo de instalación haya finalizado, compruebe la conexión con nanoe™ X y
asegúrese de que no se producen problemas. Pida al cliente que conserve estas instrucciones
de instalación a mano.
Si es necesario reinstalar o reparar la unidad, facilite estas instrucciones de instalación al
técnico.
●Panasonic se exime de la responsabilidad derivada de todos los accidentes o daños que
se produzcan debido a la instalación del kit mediante procedimientos no descritos en las
instrucciones de instalación o en los que no se utilicen las piezas especificadas. Los fallos de
funcionamiento o los problemas provocados por el método de instalación del kit no los cubren
los términos y condiciones de la garantía del producto.
●Consulte también las instrucciones de instalación incluidas con la unidad interior.
●Estas instrucciones son todo lo que necesita para la mayoría de lugares de instalación y
condiciones de mantenimiento. Si necesita ayuda para un problema especial, póngase en
contacto con su centro de ventas/servicio técnico o su distribuidor homologado para obtener
instrucciones adicionales.
●Preste atención a todas las notificaciones de advertencia y precaución que se dan en este
manual.
Los siguientes símbolos utilizados en este manual informan de estados potencialmente peligrosos
para el usuario, el personal de mantenimiento o para el aparato:
ADVERTENCIA
Este símbolo hace referencia
a un riesgo o una práctica
insegura que pueden
ocasionar graves lesiones
personales o la muerte.
PRECAUCIÓN
Este símbolo hace referencia
a un riesgo o una práctica
insegura que pueden
ocasionar lesiones personales
o daños en el producto o la
propiedad.
Acciones prohibidas Elementos que deben
observarse
00_290266_All.indb 1800_290266_All.indb 18 2017/04/04 16:26:062017/04/04 16:26:06

19
ESPAÑOL
Proporcione una toma de corriente que vaya a
utilizarse exclusivamente para cada unidad, e instale
un elemento de desconexión de la alimentación, un
disyuntor de fugas a tierra (ELCB) o un dispositivo
de corriente residual (RCD) a modo de protección
contra sobrecorriente en la línea exclusiva.
Desactive el disyuntor de fugas a tierra (ELCB)
o el dispositivo de corriente residual (RCD) de
las unidades antes de proceder con la instalación.
No desmonte ni modifique la unidad.
No utilice este aparato en entornos potencialmente
explosivos.
No toque la unidad nunca con las manos húmedas.
ADVERTENCIA
Conecte y fije el cableado especificado de la forma
correcta.
No permita que la conexión quede expuesta a la
fuerza externa de los cables.
Tenga cuidado con dónde pisa cuando realice
trabajos en alturas.
No toque la entrada de aire ni las afiladas
aletas de aluminio de la unidad exterior.
Podría resultar herido.
PRECAUCIONES
AVISO
El texto en inglés constituye las instrucciones originales.
El resto de idiomas son traducciones de las instrucciones originales.
00_290266_All.indb 1900_290266_All.indb 19 2017/04/04 16:26:062017/04/04 16:26:06

20
Índice
IMPORTANTE .................................................................................. 18
Lea este manual antes de empezar
Componentes.................................................................................. 20
Instalación....................................................................................... 21
Cómo instalar el kit nanoe™ X para el cassette de 4 vías............... 21
Cómo disponer los cables de nanoe™ X ......................................... 22
Cómo comprobar la conexión con nanoe™ X.................................. 23
Cómo comprobar la conexión con nanoe™ X (unidad existente) .... 24
Cómo colocar la etiqueta incluida..................................................... 25
Componentes
Nombre de la pieza Figura Cantidad Observaciones
Módulo nanoe™ X 1
Salida de nanoe™ X 1
Tornillo 3
Etiqueta
ヵㄉㄊㄔチㄊㄓチㄐㄏㄅㄊㄕㄊㄐㄏㄆㄓチㄊㄏㄐㄓㄑㄐㄓㄕㄆㄔチチㄊㄐㄊㄅㄍチㄑㄓㄐㄅㄖㄕハ
リㄐㄏㄊㄛㄆㄅチㄊㄓチㄈㄆㄏㄆㄓㄕㄆㄅチㄚチチㄅㄆㄗㄊㄆチㄊㄏㄐㄓㄑㄐㄓㄕㄆㄅチ
ㄊㄏチㄕㄉㄆチㄊㄓチㄐㄏㄅㄊㄕㄊㄐㄏㄆㄓチㄅㄆㄕㄊㄗㄕㄆㄔチㄕㄆㄓㄊチㄏㄅ
ㄗㄊㄓㄖㄔㄆㄔチㄊㄏチㄕㄉㄆチㄊㄓネチㄏㄅチㄐㄏチㄔㄖㄓㄇㄆㄔネチㄏㄅチㄊㄏㄉㄊㄊㄕㄔチ
ㄎㄐㄖㄍㄅチㄈㄓㄐㄘㄕㄉチㄐㄏチㄔㄖㄓㄇㄆㄔハ
モㄕㄊㄗㄆチㄔㄖㄔㄕㄏㄆㄔホチㄇㄓㄆㄆチㄓㄅㄊㄍㄔチㄈㄆㄏㄆㄓㄕㄆㄅチㄊㄏチㄔㄊㄕㄖ
チチチチチチチチチチチチチチチチチチチチチチチチチチチチチチチチㄇㄓㄐㄎチㄎㄊㄆㄏㄕチㄊㄓチㄐㄓチㄘㄕㄆㄓ
1
Instrucciones de
funcionamiento 1 Tamaño A5
Instrucciones de
instalación 1 Tamaño A5
00_290266_All.indb 2000_290266_All.indb 20 2017/04/04 16:26:072017/04/04 16:26:07
Other manuals for nanoe CZ-CNEXU1
1
Table of contents
Languages:
Other Panasonic Air Conditioner Accessories manuals