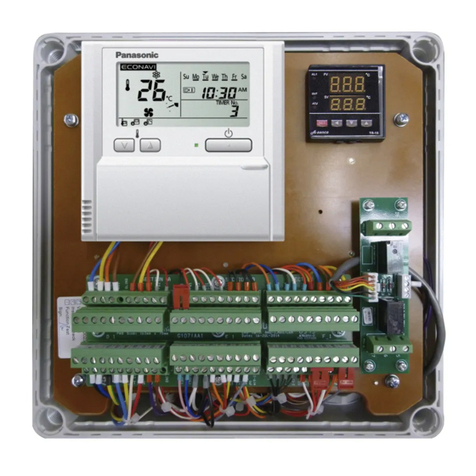
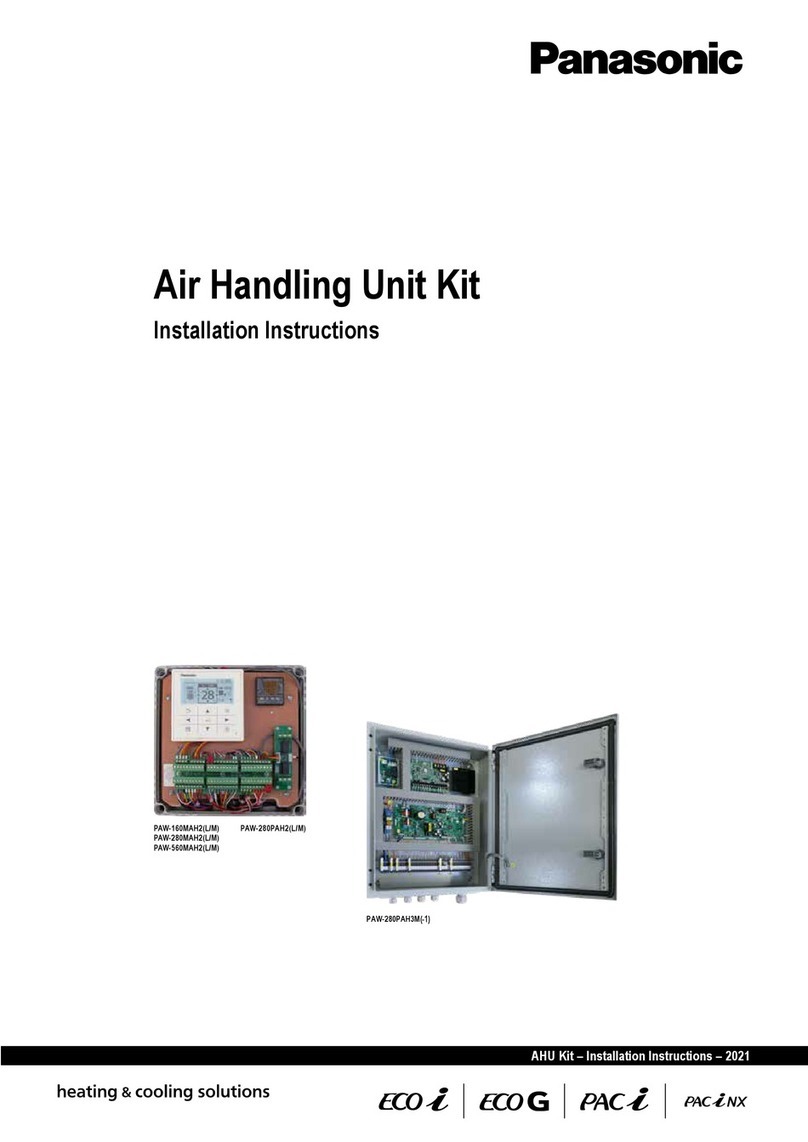
Panasonic PAW-280PAH3M Installation guide

Basic Installation Instructions
Air Handling Unit Kit
Model No. PAW-280PAH3M
(Use QR Code for full instruction manual)
Read through the Installation Instructions before you proceed with the installation.
Please carefully read the “Safety Precautions”. This booklet mainly mentions the safety-related
regulatory matters. Regarding the contents of the installation, please scan the matrix two-dimensional
(2D) barcode and refer to the detailed manuals.
Panasonic will accept no responsibility for any accident or damage that occurs because of such
improper installation in any way not described in the detailed manuals. Also, malfunction caused by
incorrect installation is not covered by the product warranty.
Contents
1. Safety Precautions........................................................................................................................... 2
2. Installation location......................................................................................................................... 4
2. Dimensions...................................................................................................................................... 5
3. Technical specification –AHU Kit.................................................................................................... 5
4. Connection cable between outdoor and AHU-Kit........................................................................... 6
a. PZ3 / PZH3 connection wiring ..................................................................................................... 6
b. PZH2 connection wiring............................................................................................................... 7
5. Terminal connection overview........................................................................................................ 8
6. Installation of thermistor on liquid pipe ......................................................................................... 9
7. Installation of thermistor on heat exchanger pipe middle ........................................................... 10
8. Installation of thermistor for suction and discharge air stream ................................................... 10
9. Adjustments before system can operate ...................................................................................... 11
a. If outdoor unit type PZ3 / PZH3 / PZH2 is connected ............................................................... 11
b. The basic steps are as follows: .................................................................................................. 11
c. Adjust the settings..................................................................................................................... 11
10. AHU-Kit Wiring lay out .............................................................................................................. 14
11. Parts location overview............................................................................................................. 14
Please Read Before Starting
These basic instructions are typical for most installation sites. Please refer to the full Installation
Instructions for extended information! If you require help for a special problem, contact our
sales/service outlet or your certified dealer for additional instructions.

2
● This product is an Air handling Unit Kit
IMPORTANT!
Please Read Before Starting
This Air Handling Unit Kit must be installed by the sales dealer or suitably qualified installer.
This information is provided for use by authorized persons only.
1. Safety Precautions
We assume no responsibility for accidents or damages resulting from methods other than those
described in the Installation Instructions or methods using unspecified parts.
Malfunctions that occur due to unauthorized installation methods are not covered by the product
warranty.
● This Air Handling Unit Kit must be installed in accordance with National Wiring Regulations.
● Please also read installation instructions of connected devices.
● When relocating or repairing this Air Handling Unit Kit, provide the Installation Instructions to the
servicing personnel.
Precautions for Installation setup
WARNING
•Turn off the circuit breaker of the units before installation.
•Select an installation location which is rigid and strong enough to support or hold
this Air Handling Unit Kit and select a location for easy maintenance.
•Use only the parts specified by Panasonic as supplied accessories.
•Ensure cables are installed properly so that external forces cannot affect them.
•Disassembly and modification of this Air Handling Unit Kit is not permitted under
any circumstances.

3
WARNING
•This Air Handling Unit Kit must be installed by the sales dealer or installer.
•When installing the Air Handling Unit Kit, use appropriate protective equipment
and tools for safety.
•This Air Handling Unit Kit should be securely installed in accordance with the
Installation Instructions.
•Electric work must be performed by authorized personnel in accordance with the
local regulations and in accordance with the Installation Instructions.
•To avoid malfunctions caused by radio wave interference, keep the Air Handling
Unit Kit away from devices such as other wireless devices, microwaves and devices
that use 2.4 GHz signal. Depending on the area, the module may not be available.
•Attach the electrical cover to the indoor unit securely.
•Make sure to connect the Air Handling Unit Kit to the PCB and terminal board of
the outdoor unit properly.
•Do not set up in hospitals or places where electronic medical devices are located.
•If you have a cardiac pacemaker or implantable cardioverter defibrillator, please
keep at least 15 cm away from the Air Handling Unit Kit.
•Do not use the remote controller near to automatic control equipment (automatic
door, fire alarms, etc.).
•In case of an abnormal condition (such as a burning smell), stop the indoor unit
and turn the breaker OFF.
•Do not operate with wet hands.
•Do not splash water into open Air Handling Unit Kit or use it in the bathroom.
Caution
•Ground yourself to discharge static electricity before performing any wiring.
•Do not install the Air Handling Unit in places with direct sunlight or where the
ambient temperature is more than 45°C. Follow specifications.
•The connecting cable must not touch piping directly.
•Do not set up where children can reach the Air Handling Unit Kit.
•Do not stand on an unstable surface when operating or checking the Air Handling
Unit Kit
•Do not use in special environments.
Use in places with large amounts oil (including machine oil), steam, flammable or
corrosive gas, voltage fluctuation, surrounding the metal body, may lead to severe
decrease in functionality and damage to parts.
•Do not use the Air Handling Unit Kit near other wireless devices, microwaves,
cordless phones, or facsimiles.

4
Note
•Install this Air Handling Unit Kit vertically.
•When attaching this Air Handling Unit Kit, be sure to fix it in a proper way and
confirm that Air Handling Unit is fixed.
•The warranty does not cover the product if it falls from an elevated location.
•For the set up and commissioning please check the remote controller manual
2. Installation location
•Install at the height of 100 mm or more (Due to space of wiring)
•Keep a space around the Air Handling Unit Kit as detailed on the figure shown above.
•Avoid the following locations for installation.
oIn direct sunlight
oLocation where vibrations can occur
oLocation where too much dust or water occurs (The AHU-Kit Protection Code is
IP65)
oLocation where condensation occurs
oLocation near heat sources
•Keep a distance of 1 m or more from TVs, radios, and PCs. (Image blur or related noise may
occur)
•In the case of high humidity there is the possibility of condensation water inside the Air
Handling Unit Kit occurring, in this case retrofit the AHU-Kit with pressure equalization
(This measure is to be created on site if required)
•Do not use in special environments.
Use in places with much oil (including machine oil), steam, flammable or corrosive gas,
voltage fluctuation, surrounding the metal body, may lead to severe decrease in
functionality and damage to parts.

5
2. Dimensions
3. Technical specification –AHU Kit
PAW-280PAH3M technical data
Unit
Value
Power source
V / ph / Hz
220 … 240 / 1 / 50
Rated current consumption
A
0.1
Rated power consumption (max.)
W
18.0
Dimensions (enclosure)
mm
400 x 500 x 150 (W x H x D)
Net weight
kg
11.5
Ambient temperature (max.)
°C
45
Protection class
-
IP65

6
4. Connection cable between outdoor unit and AHU-Kit
a. PZ3 / PZH3 connection wiring
For the power supply cable of the outdoor units, refer to the relevant installation instructions of the
outdoor unit in question.
Connection cable between AHU kit and outdoor unit:
Outdoor Unit
Connection cable
U-36 ~ 71PZ3E5
0,75 mm² (min.)
U-100 ~ 140PZ3E5, U-100 ~ 140PZ3E8
0,75 mm² (min.)
U-36~60PZH3E5
0,75 mm² (min.)
U-71 ~ 140PZH3E5, U-71 ~ 140PZH3E8
0,75 mm² (min.)

7
b. PZH2 connection wiring
.
Outdoor Unit
For the circuit breaker, power supply cable, others refer to the installation
instructions of the outdoor units
AHU-Kit
Circuit breaker
Control and power supply cable
6 A*
0,75 mm²** (min.)
*Circuit breaker must be incorporated in the fixed wiring in accordance with the
wiring regulations.
**Use a shielded cable for the control cable. Overall extension less than 1000 m.

8
5. Terminal connection overview
X1
Termin
al No.
Allocation
Function
Description
⚫
L
X1.1
Live
Live Terminal
External Potential: 230 V AC, max. 1
A
⚫
N
X1.2
Neutral
Neutral Terminal
⚫
3
X1.3
Comm
Communication terminal
Internal potential 0 - 75 V DC
⚫
PE
X1.4
Protective earth
Protective Earth Conductor
X2
⚫
F1
X2.1
Potential for F2
Fan Operation Signal
External Potential: max. 250 VAC 8 A
⚫
F2
X2.2
Fan contact
X3
⚫
FS1
X3.1
Potential for FS2
Float switch
(ex factory bridged)
Internal Potential: 12 V DC
⚫
FS2
X3.2
Float switch
⚫
FD1
X3.3
Potential for FD2
Control of an additional external fan
or additional external air handling
unit
Internal potential: 12 V DC
⚫
FD2
X3.4
Fan Signal
⚫
EX1
X3.5
Potential for EXCT
EXCT-Contact
(external thermostat off switch)
Internal Potential: 5 V DC
⚫
EX2
X3.6
EXCT-Contact
X4
⚫
TA1
X4.1
No polarity
Suction Temperature Sensor TA
(included)
(Room Temperature Sensor)
⚫
TA2
X4.2
No polarity
⚫
E1.1
X4.3
No polarity
Sensor E1/ TH2
⚫
E1.2
X4.4
No polarity
⚫
E2.1
X4.5
No polarity
Sensor E2/ TH3
⚫
E2.2
X4.6
No polarity
⚫
OP1
X4.7
12 V DC
12 V DC
12 V DC relay required for each
signal output, field supplied
⚫
OP2
X4.8
Potential of Defrost
Defrost signal output
⚫
OP3
X4.9
Potential for Thermostat
Thermostat signal output
⚫
OP4
X4.10
Potential for Cool start
Cool operation signal output
⚫
OP5
X4.11
Potential for Heat start
Heat operation signal output
⚫
OP6
X4.12
Potential for Fan start
Fan (free cooling) operation signal
output
⚫
OT1
X4.13
Potential for OT2 - OT6
COM
⚫
OT2
X4.14
Heat input
Heat mode input
5 V DC 0.5mA Current input
⚫
OT3
X4.15
Cool input
Cool mode input
⚫
OT4
X4.16
Demand Input 1
LV1 demand control input
Demand control, QUIET and EXCT
inputs must be set using indoor unit
detailed settings, parameter code
0002EE, please see relevant technical
⚫
OT5
X4.17
Demand Input 2
LV2 demand control / QUIET input

9
⚫
OT6
X4.18
Demand Input 3
LV3 demand control / EXCT (forcibly
thermostat off) input
data service manual for details. 5 V
DC 0.5mA Current input
X5
⚫
U1
X5.1
No polarity
Communication bus wiring P-link
Required for centralized controller
⚫
U2
X5.2
No polarity
⚫
R1
X5.3
No polarity
Terminal for Group Wiring (RC
connection)
Internal Potential: 16 V DC
⚫
R2
X5.4
No polarity
⚫
R1
X5.5
No polarity
Terminal for Group Wiring (RC
connection)
Internal Potential: 16 V DC
⚫
R2
X5.6
No polarity
X6
⚫
M2.1
X6.1
4 - 20 mA
Analogue output terminals
Analog output (Room temperature
monitor), Indoor temperature
monitor output. Output current : 4 to
20 mA. Temperature indication
range : 5 to 36 °C, 0.5 °C step
⚫
M2.2
X6.2
Potential of M2.1
⚫
M2.3
X6.3
0 to 10 V DC
Analogue input terminals for
temperature and demand control
Analogue input (+10 V DC) for
demand control / temperature
control
⚫
M2.4
X6.4
Potential of M2.3
Analog input Negative potential (–10
V DC) for demand control /
temperature setting
⚫
M2.5
X6.5
No polarity
Activation of demand control
Insert bridge to activate temperature
control (system is set for demand
control as standard)
⚫
M2.6
X6.6
No polarity
⚫
COM
X6.7
Potential for DI1 to DI3
Digital Inputs
(For information on functionality
refer to section “Terminal layout –
CZ-CAPBC2 / ACC-SP1A“ in this
document)
2 types of usage:
a) Potential-free:
Keep S3 of CZ-CAPBC 2/
ACC-SP1A on “NON VOLTAGE”.
b) 12 to 24 V DC, 10 mA external:
Change S3 of CZ-CAPBC2 / ACC-SP1A
to “VOLTAGE”.
⚫
DI1
X6.8
Digital Input 3
⚫
DI2
X6.9
Digital Input 2
⚫
DI3
X6.10
Digital Input 1
⚫
COM
X6.11
Potential for DO2
Alarm Signal
External Potential: max. 230 V AC / 3
A
⚫
DO2
X6.12
Alarm Signal
⚫
COM
X6.13
Potential for DO1
Operation Signal
External Potential: max. 230 V AC / 3
A
⚫
DO1
X6.14
Operation Signal
6. Installation of thermistor on liquid pipe
Mount the “E1” thermistor to the liquid pipe of the AHU heat exchanger according to the following
instructions
Attach the liquid pipe thermistor to the liquid
pipe located in the lowest position after the
distributor in the heat exchanger.

10
Cover the thermistor and pipe with aluminum
tape.
Cover the aluminum tape with thermal
insulation.
Fix thermal insulation and wiring with two bands.
Then, run the wire downwards in a loop, to avoid
putting tension and prevent ingress of moisture
due to condensate.
7. Installation of thermistor on heat exchanger pipe middle
Mount the “E2” thermistor to the middle of the heat exchanger pipe, according to the following
instructions.
1) Attach the
thermistor to the
middle of the
heat exchanger
in the middle of
each pass-line
(pipe) in the heat
exchanger.
2) Cover the thermistor
and pipe with aluminum
tape (field-supplied).
3) Fix thermistor
with two bands.
Then, run the
wire downwards
in a loop, to
avoid putting
tension to it and
avoid ingress of
moisture due to
condensate
4) Cover the aluminum
tape with thermal
insulation. And also
cover the sensor
(copper portion) with
thermal insulation
completely.
8. Installation of thermistor for suction or discharge air stream
Mount the suction or discharge air thermistor according to the following instructions.
1. Attach the suction air thermistor (TA) to the position where air suction temperature can be
measured, or where the air discharge temperature can be measured in case you wish to
directly control the supply air.

11
9. Adjustments before system can operate
a. If outdoor unit type PZ3 / PZH3 / PZH2 is connected
It is necessary to set the PACi NX Air Handling Unit Kit manually to a dedicated capacity. This cannot
be done automatically.
b. The basic steps are as follows:
a. Install the system as normal, and power up.
b. The system will try and auto-address; “Assigning” will be shown on the controller. Whilst this
is displayed, and within 30 seconds of it appearing
c. Enter detailed settings mode on the controller and edit the settings that follow.
d. Once detailed settings are completed –the system will auto-address itself. This time, it will
complete, and you will be left with a running system.
c. Adjust the settings
After finishing piping, pressure test, evacuation, charging and wiring connection as described in the
installation instruction of the units, once the system has been powered up, and within about 30
seconds to max. 1 minute, while “Assigning” is blinking -
No.
Instruction
Image
1
Press and hold the buttons shown on the controller.
(marked red)
Note: If you fail to press the buttons quickly enough,
E16 error code will be displayed. In this event,
switch power off and repeat this step within 30
seconds of the display powering on.
2
Scroll to “Detailed Settings” and press enter:
Scroll down
As soon as “Detailed settings” is reached and
highlighted, press enter
No.
Instruction
Image
3
Select the “Unit no.” and press enter.
This will usually be “1-1”, if already addressed. In
the case it is not yet been addressed “ALL” will be
displayed.

12
4
Make sure “Code no.” is highlighted, using up/down
arrows if needed. If not highlighted, press enter key
shortly, and you will be able to alter the
code number using up/down arrows.
5
Select code number “11” and press enter key
shortly, if not already highlighted, with up/down
arrows make sure “Set data” is highlighted now.
You will be able to alter the parameter value, please
change it from default data “0000” according to
below table.
Once you have set the corresponding data value by
using the up/down arrows, confirm with the enter
button.
e.g., Outdoor unit: U-71PZ3E5
Parameter value set to: “0012”
Parameter value setting table
PACi NX outdoor unit model
Setting for AHU kit code "11"
Standard
Elite
U-36PZ3E5
U-36PZH3E5
5
U-50PZ3E5
U-50PZH3E5
9
U-60PZ3E5
U-60PZH3E5
11
U-71PZ3E5
U-71PZH3E5
12
U-71PZH3E8
U-100PZ3E5
U-100PZH3E5
15
U-100PZ3E8
U-100PZH3E8
U-125PZ3E5
U-125PZH3E5
17
U-125PZ3E8
U-125PZH3E8
U-140PZ3E5
U-140PZH3E5
18
U-140PZ3E8
U-140PZH3E8
Big PACi outdoor unit model
U-200PZH2E8
21
U-250PZH2E8
23
If you wish to ignore AHU capacity by the OU control, please follow steps 6 –8, if not, you can directly
go to step 9.

13
No.
Instruction
Image
6
You will be back in the same screen as indicated in
Number 3.
Press enter again and “Code no.” will be
highlighted.
In this state keep pressing enter button for 2
seconds or more and you will be directly in the 6
digit “Code no.” where you can select the desired
code easily by altering each digit one by one, which
is much faster than scrolling up/down the whole
code list:
7
After altering one digit with up/down arrows, press
enter and you can set the next digit. In this way
select code “000303”:
8
After having set “000303”under “Code no.” press
enter again and “Set data” will become highlighted.
With the up/down arrows alter to “0002”and
confirm with enter:
9
When you have completed the detailed code
settings, press “List button”and you will be
prompted to “Exit detailed settings and restart”.
Press enter to confirm “YES”, and the controller will
restart.
The system will address itself automatically during restart. Once it is finished and the display returns
to the standard initial screen, you may now operate the system as normal.

14
10. AHU-Kit Wiring lay out
11. Parts location overview

15
NOTES:

Klein Solutions
GmbH & Co. KG
Kanadastraße 4
D-58675 Hemer
Germany
Table of contents
Other Panasonic Air Handler manuals
Popular Air Handler manuals by other brands

Daikin
Daikin UATYQ30ABAY1 Operation manual

BLAUBERG Ventilatoren
BLAUBERG Ventilatoren KOMFORT EC S200 user manual

RDZ
RDZ RNW 600 CS Instructions for installation and use

Dantherm
Dantherm TKS 60 Service manual

Surna
Surna Surna IsoStream SCMAHV-42 operating & maintenance manual

Carrier
Carrier 40WAV Installation and maintenance instructions

Salda
Salda RIS 1900VE EKO 3.0 Technical data

Haulotte
Haulotte HTL4014 Operator's manual

McQuay
McQuay Skyline OAC 003G Installation and maintenance manual

DOSPEL
DOSPEL OPTIMAL Series Maintenance Manual Warranty Card

Mitsubishi Electric
Mitsubishi Electric PAC-AH63 installation manual

Trane
Trane PCC-1L-3210-4-7.5 installation instructions