manuals.online logo
Brands
  1. Home
  2. •
  3. Brands
  4. •
  5. Panasonic
  6. •
  7. Security Camera
  8. •
  9. Panasonic WV-X4172 Installation and operating instructions

Panasonic WV-X4172 Installation and operating instructions

1
New functions and addendum
・This document contains descriptions of how to set the new functions and their restrictions.
Refer also to the Operating Instructions of this product.
・Depending on the model used, the screens shown in the explanations may differ to the
actual camera screens.
・This document is for the following models.
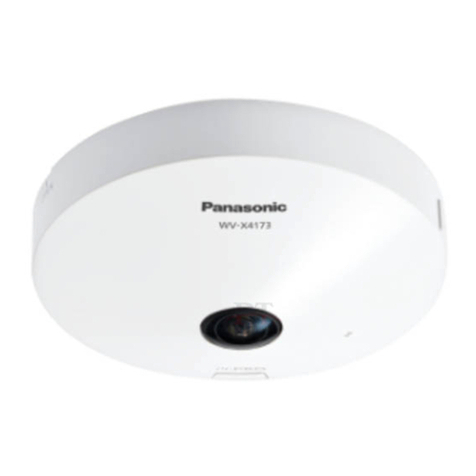
WV-X4172, WV-X4173, WV-X4573L, WV-X4573LM, WV-S4151, WV-S4551L,
WV-S4551LM
・Firmware Ver.1.50
・Firmware Ver.1.60
No.
Functions
Item (Page)
Page
1
Add a notify to the [SNMP trap setting]
Advanced (Network)
2
2 Add to the system log when recording stream fails to
write
Maintenance (Status) 3
3 Add a function to notify the user of writing failures in the
recording stream with a unique alarm
Notification (Alarm) 4
4 Add a note when the bit rate of the recording stream is
set to a value exceeding recommended value
Image/Audio (Image) 5
5 Extend authentication password for the destination of
notification
Network (Advanced)
6
No.
Functions
Item (Page)
Page
6
Add SFTP periodic image transmission to “Event
operation” of Easy Setup
Event action (Easy Setup) 7
7
Add “SFTP periodic image transmission error” to “Save
mode” of SD memory card
SD memory card (Basic) 15
8
Add a link to SFTP settings in camera action on alarm
Alarm
16
9
Add SFTP image transmission function
Advanced (Network)
19
10
Add SFTP periodic image transmission to “Operation
mode” of schedule
Schedule 24
11
Change the initial value of “Overwrite” of SD memory
card to On
SD memory card (Basic) 26
12 Add the supplementary explanation of On/Off of Internet
mode to the setting screen
Advanced (Network) 27
13
Add NTP test function
Advanced (Network)
28
14
Add TLS settings to HTTPS
Advanced (Network)
29
15
Add MQTT function
Advanced (Network)
30
16
Add a system log when MQTT function fails
Status (Maintenance)
33
17
Add LLDP function
Advanced (Network)
35
2
1. Add a notify to the [SNMP trap setting]
(Operating Instructions Configure the network settings [Network] - Configure
advanced network settings [Advanced])
Add the notifications to [SNMP trap settings].
Note
• In order to activate SNMP trap notifications for when alarms occur, alarm operation settings are
required.
For information on settings related alarm operations, refer to Configure the alarm settings [Alarm] in
Operating Instructions.
3
2. Add to the system log when recording stream fails to write
(Operating Instructions “Others” – “Maintenance” - Check the status [Status])
A system log has been added for errors in the write process of the recording stream to the log related
to SD memory cards.
Category
Indication
Description
SD memory
card
<SD>Format
Successfully formatted the SD memory card.
<SD>Format error
Error occurred when formatting the SD
memory card.
<SD> Write-protect ON
(Locked card)
A write-protected SD memory card is
inserted.
<SD> Detection error
The SD memory card could not be correctly
recognized.
<SD> Write error An error occurred when writing to the SD
memory card.
<SD> Read error An error occurred when reading from the SD
memory card.
<SD> Delete error An error occurred when deleting data from
the SD memory card.
<SD> File system error
An error occurred in File system of the SD
memory card.
<SD> Undefined error An error other that the ones above has
occurred for the SD memory card.
<SD> An abnormality occurs in
continuity of the SD memory
recording. Check the recording bit
rate setting of the SD memory
recording.
An error occurred when writing to the SD
memory card.
<SD> An error occurs in the SD
memory card. Check the status of
the SD memory card.
The SD memory card write process still
generates data loss. Make sure that the SD
memory card is properly recognized.
If the card is not recognized, reboot the unit,
or remove and reinsert the SD memory card
to check.
4
3.Add a function to notify the user of writing failures in the recording
stream with a unique alarm
(Operating Instructions “Others” – “Maintenance” - Configure the alarm settings
[Alarm])
-Configuration of the settings relating to alarm notification[Notification]-
Configure the settings relating to Panasonic alarm protocol)
Add the write processing error of the recording stream to the occurrence condition of the Panasonic
alarm protocol notification of “Diag.”
Panasonic alarm protocol
• [Panasonic alarm protocol]
Select “On” or “Off” to determine whether or not to provide notification by Panasonic alarm protocol
according to the settings for the “Alarm” and “Diag.” checkboxes of “Destination of notification” below.
- When an alarm is detected (“Alarm”)
- When a notification of the remaining capacity of the SD memory card has been provided
(“Diag.”)
- When the SD memory card has become full (“Diag.”)
- When the SD memory card cannot be recognized (“Diag.”)
- When there is a write error on the SD memory card (“Diag.”)
Default: Off
Destination of notification
•[Address 1] - [Address 8]
Enter the destination IP address or host name of the Panasonic alarm protocol from the following.
Up to 8 destination server addresses can be registered.
[Alarm] checkbox: When the checkbox is checked, the Panasonic alarm notification will be provided
upon an alarm occurrence.
[Diag.] checkbox: When the checkbox is checked, notification using Panasonic alarm protocol will be
provided in the following cases.
– When notification of the remaining capacity of the SD memory card has been provided
– When the SD memory card has become full
– When the SD memory card cannot be recognized
– When the SD memory card cannot be written
[Destination server address]: Enter the destination server address or host name.
Available characters: Alphanumeric characters, the colon (:), the period (.), the underscore (_), and
the hyphen (-).
To delete the registered destination server address, click the [Delete] button respective to the desired
destination server address.
5
4.Add a note when the bit rate of the recording stream is set to a value
exceeding recommended value
(Operating Instructions “Image/Audio” - Configure the settings relating to Stream
[Image]
Add the statement that it is possible that an error may occur in the continuity of SD memory card
recording, if you set a bit rate that exceeds the recommended value in “Note”of “Max bit rate (per
client) *”.
[Max bit rate (per client)*]:
Note
• The bit rate for “Stream” is restricted by “Bandwidth control (bit rate)” on the [Network] tab on the
“Network” page. When a value with “*” attached is set, images may not be streamed.
• It is recommend that the bit rate setting of the stream to be 8192 kbps or lower. Setting a value higher
than 8192 kbps may cause abnormalities in the continuity of the recorded video.
• When the refresh interval is too short, the actual bit rate may exceed the set bit rate depending on the
subject.
• Depending on the number users connecting at the same time or the combination of features used, the
bit rate may be lower than the configured value. Check the transmission of images after changing
settings.
6
5.Extend authentication password for the destination of notification
(Operating Instructions –Configure the network settings [Network] – Configure advanced
network settings [Advanced] - Configure the settings related to sending E-mails)
The number of characters that can be entered for the authentication password of the destination of
notification has been expanded to 128 characters.
• [Authentication − Password]
Enter the password to access the server.
Available number of characters: 0 - 128 characters
Unavailable characters: " &
7
6. Add SFTP periodic image transmission to “Event operation” of Easy
Setup
(Operating Instructions –Use Easy Setup [Easy Setup] – Configure an event action [Event
action])
With the addition of the SFTP function, SFTP periodic image transmission has been added to the
“Event action” of Easy Setup.
You can set event actions for SD schedule recording/SFTP periodic image transmission/alarm
detection. Once the settings are completed in each setup menu, click the [Next] button to proceed.
The setup flow is as follows.
Note
• If you click the [Next] button, the settings in the screen will be saved.
8
Flow of event action setup
Event function type:
Select the trigger
according to the
purpose of setting.
Event action setup:
Configure the action
conditions selected
in the event
function type setup.
Event detailed
setup:
Configure the
details of the
settings in event
action setup.
Alarm
(→Alarm: Configure the terminal
and VMD (alarm setup menu))
Schedule
(→Schedule: Configure SD
recording or SFTP periodic image
transmission (schedule function
type setup menu))
Terminal/VMD
SFTP
transmission
(→Alarm:
Configure the
details for
image transfer
or recording
conditions)
SD memory
recording
JPEG/H.265/
H.264
(→Alarm:
Configure the
details for
recording
conditions)
SD memory
recording
H.265/H.264
(→Schedule:
Set SD memory
recording (video
recording setup
menu)
SFTP periodic
image
transmission
(→Schedule:
Configure
SFTP periodic
image
transmission
(SFTP periodic
image
transmission
setup menu))
Settings of image
transfer
conditions
Settings of
recording
conditions
Settings of
recording
conditions
Settings of image
transfer method
SFTP settings
Alarm output (terminal)
E-mail settings
Schedule settings
Completed
Completed
9
Configure the schedule/alarm (event function type setup menu)
(Operating Instructions – Use Easy Setup [Easy Setup] – Configure an event action [Event
action] – Configure the schedule/alarm (event function type setup menu))
Here, select the function type of the event.
[Trigger]
• Alarm: Select when setting the alarm detection settings.
• Schedule: Select during “SD memory recording” or “SFTP periodic image transmission”.
• Default: Alarm
[SD memory card format]
To format the SD memory card, click the [Execute] button.
Once you click the [Execute] button, the “Format” confirmation screen will be displayed.
If you click the [OK] button, the formatting will start.
Once the “Format” completion screen is displayed, press the button.
IMPORTANT
• All data saved on the SD memory card will be deleted when the SD memory card is formatted.
• Do not turn off the power of the camera during formatting.
[Next] button
If you select “Alarm”, and click the [Next] button, the alarm setup menu will be displayed.
(→ Alarm: Configure the terminal and VMD (alarm setup menu)”)
If you select “Schedule”, and click the [Next] button, the schedule function type setup menu will be
displayed. (→Schedule: Configure SD recording or “SFTP periodic image transmission (schedule
function type setup menu)”)
10
Alarm: Configure the alarm function type (Alarm function type setup menu)
(Operating Instructions – Use Easy Setup [Easy Setup] – Configure an event action [Event
action] – Alarm: Configure the alarm function type (Alarm function type setup menu))
Select the alarm function type as “SFTP transfer” or “SD memory recording”.
Configure “Recording format” of SD memory recording triggered by an alarm occurrence.
[Trigger]
• SFTP transfer: When an alarm occurs, performs SFTP Transfer of the JPEG image.
• SD memory recording: When an alarm occurs, records the image to the SD memory card.
Note
• “SFTP Transfer” for when an alarm occurs and “SFTP periodic image transmission” can both be
performed simultaneously.
• If both “SFTP Transfer” for when an alarm occurs and “SFTP periodic image transmission” are set,
“SFTP Transfer” will be given priority when an alarm occurs.
[Recording format]
Select the recording format by selecting from “JPEG(1)”, “JPEG(2)”, “Stream(1)” or “Stream(2)”.
[Next] button
If you select “SFTP Transfer” for “Trigger” and click the [Next] button, the SFTP transfer setup menu will
be displayed. (→“Set SFTP transfer (SFTP transfer setup menu)”)
If you select “SD memory recording” for “Trigger”, select “JPEG(1)” or “JPEG(2)” for “Recording format”,
and then click the [Next] button, the JPEG recording setup menu will be displayed. (→Configure SD
memory recording (JPEG) (JPEG recording setup menu))
If you select “SD memory recording” for “Trigger”, select “Stream(1)” or “Stream(2)” for “Recording
format”, and then click the [Next] button, the video recording setup menu will be displayed. (→“Configure
SD memory recording (H.265 or H.264) (video recording setup menu)”)
Note
• If you click the [Next] button, the setting items in the screen are saved.
[Back] button
If you click the [Back] button the alarm setup menu will be displayed. (→Alarm: “Configure the terminal
and VMD (alarm setup menu)”)
11
Alarm: Configure the details for image transfer or recording conditions
(Operating Instructions – Use Easy Setup [Easy Setup] – Configure an event action [Event
action] – Alarm: Configure the details for recording conditions)
Set SFTP transfer (SFTP transfer setup menu)
SFTP transfer when an alarm is detected is set in this section.
Refer to “9. Add SFTP periodic image transmission” for information about how to set the above screen.
[Next] button
If you select “Alarm output” in the alarm setup menu and click the [Next] button, the alarm output setup
menu will be displayed. (→“Alarm: Configure the output terminal”)
If you click the [Next] button in the alarm setup menu without selecting “Alarm output”, the mail setup
menu will be displayed. (→“Alarm: configure the mail notifications and mail server”)
Note
• If you click the [Next] button, the setting items in the screen are saved.
[Back] button
If you click the [Back] button, the alarm function type setup menu will be displayed. (→“Alarm: Configure
the alarm function type (Alarm function type setup menu)”)
12
Schedule: Configure SD recording or SFTP periodic image transmission
(schedule function type setup menu)
(Operating Instructions – Use Easy Setup [Easy Setup] – Configure an event action [Event
action] – Schedule: Configure SD recording or SFTP periodic image transmission
(schedule function type setup menu) )
Here, the schedule type is selected as “SD memory recording” or “SFTP periodic image transmission”.
[Trigger]
• SD memory recording: Records the H.265 (or H.264) image in the SD memory card at the scheduled
time.
• SFTP periodic image transmission: Transmits the JPEG image to the SFTP server at the scheduled
time.
[Recording format]
When “SD memory recording” is selected for “Trigger”, “Stream(1)” or “Stream(2)” can be selected for
the recorded image.
[Next] button
If you select “SD memory recording” and click the [Next] button, the video recording setup menu will be
displayed. (→“Schedule: Set SD memory recording (video recording setup menu)”)
If you select “SFTP periodic image transmission” and click the [Next] button, the SFTP periodic image
transmission setup menu will be displayed. (→“Schedule: Configure SFTP periodic image transmission
(SFTP periodic image transmission setup menu)”)
Note
• If you click the [Next] button, the setting items in the screen are saved.
[Back] button
If you click the [Back] button, the event function type setup menu will be displayed. (→“Configure the
schedule/alarm (event function type setup menu)”)
Note
• “SFTP periodic image transmission” and “SFTP img. trans.” for when an alarm occurs can both be
performed simultaneously.
• If you select “SD memory recording”, the “SFTP periodic image transmission” setting will be canceled.
13
Schedule: Configure SFTP periodic image transmission (SFTP periodic image
transmission setup menu)
(Operating Instructions – Use Easy Setup [Easy Setup] – Configure an event action [Event
action])
The SFTP periodic image transmission is configured in this section.
• To configure SFTP periodic image transmission settings:
Refer to “9. Add SFTP image transmission function” for information about how to configure the above
screen.
[Set] button
“SFTP periodic image transmission” is displayed as “Off”.
Click the “Set” button to save the settings.
[Next] button
“SFTP periodic image transmission” is displayed as “On”.
If you click the [Next] button, the setup menu to set the SFTP periodic image transmission schedule will
be displayed. (→“To configure SFTP periodic image transmission schedule settings”)
Note
• If you click the [Next] button, the setting items in the screen are saved.
[Back] button
If you click the [Back] button, the schedule function type setup menu will be displayed. (→“Schedule:
Configure SD recording or SFTP periodic image transmission (schedule function type setup menu)”)
14
•To configure SFTP periodic image transmission schedule settings:
Refer to “Configure the settings relating to the schedules [Schedule]” for information about how to set the
above screen.
[Set] button
If you click the [Set] button, setup will be completed.
[Back] button
If you click the [Back] button, the SFTP periodic image transmission setup menu will be displayed.
(→“Schedule: Configure SFTP periodic image transmission (SFTP periodic image transmission setup
menu)”)
Note
•SFTP periodic image transmission will not be performed when “SFTP periodic image transmission” is
not selected in “Schedule mode”.
15
7. Add “SFTP periodic image transmission error” to “Save trigger” of SD
memory card
(Operating Instructions – Configure the basic settings of the camera [Basic] – Configure the
settings relating to the SD memory card [SD memory card])
With the addition of the SFTP function, “SFTP periodic image transmission error” has been added to the
“Save trigger” of the Recording stream.
Recording stream
[Save trigger]
Select a trigger to save images on the SD memory card from the following.
• SFTP periodic image transmission error: Saves images when images have failed to transmit to the
SFTP server by the SFTP periodic image transmission function. Available only for the “JPEG (1)” or
“JPEG(2)” images.
• Alarm input: Saves images at an alarm occurrence.
• Manual: Saves images manually.
• Schedule: Saves images in accordance with the settings for “Schedule” (→“Configure the settings
relating to the schedules [Schedule]”). Available only for the “Stream (1)” or “Stream(2)” images.
• Default: Manual
If you have selected “Alarm input” in the [Save trigger], you can select the alarm type from the following:
• Terminal 1: Save the image when an alarm occurs in Terminal 1.
• Terminal 2: Save the image when an alarm occurs in Terminal 2.
• Terminal 3: Save the image when an alarm occurs in Terminal 3.
• VMD: Save the image when motion detection occurs.
• Command alarm: Save the image when a command alarm is entered.
Note
• When “Stream (1)” or “Stream(2)” is selected for “Recording format”, “SFTP periodic image
transmission error” is unavailable.
• To enable alarms to occur, alarm settings must be configured in advance on the [Alarm] tab.
• When “JPEG (1)” or “JPEG(2)” is selected for “Recording format”, “Schedule” is unavailable.
• When connected with our network disk recorder, “Save trigger” may be displayed in a gray-out state
as “Network failure”. To change the setting of “Save trigger” after disconnecting the recorder, set “Not
use” for “SD memory card” once and then set “Use” again.
16
8. Add link to SFTP settings in Camera action on alarm
(Operating Instructions – Configure the alarm settings [Alarm] – Configure the settings relating
to the camera action on alarm occurrence [Alarm])
Click the [Alarm] tab on the “Alarm” page. (→“How to display the setup menu”, “How to operate the setup
menu”) The settings related to the camera action on alarm can be configured in this section.
[Alarm E-mail notification]
Click “E-mail server >>” to display the setup menu that can configure the settings relating to E-mail
notification when an alarm occurs. The setup menu will be displayed in a newly opened window.
(→“Configure settings relating to alarm E-mail notifications”)
[Alarm image SFTP transmission]
Click “SFTP setup >>” to display the setup menu that can configure the settings relating to SFTP
transmission when an alarm occurs. The setup menu will be displayed in a newly opened window.
(→”Configure settings relating to SFTP transmissions of alarm images”)
[Alarm image recording (SD memory card)]
Click “SD memory card setup >>” to display the setup menu that can configure the settings relating to
recording images on an SD memory card when an alarm occurs. The setup menu will be displayed in a
newly opened window. (→“Configure settings relating to recording to an SD memory card when an alarm
occurs”)
[TCP alarm notification]
Click “TCP alarm notification >>” to display the setup menu that can configure the settings
relating to transmitting TCP alarm notifications when an alarm occurs. The setup menu will be displayed
in a newly opened window. (→“Configure settings relating to TCP alarm protocol notification when an
alarm occurs”)
[HTTP alarm notification]
Click “HTTP alarm notification setup >>” to display the setup menu that can configure the settings
relating to transmitting HTTP alarm notifications when an alarm occurs. The setup menu will be
displayed in a newly opened window. (→“Configure settings relating to HTTP alarm notification when an
alarm occurs”)
17
[Preset action upon alarm detection]
Click the [Preset action on alarm >>] button to display the setup menu that can configure the settings
relating to which preset position the camera moves to when an alarm occurs. The setup menu will be
displayed in a newly opened window. (→”Configure settings relating to preset actions when an alarm
occurs”)
[SNMP transmission upon alarm detection]
Click “To SNMP setting” to display the setup menu that can configure the settings relating to SNMP
transmission when an alarm occurs. The setup menu will be displayed in a newly opened window.
(→“Configure settings relating to SNMP transmissions of alarm images”)
18
Configure settings relating to SFTP transmissions of alarm Images
(Operating Instructions – Configure the alarm settings [Alarm]
– Configure the settings relating to the camera action on alarm occurrence [Alarm])
Click “SFTP setup >>” of “Camera action on alarm” on the [Alarm] tab of the “Alarm” page. (→”Configure
the settings relating to the camera action on alarm occurrence [Alarm]”)
Refer to “9. Add SFTP image transmission function” for information on configuration for these settings.
19
9. Add SFTP image transmission function
(Operating Instructions – Configuring the network settings [Network] – Configure advanced
network settings [Advanced])
SFTP (SSH File Transfer Protocol) function has been added to securely send images to the server by
using SSH (Secure Shell) encrypted data stream.
It has the following two transmission functions.
・Send images when an alarm occurs
・Send images periodically
SFTP alarm
[Alarm image SFTP transmission]
Select “On” or “Off” to determine whether or not to transmit the alarm image to the SFTP server.
• Default: Off
[Directory name]
Enter the directory name where the alarm images are to be saved.
For example, enter “/ALARM” to designate the directory “ALARM” under the root directory of the SFTP
server.
20
• Available number of characters: 1 - 256 characters
• Unavailable characters: " & ;
[File name]
Enter the file name used for the alarm image to be transmitted to an SFTP server. The file name will be
as follows.
File name: [“Entered file name” + “Time and date (year/ month/ day/ hour/ minute/ second)”] + “Serial
number”
• Available number of characters: 1 - 32 characters
• Unavailable characters: " & * / : ; < > ? ¥ |
• Terminal 1: Transmit the image to the SFTP server when an alarm occurs in Terminal 1.
• Terminal 2: Transmit the image to the SFTP server when an alarm occurs in Terminal 2.
• Terminal 3: Transmit the image to the SFTP server when an alarm occurs in Terminal 3.
• VMD: Transmit the image to the SFTP server when motion is detected.
• Command alarm: Transmit the image to the SFTP server when a command alarm is entered.
[Pre alarm]
• Transmission interval
Select the update interval of images before an alarm occurs from the following.
When “Frame rate mode” is set to 30fps mode: 0.1fps/ 0.2fps/ 0.33fps/ 0.5fps/ 1fps
When “Frame rate mode” is set to 25fps mode: 0.08fps/ 0.17fps/ 0.28fps/ 0.42fps/ 1fps
• Default: 1fps
• Maximum number of images
Select the number of images to be transmitted from the following.
0pics/ 1pic/ 2pics/ 3pics/ 4pics/ 5pics/ 6pics*/ 7pics*/ 8pics*/ 9pics*/ 10pics*/ 20pics*/ 30pics*/ 40pics*/
50pics*
• Default: 0 pics
• Recording duration
The recording duration, which changes according to the configured “Transmission interval” and
“Maximum number of images”, of images recorded before an alarm occurs is displayed.
Note
• When “JPEG(1)” is selected for the capture size of the image to be transmitted, pre alarm is
unavailable if the image capture size of “JPEG(1)” is either “2992x2992“, “2560x1920“, “2560x1440“,
“2048x1536“, “2192x2192“, “1920x1080“ or “1600x1200“.
• When “On” is selected for “Image compression rate upon alarm detection”, only post alarm recorded
images are compressed. Compression is not applied to pre alarm recorded images.
• When a selection with an asterisk (*) on the right of it is selected for “Maximum number of images” of
“Pre alarm”, the specified number of images may not be able to be sent depending on the image capture
size and image quality. The following table shows the maximum number of images that can be sent
for pre alarm.

This manual suits for next models

6

Other Panasonic Security Camera manuals
Panasonic WVBP330 - B/W CCTV CAMERA User manual

Panasonic

Panasonic WVBP330 - B/W CCTV CAMERA User manual

Panasonic WV-BS500 User manual

Panasonic

Panasonic WV-BS500 User manual

Panasonic WVBL734 - CCTV CAMERA User manual

Panasonic

Panasonic WVBL734 - CCTV CAMERA User manual

Panasonic BL-VP104W User manual

Panasonic

Panasonic BL-VP104W User manual

Panasonic KX-HCM250 User manual

Panasonic

Panasonic KX-HCM250 User manual

Panasonic WV-CL920A Series Installation and operation manual

Panasonic

Panasonic WV-CL920A Series Installation and operation manual

Panasonic WV-CF224EX User manual

Panasonic

Panasonic WV-CF224EX User manual

Panasonic F0205Y0 User manual

Panasonic

Panasonic F0205Y0 User manual

Panasonic WV-X2251L Installation guide

Panasonic

Panasonic WV-X2251L Installation guide

Panasonic WV-SF549 User manual

Panasonic

Panasonic WV-SF549 User manual

Panasonic KX-HN1007 User manual

Panasonic

Panasonic KX-HN1007 User manual

Panasonic AW-HE40HWP User manual

Panasonic

Panasonic AW-HE40HWP User manual

Panasonic BL-C30A - Wireless 802.11 b/g Network Camera Guide

Panasonic

Panasonic BL-C30A - Wireless 802.11 b/g Network Camera Guide

Panasonic WV-SFV631L Operating manual

Panasonic

Panasonic WV-SFV631L Operating manual

Panasonic WV-CW504S User manual

Panasonic

Panasonic WV-CW504S User manual

Panasonic WV-SW458 User manual

Panasonic

Panasonic WV-SW458 User manual

Panasonic WV-NS202AE User manual

Panasonic

Panasonic WV-NS202AE User manual

Panasonic Super Dynamic III WV-CW964 User manual

Panasonic

Panasonic Super Dynamic III WV-CW964 User manual

Panasonic WV-SP305 User manual

Panasonic

Panasonic WV-SP305 User manual

Panasonic WV-SPN531A User manual

Panasonic

Panasonic WV-SPN531A User manual

Panasonic WV-CL270 User manual

Panasonic

Panasonic WV-CL270 User manual

Panasonic BL-C10A - Network Camera - Pan User manual

Panasonic

Panasonic BL-C10A - Network Camera - Pan User manual

Panasonic WV-SFV310 User manual

Panasonic

Panasonic WV-SFV310 User manual

Panasonic KX-HCM280A User manual

Panasonic

Panasonic KX-HCM280A User manual

Popular Security Camera manuals by other brands

Clover ZEC470 Specifications

Clover

Clover ZEC470 Specifications

Speco CVC-105CM Specification sheet

Speco

Speco CVC-105CM Specification sheet

advidia A64 quick start guide

advidia

advidia A64 quick start guide

Pentatech DF400K operating instructions

Pentatech

Pentatech DF400K operating instructions

Honeywell H34S-IC Quick installation guide

Honeywell

Honeywell H34S-IC Quick installation guide

Idis DC-D1223WX' quick guide

Idis

Idis DC-D1223WX' quick guide

ENVIO Terra AESS-BVM75H500ST quick start guide

ENVIO

ENVIO Terra AESS-BVM75H500ST quick start guide

Vitek VTC-IRM40-2812 manual

Vitek

Vitek VTC-IRM40-2812 manual

Boavision W54F5MP-WP user guide

Boavision

Boavision W54F5MP-WP user guide

VADDIO 999-6900-000W Installation and user guide

VADDIO

VADDIO 999-6900-000W Installation and user guide

ERA HOMECAM IP116 Plus user manual

ERA

ERA HOMECAM IP116 Plus user manual

Lilin E1 Series user manual

Lilin

Lilin E1 Series user manual

Sunforce 82346 manual

Sunforce

Sunforce 82346 manual

Idis DC-V3213XJ Operation manual

Idis

Idis DC-V3213XJ Operation manual

Honeywell HD4U user guide

Honeywell

Honeywell HD4U user guide

Eneo VKC-1327CW3 Quick installation guide

Eneo

Eneo VKC-1327CW3 Quick installation guide

ENFORCER ENFORCER EV-1626-NWGQ manual&nbsp;

ENFORCER

ENFORCER ENFORCER EV-1626-NWGQ manual&nbsp;

Brinno MAC 200 user manual

Brinno

Brinno MAC 200 user manual

manuals.online logo
manuals.online logoBrands
  • About & Mission
  • Contact us
  • Privacy Policy
  • Terms and Conditions

Copyright 2025 Manuals.Online. All Rights Reserved.