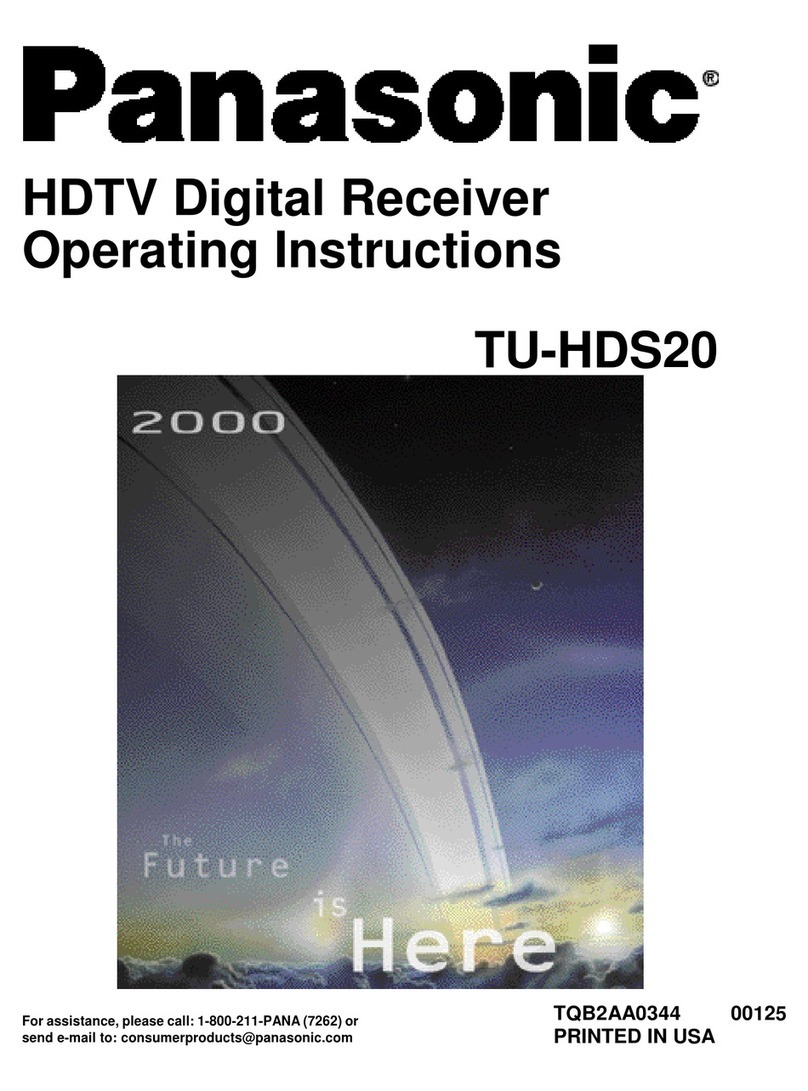
Panasonic TU-HDS20 User manual

133TUHDS20

Table
of
Contents
Safety Instructions 2
Important Information 4
Information
on
Digital Television 6
Digital Broadcasting and Cable TV 6
Digital Audio 6
Information on the HDTV Digital Receiver 7
Reception Capability
of
HDTV Digital Receiver 7
Panasonic HDTV Digital Receiver Model TU-HDS20 8
Congratulations 9
Customer Record 9
Care and Cleaning 9
Specifications 9
Important Notes 10
HDTV Digital Receiver Location 10
Connecting Cables 10
AC Power Supply Cord 10
Satellite Dish Antenna Connection 10
Antenna Installation and Orientation 10
Antenna/Cable Connection
11
TU-HDS20 Front Panel
12
TU-HDS20 Rear Panel 13
HD
Digital TV Display Formats 14
HD Digital
TV
video Formats 14
Display Format Selection 14
Aspect Ratio Selection 16
Channel and Program Tuning ATSC Reception 18
Channel Banner 19
Viewing modes
22
Dolby Digital (AC-3) Audio 25
Getting Started
27
Step
1.
Connect AC Power Cord 27
Step 1
a.
Antenna /Cable Connection 27
Step 1
b.
DIRECTV Satellite Dish Connection
27
Step
2.
Connection to DTV-Compatible TV 28
Step 2a. Connection to RGB Monitor. 29
Step 2b. Connection to Conventional TV 30
Step
3.
Digital Tv Reception with DTV-Compatible TV
(no Satellite or Cable Service)
31
Step 3a. Digital Tv Reception with Conventional TV
(no Satellite or Cable Service) 32
Step 3b. Digital
TV
Reception with DTV-Compatible
TV
(Cable Service and Terrestrial Antenna) 33
Step 3c. Digital TV Reception with Conventional TV
(Cable Service and Terrestrial Antenna) 34
Step 3d. Digital8VSB Cable /Analog Cable Reception
with DTV-Compatible
TV
35
Step 3e. Digital 8VSB Cable /Analog Cable Reception
with Conventional TV 36
Step 4. Turning HDTV Digital Receiver
ON
37
Step
5.
Switching to DTV Mode 37
Step 6. Roller Guide
Menu™
37
Step 6a. ACTION/Navigation Button 38
Step
7.
Antenna/Cable Mode 38
Step
8.
HDTV Digital Receiver Connection to
VCRIS-VIDEO VCR 39
Step
9.
Programming Available Channels .40
TABLE OF CONTENTS
Optional Connections
41
HDTV Digital Receiver Connection to Dolby Digital
AC-3 Decoder
41
Remote Control Guide
42
Remote Control Functional Key Chart 43
Battery Installations and Precautions 45
Special Remote Buttons 46
Programming the Remote Control... 49
Remote Control Component Codes
50
Special Features
of
the HDTV
Digital Receiver
54
Impulse Pay per View
54
Impulse Pay per View Icons 55
Software Upgrade Messages
57
Roller Guide Menu
TM
58
Navigation/ACTION button
59
Roller Guide Menu Feature Chart
60
SETUP 63
Satellite Setup 63
Guide Setup 67
Antenna Setup 68
Monitor.
71
System Test. 72
Access Card 73
ADVANCED PROGRAM GUIDE :74
Direct Channel Entry 75
Banner Description Icons 76
Guide Banner Categories 77
Grid 78
LOCK 79
Password 79
Movies Limits 80
TV
Limits
81
Channel Lock 82
Spending 84
ACCOUNT 85
Future Purchases 85
Past Purchases 86
OPTIONS 87
Audio 87
Caption 88
Clock 89
Satellite/Local Tuning Mode 90
About
91
TIMER 92
Timer error Messages 93
Glossary and Acronyms 94
Troubleshooting Table
96
Read these instructions completely before
operating.
Specifications are SUbject
to
change
without
notice
or
obligation.
Copyright
2000
by
Matsushita Electric Corporation
of
America.
All rights reserved. Unauthorized
copying
and
distribution is a
violation
of
law.
..

SAFETYINSTRUCTIONS
SAFETY INSTRUCTIONS
WARNING
WARNING:
To
reduce the risk of electric shock do not remove cover or back. No
user-serviceable parts inside. Refer servicing to qualified service personnel.
The lightning flash with arrow
head within atriangle is intended
to tell the user that parts inside
the product are arisk
of
electric
shock to persons. AThe exclamation point within atriangle
is
intended to
tell
the user that important
operating and servicing instructions are
in
the papers with the appliance.
Note
To
CATV System Installer: This reminder is proVided to call the CATV system installer's attention to article 820-40
of
the National Electric Code that provides guidelines for proper grounding and,
in
particular, specifies that the cable ground shall be
connected to the grounding system
of
the building, as close to the point
of
cable entry as practical.
Note
To
Satellite Dish Installer:
This reminder
is
provided to call your attention to Article 810 and
in
particular article 810-15
of
the National Electrical Code which
covers proper installation and grounding of television receiving equipment as well as to article 820-40
of
the National Electrical Code
which specifies that the satellite dish cable ground shall connected to the grounding system ofthe building as close to the point
of
cable entry as practical.
Safety Instructions For The HDTV Digital Receiver:
1.
Read and apply the operating instructions provided with
HDTV
Digital Receiver.
2. Read all
of
the instructions given here and retain them for later use.
3.
Unplug this HDTV Digital Receiver from the wall outlet before cleaning. Do not use liquid or aerosol cleaners. Use adamp
cloth for cleaning.
4.
Do not use attachments not recommended by the HDTV Digital Receiver manufacturer as they may cause hazards.
5.
Do not use this HDTV Digital Receiver near water. For example: Avoid placing it near abathtub, washbowl, kitchen sink, or
laundry tub,
in
awet basement, or near aswimming pool, etc.
6.
Do not place this HDTV Digital Receiver on an unstable cart, stand, or table. The HDTV Digital Receiver may fall, causing
serious injury to achild or adult and serious damage to the appliance. Use only with acart or stand recommended by the
manufacturer, or sold with the
HDTV
Digital Receiver. Wall
or
shelfmounting should follow the manufacturer's instructions. and
should use amounting kit approved by the manufacturer.
6a. An appliance and cart combination should be moved with care. Quick stops, excessive force. and uneven
surfaces may cause the appliance and cart combination to overturn.
<I
7.
Slots and openings in the cabinet and the back or bottom are provided for ventilation, and to insure reliable
operation
of
the HDTV Digital Receiver and to protect it from overheating. These openings must not be blocked
or
covered. The openings should never be blocked by placing the HDTV Digital Receiver on abed, sofa, rug
or
other similar surface. This HDTV Digital Receiver should never be placed near or over aradiator or heat register. This HDTV
Digital Receiver should not be placed
in
abuilt-in.installation such as abookcase unless proper ventilation is provided.
8.
Operate only from the type
of
power source indicated on the marking label. If you are not sure
of
the type
of
power supplied to
your home consult your HD Video dealer or local power company. For Digital Receivers designed to operate from battery
power, refer to the operating instructions.
9.
This
HDTV
Digital Receiver is equipped with apolarized alternating-current line plug (a plug haVing one blade wider than the
other). This plug will fit into the power outlet only one way. This is asafety feature. Ifyou are unable to insert the plug fully into
the outlet, try reversing the plug. Ifthe plug should still fail to fit, contact your electrician to replace your obsolete outlet. Do not
defeat the safe purpose
of
the polarized plug,
10. Do not allow anything to rest on the power cord. Do not locate this HDTV Digital Receiver where the cord will be abused by
persons walking on it.
11.
Follow all warnings and instructions marked on the HDTV Digital Receiver.
12. Do not overload wall outlets and extension cords as this can result
in
fire
or
electric shock.
•
_________________
.SAFETYINSTRUCTIONS
13.
Never push objects of any kind
in
to this HDTV Digital Receiver through cabinet slots as they may touch dangerous voltage
points or short out parts that could result
in
afire or electric shock. Never spill liquid
of
any kind
on
the HDTV Digital Receiver.
ANTENNA
LEAD-IN
WIRE
ANTENNA
DISCHARGE UNIT
(NEC SECTION 810-20)
~0"7'---":~
GROUNDING CONDUCTORS
(NEC SECTION 810-21)
EXAMPLE OF ANTENNA GROUNDING AS
PER NATIONAL ELECTRICAL CODE (NEe)
~::;~=--
GROUND
ClAMPS
POWER SERVICE GROUNDING
~
ELECTRODESYSTEM
(NEC ART 250, PART H)
14.
If
an
outside antenna
is
connected to the decoder equipment,
be
sure the antenna system
is
grounded so
as
to provide some
protection against voltage surges and built
up
static charges.
In
the U.S. Section 810 of the National Electrical Code, ANSII
NFPA
70
provides information with respect to proper grounding
of
the mast and supporting structure, grounding
of
the lead-in
wire to
an
antenna discharge unit, size
of
grounding conductors, location of antenna-discharge unit, connection to grounding
electrodes,
and
requirements for the grounding electrode. See Figure.
15.
For added protection for this HDTV Digital Receiver during alightning storm, or when it
is
left unattended and unused for long
periods of time, unplug it from the wall outlet and disconnect the antenna. This will prevent damage to the decoder due
to
lightning and power-line surges.
16.
An
outside antenna system should not
be
located
in
the vicinity of overhead power lines or other electric light or power circuits,
or where it
can
fall into such power lines or circuits. When installing
an
outside antenna system extreme care should betaken
to
keep from touching such power lines or circuits as contact with them might
be
fatal.
17.
Unplug this HDTV Digital Receiver from the wall outlet, and refer servicing to qualified service personnel under the following
conditions:
a.
When the power cord or plug
is
damaged or frayed.
b.
Ifliquid has been spilled into the HDTV Digital Receiver.
c.
Ifthe Digital Television Decoder has been exposed to rain or water.
d.
Ifthe HDTV Digital Receiver does not operate normally by following the operating instructions. Adjust only those controls
that are covered by the operating instructions
as
improper adjustment
of
other controls may result
in
damage and will
often require extensive work by aqualified technician to restore the HDTV Digital Receiver to normal operation.
e.
Ifthe HDTV Digital Receiver has been dropped or the cabinet has been damaged.
f.
When the HDTV Digital Receiver exhibits adistinct change
in
performance -this indicates aneed for service.
18.
Do
not attempt to service this Digital Television Decoder yourself
as
opening or removing covers may expose
you
to dangerous
voltage or other hazards. Refer all servicing to qualified service personnel.
19. When replacement parts are required,
be
sure the service technician has used replacement parts specified by the
manufacturer that have the same characteristics
as
the original part. Unauthorized substitutions may result
in
fire, electric
shock, or other hazards.
20. Upon completion of any service or repairs to this HDTV Digital Receiver, ask the service technician to perform routine safety
checks to determine that the decoder
is
in
safe operating condition.
21. WARNING:
TO
PREVENT FIRE OR SHOCK HAZARD, DO NOT EXPOSE THIS APPLIANCE
TO
RAIN OR MOISTURE.
22. CAUTION:
TO
PREVENT ELECTRIC SHOCK DO NOT
USE
THIS (POLARIZED) PLUG WITH ARECEPTACLE
OR
OTHER
OUTLET UNLESS THE BLADES CAN
BE
FULLY INSERTED
TO
PREVENT BLADE EXPOSURE.
Note: DIRECTVservice can only
be
received within the USA and is not available
in
Canada
II

IMPORTANT
INFORMA
TJON
Important
Information
FCC
INFORMATION
Your
HDTV
Digital
Receiver
is registered
with
the
Federal
Communication
Commission
and
is in
compli-
ance
with
CFR47,
Parts
15
and
68,
FCC
Rules
and
Regulations.
Radio Interference
This equipment has been tested and found to comply with the limit for aClass BDigital Device in accordance
with the specifications in Part 15
of
FCC Rules.
The
rules are designed to provide reasonable protection against
radio and television interference in aresidential installation. This equipment generates, uses and can radiate
radio frequency energy and,
if
not installed and used
in
accordance with the instructions, may cause harmful
interference to radio communications. However, there is no guarantee that interference will not occur
in
apartic-
ular installation.
Ifthis equipment does cause interference to radio
or
televisions reception (which you can determine by turning
the equipment off and on), try to correct the interference by one
or
more
of
the following measures.
•Reposition
or
relocate the receiving antenna
for
the radio
or
television that is "receiving" the interference.
•Change the position
of
the
HDTV
Digital receiver with respect to the radio
or
television equipment that is
receiving interference.
•Move the
HDTV
Digital receiver
away
from equipment receiving interference.
•Plug the
HDTV
Digital receiver into adifferent wall outlet so the
HDTV
Digital receiver and equipment
receiving the interference are on different branch circuits.
If
these
measures
do
not
eliminate
interference,
please
consult
your
dealer
or
an
experienced
radio/televi-
sion
technician
for
assistance.
FCC
CAUTION:
Pursuant
to
47CFR, Part
15.21
of
the
FCC
rules, any changes
or
modifications
to
this HDTV Digital Receiver not
expressly approved
by
Matsushita Electric Corporation
of
America could cause harmful interference and would
void the user's authority
to
operate
this
device.
A
FCC
compliant modem cable with
modular
plug is provided with
this
equipment. This equipment
is
designed
to
be connected
to
the telephone network
or
premises wiring using acompatible modular
jack
that is Part
68
compliant.
See
Installation Instructions
for
details.
To
assure continued compliance, the modem cable (Part #TSX2AX002) provided with the HDTV Digital Receiver
must
be used when connecting the
unit
to
the phone line.
FCC
Declaration
of
Conformity
PANASONIC CONSUMER ELECTRONICS COMPANY
Responsible party:
Matsushita Electric Corporation
of
America
One Panasonic Way
Secaucus,
NJ
07094
U.S.A.
Telephone Number: 1-888-726-2377
(8
a.m.- 10 p.m., Mon-Fri, EST)
(10 a.m.- 10 p.m., Sat-Sun, EST) OR
E-MAIL: [email protected]
This device complies with Part 15 of the FCC rules. Operation is
subject to the following two conditions: (1) this device may not
cause harmful interference, and (2) this device must accept any
interference received, inclUding interference that may cause
undesired operation.
II

IMPORTANT INFORMA
nON
Notification
to
the Local Telephone Company.
On the back
of
this equipment is alabel indicating among other information, the FCC Registration number
and Ringer Equivalence Number (REN) for the equipment.
You
must, upon request, provide this informa-
tion to your telephone company. The REN is useful to determine the number
of
devices you may connect
to your telephone line and still have all these devices ring when your telephone number is called.
In
most
(but not all) areas, the sum
of
the RENs
of
all devices connected to one line should not exceed
5.
To
be
certain
of
the number
of
devices you may connect to your line as determined by the REN, you should con-
tact your local telephone company.
Iftrouble is experienced with this equipment (HDTV Digital Receiver), for repair orwarranty information,
please contact the service center
in
the U.S.A. at the phone number listed on page 97. If the equipment is
causing harm to the telephone network, the telephone company may request that you disconnect the
equipment until the problem is resolved.
Notes: This equipment may not be used on coin service provided by the telephone company.
Party lines are subject to state tariffs, and therefore, you may not be able to use your own telephone equip-
ment ifyou are on aparty line. Check with your local telephone company.
Notice must be given to the telephone company upon permanent disconnection
of
your HDTV Digital
Receiver from your line.
Rights
of
the Telephone Company.
Should your equipment cause trouble on your line which may harm the telephone network, the telephone
company shall, where practicable, notify you that temporary discontinuance
of
service may be required.
Where prior notice is not practicable and the circumstances warrant such action, the telephone company
maytemporarily discontinue service immediately. In case
of
such temporary discontinuance, the telephone
company must: (1) promptly notify you
of
such temporary discontinuance (2) afford you the opportunity to
correct the situation and (3) inform you
of
your right to bring acomplaint to the Commission pursuant to
procedures set forth
in
Subpart E
of
Part 68, FCC Rules and Regulations. The telephone company may
make changes
in
its communication facilities, equipment, operations
of
procedures where such action is
required
in
the operation of its business and not inconsistent with FCC Rules and Regulations.
Of
these
changes are expected to affect the use or performance
of
your telephone equipment, the telephone com-
pany must give you adequate notice, in writing, to allow you to maintain uninterrupted service.
II

INFORMATION ON DIGITAL TELEVISION
Information on Digital Television
Digital Television
HDTV (High Definition Television)
HDTV signal formats are 1080i (interlaced scan) and 720p (progressive scan). HDTV
provides the highest resolution picture and audio
in
either stereo or
5.1
channel
surround sound.
SDTV (Standard Definition Television)
SDTV signal formats are 480p and 480i.
SDrv
provides lower resolution, yet presents
avery sharp clear picture. Lower resolution allows broadcasters to transmit multiple
programs per channel.
Digital Broadcasting and Cable TV
The FCC has not mandated any standards for cable operators at the time this manual
is printed. Some cable companies have announced plans to introduce digital cable
boxes into their markets. They may choose, however, to use the digital capability to
increase the number
of
channels available or to provide data capability, such as high
speed modem rather than transmit HDTV programming. Contact your local cable
provider to determine
if
digital cable is available and whether acable box
is
needed
for converting the signals.
Digital Audio Dolby* Digital surround sound (also commonly referred to as AC-3* or
DO
5.1) is the
audio standard. AC-3 will provide digital-quality sound. The system provides 3
separate audio channels for the front speakers (left, center, right), 2channels for the
rear surround sound speakers, plus one channel for subwoofer sound.
You
will need
an
external audio system capable
of
decoding the AC-3 encoded sound to get the full
surround sound effect. Otherwise, it can
be
connected directly to your TV or audio
system using only the stereo (left/right) audio outputs.
Note:
The
stereo audio outputs are Dolby Surround compatible.
You
can connect aDolby
Surround Pro Logic* decoder (not included)
to
the
stereo audio outputs and receive
surround sound.
*Manufactured under license from Dolby Laboratories. "Dolby", "AC-3", "Pro Logic" and the double-D
symbol are trademarks
of
Dolby Laboratories.
II

INFORMATlON ON THE
HDTV
DIGITAL RECEIVER
Information
on
the HDTV
Digital
Receiver
Reception
capability
of
HDTV Digital Receiver
The Panasonic HDTV Digital Receiver
is
capable of receiving analog (NTSC) and
digital
(ATSC
format), cable (NTSC
and
ATSC
formats),
and
digital satellite (coming
from DIRECTV if
you
subscribe to DIRECrv® programming*) programming. With
availability of digital terrestrial broadcast, your HDTV Digital Receiver
can
make
receiVing
all types of signals seamless. The following drawing shows how
you
can
receive various types of signals.
\
TV,
t-VTV,
OR
t-V
MCNTOR
ANALOG/DIGITAL
TERRESTRIAL
ANTE/'I'4A.
DlRECTV
SATELliTE
CABLE
SIGNAL
_----J
SAlEl.LJTE
~
DISH
ANTENNA
~
---:.'
:.....--....L.-----t---"'""
DlRECTV
SAlEl.LJTE
*Terrestrial off-air signals
or
unscrambled cable-service signals can
be
received
by
the HDTV Digital Receiver.
Note:
The
shape
of
your satellite dish antenna determines what type
of
signal that
your antenna can receive.
If
you have an oval shaped dish, you can receive
signals from DIRECTVSatellites, including HD programming.
Note: Due to
copyright
restrictions,
you
may
not
be able to view some
high
definition
programs
in
high
definition format using this product.
II

INFORMATION ON THE HDTV
DIGITAL
RECEIVER
Panasonic HDTV Digital Receiver Model TU-HDS20
Panasonic
HD
ATSC/NTSC HDTV Digital Receiver with abuilt-in DIRECTV
PLUSTM
receiver, can receive and process DIRECTV standard definition video
and
DIRECTV
high definition video from satellite broadcasts if you subscribe
to
DIRECTv®*programming. It can also receive and process NTSC local terrestrial
and
cable analog programming
and
ATSC compliant terrestrial and cable digital
programming. This HDTV Digital Receiver can output both Digital (Y,PB'pR or RGB) or
composite signals. This digital receiver will output NTSC composite video when 480i
video output is selected.
Current Conventional Televisions
Model TU-HDS20 uses specially developed chips which allow current televisions (with
AN
inputs) to display digitally broadcast programs. The HDTV Digital Receiver, which
receives digital signals, has the ability
to
convert the digital broadcast into National
Television System Committee (NTSC)** signals (480i) that aconventional television
can display. Most conventional televisions will not
be
able to display HDTV programs
in
their original format.
DTV-Compatible Televisions
The HDTV Digital Receiver, by using component video or RGB connections, will allow
DTV-compatible televisions to produce pictures with incredible resolution.
Component video consists ofthree (3) primary color signals: red, green and blue that
together convey all necessary picture information. The three (3) component signals
have been translated into luminance (Y) and two color difference signals
(P
B, PR
),
each
on
aseparate wire. The HDTV Digital Receiver, depending
on
the capabilities
of
the DTV-compatible television, will give you the choice
of
HDTV or SDTV video
output.
HDTV-Compatible (1080i I720p)
HDTV-compatible TV models process and display high definition output from the
Panasonic HDTV Digital Receiver
in
a1080i or 720p video format.
SDTV-Compatible (480p I480i)
SDTV-compatible TV models process and display standard definition output from the
Panasonic HDTV Digital Receiver
in
a480p or 480i video format.
*OIRECTV, the Cyclone Design logo, and DIRECTV PLUS are trademarks
of
DIRECTV, Inc., aunit
of
Hughes Electronics Corp., and are used with permission.
**NTSC is the current television system used
in
the U.S. It uses analog (non-digital) signals.
•

CONGRA
TULATlONS
Congratulations
Your
Panasonic HDTV Digital Receiver features state-of-the-art technology for high-quality
picture
and
sound with complete audio/video output jacks for your home theater system.
This HDTV Digital Receiver
is
capable of receiving DIRECTv® high definition satellite
signals. DTV signals are displayed
in
either
an
interlaced or progressive format, providing a
clear,
crisp picture. This HDTV Digital Receiver also has aseparate ATSC/NTSC tuner
to
provide additional digital
and
analog signal capability.
Your
new HDTV Digital Receiver
is
designed to give you many years ofenjoyment.
Customer
Record
The model and serial number of this product are located on the back
of
the Digital
Receiver.
You
should note the model and serial number in the space provided and
retain as apermanent record
of
your purchase. This will aid
in
identification
in
the
event
of
theft or loss. Product registration is available on-line at:
www.prodreg.com\panas.onic.
Model TU
..
HDS20
Number
Serial
Number
Care and Cleaning
Turn HDTV Digital Receiver
Off
oFor HDTV Digital Receiver, avoid excessive moisture and wipe dry.
oAvoid bumping or scraping the HDTV Digital Receiver.
Remote Control
oFor Remote Control, use asoft cloth dampened with water or amild detergent
solution. Avoid excessive moisture and wipe
dry.
oDo not use benzene, thinner or other petroleum based products.
Specifications
Power Source 120V AC, 60Hz
Channel Capability-NTSC and DTV VHF/UHF -2-69*
CATV -1-125*
Satellite Signal Range 950 -1450 Mhz (L-Band)
Digital
Audio
Output
PCM/AC-3 Fiber Optic
Video
Output
Jacks 1Vp_p'
75
Ohm, Phono Jack Type
S-Video
Output
jack
S-Video (Y-C) Connector
Audio
Output
Jacks 0-2.0V rms 4.7k Ohm
NTSC Video
Output
jack
1Vp_
p'
75
Ohm, Phono Jack Type
NTSC
Audio
Output
jacks
0-2.0V rms 4.7k Ohm
DTV
Output
(V,
PB,
PR)/RGB
Output
75
Ohm, Phono Jack Type
Modem
Jack
RJ11C, 4Conductor
Specifications are subject to change without notice or obligation,
*The digital tuning system allows channel numbers up to 999 to
be
displayed. The total channel capability,
however, remains as stated.
II

IMPORTANT NOTES
Important Notes
HDTV Digital Receiver Location
This unit can be used as part
of
an entertainment center. Consult your dealer for
available options.
oAvoid excessive sunlight
or
bright lights.
oKeep away from excessive heat or moisture. Inadequate ventilation may cause internal
component failure.
oFluorescent lighting may reduce Remote Control transmitting range.
Connecting Cables
Component video cables
(Y,
PB,PR
),
audio cables and modem cable are provided for
connection to aDTV-compatible monitor/receiver. Shielded video cables (not
provided) should be used for all other connections between components. For best
results:
oUse 75 Ohm coaxial shielded cables.
oCheck type
of
output and input connectors on your components.
oDetermine required cable lengths.
AC Power Supply Cord
CAUTION: TO PREVENT ELECTRIC SHOCK, MATCH WIDE BLADE
OF PLUG TO WIDE SLOT OF AC OUTLET AND FULLY INSERT. DO
NOT USE APLUG WITH ARECEPTACLE OR OTHER OUTLET
UNLESS THE BLADE CAN BE FULLY INSERTED TO PREVENT
BLADE EXPOSURE.
Polarized Plug
Satellite Dish Antenna Connection .
Connect the cable coming from the DIRECTV
PLUSTM
satellite dish to the Satellite
In
jack on the HDTV Digital Receiver.
Note:
The
shape
of
your satellite dish antenna determines what type
of
programming that
your antenna can receive.
If
you have
an
oval shaped
dish,
you can receive
programming from DIRECTV Satellites plus some local channels
in
certain areas.
Note: Consult your dealer on Satellite dish installation and options.
Antenna Installation and Orientation
In
many areas,
an
indoor antenna
can
be used to received DTV signals. Certain conditions,
however, may create asituation where
an
outdoor antenna
is
required.
Tall
buildings, large
metal objects
(e.g.,
awater tower) or hills may block the line-of-sight to the TV station
and
interfere with DTV signal reception. Keep the following
in
mind when installing and orienting
your outdoor antenna. For additional information about antennas, see the Consumer
Electronics Manufacturing Association (CEMA) website at www.AntennaWeb.org or ask
your local dealer.
Vagi
0Choose an antenna with directional receiving characteristics such as aVagi, log periodic,
or reflector antenna. Avoid loop, wire bowtie, rabbit-ear and omni-directional antennas.

IMPORTANT
NOTES
Log Periodic
DUse good grade 75 Ohm coax (round) cable to connect the antenna to the HDTV Digital
Receiver.
Do
not use 300 Ohm flat twin-lead cable.
DPlace the antenna away from large metal objects. If using an indoor antenna, remember
that aluminum siding
and
foil-covered insulation can greatly reduce the signal strength
inside your house.
DPoint the antenna
in
the direction
of
the TV station. Allow a4-6 second delay
in
tuning.
Watch for aprogram to appear
on
the
TV.
If the signal indicator
is
"NOT FOUND" or if a
program comes and goes, try aslightly different position for the antenna. Slowly raising or
lowering the antenna by afew feet may help.
DAvoid standing
in
front of the antenna while adjusting its position. Move afew feet to the
rear to avoid changing the signal characteristics.
DIf you are located
in
an
area serviced by two (2) different DTV stations
in
different
directions, you may need
an
antenna rotator to receive signals from both stations.
Reflector
Antenna/Cable Connection
Antenna Connection
For proper reception
of
VHF/UHF channels, adirectional antenna is required (see
previous page). For best reception,
an
outdoor antenna is recommended.
Procedure
DConnect the antenna cable from your antenna.
DSelect ANTENNA,
in
the Roller Guide Menu™* SET UP Menu under Input (see Getting
Started section, Step 6).
Incoming Cable from
Home Antenna
75 Ohm ANT
IN
input on back
of
HDTV Digital Receiver
Cable Connection
Before connecting your cable
to
the HDTV Digital Receiver, contact your local cable
provider and ask the following question:
Do
you need aseparate cable box to receive cable channels
in
your area?
75 Ohm ANT
IN
input
on
back
of
Digital
Receiver
Incoming Cable from
Cable Provider
Note:
The
Panasonic HDTV Digital Receiver is able
to
receive DTV signals from your local
cable provider
only
if
they are transmitted in the
BVSB
modulation format approved by
the FCC for DTV transmission. Also, your cable provider may elect
to
transmit
in
the
BVSB
format for only alimited period
of
time.
Procedure
DConnect the cable wire provided by your local cable provider.
DSelect one of the following
in
the Roller Guide
Menu™
SET UP Menu under Ant/Cable
Input (see Getting Started section, Step
7).
LJl.
@ID@
*Roller Guide Menu
is
atrademark
of
Panasonic Consumer Electronics Company. U.S. Patent Pending.

FRONT
AND
REAR
VIEW
OF THE HDTVDIGITAL RECEIVER
Front
and
Rear View
of
the
HDTV
Digital Receiver
Front Panel
NAVIGATION buttons
Messages indicator
(LED)
·
...
1
ftC'lla-I
o
,,
, f
NaViga!
buttons
li'FO
o0
ACTION but
on
MENU,
GUIDE, INFO
buttons.
Panasonic
I-DlV
DIGITAL
RECEIVER
ATSONTSC/SAlBJ..JlE
Video out indicator (LED)
r -
_.,
..
-
-,
NO.lM: I-MlRIO
--
I
.=
.:
I
I=
.:
I
r.=========L.=.-.-=_:.=.:.=.::=]
========~
L
-l~.
PowerButton
Power indicator (LED) Video Out Button Smart card
(behind door)
POWER
VIDEO OUT
SMART CARD
MENU
GUIDE
INFO
ACTION
NAVIGATION
BUTTONS
MESSAGES
Turns the HDTV Digital Receiver
On.
Press to select Video Output mode.
Also known as Access Card, identifies you to your program
providers. DIRECTV PLUS™system requires avalid card.
Press to enter and exit Roller Guide Menu system.
Press to access Advanced Program Guide.
Press to display channel banner.
Press to enter selection from the Guide or from the Menu.
Press the navigation arrows to move the highlight up, down, left
or right.
Message indicator LED.

FRONT
AND
REAR
VIEW OF
THEHDTV
DIGITAL RECEIVER
Rear Panel
NTSC OUTPUTS
AC-3 /PCM Output
jack
DIGITAL OUTPUTS
H,
V
Jacks
,......--+----...-P~
P
B-Y
R-B-G
<0
<0
Q
<0
<0
mC
R-JlUDlO.L VlCEO&VICEO llGlTJIL
1---
.......
.--+---------1
AlDlOaJT
lE...1JI£
NTSC
0l1TPUT (PC-3)
RGBIYPSPRSwitch
SATELLITE
IN
jack CH3/CH4 Switch
RF
Out jack
I
f>NTIN
o
AN
IN
jack
ANT
IN
SATELLITE
IN
RFOUT
CH3/CH4
Switch
YPBPR/RGB
Jacks
RGBNPBPR
Switch
DIGITAL OUTPUTS
NTSC OUTPUTS
H,
V
jacks
AC 3/PCM OUTPUT
MODEM
Use to connect
an
off-air antenna or cable TV signal to the
HDTV Digital receiver.
Use to connect DIRECTV satellite signal to the HDTV Digital
Receiver.
Use to connect the HDTV Digital Receiver to your
TV.
If acoaxial cable
is
used to connect the digital receiver to
your
TV,
you must set the CH3/CH4 switch to either CH3 or
CH4.
Primaryjacks used to connect the HDTV Digital Receiver to a
DTV Compatible Television.
Selects either RGB or Component video
(Y,PB.PR)
signals
according to your TV/Monitor.
Outputs either Component Video or RGB signal .
Use to connect the HDTV Digital Receiver to aConventional
TV.
Horizontal and Vertical sync jacks used with RGB for high-
end monitors, video projectors etc
..
Use to connect your HDTV Digital Receiver to aDolby Digital
AC-3 receiver
or
decoder.
Use to connect aphone line to the HDTV Digital Receiver to
enable DIRECTV pay per view services.

HDDIGITAL
TVDISPLAyFORMATS
HD Digital
TV
Display Formats
The HDTV Digital Receiver converts all ATSC signal formats
and
HD
DIRECTV signal
into viewable programming. The formats are variations
on
the four (4) formats, 1080i,
720p, 480p and 480i. The following table shows the display formats, resolutions and
aspect ratios.
480p
480i
StandardOefiniUon
16:9 or 4:3
Display Format Selection
The HDTV Digital Receiver allows you to choose adisplay format based
on
the
capability of your TV or monitor.
To
select the appropriate display format, use the
VIDEO OUT button
on
the front panel ofthe HDTV Digital Receiver.
Note:
This
section applies
to
DTV-compatible televisions only.
NATIVE Format
If your TV is capable of displaying all four (4) formats, 1080i, 720p, 480p and 480i,
then select NATIVE mode using the VIDEO OUT button.
HYBRID Format
In
the HYBRID format all 1
D8Di
and 720p signals are output
as
1080i and
48Di
is
outputted as
480p.~_--=_--==_=========='l
480p
III

HD DIGITAL TV
DISPLAY
FORMATS
1080i Format
If your TV is capable
of
displaying 1080i, then select 1080i by using the VIDEO OUT
button on the front
of
the HDTV Digital Receiver.
720p Format
If your TV is capable of displaying 720p. then select 720p by using the VIDEO OUT
button
on
the front
of
the HDTV Digital Receiver.
480p Format
If your TV
is
capable
of
displaying 480p format only, then select 480p by using the
VIDEO OUT button
on
the front ofthe HDTV
Oi
ital Receiver.
480i Format
If your TV is capable of displaying NTSC format only, then select 480i by using the
VIDEO OUT button
on
the front
of
the HDTV
Di
ital Receiver.
Note:
In
order
to
use either
RF
OUT
or
NTSC outputjacks for NTSC video, the 480i Format
mode mustbe selected.

HD DIGITAL TV
DISPLAY
FORMATS
Aspect Ratio Selection
The HDTV Digital Receiver allows you to select
an
aspect ratio (picture display shape)
to match the source signal and shape
of
your TV screen.
You
can also change the
aspect ratio for your personal viewing preference.
To
select an aspect ratio, press the
ASPECT button
on
your remote control and the HDTV Digital Receiver will cycle
to
the next available aspect ratio choice. The following table shows the available aspect
ratios.
"Full
(No
ScaH~g)
'.
Full Aspect
16:9 or 4:3 picture will be displayed in the center
of
the viewing screen at full screen
width and height.
Zoom Aspect (4:3 Monitor receiving 16:9 source signal)
The picture will be expanded uniformly (width and height) to fill the viewing screen.
The picture will
be
cropped, either horizontally or vertically to fit the viewing screen.
The cropped portion
of
the original picture will
be
lost from view.
Note:
To
properly view Closed Captioning,
the
HDTV Digital Receiver
may,
in
some cases,
change the aspect ratio from Zoom
to
Full.
Letterbox Aspect
Video formats with aspect ratios greater than 16:9 will be displayed at the proper
width, so no video information
is
lost. Bars will appear above and below the picture.
Sidebar Aspect
4:3 pictures will be viewed
on
awide aspect TV screen with vertical bars on both sides
of
the picture.
Note:
See
following page for illustrations
of
the
various aspect ratios.

ASPECT RATIO FORMATS
16:9
MONITOR
FORMAT
4:3
MONITOR
FORMAT
Source
Signal
FUll
ZOOM SIDEBAR EXPAND
FUll
ZOOM lETTERBOX
SHRINK
4
3~
I
The 16:9 and 4:3 pictures
represent
the
incoming
source signals received by
the
HDTV Digital Receiver.
These pictures show the different aspect ratios
available with a16:9 monitor formal.
The top picture shows the 16:9 monitor
format available when the HDTV Digital
Receiver receives a16:9 source signal.
The bottom pictures show the 16:9 monitor
formats available when the HDTV Digital
Receiver receives a4:3 source signal.
These pictures show the different aspect ratios
available with a4:3 monitor format.
The top pictures show the 4:3 monitor
formats available when the HDTV Digital
Receiver receives a16:9 source signal.
The bottom picture shows the 4:3 monitor
format available when the HDTV Digital
Receiver receives a4:3 source signal.

FEA
TURES
OF
THE
HDTVDIGITAL
RECEIVER
Features
of
the
HDTV
Digital Receiver
Channel and Program Tuning -ATSC reception only
Channel
and
program tuning
in
digital television
is
very different from current
conventional television.
In
DTV,
up
to six (6) multiple programs can exist within a
single 6MHz channel. These programs behave as subchannels within the single
channel. When tuning
to
achannel, the HDTV Digital Receiver will also tune to a
program. Your HDTV Digital Receiver will indicate the channel
and
program through
the on-screen Channel Banner display.
Channel and Program Tuning
The HDTV Digital Receiver allows channel
and
program selection
in
the following
ways:
aDirect Tuning
(0
- 9 keys) -Tunes directly to achannel or program.
aChannel Up/Down Tuning
(.
or Tbuttons) -Tunes to the next or previous available
channel or program.
aNext Program Tuning (PROG button) -Tunes to the next program within asingle 6MHz
channel.
aRapid Tuning (R-TUNE button) -Switches between the last two remembered channels or
programs.

FEATURES
OF
THE
HDTV
DIGITAL
RECEIVER
Channel Banner: DIRECTV
HD
IATSC INTSC
The Channel Banner is available with all signal sources; DIRECTV SD, DIRECTV
HD,
ATSC and NTSC to show you which channel and program you are currently viewing
or have selected. The following figure shows the DIRECTV HD /ATSC /NTSC
channel banner. The DIRECTV
HD
/ATSC /NTSC channel banner description area
can
be
expanded, ifthe user presses the INFO
key.
S1~'~
S'111"!
1
~
[)
'.'idl~
•
~
pt1
1__
,,_
l
T(",!
tr"l
~
1,
-
).J
'-"01
~
~
',~'<;,';
t«
~~\;
t',.,.
N;\,~
,~r
~
CC
rI"/
l'
f"t~
~>}'.,.1
HD
DIRECTV
HD
IATSC INTSC
In
addition to viewing the program description, the user can add or remove the
channel from the favorite channel list. This
is
accomplished by navigating left or right
and pressing the ACTION
key.
Channel Banner: Favorite Channel
List
The favorite channel list is acustomized list that allows you to create your own unique
channel list. The favorite channel list is active when you select the
"FAV
CH" mode
in
the guide screen. By default, the "ALL CH" mode is selected. Also, by default, both the
"ALL" mode and
"FAV"
modes default to all the channels selected
in
their lists.
When the description of the channel banner
is
expanded, the user now has the
opportunity to add or remove achannel from the favorite list. By default,
Add
to
FAV
button
is
highlighted when the Channel Banner
is
expanded. Once achannel
is
removed from the favorite list, the user is required
to
numerically enter
in
the channel
number to view that channel, at which time the user can add the channel back into the
favorite channel list.
The following figure depicts the DIRECTV
HD
/ATSC /NTSC Channel Banner, when
the Description area is highlighted.
AddtOFAV_
DIRECTV
HD
IATSC INTSC
••
Other manuals for TU-HDS20
2
Table of contents
Other Panasonic TV Receiver manuals

Panasonic
Panasonic CT-27G14D User manual

Panasonic
Panasonic TU-DST52F User manual

Panasonic
Panasonic CT-27SF25 User manual

Panasonic
Panasonic TU-HDT105A User manual

Panasonic
Panasonic TU-PTA100E User manual

Panasonic
Panasonic CT-G2937X User manual

Panasonic
Panasonic CT1386YD - 13" MONITOR W/O TUNER User manual

Panasonic
Panasonic TU-HDS20 User manual

Panasonic
Panasonic CT-27SF25 User manual

Panasonic
Panasonic TU-HDS20 User manual