Install DCT Hand Sanitizer Dispenser 1 of 2
DCT Hand
Sanitizer
Products Needed Tools Needed
Drill & Drill Bit [7/32]
Hammer
Nut Driver [Drill, 5/16
Inch]
Nut Driver [Hand
Held, 5/16 Inch]
Screw [#10, 1 Inch]
Wall Anchor [#10-
#12 x 1-1/4 Inch]
Frequency
(1) Time
Special Directions
Additional Tools Needed:
Isopropyl Alcohol (90%),
Scraper, Scrub Pad - Non
Scratch, Paper Towel, Pen
or Marker
Link to Video
Scan QR code to
see video.
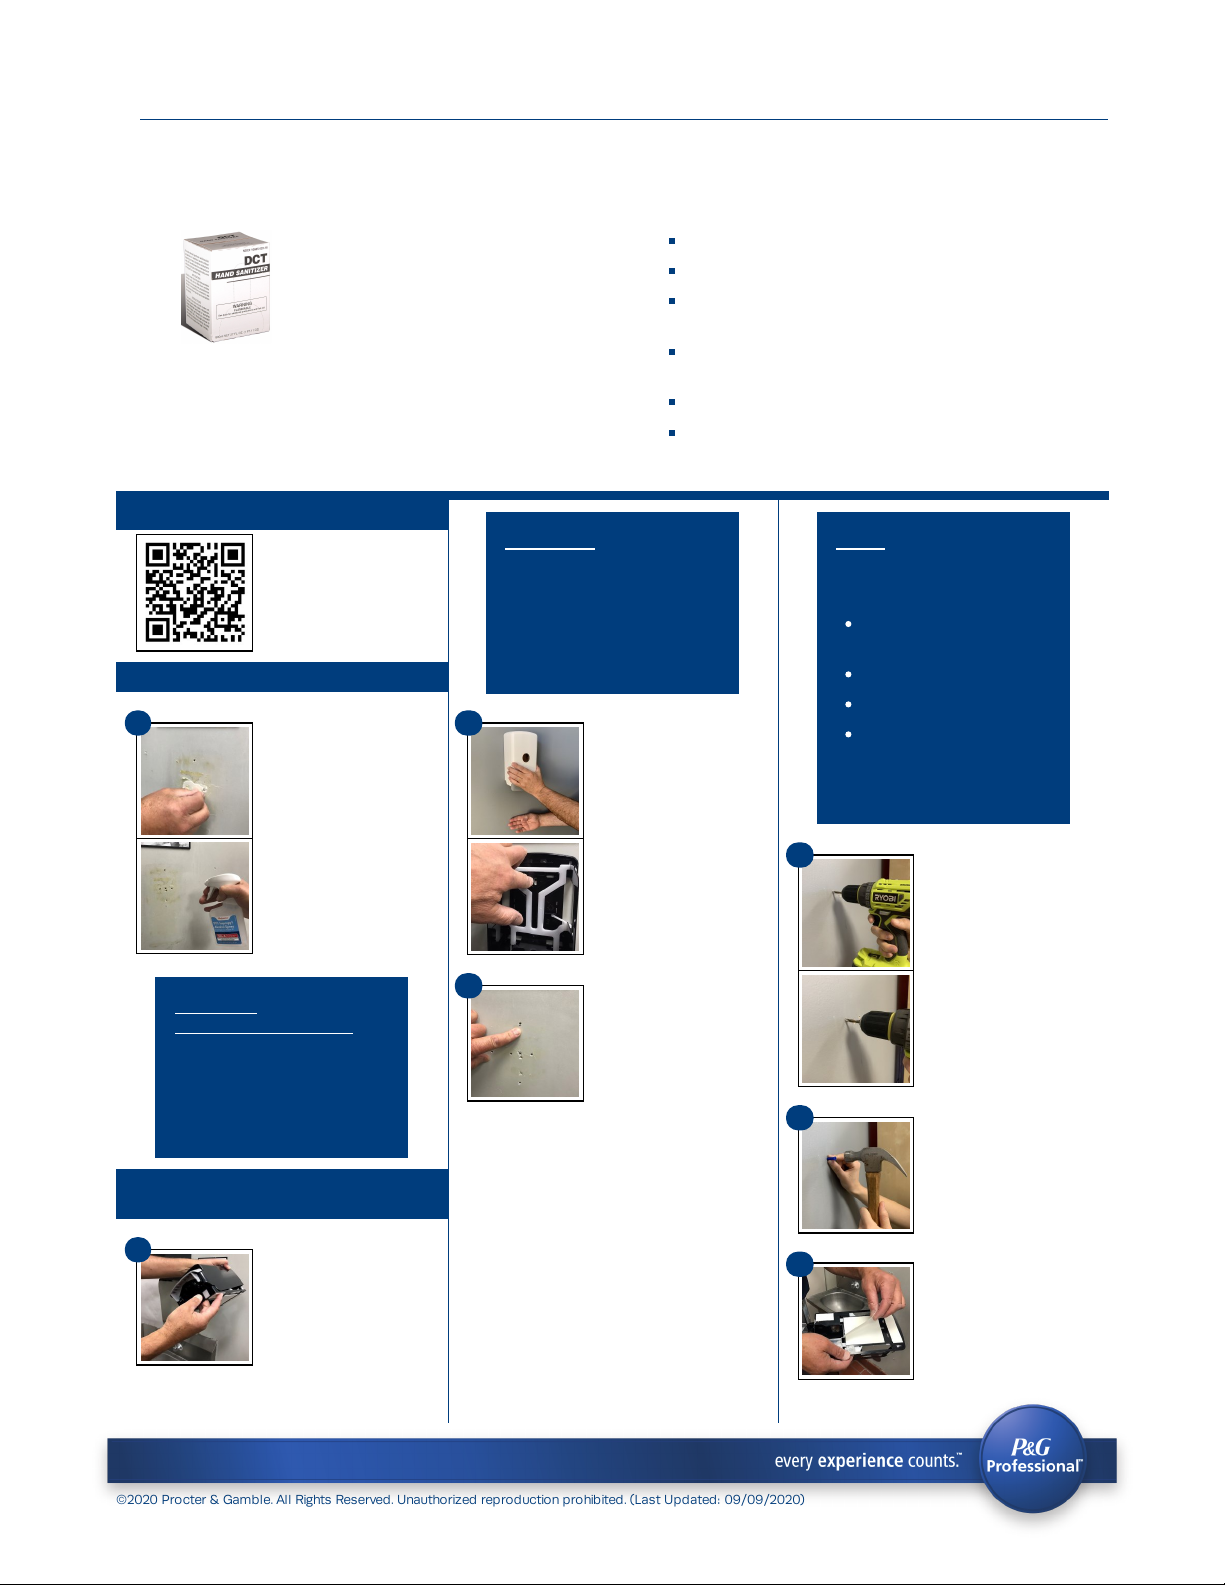
Prepare the Wall
Clean the wall of
soils and old
adhesive peel old
tape if needed.
Scrap the soils
using your fingers,
or a scraper, scrub
pad, or paper towel
and an adhesive
remover like
isopropyl alcohol if
needed.
CAUTIONCAUTION: Do not use
Heavy Duty Degreaser as
this product does not
allow the adhesive tape
on the new hand sanitizer
dispenser to bond to the
wall.
Install Hand Sanitizer
Dispenser
Unpack the
dispenser and open
the cover.
WARNINGWARNING: Assess the
surrounding wall area to
ensure that electrical
outlets or hand sink water
supply lines are not
directly below or above
the area to be drilled.
Hold the dispenser
against the wall.
Locate an area that
allows the drip tray
to be installed
under the
dispenser. Align (1)
of the mounting
holes to an existing
hole or note where a
new hole is needed.
Mark the selected
1-3 hole(s) with pen
or marker. Choose a
mounting hole that
will cover all the old
mounting holes in
the wall.
NOTENOTE: Walls made with
the following materials
need anchors installed to
secure the dispenser.
Brick, Concrete,
Masonry
Dry Wall
Fiberglass Panels
Stainless Steel Sheets
NO anchor is needed if
installing to a wood wall
stud.
Drill the marked new
hole(s) with a drill
and drill bit. Drill
slowly, feel for
resistance, in the
event water/drain
pipes are in the wall.
If needed, stop
drilling. Find a new
hole, repeat stepssteps
3-53-5.
Tap the wall anchor
into the hole(s)
using a hammer.
Ensure the anchor
is flush to the wall.
Turn the dispenser
over and remove the
adhesive tape paper
backing.
©2020 Procter & Gamble. All Rights Reserved. Unauthorized reproduction prohibited. (Last Updated: 09/09/2020)


