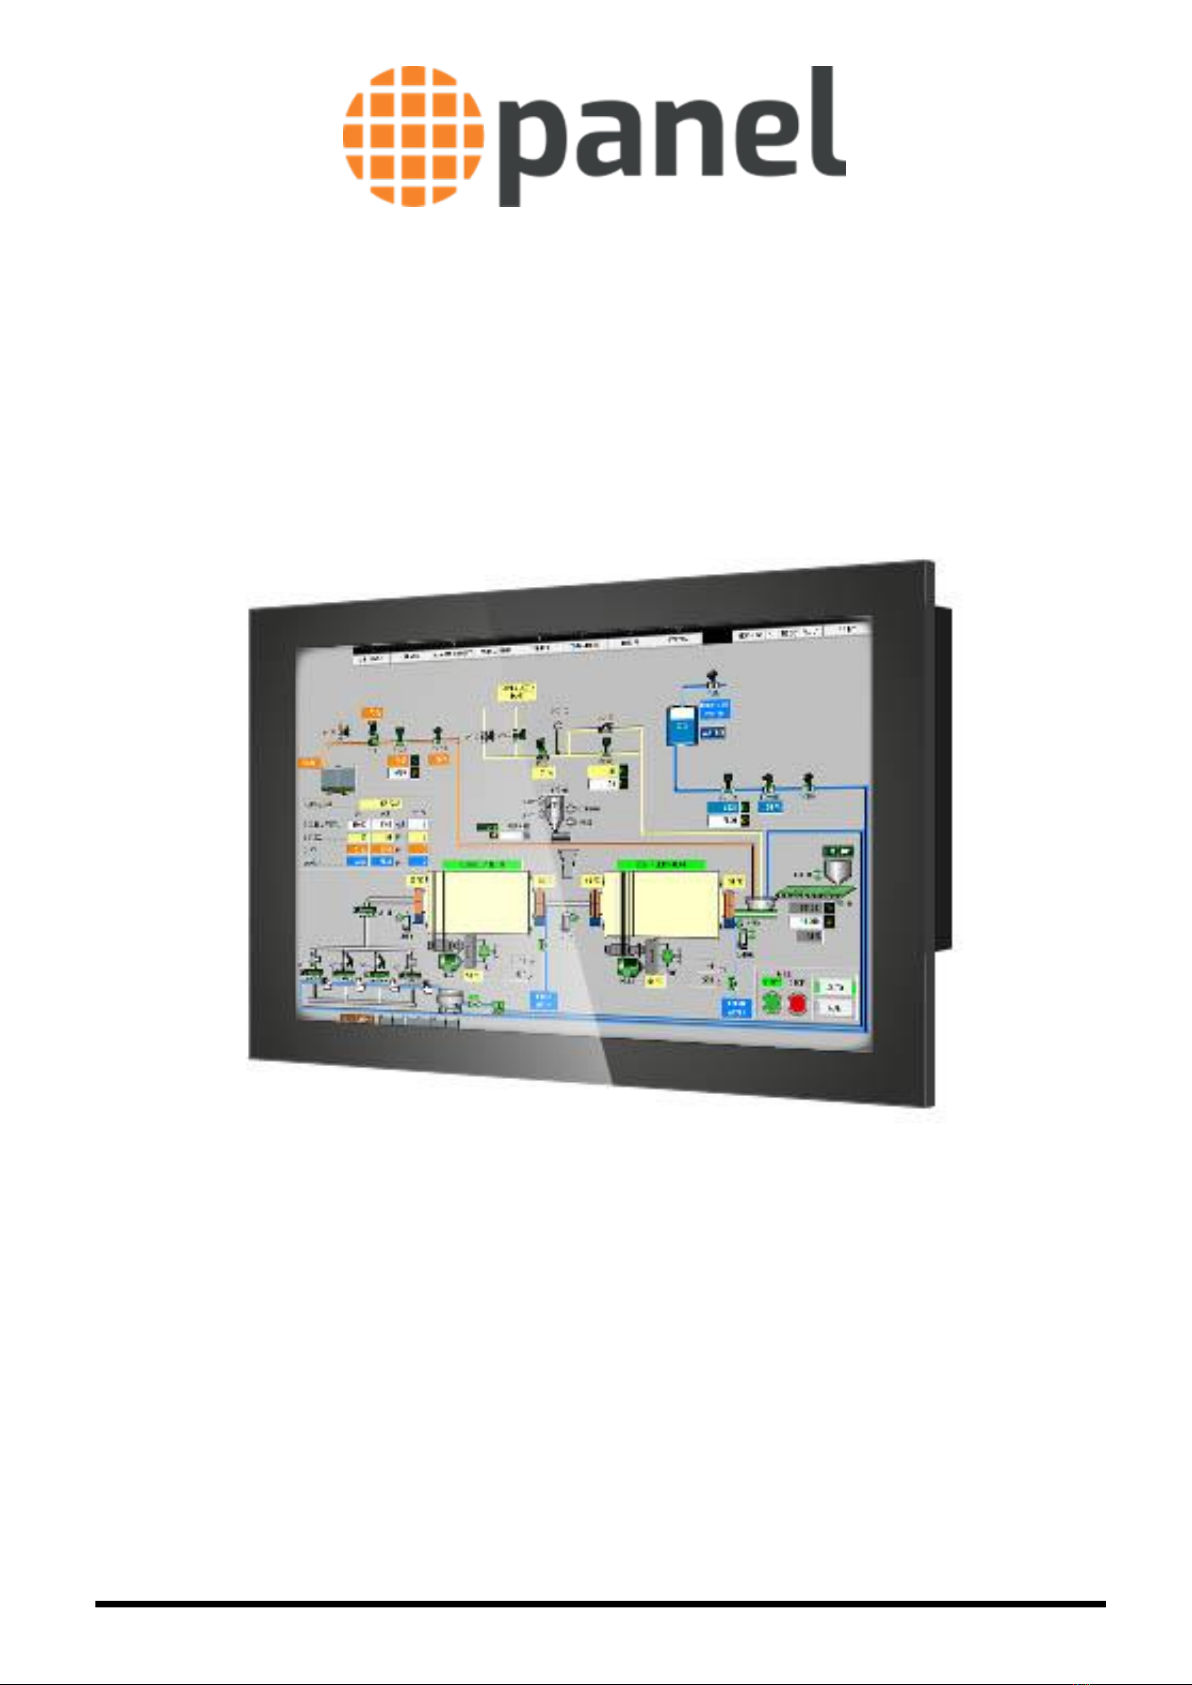
www.panel.it 8
8
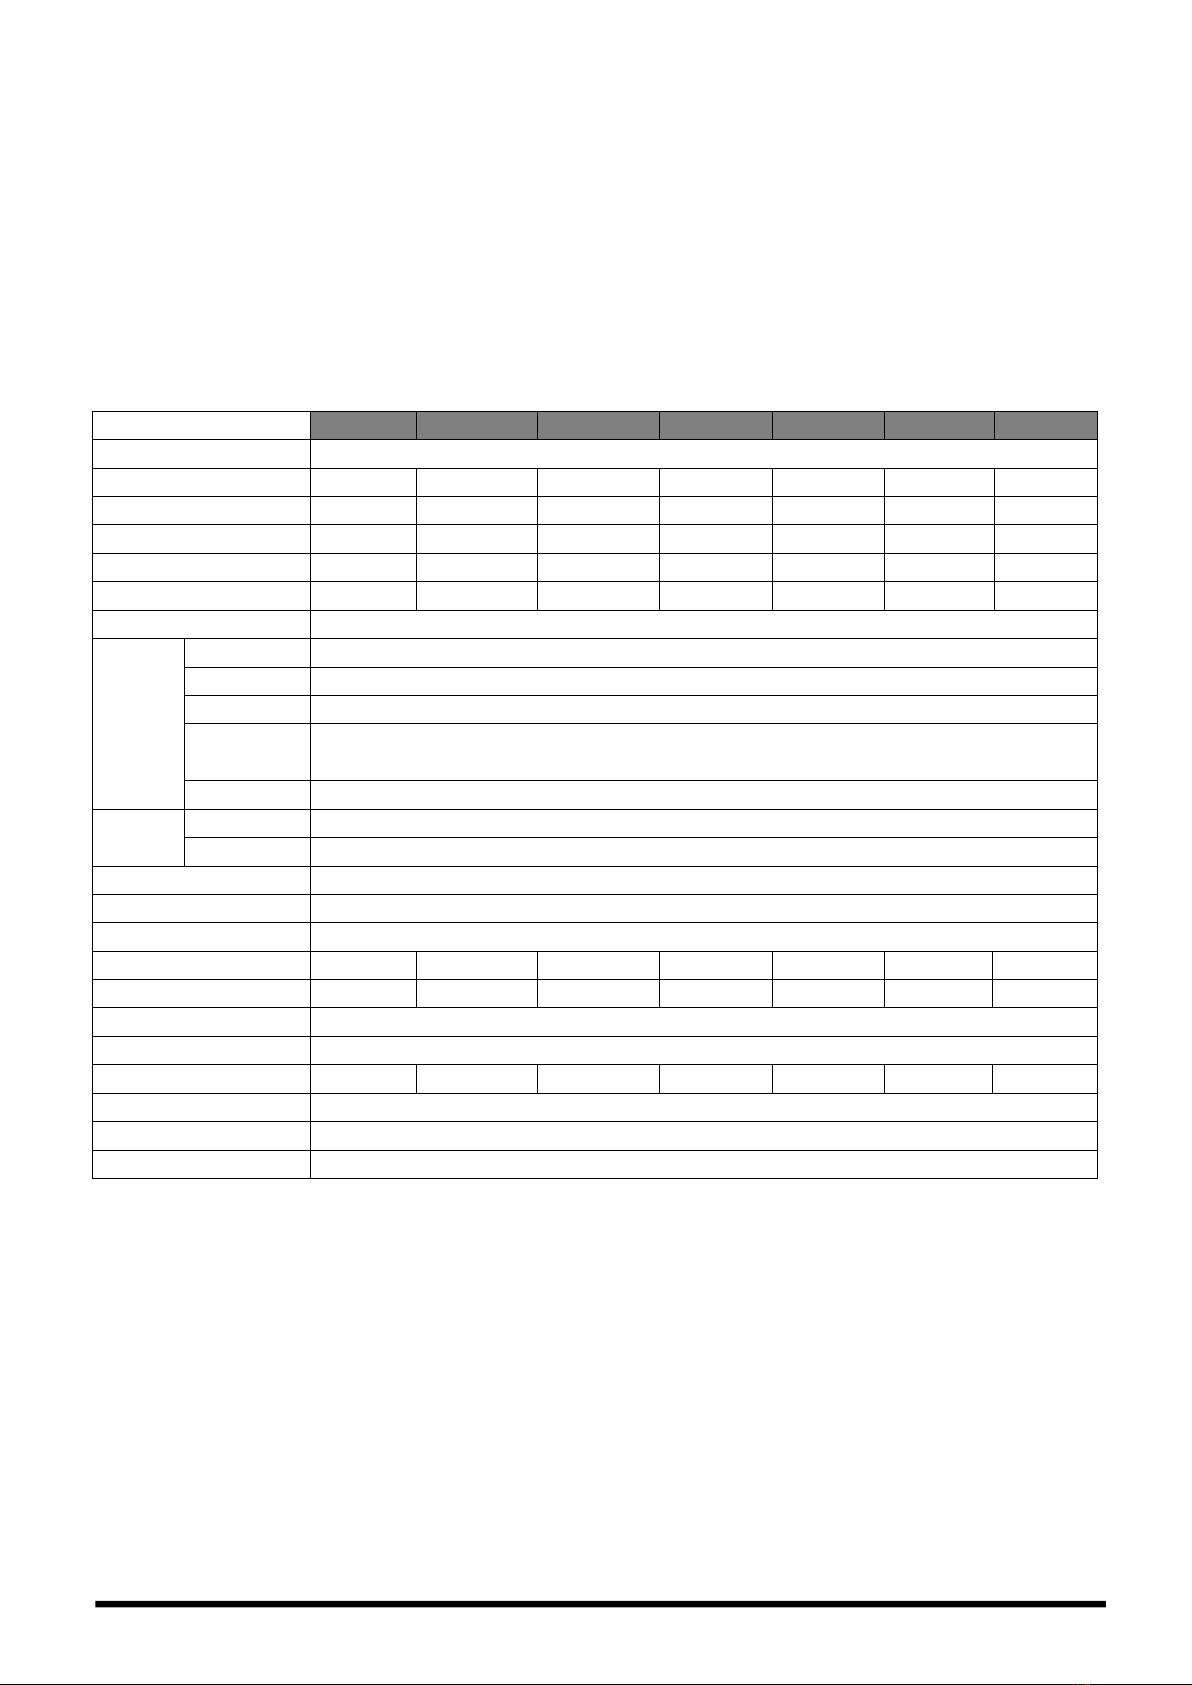
2.4 Touchscreen specifications
Scope: The specification is for projected capacitive touchscreen
Features
Type: Projected capacitive
Input Mode: Finger
Environmental Characteristics
Operation temperature: -20 °C ~ +70 °C; Humidity 20% RH ~ 85% RH Non Condensing
Storage temperature: -40 °C ~ +80 °C; Humidity 10% RH ~ 90% RH Non Condensing
Optical Characteristics
Transparency: 90% ± 3% (Measured by BYK-Gardner)
Haze: < 2%
Electrical Characteristics
Linearity: X≦1.0%, Y≦1.0%
Insulation: ≧100MΩ/25V(DC)
Response: According to Integration time of controller
Mechanical Characteristics
Total Thickness: 2.45±0.30 mm
Operating force specifications: Finger=≦10g
Impact: 25.0 mm DIA. Steel Ball/67g, height=30 cm, 1 time, impact at center area
Static Load: 5000g within 10cm2area for 30 sec
Hardness: 7H pencil, pressure 750g/45°
Tail peeling: 800g/cm by vertical 90° for 30sec
Reliability
Constant temperature /Humidity: 70°C X 90%RH, 120 hrs and normalized for 4 hrs
Heat cycle: 70°C /120 hrs and normalized for 4 hrs
Cold cycle: -40°C /120 hrs and normalized for 4 hrs
Thermal Cycle: -40°C ~80℃[60 min./cycle] *10 cycles and normalized for 4 hrs
Durability
Knock Test: 100,000,000 times
PSG2 projected capacitive touch controller
Tecnology: allow 10 finger multi-touch
Power Requirements: 3.5V~5.5V typical 5V, 100mA max.
Operating Temperature: -25 to 85 ℃
Storage Temperature: -25 to 85 ℃
Relative Humidity: 95% at 60 ℃, RH Non-condensing
Interface: USB: 1.1 Full Speed
Resolution: 4096×4096 resolution
Report rate: USB: Max. 100 points/sec
Response time: Max. 25 ms
MTBF: 200,000 hrs