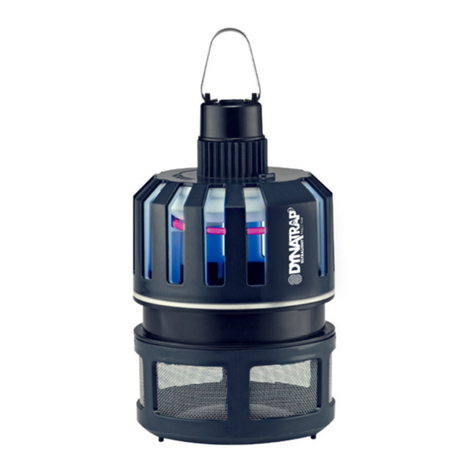
Paraclipse Insect Inn Ultra I User manual

Replace Ultraviolet lamp every eight months
of use to maintain optimum performance of
the unit.
At eight months of continuous use the UV
output of the lamp have lost approximately
30% effectiveness and should be replaced.
After this time the lamp may still light but is no
longer emitting enough of the special UV light
frequency required for an effective insect
catch.
All other services:
Any servicing other than cartridge or UV lamp
replacement, should be performed by an au-
thorized service representative.
Call, Fax, or email Paraclipse for the name of
the nearest service representative.
Use only Genuine Para-
clipse replacement Car-
tridges and Ultraviolet
(UV) Lamps to maintain
your Paraclipse product in proper
working order. Use of Non-
Paraclipse Replacement parts may
cause damage to your Paraclipse
equipment and may void warranty.
For replacement parts contact your dealer. Call,
email, or Fax Paraclipse for the nearest dealer.
Replacement Parts and Part Number:
UV Quantum lamp #72651
Cartridges #73836
Shatterproof UV lamp #72653
To order additional Units:
Insect Inn Ultra Unit #250501
Save these instructions
Page 8
Maintenance Instructions
Care and Cleaning of Unit:
For the best results your Insect Inn Ultra™
should be cleaned regularly when you change
the cartridge.
When cleaning do the following:
1. Disconnect power cord from electrical
outlet.
2. Use glass cleaner to clean the body of the
trap and lamp. Make sure you remove
excess insect droppings and dead car-
casses.
3. Dry trap thoroughly with soft cloth.
4. Reconnect to electrical outlet.
72671 4-29-2014
Paraclipse
2271 East 29th Ave. PO Box 686
Columbus, NE 68602-0686 USA
Phone: (402)563-3625
Fax: (402) 564-2109
Email: [email protected]
Web site: www.paraclipse.com
SAVE THESE INSTRUCTIONS
72671 4-29-2014
Paraclipse ®
I

72671 4-29-2014
Save these instructions
Page 2
Insect Inn Ultra™ is their fatal attraction
Features
Research- proven, flying insect attracting UV light
device.
Exclusive automatic advance 60 day cartridge trap-
ping system.
Large capacity disposable cartridge.
Specially engineered reflective top shell.
Front UV light slots.
Stylish unit can be placed in public areas.
End of cartridge alarm.
Highly effective combination of special UV light,
attractants, and trapping surface.
The trapping system is environmentally friendly -
unit has been designed for use in food handling
areas, and meets applicable guidelines.
Easy to maintain, easy to clean.
Unique cartridge placement-directly under bulb(s).
Ultraviolet Light Booster Reflector.
Mounting Instructions Page 4
Ultraviolet Lamp/Cartridge Installation Page 5
Cartridge Alarm Page 6
Manual Paper Advance Page 6
Cover Installation Page 7
Maintenance Page 7 & 8
Benefits
Effective attraction of flying insects already inside
the building.
Eliminates large quantities of flies. Sanitary han-
dling.
Holds up to 10 times the capacity of glue boards.
Directs light out and down, to increase overall effec-
tiveness. Unit can be used on any color of wall for
maximum effectiveness.
Your customers never know it’s a flying insect trap.
Audible alert to replace used cartridge.
Draws flying insects to trapping surface - keeps
them trapped.
No hazards to your customers from chemicals or
unsanitary scatter of insect parts.
Effective flying insect control that doesn’t make extra
work for you or your staff.
Flies more quickly caught during random flight near
bulb(s). Cartridge warmed from beneath draws more
flies to catch surface.
Increases the outward reflective power of the UV
bulb(s).
72671 4-29-2014
Insect Inn Ultra™ Page 7
Maintenance Instructions
Cover Installation:
1. Plug in unit to verify that the lamp is opera-
tional.
Top & Bottom Cover Assembly:
1. Fig. 9 is a back view of the Ultra cover shells
attachment features. The top & bottom cover
have slide attachments for ease of assem-
bly, disassembly, and ease of cleaning. After
top & bottom are assembled, the Back
Frame (Fig.10) has two ears, that fit into
slots on bottom of Ultra top cover. Simply set
the assembled fixture on ears.
2. Attach the cover shell (Fig. 8 & 9)
NOTE: The drive spool will turn approxi-
mately 1/2 revolution per day (24 hours).
Cartridge Maintenance:
The tacky surface of the Cartridge advances
slowly and can regularly remain effective up to 60
days, depending on the volume of insect catch.
(Fig. 10)
1. When surface is no longer available or you
hear the audible beep then you need to re-
place the cartridge.
2. If the surface is filled with a
heavy catch of insects, manually
advance the cartridge so fresh
surface is available. (See pg. 6)
Ultraviolet Quantum lamp
Replacement:
1. Disconnect power cord from electrical
outlet.
2. Remove old lamp.
3. Insert new lamp and twist lamp 90° (see
page 5, Fig. 3).
4. Reconnect to electrical outlet..
DEAD INSECTS ARE
UNSANITARY
Fig. 8
Cartridge
Alarm Hole
Fig. 10
Ultra Top Cover
Ultra Bottom Cover
Advance Knob
Ultraviolet Lamp
Fig. 9
Slot
Top & Bottom
Slide Attachment
Top & Bottom
Slide Attachment
BACK VIEW
Ear Attachments(2)
Slot

72671 4-29-2014
Save these instructions
Page 6
Cartridge Alarm & Manual Paper Advance
Cartridge Alarm:
The Insect Inn Ultra™ has an out of paper sensor
that emits an audible beep when it is time to re-
place the cartridge. (Fig. 6)
The alarm is triggered when the paper no longer
covers the alarm hole in the top of the paper hold-
er plate . An electronic light sensor recognizes this
and begins to emit a high pitched beep.
Testing:
To test the operation of the alarm follow these
steps:
1. Plug the unit in to the outlet.
2. Carefully remove the cartridge. The alarm
should emit an audible beeping.
3. Stop the alarm by installing a fresh cartridge.
NOTE: If new cartridge is not available for
installation, unplug the unit to shut off the alarm
until a genuine Paraclipse replacement cartridge is
available.
Manual Paper Advance:
You can manually advance the tacky paper sur-
face by simply turning the right advance knob
clockwise until the desired amount of tacky paper
is available to catch insects. (Fig. 7)
This maybe required when installing a new car-
tridge and advancing the paper due to heavy in-
sect catch.
Alarm Hole
Fig. 6
Fig. 7
Advance Knob
This symbol is intended to alert you of
the presence of dangerous voltage
within the unit’s enclosure that maybe
of sufficient magnitude to constitute a
risk of electric shock.
This symbol is intended to alert you
of the presence of important operat-
ing and maintenance instructions
accompanying the unit.
Caution! To reduce the risk of electric shock, observe the following:
1. Do not remove the motor enclosure. No user serviceable parts are inside.
2. This product is intended for indoor use only. Do not use where it may be ex-
posed to flammable vapor, explosive dust, water or direct sunlight (including
roofed but open porches).
3. Disconnect the product from power supply when not in use, before servicing,
cleaning, or when changing lamps.
4. Use only extension cords marked SPT- 1, or equivalent. Its electrical rating
must be at least 120 V, 60 Hz, and 10 Amps. Use only extension cords which
have plugs and receptacles which accept product’s plug.
5. Replace or repair damaged cords.
6. Don’t abuse the cord. Never carry the product by the cord or yank it to discon-
nect it. Keep the cord from heat, oil, and sharp edges. Main plug should always
be accessible.
7. Extension cords & devices for retaining an extension cord connection to the
power supply cord are available at most hardware stores.
8. Keep of the reach of children.
CAUTION! To avoid risk of contamination, observe the following: Dead insects are un-
sanitary. Use care in removing used cartridge.
IMPORTANT SAFETY INSTRUCTIONS
Insect Inn Ultra™ Page 3
72671 4-29-2014
SAVE THESE INSTRUCTIONS
HG—LAMP CONTAINS MERCURY
Manage in Accordance with Disposal Laws
See: www.lamprecycle.org

72671 4-29-2014
Mounting Instructions
Save these instructions
Page 4
Insect Inn Ultra contents:
One Ultra Cover Shell Top.
One Ultra Cover Shell Bottom.
One Wall Anchor Kit.
Two drywall anchors.
Instructions.
Screws.
One Frame Assembly.
One Cartridge.
UV Quantum Lamp.
Unit location on wall:
Select a wall away from windows or competing
light source. For best results, mounting holes
should be located 66” ( 1.68m) above the floor
(Fig. 1).
Mounting unit to wall:
1. As guide to hanging unit locate wall studs if
possible. Mark two locations on the wall for
your fasteners that are 16” (40.6 cm) apart.
Make sure that the marks are level with each
other.
a. Types of Fasteners that can be used:
Drywall anchors.
NOTE: When using the drywall anchors
follow the instructions provided in the
Wall Anchor Kit.
Two Screws.
Combination of one anchor and one
screw.
NOTE: The wall anchor kit provided will
accommodate these combinations.
2. Use a Phillips head screwdriver to mount the
frame assembly on the wall. The frame as-
sembly must be securely mounted to the wall
NOTE: For other surfaces, such as concrete,
different fasteners or anchors maybe re-
quired. These types of fasteners are not in-
cluded.
16”
(40.6 cm)
Drill 1/4”
(6.5mm) hole
Drywall anchor
Anchors are for drywall
where wall studs are
unavailable
1 1/4” screw
Locate mounting holes
approximately 66” (1.68m)
above the floor
Fig. 1
Fig. 2
72671 4-29-2014
Insect Inn Ultra™ Page 5
Lamp and Cartridge Installation:
Note: Unit must be securely mounted to
the wall before you proceed with the in-
stallation of Lamp & Cartridge.
1. Remove the ultraviolet lamp from the box.
insert the lamp into the lamp sockets by align-
ing the pins of the lamp with the light socket
and twist 90 degrees. (Fig. 3)
NOTE: It is recommended to replace the
ultraviolet lamp every eight months of use to
maintain optimum performance of the unit.
At eight months of continuous use the UV
output of the lamp has lost approximately 30%
effectiveness and should be replaced. After
this time the lamp may still light but is no
longer emitting enough of the special UV light
frequency required for an effective insect
catch.
2. Rotate the drive spool of the cartridge in the
direction of the arrow shown on the drive spool
until the glue surface spans the full length of
the cartridge. (Fig. 4)
NOTE: About 11 to 12 rotations will be re-
quired.
3. Position the cartridge on the front of the motor
enclosure. Push the cartridge in until it stops.
(Fig. 4 & 5)
Replacement Quantum lamp: part # 72651
Ultraviolet Lamp/Cartridge Installation
Frame
Assembly Lamp Socket
Fig. 3
Fig. 4
Fig. 5
Ultraviolet Lamp
Drive Spool Cartridge
Lamp Socket
Motor Enclosure
Table of contents
Other Paraclipse Insect Control Equipment manuals