Parata ATP Configuration guide

DEVICE MAINTENANCE AND CLEANING
TRAINING
1
©Parata
2014
CONTENTS
MODULE ONE: OVERVIEW ............................................................................................................. 2
ATP Device Maintenance Introduction....................................................................................... 2
Precautions for Safe Operation .............................................................................................. 3
ATP Device Components................................................................................................................. 7
ATP Cleaning and Maintenance Checklist....................................................................................... 9
How to Turn the ATP on and off ............................................................................................... 11
ATP Device Power Switch ..................................................................................................... 11
MODULE TWO: CLEANING ........................................................................................................... 13
How to Clean the Canister and Motor Base ................................................................................. 13
How to Clean the ATP Device Med Drawer .................................................................................. 15
How to Clean the ATP Device Sub Hoppers.................................................................................. 17
How to Clean the ATP Device 1st Shutter..................................................................................... 19
How to Clean the UTC Tray and Drawer....................................................................................... 21
How to Clean the ATP Device Main Hopper ................................................................................. 23
How to Clean the ATP Lower Packaging Unit (LPU)...................................................................... 25
MODULE THREE: MAINTENANCE................................................................................................. 29
How to Change the Printer Ribbon and Clean the Thermal Print Head ....................................... 29
How to Maintain the Paper Path and Change the Paper ............................................................. 35
How to Remove the Lower Packaging Unit (LPU)......................................................................... 39
How to Replace the Cutter Blade (ADMIN) .................................................................................. 45
How to adjust or replace the Perforation Blade (ADMIN)[online video] ..................................... 51
How to Replace the TC Motor Assembly (ADMIN)....................................................................... 59
How to Replace the Printer Head (ADMIN) [online video].......................................................... 63
Warranty Verification ................................................................................................................... 67
Consumables FAQ ......................................................................................................................... 69

DEVICE MAINTENANCE AND CLEANING
TRAINING
2
©Parata
2014
Updated 05/2015
INTRODUCTION
Welcome to the Device Maintenance and Cleaning Unit. It is important to clean and maintain your ATP
Device to ensure safe and efficient operation. Parts will last longer and you will get more out of your
device when you follow the maintenance and cleaning schedule. You can find this schedule in the
“resources and worksheet” section of this unit. The cleanliness of the pill path impacts the timing of pills
falling through the machine, therefore regular cleaning is important to prevent late drops and resulting
errors.
VOCABULARY
1st Shutter
Anvil Assembly
Blade Holder Pin
Calibration
Cancel Key
Canister
Control Panel
Cut Key
Cutter Blade
Feed Key
Front Door
Heater Holder
Heater Rubber
LCD Indicator
Lower Packaging Unit (LPU)
Main Hopper
Med Drawer
Medication Drawer
Mimi Adjustment
Mode Key
Motor Assembly
Motor Base
Package Exit
Lower Packaging Unit
Paper Guide Roller
Paper Remaining Indicator
Perforation Blade
Printer Head
Scanner
Scroll Key
Stop Key
Sub Hopper
Thermal Print Head
UTC Tray
MODULE ONE: OVERVIEW
ATP Device Maintenance Introduction
Read the Maintenance Procedures carefully before using the device, and follow the
instructions for safe operation. Parata does not guarantee safety if the device is used with any
objects other than intended, or maintained following procedures other than those detailed in
this guide.

DEVICE MAINTENANCE AND CLEANING
TRAINING
3
©Parata
2014
Precautions for Safe Operation
It is imperative that the user complies with this guide as it contains important safety advice.
Items and procedures are described so that you can use this device correctly and safely.
Following these procedures will prevent possible injury. Precautions are illustrated as follows:
Always use the specified packaging paper and printer ribbon. Other paper or ribbon
may cause machine failure and will void the warranty.
Do not use the device outdoors. Current leakage or electric shock may result if the
device is exposed to water.
Precautions for Safe Operation
Only qualified engineers or service personnel should install the device. Installation by
unqualified personnel may cause electric shock or fire.
Use a dedicated power source (a dedicated 20 amp circuit with a breaker) as indicated
on the rating label attached to the device. A branched circuit may cause abnormal
heating resulting in fire.

DEVICE MAINTENANCE AND CLEANING
TRAINING
4
©Parata
2014
Connect the power supply plug to the power source firmly after removing the dust on
the plug. A dusty plug or improper insertion may cause abnormal heating or ignition.
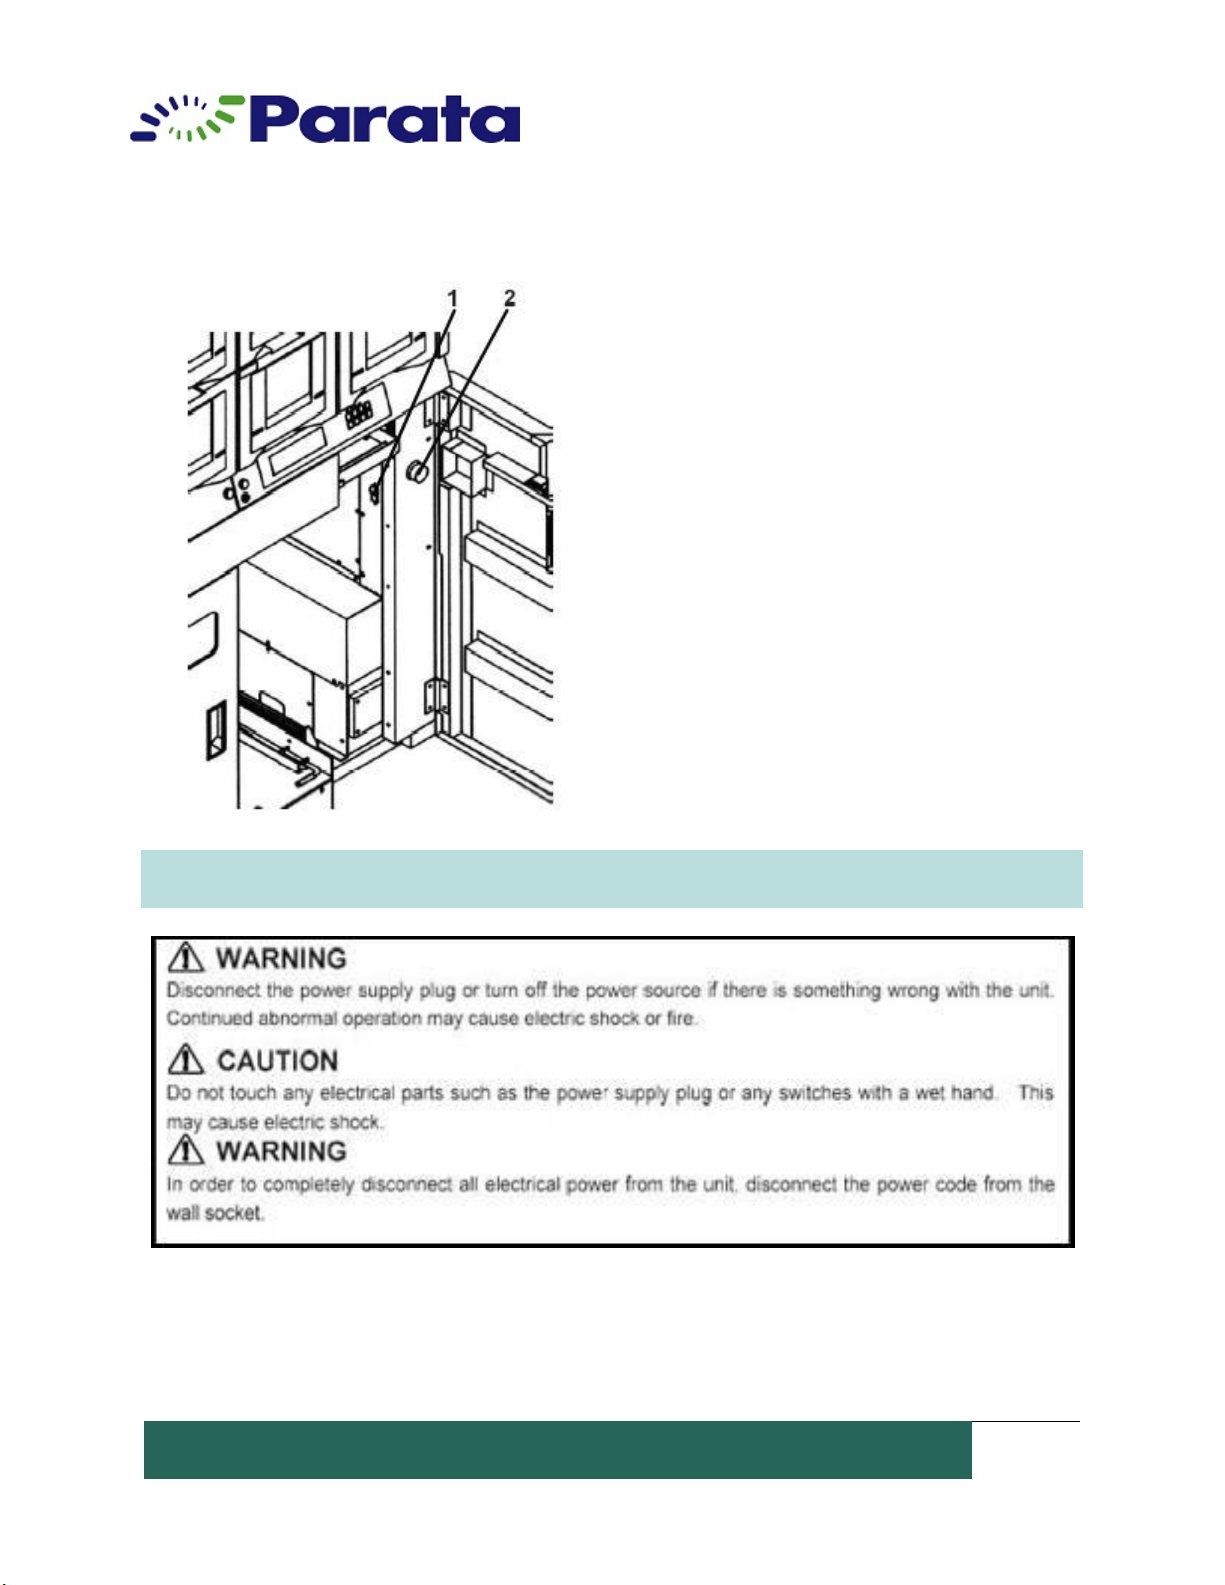
Disconnect the power supply plug if there is something wrong with the device.
Continued abnormal operation may cause electric shock or fire.
Turn off the power switch and disconnect the power supply to the device prior to any
repair or maintenance to prevent electric shock or injury.
Always ground the device to prevent electric shock. If the power supply outlet is not
grounded, a qualified engineer must install a ground.
Never disassemble, repair, or modify the unit yourself. Any work carried out by an
unauthorized person may result in fire, electric shock or injury due to a malfunction.
Never splash water directly onto the device as this may cause electric shock or a short
circuit.
Never ground the device through a gas pipe, water main, telephone line or lightening
rod. This may cause electric shock.
Do not insert metal objects such as pins or wires into any vent, gap or outlet on the
unit. This may cause electric shock or injury by accidental contact with moving parts.
Never insert a finger or any object into the exhaust vent. This may cause injury since
the fan is turning with high speed inside the device.
Never insert a hand or any object into the package exit. This may cause injury by
accidental contact with moving parts.
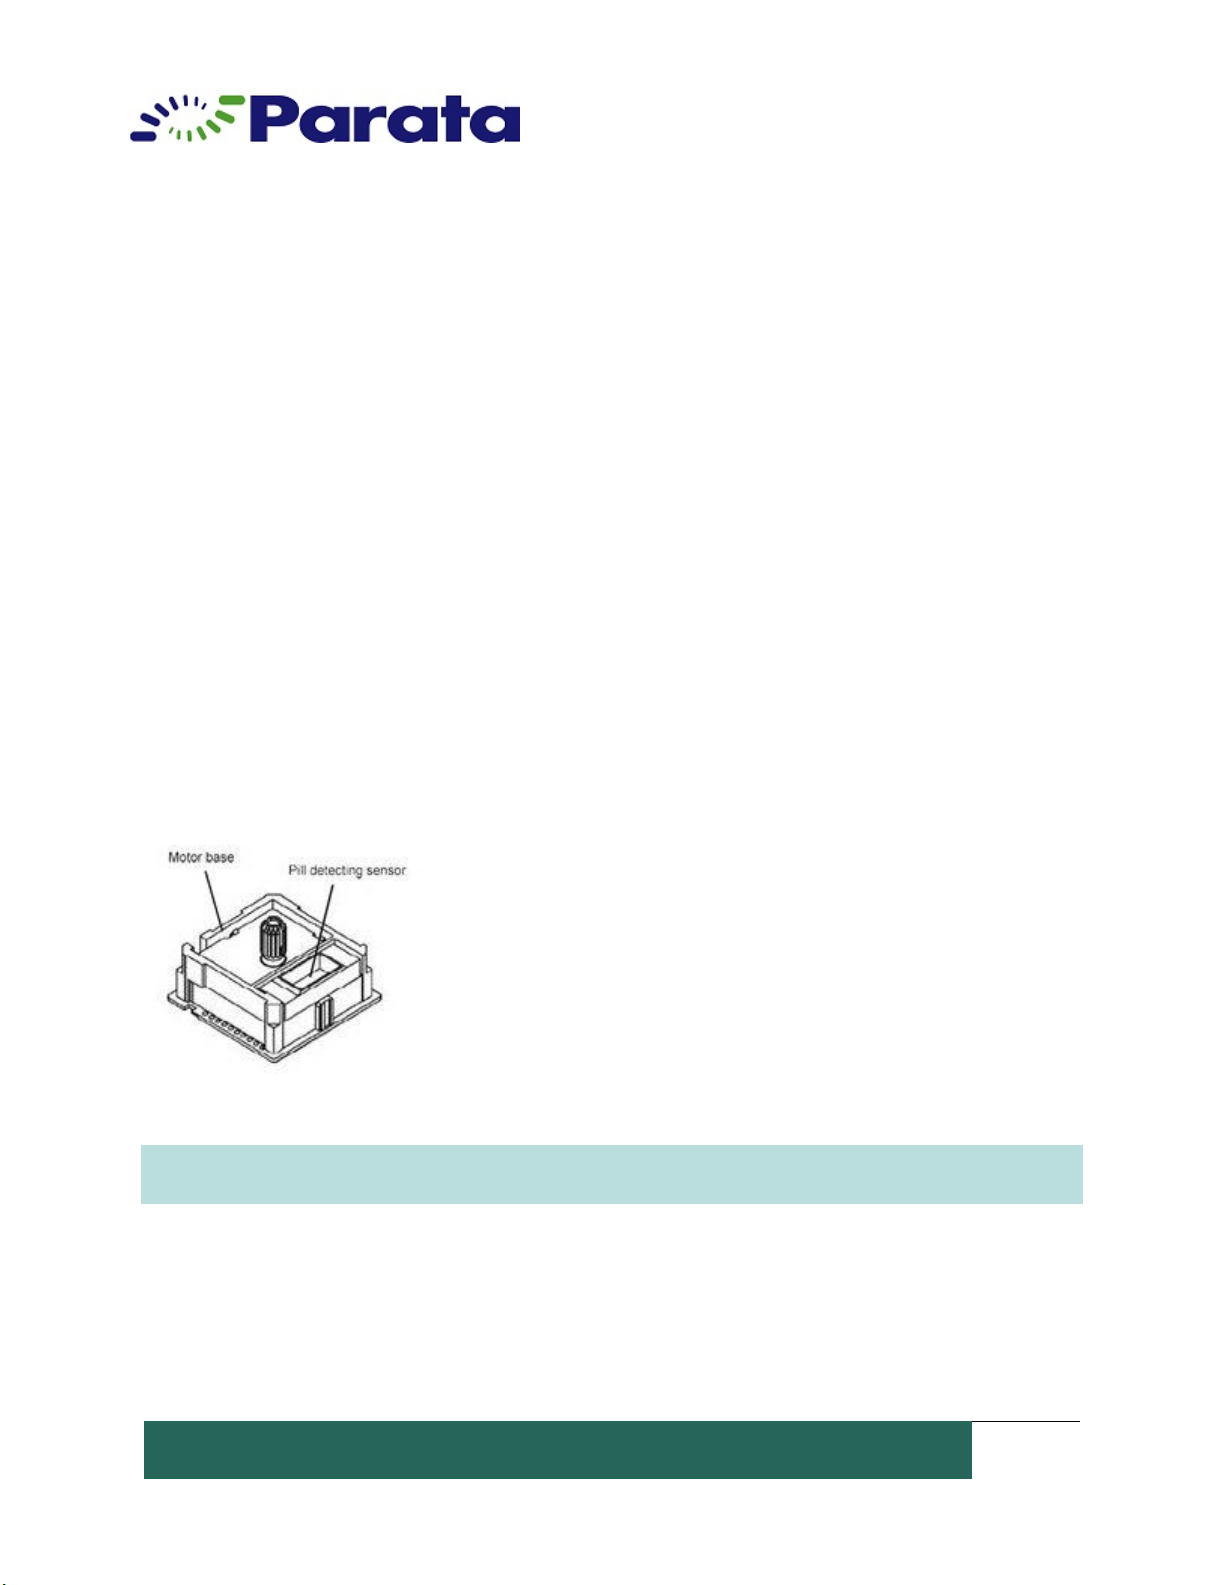
Never touch the heater block. High temperature may cause injury.
Never touch the heater block until the heater block is cooled down. It will remain hot
even if the power switch is tuned off, and may cause injury.
Turn off the power switch prior to cleaning. Do not touch the cutter blade or
perforation knife as they may cause injury.
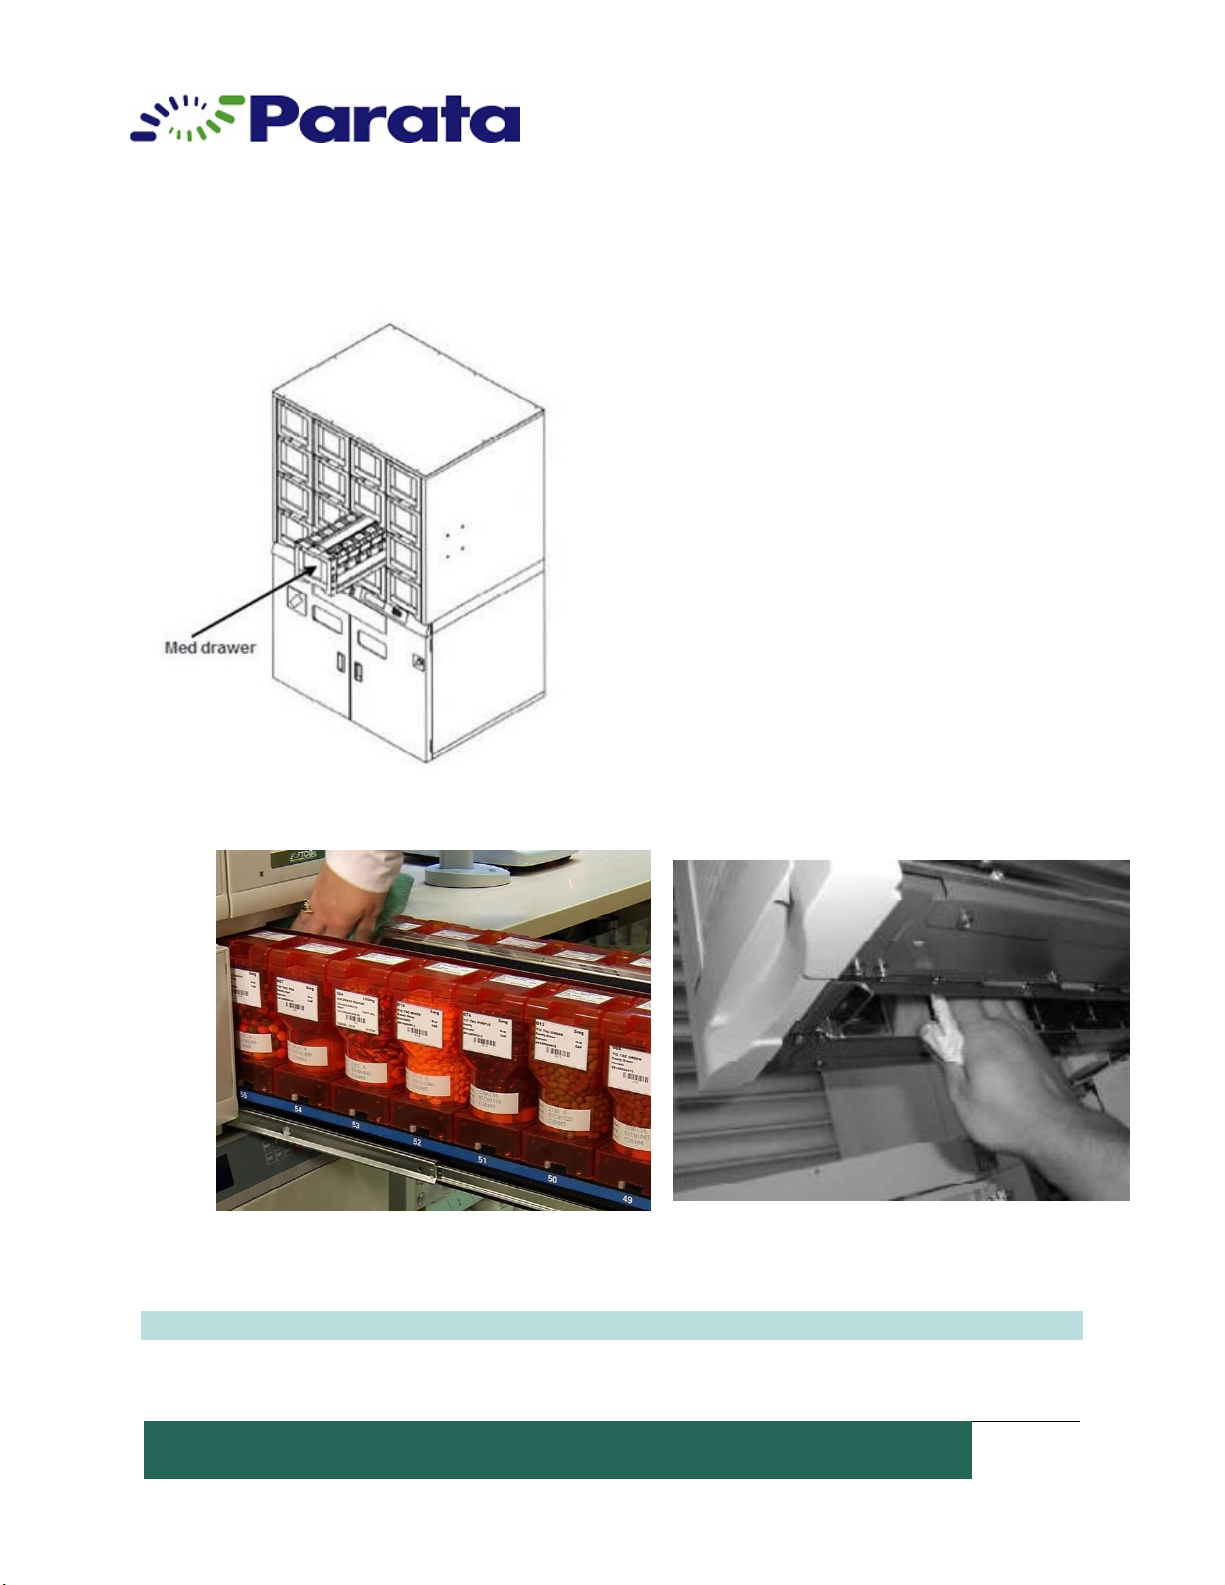
Always use the canister for the dedicated medication. The canister is assigned to one
medication.
Medication in the device may be affected by temperature and humidity. The device is
not a cabinet for medication storage.
Precautions for Safe Operation
When removing the plug from the power supply outlet, grasp the plug, not the cord.
Pulling the cord may result in electric shock or fire by short circuit.
Do not touch any electrical parts such as the power supply plug or any switches with a
wet hand. This may cause electric shock.

DEVICE MAINTENANCE AND CLEANING
TRAINING
5
©Parata
2014
Disconnect the power supply plug before moving the device. Take care not to damage
the power cord. A damaged cord may cause electric shock.
Connect the device to a power source as indicated on the rating label attached to the
device. Use of any voltage or frequency other than that on the rating label may cause
fire or electric shock.
Disconnect the power plug when the device is not used for long periods. Keeping the
connection may cause electric shock, current leakage, or fire due to deterioration of
insulation.
Do not put a container with water or heavy articles on the device. It may cause injury if
the articles fall. Current leakage or electric shock may result from the deterioration of
insulation exposed to spilled water.
Do not climb onto the device or put articles on it. Injury may result from the device
tipping, or damage may be caused to the device.
Ensure you do not inhale or consume medication or aerosols around the device during
maintenance. Doing so may be harmful to your health.
Clean the device regularly. Contamination may be caused by pill dust accumulated
inside the device.
CAUTION: When setting up or relocating the device, contact your authorized Parata
representative

DEVICE MAINTENANCE AND CLEANING
TRAINING
7
©Parata
2014
ATP Device Components
1. Medication Drawer. Drawer that
houses the canisters that contain the
medication. The ATP Device has 4 rows
of drawers stacked 5 or 6 high, with a
maximum of 24 medication drawers.
The medication drawers are always
locked for safety. Always pull out 1
drawer for 1 row when opening. Pulling
out more than one drawer in a column simultaneously is not possible.
Note: For safety purposes, if multiple drawers are open at the same time, the machine
could potentially tip.
2. Control Panel. Packaging status and alarms are displayed on this panel. You will not
need to use these buttons, as all commands are initiated by your software application
on the screen. Only use these buttons if instructed to do so by Parata Support.
3. Package Exit. The packets are advanced to this exit though the internal conveyor.
4. Front Door. The door protects the operator from the lower packaging unit (motor,
heater, etc.). The device will not operate when the front door is open.
5. Lower Packaging Unit. The mechanism for making a packet including the conveyor,
shutter, sealer, cutter, and printer.

DEVICE MAINTENANCE AND CLEANING
TRAINING
9
©Parata
2014
ATP Cleaning and Maintenance Checklist
Clean Daily (or Every Eight Hours of Use) in this Order
Step One: Med Drawers
Step Two: Sub Hoppers
Step Three: 1st Shutter
Step Four: UTC Tray
Step Five: Main Hopper
Step Six: LPU: 2nd Shutter, Heat Anvil, Heat Anvil Pad, LPU Floor
Clean Quarterly
UTC Conveyor Assembly
Clean with Each Canister Refill
Canister and Motor Base
Clean with Each Ribbon Change
Print Head
Replace as Needed
Ribbon
Paper
Cutter Blade
Perforation Blade
Motor Assembly
Printer Head

DEVICE MAINTENANCE AND CLEANING
TRAINING
11
©Parata
2014
How to Turn the ATP on and off
ATP Device Power Switch
1. Power Switch. The power switch (main
switch) is located in the upper right, inside the
front door.
2. Emergency Switch. The device has an
emergency switch for extra safety. Pressing this
switch disconnects the power to the device
even if the power switch is on. The switch
should be kept in the projected position (turned
to the right). The emergency switch is a
safeguard against accidents during
maintenance.
NOTE: To shut down the machine in an emergency situation, the operator must remove the
plug from the electrical outlet (wall socket) to disable power.

DEVICE MAINTENANCE AND CLEANING
TRAINING
13
©Parata
2014
MODULE TWO: CLEANING
How to Clean the Canister and Motor Base
It is best practices to clean canisters when they are empty and in need of a refill. Clean the
med drawers every eight hours of operation, while performing the daily cleaning routine.
1. Normally, the drawers are auto-locked. Go to the Home Screen in the Dispense
Manager application.
2. Select the “Meds” button. Select a canister medication and click “Unlock”.
3. Pull out the drawer and remove a canister. Start at the top of one column and work
your way down, so debris from the top does not contaminate previously cleaned
bottom drawers.
4. Empty the canister of medication. Remove one canister at a time to clean. Use HEPA
vacuum to extract pill dust from the canister.
5. Power down the machine. Cleaning the sensors will
trigger a mixed drug alarm if the ATP unit is powered on. Clean
around the motor base and the pill detecting sensor using a 1”
foam brush or stain brush if available.
6. Repeat steps 1-4 to clean all of the canisters and motor
bases. Again, clean one at a time. Start at the top and work
your way down if you are cleaning more than one drawer.
NOTE: Parata recommends cleaning the canister and motor base with each canister refill. Do
not power off during operation.

DEVICE MAINTENANCE AND CLEANING
TRAINING
15
©Parata
2014
How to Clean the ATP Device Med Drawer
1. Normally, the drawers are auto-locked. Go
to the Home Screen in the Dispense Manager
application.
2. Select the “Meds” button. Select a canister
medication and click “Unlock”.
3. Pull out the drawer to be cleaned.
4. Clean the pill path at the center of the med
drawer by wiping with a soft, lint free cloth.
5. Clean all other areas by wiping with a soft,
lint free cloth as necessary.
6. Replace the clean med drawer and pull out the next drawer to clean.
NOTE: Parata recommends daily cleaning of the ATP Device Med Drawers.

DEVICE MAINTENANCE AND CLEANING
TRAINING
17
©Parata
2014
How to Clean the ATP Device Sub Hoppers
1. Four (4) sub hoppers are located inside the middle panel. Each sub hopper is installed
for collecting the medications dropped from each of the four (4) med drawer lines. The
sub hopper can be removed by sliding it out. Pay attention to the dropout of the sub
hopper.
2. Pull out the sub hopper and remove the curtain.
3. Clean the sub hopper with a HEPA vacuum (best practices) or a soft, lint-free cloth.
4. Set the curtain in the sub hopper and replace the sub hopper. Make sure the curtain is
installed in the correct direction.
5. Close the middle panel.
NOTE: Parata recommends daily cleaning of ATP Device sub hopper.

DEVICE MAINTENANCE AND CLEANING
TRAINING
19
©Parata
2014
How to Clean the ATP Device 1st Shutter
1.Turn off the power switch.
2.Open the front door and pull
out the 1st shutter base.
3.Remove the curtain in the 1st
shutter and clean the shutter
by wiping with a soft, lint free
cloth.
4.Install the curtain and
replace the 1st shutter base.
5.Close the front door.
NOTE: In an extreme case, where shutters are very dirty, you may wipe with a soft cloth,
moistened slightly with alcohol, and then wipe off immediately to prevent streaking of pill
dust residue. Alcohol should never be used on the curtains, as it will dry them out.
NOTE: Parata recommends daily cleaning of the ATP Device 1st shutter.
CAUTION: Handle with care when cleaning the 1st shutter. Do not clean the shutter with
excessive force even if it has a lot of medication powder on it. Excessive force may cause
failure in shutter operation. Do not manually force the shutters open.
Proper curtain placement in the shutter is critical to ensure proper pill travel down the pill
path. Mis-aligned curtains can cause a pill dam.
Inspect curtains for dry or curled edges, and call Parata service is this occurs.

DEVICE MAINTENANCE AND CLEANING
TRAINING
21
©Parata
2014
How to Clean the UTC Tray and Drawer
1. Normally, the UTC tray is auto-locked. Select Meds in the Dispense Manager application;
select a tray to unlock. Select unlock.
2. Turn off the ATP device power before cleaning.
3. Wipe the UTC tray and each cell with a dry, lint-free cloth. Wipe the underside of the
tray. Build-up within the cells may be cleaned by wiping with a soft cloth, moistened
with 90% Isopropyl Alcohol. Vacuum the individual cells with a HEPPA vacuum.
4. Replace the UTC tray and lock it in place in the drawer.
CAUTION: Always turn off the power switch before cleaning the UTC tray to prevent the
electric component from short circuiting.
NOTE: Parata recommends daily cleaning of the ATP Device UTC Drawer.

DEVICE MAINTENANCE AND CLEANING
TRAINING
23
©Parata
2014
How to Clean the ATP Device Main Hopper
1. Turn off the power switch before cleaning.
2. Open the front door. The main hopper is
located between the Lower Packaging Unit and
the 1st shutter.
3. Normally, the hopper is locked. Pull the 2
latches (white resin components) at the upper
side of the main hopper to unlock the main
hopper.

DEVICE MAINTENANCE AND CLEANING
TRAINING
24
©Parata
2014
How to Clean the ATP Device Main Hopper
4. Pull out the main hopper and clean the main hopper by wiping with a soft, lint free
cloth.
5. Replace the main hopper along the guide.
6. Slide the main hopper all the way in until it stops.
NOTE: In an extreme case, where shutters are very dirty, you may wipe with a soft cloth,
moistened slightly with alcohol, and then wipe off immediately to prevent streaking of pill
dust residue.
NOTE: Parata recommends daily cleaning of the ATP Device main hopper.

DEVICE MAINTENANCE AND CLEANING
TRAINING
25
©Parata
2014
How to Clean the ATP Lower Packaging Unit (LPU)
1. Turn off the power switch and check that the heater is cool before cleaning.
2. Open the front door and slide the Lower Packaging Unit out.
3. Move the 2nd Shutter to it’s upward position and clean the shutter by wiping with a
soft, lint free cloth. Then, pass the cloth through the shutter to clean.
2. Remove the heater holder if the heater or the heater holder rubber is caked with
medication powder. To remove the heater holder, move it back an forth, while
simultaneously pushing upwards.

DEVICE MAINTENANCE AND CLEANING
TRAINING
26
©Parata
2014
How to Clean the ATP Lower Packaging Unit (LPU)
3. Clean the heater area with a scotch-brite pad. Clean the cutter with an alcohol pad.
4. After cleaning, move the shutter back down into the fork in it’s secure postion.
Assure that the shutter is inserted
into the center of the paper fold.

DEVICE MAINTENANCE AND CLEANING
TRAINING
27
©Parata
2014
How to Clean the ATP Lower Packaging Unit (LPU)
5. Replace the heater holder securely.
6. Vacuum or wipe the floor of the LPU with a soft, lint-free cloth.

DEVICE MAINTENANCE AND CLEANING
TRAINING
29
©Parata
2014
MODULE THREE: MAINTENANCE
How to Change the Printer Ribbon and Clean the
Thermal Print Head
This procedure outlines how to change the ribbon and clean the ATP thermal print head
using the Parata approved Thermal Printer Cleaning Pen. The ATP thermal print head
cleaning procedure should be performed during each ribbon change.
Required Materials:
1 - Thermal Printer Cleaning Pen
CAUTION: The thermal print head can easily be damaged! Do not use excessive force
when cleaning the thermal print head. Do not use unapproved cleaning compounds or
methods to clean the thermal print head. Replace the pen periodically for best results.
1. Open the ATP device’s front access doors.
2. Slide the lower packaging unit out from the ATP device. Find the release lever for the
lower packaging unit and use the front handle to pull the unit out on its slide rails for
access to the printer assembly.

DEVICE MAINTENANCE AND CLEANING
TRAINING
30
©Parata
2014
How to Change the Printer Ribbon and Clean the Thermal Print Head
4. Locate the printer assembly and pull the plastic handle towards you to release the
assembly.
4. Open the printer assembly cover, by pulling up on the black knob. You will see that the
left-hand ribbon spool is empty.
Table of contents
Popular Medical Equipment manuals by other brands

Invacare
Invacare MicroAIR MA50 user manual

LORAD
LORAD AFFINITY Series Service manual

Erbe
Erbe ERBEJET 2 user manual

DeVilbiss Healthcare
DeVilbiss Healthcare drive Novaltis user guide

Aulisa
Aulisa Guardian Angel Rx GA1000 Instructions for use

Accelerated Care Plus
Accelerated Care Plus OMNISTIM FX2 PRO user manual

Siem Nova
Siem Nova 1001 NEB manual

CU Medical Systems
CU Medical Systems i-PAD CU-SP2 Instructions for use

AngioDynamics
AngioDynamics C3 WAVE owner's manual

truMedic
truMedic truRelief IMPACT THERAPY DEVICE user manual

EarlySense
EarlySense Contact-Free Sensors Instructions for use

baxter
baxter DUPLOSPRAY Quick reference guide