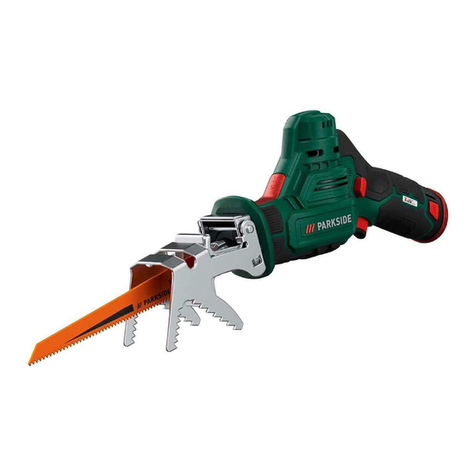
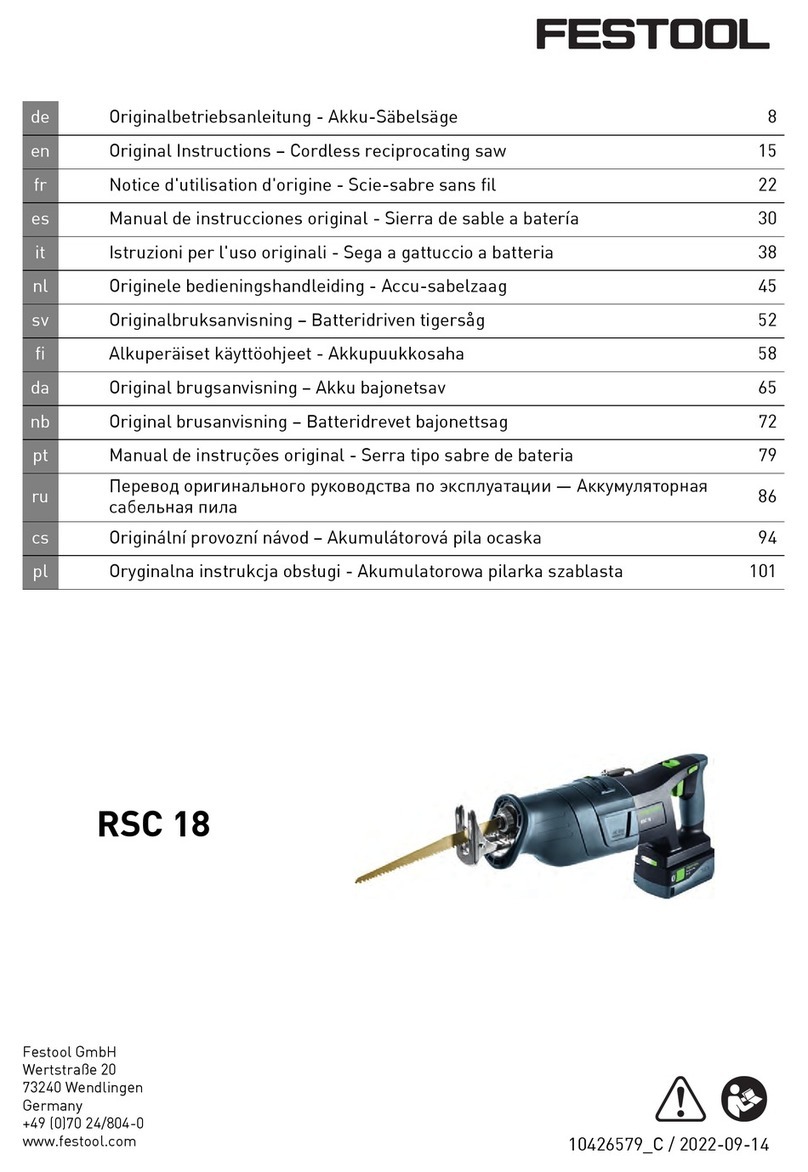
Parkside Performance PSSAP 20-Li B2 User manual

145 mm 140 mm
CORDLESS SABRE SAW 20 V PSSAP 20‑Li B2
CORDLESS SABRE SAW 20 V
Operation and safety notes
Translation of the original instructions
AKKUS KARDFŰRÉSZ 20 V
Kezelési és biztonsági utalások
Eredeti használati utasítás fordítása
AKUMULATORSKA
SABLJASTA ŽAGA 20 V
Navodila za upravljanje in varnostna opozorila
Prevod izvirnih navodil
AKU PILA OCASKA 20 V
Pokyny pro obsluhu a bezpečnostní pokyny
Překlad původního návodu k používání
AKUMULÁTOROVÁ
CHVOSTOVÁ PÍLA 20 V
Pokyny pre obsluhu a bezpečnostné pokyny
Preklad pôvodného návodu na použitie
AKKU‑SÄBELSÄGE 20 V
Bedienungs- und Sicherheitshinweise
Originalbetriebsanleitung
145 mm 140 mm
IAN 322690_1901

140 mm
GB Operation and safety notes Page 5
HU Kezelési és biztonsági utalások Oldal 24
SI Navodila za upravljanje in varnostna opozorila Stran 43
CZ Pokyny pro obsluhu a bezpečnostní pokyny Strana 62
SK Pokyny pre obsluhu a bezpečnostné pokyny Strana 81
DE/AT/CH Bedienungs- und Sicherheitshinweise Seite
100
140 mm

A
140 mm
B
6
1
10
11
8
1213
2 3 4 5
7
98
C
14
8
15
17
16

145 mm 145 mm
BATTERY COMPATIBLE WITH ALL DEVICES OF THE SERIES
“PARKSIDE X 20 V TEAM“
AZ AKKUMULÁTOR A „PARKSIDE X 20 V TEAM“ SOROZAT MINDEGYIK
KÉSZÜLÉKÉVEL KOMPATIBILIS
POLNILNA BATERIJA JE ZDRUŽLJIVA Z VSEMI NAPRAVAMI SERIJE
„PARKSIDE X 20 V TEAM“
AKUMULÁTOR JE KOMPATIBILNÍ SE VŠEMI ZAŘÍZENÍMI ŘADY
„PARKSIDE X 20 V TEAM“
AKUMULÁTOR KOMPATIBILNÝ SO VŠETKÝMI PRÍSTROJMI SÉRIE
„PARKSIDE X 20 V TEAM“
AKKU KOMPATIBEL MIT ALLEN GERÄTEN DER SERIE
„PARKSIDE X 20 V TEAM“
20V max.
18V

E
F G
H
J K
D
1.3.
2.
I
2.
1.
140 mm

5GB
Warnings and symbols used .......................................... Page 6
Introduction............................................................ Page 6
Intended use............................................................ Page 6
Scope of delivery........................................................ Page 7
Parts description......................................................... Page 7
Technical data .......................................................... Page 7
Safety instructions..................................................... Page 9
General power tool safety warnings ......................................... Page 9
Reciprocating saws safety warnings ......................................... Page 12
Vibration and noise reduction .............................................. Page 14
Behaviour in emergency situations........................................... Page 14
Residual risks ........................................................... Page 14
Battery charger safety warnings ............................................ Page 15
Before first use......................................................... Page 15
Accessories ............................................................ Page 15
Operation.............................................................. Page 16
Attaching/removing the battery pack ........................................ Page 16
Checking the battery pack charging level ..................................... Page 16
Charging the battery pack................................................. Page 16
Adjusting the base plate................................................... Page 17
Inserting/removing the saw blade ........................................... Page 17
Switching on and off ..................................................... Page 18
Speed control........................................................... Page 18
LED work light .......................................................... Page 18
Trial run ............................................................... Page 19
Working instructions .................................................. Page 19
Cleaning and care ..................................................... Page 20
Cleaning............................................................... Page 20
Maintenance ........................................................... Page 20
Repair................................................................. Page 20
Storage ............................................................... Page 21
Transportation .......................................................... Page 21
Disposal................................................................ Page 21
Warranty .............................................................. Page 22
EC declaration of conformity .......................................... Page 23

6 GB
Warnings and symbols used
The following warnings are used in this instruction manual, on the packaging and on the rating label:
Read the instruction manual.
Switch the product off and remove
the battery pack before replacing
attachments, cleaning and when not
in use.
Follow the warnings and safety notes!
max. 45°C
Protect the battery pack against heat
and continuous intense sunlight.
Use in dry indoor rooms only. Protect the battery pack against water
and moisture.
Wear protective gloves! Protect the battery pack from fire.
Wear hearing protection! Protection class II (double insulation)
Wear eye protection!
Alternating current
Direct current
T3.15A Fuse
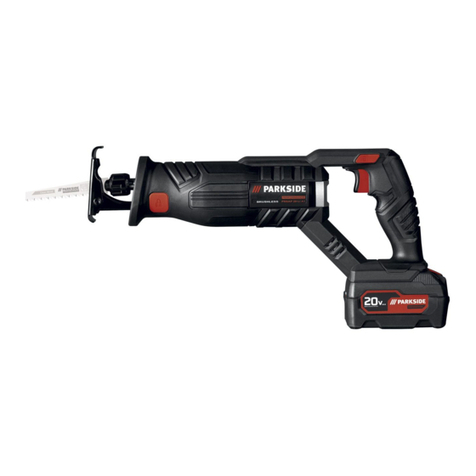
CORDLESS SABRE SAW 20 V
PSSAP 20‑Li B2
Introduction
We congratulate you on the purchase of your
new product. You have chosen a high quality
product. The instructions for use are part of the
product. They contain important information
concerning safety, use and disposal. Before using
the product, please familiarise yourself with all
of the safety information and instructions for use.
Only use the product as described and for the
specified applications. If you pass the product on
to anyone else, please ensure that you also pass
on all the documentation with it.
Intended use
This cordless sabre saw (hereinafter “product” or
“power tool”) is designed for light and medium
sawing through wood, chip board, plastic, metal,
and plaster board.
The product is not intended to handle heavy
sawing work, such as in stones or in workpieces
exceeding the maximum cutting capacity
(see “Technical data”).

7GB
Always use the correct saw blades according
to the intended use! Observe the technical
requirements of this product (see “Technical
data“) when purchasing and using saw blades!
The LED work light
10
on this product is intended
to illuminate the immediate work area.
Any other use or modification of the product
are considered improper use and can result in
hazards such as death, life-threatening injuries
and damage. The manufacturer is not liable
for any damages caused by improper use. The
product is not intended for commercial use or for
any other use.
Scope of delivery
m WARNING!
uThe product and the packaging are not
children’s toys! Children must not play with
plastic bags, sheets and small parts! There
is a danger of choking and suffocation!
1x Cordless sabre saw 20 V PSSAP 20-Li B2
1x Battery pack PAP 20 A3
1x Rapid battery charger PLG 20 B1
1x Carrying case
1x Instruction manual
Parts description
Figure A:
1Locking lever
2Chuck ring
3Saw blade holder
4Base plate
5Switch lock
6On/off switch/speed control
7Rear handle
8Battery pack
9Front handle
10
LED work light
Figure B:
8Battery pack
11
Release button for battery pack
12
button (charging level)
13
Charging level LEDs (red/orange/green)
Figure C:
14
Battery charger (rapid battery charger)
15
Power cord with power plug
16
Charging control LED – Green
17
Charging control LED – Red
Not illustrated:
18
Carrying case
Technical data
Cordless sabre saw
PSSAP 20‑Li B2
Rated voltage: 20 V
Stroke rate: 0 – 3000 min–1
Stroke length: 22 mm
Saw blade intake: Standard
Maximum cutting capacity:
Wood: 150 mm
Steel: 12 mm
Non-ferrous metal: 18 mm
Metal pipe: 100 mm

8 GB
Battery pack PAP 20 A3
Type: Lithium-Ion
Rated voltage: 20 V max.
Capacity: 4 Ah
Energy value: 72 Wh
Number of cells: 10
Rapid battery charger PLG 20 B1
Input:
Rated voltage: 230–240 V∼
Rated frequency: 50 Hz
Rated power: 120 W
Output:
Rated voltage: 21.5 V
Charging current: 4.5 A
Protection class: II /
Fuse (internal): 3.15 A / T3.15A
Charging time:
¾Battery type PAP 20 A3, 4.0 Ah (supplied):
60 minutes
¾Battery type PAP 20 A1, 2.0 Ah
(available separately): 45 minutes
Recommended ambient temperature:
While charging: +4 to +40 °C
During operation: +4 to +40 °C
During storage: +20 to +26 °C
Noise emission value
The measured values have been determined in
accordance with EN 62841. The A-rated noise
level of the power tool is typically as follows:
Sound pressure level LpA: 87.6 dB(A)
Uncertainty KpA: 3 dB
Sound power level LWA: 98.6 dB(A)
Uncertainty KWA: 3 dB
Vibration emission value
Vibration total values (triaxial vector sum)
determined according to EN 62841:
Cutting boards
(with saw blade Bosch S644D)
Main handle:
Hand/arm vibration ah,B: 21.26 m/s²
Uncertainty K: 1.5 m/s²
Auxiliary handle:
Hand/arm vibration ah,B: 22.17 m/s²
Uncertainty K: 1.5 m/s²
Cutting wooden beams
(with saw blade Bosch S644D)
Main handle:
Hand/arm vibration ah,WB: 23.54 m/s²
Uncertainty K: 1.5 m/s²
Auxiliary handle:
Hand/arm vibration ah,WB: 25.46 m/s²
Uncertainty K: 1.5 m/s²
m WARNING!
Wear ear protection!
NOTE
uThe declared vibration total values and
the declared noise emission values have
been measured in accordance with a
standard test method and may be used for
comparing one tool with another.
uThe declared total vibration values and the
declared noise emission values may also
be used for a preliminary assessment of
exposure.

9GB
m WARNING!
uThe vibration and noise emissions during
actual use of the power tool can differ
from the declared values depending on
the manner in which the tool is used,
especially what kind of workpiece is
processed.
Try to minimise exposure to vibration and
noise. Examples of measures to reduce
vibration include wearing gloves when
using the tool and limiting working time. All
parts of the operating cycle must be taken
into account (e.g. times when the power
tool is switched off and when it is running
idle in addition to the trigger time).
Safety instructions
General power tool safety
warnings
m WARNING!
uRead all safety warnings,
instructions, illustrations and
specifications provided with
this power tool. Failure to follow
all instructions listed below may result in
electric shock, fire and/or serious injury.
Save all warnings and instructions for
future reference.
The term “power tool” in the warnings refers to
your mains-operated (corded) power tool or
battery-operated (cordless) power tool.
Work area safety
1) Keep work area clean and well
lit. Cluttered or dark areas invite accidents.
2) Do not operate power tools in
explosive atmospheres, such as in
the presence of flammable liquids,
gases or dust. Power tools create sparks
which may ignite the dust or fumes.
3) Keep children and bystanders
away while operating a power
tool. Distractions can cause you to lose
control.
Electrical safety
1) Power tool plugs must match the
outlet. Never modify the plug in any
way. Do not use any adapter plugs
with earthed (grounded) power
tools. Unmodified plugs and matching
outlets will reduce risk of electric shock.
2) Avoid body contact with earthed
or grounded surfaces, such as
pipes, radiators, ranges and
refrigerators. There is an increased risk
of electric shock if your body is earthed or
grounded.
10 GB
3) Do not expose power tools to rain
or wet conditions. Water entering a
power tool will increase the risk of electric
shock.
4) Do not abuse the cord. Never use
the cord for carrying, pulling or
unplugging the power tool. Keep
cord away from heat, oil, sharp
edges or moving parts. Damaged or
entangled cords increase the risk of electric
shock.
5) When operating a power tool
outdoors, use an extension cord
suitable for outdoor use. Use of a
cord suitable for outdoor use reduces the risk
of electric shock.
6) If operating a power tool in a
damp location is unavoidable, use
a residual current device (RCD)
protected supply. Use of an RCD
reduces the risk of electric shock.
Personal safety
1) Stay alert, watch what you are
doing and use common sense when
operating a power tool. Do not use
a power tool while you are tired or
under the influence of drugs, alcohol
or medication. A moment of inattention
while operating power tools may result in
serious personal injury.
2) Use personal protective
equipment. Always wear eye
protection. Protective equipment such as
dust mask, non-skid safety shoes, hard hat,
or hearing protection used for appropriate
conditions will reduce personal injuries.
3) Prevent unintentional starting.
Ensure the switch is in the off‑
position before connecting to power
source and/or battery pack, picking
up or carrying the tool. Carrying
power tools with your finger on the switch or
energising power tools that have the switch
on invites accidents.
4) Remove any adjusting key or
wrench before turning the power
tool on. A wrench or a key left attached to
a rotating part of the power tool may result
in personal injury.
5) Do not overreach. Keep proper
footing and balance at all times. This
enables better control of the power tool in
unexpected situations.
6) Dress properly. Do not wear loose
clothing or jewellery. Keep your
hair, clothing and gloves away from
moving parts. Loose clothes, jewellery or
long hair can be caught in moving parts.

11GB
7) If devices are provided for the
connection of dust extraction and
collection facilities, ensure these are
connected and properly used. Use
of dust collection can reduce dust-related
hazards.
8) Do not let familiarity gained from
frequent use of tools allow you to
become complacent and ignore tool
safety principles. A careless action can
cause severe injury within a fraction of a
second.
Power tool use and care
1) Do not force the power tool. Use
the correct power tool for your
application. The correct power tool will
do the job better and safer at the rate for
which it was designed.
2) Do not use the power tool if the
switch does not turn it on and
off. Any power tool that cannot be
controlled with the switch is dangerous and
must be repaired.
3) Disconnect the plug from the
power source and / or the battery
pack from the power tool before
making any adjustments, changing
accessories, or storing power
tools. Such preventive safety measures
reduce the risk of starting the power tool
accidentally.
4) Store idle power tools out of the
reach of children and do not allow
persons unfamiliar with the power
tool or these instructions to operate
the power tool. Power tools are
dangerous in the hands of untrained users.
5) Maintain power tools and
accessories. Check for misalignment
or binding of moving parts,
breakage of parts and any other
condition that may affect the power
tool’s operation. If damaged, have
the power tool repaired before
use. Many accidents are caused by poorly
maintained power tools.
6) Keep cutting tools sharp and
clean. Properly maintained cutting tools
with sharp cutting edges are less likely to
bind and are easier to control.
7) Use the power tool, accessories
and tool bits etc. in accordance
with these instructions, taking into
account the working conditions and
the work to be performed. Use of
the power tool for operations different from
those intended could result in a hazardous
situation.

12 GB
8) Keep handles and grasping surfaces
dry, clean and free from oil and
grease. Slippery handles and grasping
surfaces do not allow for safe handling and
control of the tool in unexpected situations.
Battery tool use and care
1) Recharge only with the charger
specified by the manufacturer. A
charger that is suitable for one type of
battery pack may create a risk of fire when
used with another battery pack.
2) Use power tools only with
specifically designated battery
packs. Use of any other battery packs may
create a risk of injury and fire.
3) When battery pack is not in use,
keep it away from other metal
objects, like paper clips, coins,
keys, nails, screws or other small
metal objects, that can make a
connection from one terminal to
another. Shorting the battery terminals
together may cause burns or a fire.
4) Under abusive conditions, liquid
may be ejected from the battery;
avoid contact. If contact accidentally
occurs, flush with water. If liquid
contacts eyes, additionally seek
medical help. Liquid ejected from the
battery may cause irritation or burns.
5) Do not use a battery pack
for tool that is damaged or
modified. Damaged or modified batteries
exhibit unpredictable behaviour resulting in
fire, explosion or risk of injury.
6) Do not expose a battery pack
or tool to fire or excessive
temperature. Exposure to fire or
temperature above 130 °C may cause
explosion.
7) Follow all charging instruction and
do not charge the battery pack or
tool outside the temperature range
specified in the instruction. Charging
improperly or at temperatures outside the
specified range may damage the battery
and increase the risk of the fire.
Service
1) Have your power tool serviced by
a qualified repair person using only
identical replacement parts. This will
ensure that the safety of the power tool is
maintained.
2) Never service damaged battery
packs. Service of battery packs should be
only be performed by the manufactured or
authorized service providers.
Reciprocating saws safety
warnings
1) Hold the power tool by insulated
gripping surfaces when performing
an operation where the accessory
tool may contact hidden wiring.
Accessory tools contacting a “live” wire may
make exposed metal parts of the power tool
“live” and could give the operator an electric
shock.

13GB
2) Use clamps or another practical
way to secure and support the
workpiece to a stable platform.
Holding the workpiece by hand or against
your body leaves it unstable and may lead
to loss of control.
3) Keep hands away from the sawing
area. Do not reach underneath the
workpiece. Upon contact with the blade
there is a risk of injury.
4) Only when the power tool is turned
on should the sawing blade be
moved against the workpiece. There
is a risk of kickback if the accessory tool jams
in the workpiece.
5) Make sure that the base plate
is securely placed against the
workpiece during sawing. The saw
blade can tilt and lead to loss of control over
the power tool.
6) After you have finished work, turn
the power tool off and do not pull
the saw blade out of the cut until it
has come to a standstill. In this way
you will avoid any kickback and can safely
put down the power tool.
7) Use only undamaged saw blades in
perfect condition. Bent or blunt blades
can break, adversely affect the cut or cause
kickback.
8) Do not brake the saw blade after
switching the product off by
applying side pressure. The saw
blade may be damaged, break or cause a
kickback.
9) Tighten the material firmly. Do not
support the workpiece by hand or
foot. Do not touch any objects or the
ground with the saw running. There
is a risk of kickback.
10) Use suitable detectors in order to
find hidden supply lines or ask the
local utility company. Contact with
electrical cables can lead to electric shock
and fire, contact with a gas pipe can result
in an explosion. Damage to a water pipe
can lead to property damaged and electric
shock.
11) Hold the power tool tightly with
both hands while working and
ensure a secure footing. The power
tool is guided more securely with both hands.
12) Secure the workpiece. A workpiece
that is retained with clamping products or
a vice is held more securely than with your
hand.
13) Wait until the power tool has
stopped before placing it down. The
accessory tool can tilt and lead to loss of
control over the power tool.
14) Do not saw any materials (e.g. lead-based
paints and coatings or materials containing
asbestos) whose dust can be harmful.

14 GB
Vibration and noise reduction
To reduce the impact of noise and vibration
emission, limit the time of operation, use low-
vibration and low-noise operating modes as well
as wear personal protective equipment.
Take the following points into account to minimise
the vibration and noise exposure risks:
¾Only use the product as intended by its
design and these instructions.
¾Ensure that the product is in good condition
and well maintained.
¾Use correct accessory tools for the product
and ensure they are in good condition.
¾Keep tight grip on the handles / grip surface.
¾Maintain this product in accordance with
these instructions and keep it well lubricated
(where appropriate).
¾Plan your work schedule to spread any high
vibration tool use across a longer period of
time.
Behaviour in emergency
situations
Familiarise yourself with the use of this product by
means of this instruction manual. Memorise the
safety warnings and follow them to the letter. This
will help to prevent risks and hazards.
¾Always be alert when using this product,
so that you can recognise and handle risks
early. Fast intervention can prevent serious
injury and damage to property.
¾Switch the product off and disconnect it from
the mains if there are malfunctions. Have the
product checked by a qualified professional
and repaired, if necessary, before you
operate it again.
Residual risks
Even if you are operating this product in
accordance with all the safety requirements,
potential risks of injury and damage remain. The
following dangers can arise in connection with the
structure and design of this product:
¾Health defects resulting from vibration
emission if the product is being used over
long periods of time or not adequately
managed and properly maintained.
¾Injuries and damage to property due to
broken accessory tools or the sudden impact
of hidden objects during use.
¾Danger of injury and property damage
caused by flying objects.
NOTE
uThis product produces an electromagnetic
field during operation! This field may
under some circumstances interfere with
active or passive medical implants! To
reduce the risk of serious or fatal injury, we
recommend persons with medical implants
to consult their doctor and the medical
implant manufacturer before operating this
product!

15GB
Battery charger safety
warnings
¾This appliance can be used
by children aged from 8 years
and above and persons with
reduced physical, sensory
or mental capabilities or
lack of experience and
knowledge if they have
been given supervision or
instruction concerning use of
the appliance in a safe way
and understand the hazards
involved.
Children shall not play with the
appliance.
Cleaning and user
maintenance shall not be made
by children without supervision.
¾Do not charge non-
rechargeable batteries.
Disregarding this instruction is
hazardous.
¾If the supply cord is damaged,
it must be replaced by the
manufacturer, its service agent
or similarly qualified persons in
order to avoid a hazard.
¾Protect the electrical parts
against moisture. Do not
immerse such parts in water
or other liquids to avoid
electrical shock. Never hold
the appliance under running
water. Pay attention to the
instructions provided for
cleaning, maintenance and
repair.
¾The appliance is suitable for
indoor use only.
¾ATTENTION! This charger is
only designed for charging the
battery pack types:
Parkside 20 V
battery pack
PAP 20 A1 2 Ah 5 cells
PAP 20 A2 3 Ah 10 cells
PAP 20 A3 4 Ah 10 cells
¾An up-to-date list of battery
compatibility can be found at
www.lidl.de/akku.
Before first use
Accessories
To operate this product safely and correctly, the
following accessories, i.e. tools and saw blades,
are necessary:
¾Suitable saw blade

16 GB
Accessories and saw blades are available
through your authorised dealer. When buying
always consider the technical requirements of this
product (see “Technical data”).
If you are not certain, ask a qualified specialist
and get advice from your trusted dealer.
NOTE
uThis instruction manual contains
information and suggestions for several
saw blades and their uses. The saw blades
depicted are not necessarily included in
the shipment, but are meant to indicate
additional possibilities for using this
product.
Suitable battery packs and chargers
Battery
pack:
Parkside 20 V battery pack
PAP 20 A1, PAP 20 A2, PAP 20 A3
Charger: Parkside 20 V charger PLG 20 A1,
PLG 20 A2, PLG 20 B1, PLG 20 A3
Operation
Attaching/removing the
battery pack
¾Removing the battery pack: Press the
battery pack release button
11
. Remove the
battery pack 8(Fig. D).
¾Attaching the battery pack: Align the
battery pack 8to the handle and slide it
into it. Ensure it clicks noticeably in place.
Checking the battery pack
charging level
(Fig. B)
¾Check battery pack charge level: Press the
button
12
. The charging level LEDs
13
light up:
LED
13
Charging level
Red / orange / green Maximum
Red / orange Medium
Red Low
Charging the battery pack
(Fig. C)
NOTE
uThe battery pack 8may be charged at
any time without reducing the life.
uInterrupting the charging process does not
damage the battery pack 8.
¾Charge the battery pack 8before
operation when it is at medium or low
charging level.
¾The charging control LEDs (green
16
and
red
17
) indicate the status of the charger
14
and the battery pack 8:
LED Status
Red LED lights up Battery pack
charges
Green LED lights up Battery pack fully
charged
Green and red LED
flashing
Battery pack
defective
Red LED flashing Battery pack too
cold or too warm
Green LED lights up
(without battery pack) Charger ready
¾Insert the battery pack 8into the charger
14
.

17GB
¾Connect the power cord with power plug
15
of the charger
14
to the socket.
¾When the battery pack 8is fully charged:
Remove the battery pack from the charger
14
. Then disconnect the power cord with
power plug
15
of the charger from the
socket.
Adjusting the base plate
(Fig. E)
m WARNING!
Always switch the product off, remove
the battery pack 8and let the
product cool down before making any
adjustments!
m CAUTION! RISK OF INJURY!
Saw blades can be sharp and become
hot during use. Always wear protective
gloves when handling saw blades.
m CAUTION! RISK OF INJURY!
uRemove the saw blade from the product
before adjusting the base plate 4(see
“Inserting/removing the saw blade”).
uDo not use the product without having
inserted the base plate 4.
To adapt to the workpiece, the base plate 4can
be adjusted and swivelled to different positions.
¾Unlock the base plate 4: Turn the locking
lever 1in a counter-clockwise direction.
¾Adjust the desired position of the base plate
4by pushing it in or pulling it out.
¾Lock the base plate 4: Turn the locking
lever 1in a clockwise direction.
Inserting/removing the saw
blade
m WARNING!
Always switch the product off, remove
the battery pack 8and let the
product cool down before making any
adjustments!
m CAUTION! RISK OF INJURY!
Saw blades can be sharp and become
hot during use. Always wear protective
gloves when handling saw blades.
m CAUTION! RISK OF INJURY!
uDo not use any blunt, bent or damaged
saw blade.
uAlways install a suitable saw blade for
the job.
Inserting the saw blade
(Fig. F)
¾Turn the chuck ring 2in a counter-clockwise
direction.
¾Insert the saw blade into the saw blade
holder 3.
¾Release the chuck ring 2and let it return to
its original position.
¾Before use: Pull on the saw blade and check
if it is inserted safely and tightly.

18 GB
Removing the saw blade
(Fig. G)
¾Turn the chuck ring 2in a counter-clockwise
direction.
¾Pull the saw blade out of the saw blade
holder 3.
¾Release the chuck ring 2and let it return to
its original position.
NOTE
uFor certain work, the saw blade can also
be inserted after turning through 180°.
Switching on and off
m CAUTION! RISK OF INJURY!
Always wear protective gloves when
handling or working with the product.
m CAUTION! RISK OF INJURY!
uBefore switching on the product: Ensure
the saw blade is not in contact with the
workpiece.
uEnsure your stance is stable. Always hold
the product’s front 9and rear handle
7firmly with both hands while working
(Fig. H).
uKeep your hands away from the saw
blade when the product is in operation.
NOTE
uThe on/off switch 6cannot be locked.
(Fig. I)
¾Switching on: Release the switch lock 5
by pushing it in on the left or right side.
Press and hold the on/off switch 6.
Regulate the speed as required (see “Speed
control”).
¾Switching off: Release the on/off switch
6.
When releasing the on/off switch, the switch
lock 5moves back into its original position.
Speed control
¾By using the on/off switch 6, you can
progressively control the speed:
Pressure Speed
Gentle pressure: Lower speed
Greater pressure: Higher speed
LED work light
This product is equipped with a LED work light
10
to illuminate the immediate working area to
improve visibility in poorly lit areas.
¾The LED work light
10
lights up automatically
as soon as the product is switched on.
NOTE
uThe LED work light
10
stays on for an
additional approx. 10 seconds after
switching off the product.

19GB
Trial run
NOTE
uAlways carry out a no-load trial run
before starting work and after every saw
blade replacement. Switch the product off
immediately if the saw blade is not running
smoothly, if considerable vibration occurs
or if you hear abnormal noises.
Working instructions
m CAUTION! RISK OF INJURY AND
DAMAGE TO PROPERTY!
uWear gloves when handling the saw
blade. In this way, you avoid injury from
cuts.
uDo not use any blunt or bent blades or
blades which are damaged in any other
way.
uBefore sawing the workpiece, check for
hidden foreign objects such as nails,
screws. These must be removed.
uAlways insert a suitable saw blade.
uSecure the workpiece with the aid of
clamping devices on the workbench.
uApply only as much pressure as is required
for sawing. If there is excessive pressure,
the sawing blade may bend and break.
uSwitch the product off immediately if the
sawing blade jams.
Spread the saw cut out and pull the blade
out carefully.
m CAUTION! RISK OF INJURY AND
DAMAGE TO PROPERTY!
uAlways stand to the side of the product
when working.
uAlways make sure that the workplace is
well ventilated.
uAvoid over-stressing the product while
working.
Regular cuts
¾Verify the saw blade is not touching the
workpiece. Then, switch on the product.
¾Apply the base plate 4to the workpiece.
¾Use even pressure, advancing at a steady
pace when making your cut. You can make
horizontal, diagonal, or vertical cuts.
¾When you are finished: First, switch off the
product. Then, pull the saw blade out of the
workpiece.
Plunge cuts
(Fig. J)
¾Plunge cuts are very challenging and are
associated with a higher risk of injuries. Only
use this technique if you are familiar with it.
¾Plunge cuts may only be carried out in soft
materials such as wood or plasterboard and
with short blades (max. length 150 mm).
There is a risk of kickback and personal
injury.
¾Place the front edge of the base plate 4on
the workpiece so that the saw blade does
not touch the workpiece.
¾Turn the product on. Let the saw blade slowly
plunge into the workpiece.
¾When the workpiece depth has been cut
through, continue sawing as usual.
Table of contents
Languages:
Other Parkside Performance Cordless Saw manuals

Parkside Performance
Parkside Performance PSSAP 20-Li A1 User manual

Parkside Performance
Parkside Performance PSSAP 20-Li A1 User manual

Parkside Performance
Parkside Performance PHKSAP 20-Li A1 User manual

Parkside Performance
Parkside Performance PSSAP 2028 A1 User manual

Parkside Performance
Parkside Performance PHKSAP 20-Li A1 User manual