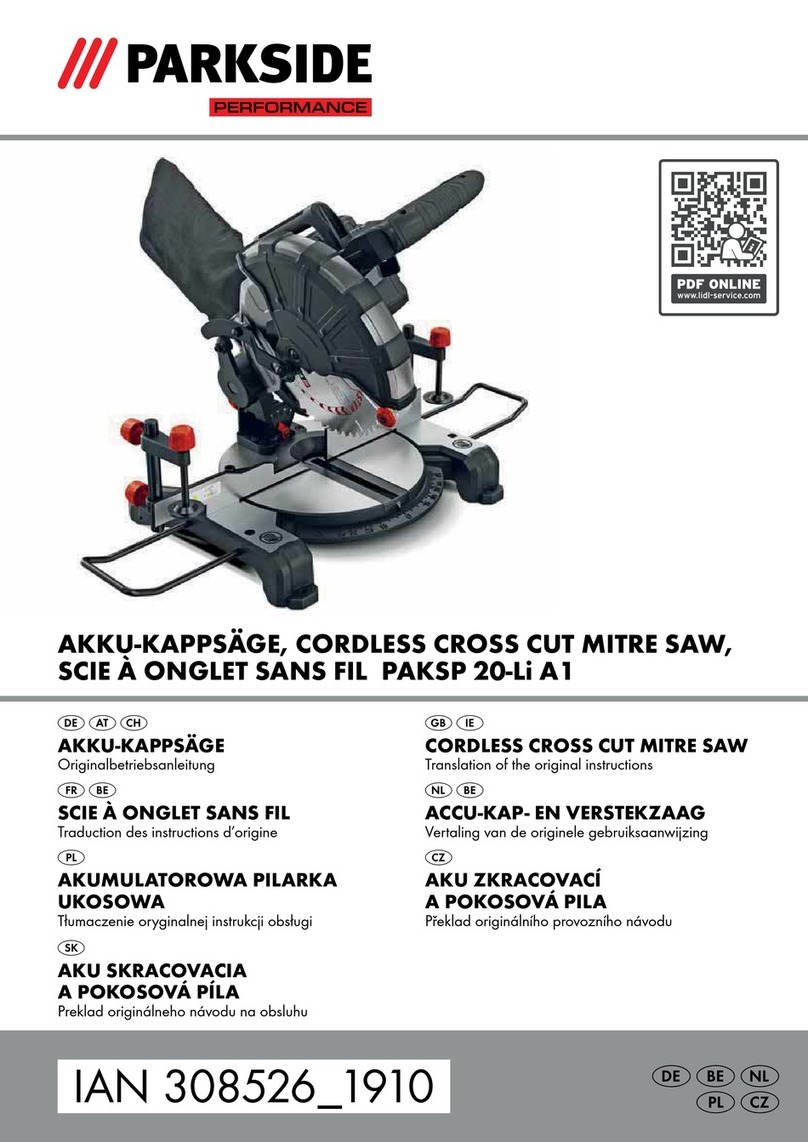
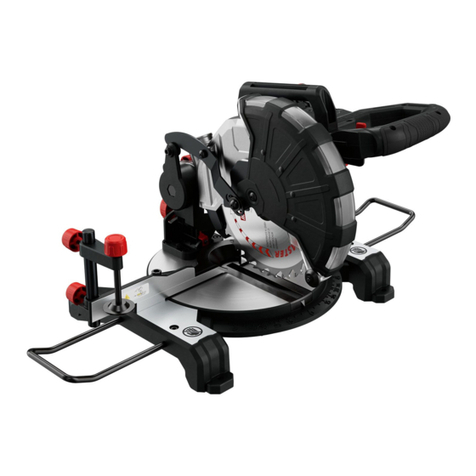
Parkside Performance 308526 1910 User manual

IAN 308526_1910
CORDLESS CROSS CUT MITRE SAW PAKSP 20-Li A1
AKKU-KAPPSÄGE
Originalbetriebsanleitung
ΕΠΑΝΑΦΟΡΤΙΖΟΜΕΝΟ
ΦΑΛΤΣΟΠΡΙΟΝΟ
Μετάφραση των αυθεντικών οδηγιών λειτουργίας
CORDLESS CROSS CUT MITRE SAW
Translation of the original instructions

GB/CY Translation of the original instructions Page 1
GR/CY Μετάφραση των αυθεντικών οδηγιών λειτουργίας Σελίδα 11
DE/AT/CH Originalbetriebsanleitung Seite 23
Before reading, unfold the page containing the illustrations and familiarise yourself with all functions of the
device.
Πριν ξεκινήσετε την ανάγνωση, ανοίξτε τις δυο σελίδες με τις εικόνες και εξοικειωθείτε με όλες τις λειτουργίες
της συσκευής.
Klappen Sie vor dem Lesen die beiden Seiten mit den Abbildungen aus und machen Sie sich anschließend mit
allen Funktionen des Gerätes vertraut.

AB
C D
17a
17a
24a

20V max.
18V
All Parkside tools and the chargers PLG 20 A1/PLG 20 A2/PLG 20 A3/PDSLG 20 A1 of the X20V Team series are compatible with the
PAP 20 A1/PAP 20 A2/PAP 20 A3 battery pack.
Charging times
Charging currents
2 Ah
Battery pack
PAP 20 A1
3 Ah
Battery pack
PAP 20 A2
4 Ah
Battery pack
PAP 20 A3
max. 2.4 A
Charger PLG 20 A1
60 min
2,4 A
90 min
2,4 A
120 min
2,4 A
max. 3.5 A
Charger PLG 20 A2
60 min
2,4 A
60 min
3,5 A
80 min
3,5 A
max. 4.5 A
Charger PLG 20 A3
35 min
3,5 A
45 min
4,5 A
60 min
4,5 A
max. 4.5 A
Charger PDSLG 20 A1
35 min
3,5 A
45 min
4,5 A
60 min
4,5 A

GB│CY │ 1 ■
PAKSP 20-Li A1
Contents
Introduction .............................................................................................2
Intended use ..............................................................................................................2
Features..................................................................................................................2
Package contents...........................................................................................................2
Technical specifications ......................................................................................................3
General power tool safety warnings ........................................................................3
1. Work area safety ........................................................................................................3
2. Electrical safety ..........................................................................................................3
3. Personal safety ..........................................................................................................4
4. Power tool use and care ...................................................................................................4
5. Use and handling of the cordless electrical power tool ...........................................................................4
6. Service ................................................................................................................4
Safety instructions for mitre crosscut saws........................................................................................5
Icons ....................................................................................................................6
Safety guidelines for battery chargers...........................................................................................6
Original accessories/attachments..............................................................................................6
Before use ..............................................................................................6
Charging the battery pack ...................................................................................................6
Checking the battery charge level..............................................................................................7
Setting up the appliance .....................................................................................................7
Transport.................................................................................................................7
Check that the blade guard is functioning correctly .................................................................................7
Fitting/changing the saw blade ...............................................................................................7
Fitting the workpiece rest .....................................................................................................7
Fitting the tensioning clamps ..................................................................................................7
Clamping the workpiece .....................................................................................................7
Fitting the dust collection bag .................................................................................................8
Use ....................................................................................................8
Setting the table............................................................................................................8
Make cuts without a mitre angle ..............................................................................................8
Carrying out mitre cuts ......................................................................................................8
Cleaning and maintenance .................................................................................8
Disposal ................................................................................................8
Kompernass Handels GmbH warranty .......................................................................9
Service .................................................................................................9
Importer................................................................................................9
Original declaration of conformity .........................................................................10
Ordering a replacement battery ...........................................................................10
Telephone ordering ....................................................................................................... 10

■2 │ GB│CY PAKSP 20-Li A1
CORDLESS CROSS CUT MITRE SAW
PAKSP 20-Li A1
Introduction
Congratulations on the purchase of your new appliance. You have chosen
a high-quality product. The operating instructions are a part of this product.
They contain important information about safety, usage and disposal.
Before using the product, please familiarise yourself with all operating and
safety instructions. Use the product only as described and for the range of
applications specified. Please also pass these operating instructions on to
any future owner.
Intended use
This appliance is intended for cutting wood, wood-like products or plastics.
It may not be used for cutting ferrous materials such as rods, bars, screws,
etc.
Any other usage or modification of the appliance is deemed to be improper
and carries a significant risk of accidents.
The appliance should not be used for industrial purposes.
Features
On/Off switch
Handle
Motor unit
Spindle lock
Locking screw for the bevel angle
Locking screw for the table
Workpiece rest
Screw for the workpiece rest
Table
Display arrow on table
-Mitre scale
3Adjustable fence
!Socket head screw
.Blade guard
0Release button
Figure A
6Saw blade
1Tensioning clamp
17a Setting screw for tensioning clamp
%Drill holes for workpiece rest
+Drill holes
,Mounting screw
Clamping flange (external)
Figure B
/Handle
Dust extractor connection
"Dust collection bag
24a Fastening clips
#Transport restraint
$Clamping screw
&Threaded rod
Figure C
'Bevel scale
(Bevel indicator
Figure D
5Battery pack*
4Release button
Battery charger*
2Battery display LED
Battery charge level button
*Red control LED
)Green control LED
Hex key
Package contents
1 cordless cross cut mitre saw
1 tungsten carbide saw blade Ø 210 x 2.0 x Ø 30 mm 48Z
(pre-assembled)
2 tensioning clamps
1 dust collection bag
1 hex key
2 workpiece supports
1 set of operating instructions

GB│CY │ 3 ■
PAKSP 20-Li A1
Technical specifications
Cordless cross cut mitre saw PAKSP 20-Li A1
Rated voltage 20 V (DC)
Rated idle speed n04300 rpm
Max. cutting width/depth at 90 x 90° 120 x 60 mm
90 x 45° 80 x 60 mm
45 x 90° 120 x 35 mm
45 x 45° 80 x 35 mm (right)
45 x 45° 60 x 35 mm (left)
Pivoting range (table) -45°/+45°
Mitre cut 0–45° to the left
Saw blade
210 mm
Ø 210 x 30 mm, 48 teeth,
Tooth width: max. 2 mm
Battery PAP 20 A3*
Type LITHIUM ION
Rated voltage 20 V (DC)
Capacity 4 Ah (80 Wh)
Cells 10
High-speed battery charger PLG 20 A3*
INPUT
Rated voltage 230–240 V ∼ (AC), 50 Hz
Rated power consumption: 120 W
Fuse (internal) 3.15 A T3.15A
OUTPUT
Rated voltage 21.5 V (DC)
Rated current 4.5 A
Charging time approx. 60min.
Protection class II/ (double insulation)
* BATTERY AND CHARGER ARE NOT INCLUDED
Wear ear muffs!
Read the operating
instructions before use!
Noise emission value
Noise measurement value determined in accordance with EN 62841.
The A-rated noise level of the power tool is typically:
Sound pressure level LPA = 83.2 dB (A)
Uncertainty K KPA = 3 dB
Sound power level LWA = 94.2 dB (A)
Uncertainty K KWA = 3 dB
Wear ear muffs!
Vibration emission value
Total vibration values (vector total of three directions) determined in
accordance with EN 62841:
Sawing wood ah,W = 2.03 m/s2
Uncertainty K = 1.5 m/s2
NOTE
► The vibration emission values and the noise emission values given
in these instructions have been measured in accordance with a
standardised test procedure and can be used for comparison of the
power tool with another tool.
► The specified total vibration values and the noise emission values can
also be used to make a provisional load estimate.
WARNING!
► Depending on the manner in which the power tool is being used, and
in particular the kind of workpiece being worked, the vibration and
noise emission values can deviate from the values given in these
instructions during actual use of the power tool.
► Try to keep the vibration load as low as possible. Measures to reduce
the vibration load are, e.g. wearing gloves and limiting the working
time. Wherein all states of operation must be included (e.g. times
when the power tool is switched off and times where the power tool is
switched on but running without load).
General power tool safety warnings
WARNING!
►Read all safety warnings, instructions, illustrations and specifica-
tions provided with this power tool. Failure to follow all instructions
listed below may result in electric shock, fire and/or serious injury.
Save all warnings and instructions for future reference.
The term "power tool" in the warnings refers to your mains-operated
(corded) power tool or battery-operated (cordless) power tool.
1. Work area safety
a) Keep work area clean and well lit. Cluttered or dark areas invite
accidents.
b) Do not operate power tools in explosive atmospheres, such as in
the presence of flammable liquids, gases or dust. Power tools create
sparks which may ignite the dust or fumes.
c) Keep children and bystanders away while operating a power tool.
Distractions can cause you to lose control.
2. Electrical safety
a) Power tool plugs must match the outlet. Never modify the plug in any
way. Do not use any adapter plugs with earthed (grounded) power
tools. Unmodified plugs and matching outlets will reduce risk of electric
shock.
b) Avoid body contact with earthed or grounded surfaces, such as
pipes, radiators, ranges and refrigerators. There is an increased risk
of electric shock if your body is earthed or grounded.
c) Do not expose power tools to rain or wet conditions. Water entering
a power tool will increase the risk of electric shock.
d) Do not abuse the cord. Never use the cord for carrying, pulling or
unplugging the power tool. Keep cord away from heat, oil, sharp
edges or moving parts. Damaged or entangled cords increase the risk
of electric shock.
e) When working outdoors with an electrical power tool always use
extension cords that are also suitable for use outdoors. Use of a
cord suitable for outdoor use reduces the risk of electric shock.
f) If operating a power tool in a damp location is unavoidable, use
a residual current device (RCD) protected supply. Use of an RCD
reduces the risk of electric shock.

■4 │ GB│CY PAKSP 20-Li A1
3. Personal safety
a) Stay alert, watch what you are doing and use common sense when
operating a power tool. Do not use a power tool while you are tired
or under the influence of drugs, alcohol or medication. A moment of
inattention while operating power tools may result in serious personal
injury.
b) Use
personal protective equipment. Always wear eye protection.
Protective equipment such as a dust mask, non-skid safety shoes, hard hat
or hearing protection used for appropriate conditions will reduce personal
injuries.
c) Prevent unintentional starting. Ensure the switch is in the off-position
before connecting to power source and/or battery pack, picking up
or carrying the tool. Carrying power tools with your finger on the switch
or energising power tools that have the switch on invites accidents.
d) Remove any adjusting key or wrench before turning the power tool
on. A wrench or a key left attached to a rotating part of the power tool
may result in personal injury.
e) Do not overreach. Keep proper footing and balance at all times.
This enables better control of the power tool in unexpected situations.
f) Dress properly. Do not wear loose clothing or jewellery. Keep your
hair and clothing away from moving parts. Loose clothes, jewellery
or long hair can be caught in moving parts.
g) If devices are provided for the connection of dust extraction and
collection facilities, ensure these are connected and properly used.
Use of dust collection can reduce dust-related hazards.
h) Do not allow yourself to get lulled into a false sense of security and
do not ignore the safety rules for power tools, even if you are familiar
with the power tool after repeated use. A careless action can cause
severe injury within a fraction of a second.
4. Power tool use and care
a) Do not force the power tool. Use the correct power tool for your
application. The correct power tool will do the job better and safer at
the rate for which it was designed.
b) Do not use the power tool if the switch does not turn it on and off.
Any power tool that cannot be controlled with the switch is dangerous
and must be repaired.
c) Disconnect the plug from the power source and/or remove the
battery pack, if detachable, from the power tool before making
any adjustments, changing accessories, or storing power tools.
Such preventive safety measures reduce the risk of starting the power
tool accidentally.
d) Store idle power tools out of the reach of children and do not allow
persons unfamiliar with the power tool or these instructions to operate
the power tool. Power tools are dangerous in the hands of untrained
users.
e) Maintain power tools and accessories. Check for misalignment or
binding of moving parts, breakage of parts and any other condition
that may affect the power tool’s operation. If damaged, have the
power tool repaired before use. Many accidents are caused by poorly
maintained power tools.
f) Keep cutting tools sharp and clean. Properly maintained cutting tools
with sharp cutting edges are less likely to bind and are easier to control.
g) Use the power tool, accessories and tool bits etc. in accordance with
these instructions, taking into account the working conditions and the
work to be performed. Use of the power tool for operations different
from those intended could result in a hazardous situation.
h) Keep handles and grasping surfaces dry, clean and free from oil
and grease. Slippery handles and grasping surfaces do not allow for
safe handling and control of the tool in unexpected situations.
5. Use and handling of the cordless electrical
power tool
a) Charge a rechargeable battery using only the charger recommended
by the manufacturer. Chargers are often designed for a particular type
of rechargeable battery unit. There is the danger of fire if other types of
rechargeable battery units are used.
b) Only the rechargeable battery units supplied are to be used with an
electrical power tool. The use of other rechargeable battery units may
lead to the danger of injury or fire.
c) When they are not being used, store rechargeable battery units
away from paperclips, coins, keys, nails, screws or other small metal
objects that could cause the contacts to be bridged. Short-circuiting
the contacts of a rechargeable battery unit may result in heat damage
or fire.
d) Fluids may leak out of rechargeable battery units if they are misused.
If this happens, avoid contact with the fluid. If contact occurs, flush
the affected area with water. Seek additional medical help if any of
the fluid gets into your eyes. Escaping battery fluid may cause skin
irritation or burns.
e) Do not use a damaged or modified battery. Damaged or modified
batteries may behave unexpectedly and cause fires, explosions or pose
a risk of injury.
f) Do not expose a battery to fire or excessively high temperatures.
Fire or temperatures in excess of 130°C (265°F) can cause an
explosion.
g) Follow all instructions regarding charging and never charge the
battery or the cordless tool outside of the temperature range given
in the operating instructions. Incorrect charging or charging outside of
the permissible temperature range can destroy the battery and increase
the risk of fire.
CAUTION! RISK OF EXPLOSION!
Never charge non-rechargeable batteries.
Protect the rechargeable battery from heat
(for example, from continuous exposure to sunlight), fire, water
and moisture. There is a risk of explosion.
6. Service
a) Have your power tool serviced by a qualified repair person using
only identical replacement parts. This will ensure that the safety of the
power tool is maintained.
b) Never try to repair damaged batteries. Batteries should only be
maintained by the manufacturer or an approved customer service
centre.

GB│CY │ 5 ■
PAKSP 20-Li A1
Safety instructions for mitre crosscut saws
■Mitre crosscut saws are designed for cutting wood or wood-like
products. They may not be used for cutting ferrous materials such
as rods, bars, screws, etc. Abrasive dust leads can cause blockages in
moving parts such as the lower blade guard. Sparks generated during
cutting can burn the lower blade guard, the insert plate and other
plastic parts.
■If possible, fix the workpiece with clamps. If you are holding the
workpiece by hand, always keep your hand at least 100 mm from
either side of the saw blade. Do not use this saw to cut workpieces
that are too small to be clamped or held safely by hand. If your hand
is too close to the saw blade, there is an increased risk of injury from
contact with the saw blade.
■The workpiece must be held firmly in place and either clamped or
pressed against the fence and the table. Do not push the workpiece
into the saw blade and never cut "freehand". Loose or moving
workpieces could be thrown out at high speed and cause injury.
■Never put your hand over the intended cutting line, or in front of or
behind the saw blade. Supporting the workpiece with crossed hands,
i.e. holding the workpiece to the right of the saw blade with the left
hand or vice versa, is very dangerous.
■Do not reach behind the fence while the saw blade is turning.
Always maintain a safety distance of at least 100 mm between your
hand and the rotating saw blade (this applies to both sides of the
saw blade, e.g. when removing wood debris). The proximity of the
rotating saw blade to your hand is not always immediately apparent
and you could be seriously injured.
■Check the workpiece before starting the cut. If the workpiece is bent
or warped, clamp it with the outwardly curved side towards the fence.
Always make sure that there is no gap between the workpiece, fence
and table along the cutting line. Bent or warped workpieces can twist
or shift and cause the rotating saw blade to jam while cutting. Make
sure that there are no nails or foreign bodies in the workpiece.
■Do not use the saw until the table is free of tools, wood debris, etc.;
only the workpiece should be on the table. Small waste items, loose
pieces of wood or other objects that come into contact with the rotating
blade can be thrown out at high speed.
■Only cut one workpiece at once. Stacked workpieces cannot be
properly clamped or held in place and can cause the blade to jam or
slip during sawing.
■Ensure that the mitre crosscut saw is placed on a flat, solid work
surface before use. A level and solid work surface reduces the risk
of the mitre crosscut saw becoming unstable.
■Plan your work. Whenever you adjust the saw blade bevel or mitre
angle, make sure that the adjustable fence is correctly set and supports
the workpiece without coming into contact with the blade or the
blade guard.
Without switching on the machine and with no workpiece on the table,
simulate a complete cutting movement using the saw blade to ensure
that there is no obstruction or danger of cutting into the fence.
■With workpieces that are wider or longer than the top of the table,
provide adequate support, e.g. using table extensions or a
sawhorse. Workpieces that are longer or wider than the table of the
mitre crosscut saw could tilt if they are not firmly supported. If a cut
piece of wood or the workpiece tips, it can lift the lower blade guard or
be thrown out uncontrollably by the rotating blade.
■Do not use other people instead of a table extension or for addi-
tional support. If the workpiece is not stably supported, the blade can
jam.
Also, the workpiece can shift during the cut and pull you and the helper
into the rotating blade.
■The cut-off piece must not be pressed against the rotating saw blade.
If there is not much space, e.g. when using longitudinal stops, the cut-off
piece can wedge into the blade and be thrown out violently.
■Always use a clamp or a suitable device to properly support round
material such as rods or pipes. Bars tend to roll away during cutting,
causing the blade to "bite" and the workpiece to be pulled into the
blade along with your hand.
■Allow the blade to reach full speed before cutting into the work-
piece. This reduces the risk of the workpiece being thrown out.
■If the workpiece becomes jammed or the blade jams, turn off the
mitre crosscut saw. Wait until all moving parts have come to a
standstill, unplug the appliance and/or remove the battery. Then
remove the jammed material. If you continue cutting despite such a
blockage, you may lose control or damage the mitre crosscut saw.
■When the cut is complete, release the switch, hold the saw head
down and wait for the blade to stop before removing the cut piece.
It is very dangerous to reach towards the emerging sheet with your
hand.
■Hold the handle firmly if you make an incomplete saw cut or if you
release the switch before the saw head has reached its lower position.
The braking effect of the saw can cause the saw head to be pulled
down abruptly and thus lead to a risk of injury.
■Keep your work area clean! Material mixtures can be particularly
dangerous. Light metal dust can burn or explode.
■Do not use blunt, cracked, warped or damaged saw blades. Saw
blades with blunt or misaligned teeth may cause excessive friction as
the saw cut is too narrow, and this can cause a saw blade jam and
kickback.
■Do not use any saw blades made of high-alloy high-speed steel
(HSS steel). These saw blades can break easily.
■Always use saw blades of the correct size and with a suitable
mounting hole (e.g. square or round).Blades that do not match the
mounting hardware of the saw will run eccentrically, causing loss of
control.
■Never remove cutting residue, wood chips, etc. from the cutting area
while the power tool is running. Always place the tool arm in the idling
position and switch the power tool off.
■After finishing work, do not touch the saw blade until it has cooled
down. The saw blade becomes very hot during use.
Supplementary notes
■ Use only saw blades with diameters corresponding to the inscriptions
on the saw.
■ When sawing wood or other materials that can create dusts that are
hazardous to health, always connect a suitable, certified vacuum
extractor device.
■ Wear a dust mask when sawing wood.
■ Only use recommended saw blades.
■ Always wear ear muffs.
■ Do not allow the teeth of the saw blade to overheat.
■ When sawing plastic, avoid melting the plastic.
■ Always use the correct saw blade for the material being worked.
Supplementary instructions according to EN 847-1
■ The tools comply with the EN 847-1 standard.
■ Tools may only be used by trained and experienced operators who
know how to handle them.
■ Do not exceed the maximum speed indicated on the tool. If specified,
the speed range must be complied with.
■ Circular saw blades that are cracked must be taken out of service
(repair is not permitted).
■ Tools with visible cracks must be discarded.
■ Tools must be cleaned regularly.
■ Tool parts made of light metal alloys that are contaminated with residues,
e.g. resin, may only be cleaned with solvents that do not impair the
mechanical properties of these materials.
■6 │ GB│CY PAKSP 20-Li A1
■ Use only saw blades specified by the manufacturer which comply with
EN847-1 (intended for cutting wood or similar materials).
■ Use only saw blades marked with a speed equal to or higher than the
speed indicated on the power tool.
Assembly and fastening of tools and tool parts
■ Tools and tool bodies must be clamped so that they cannot come loose
during operation.
■ When mounting the tools, you must ensure that the clamping is carried
out on the tool hub or the clamping surface of the tool and that the
cutting edges do not come into contact with each other or with the
clamping elements.
■ Mounting screws and nuts must be tightened using suitable spanners
etc. and to the torque specified by the manufacturer (9–12 Nm).
■ Extending the spanner or using hammer blows to tighten bolts is not
permitted.
■ All dirt, grease, oil or water must removed from the clamping surfaces.
■ Clamping screws must be tightened according to the manufacturer's
instructions.
■ To adjust the bore diameter of circular saw blades to the spindle diameter
of the machine, use only firmly inserted rings, e.g. rings that are pressed
in or affixed by adhesive bonding. The use of loose rings is not permitted.
Maintenance of tools
■ The maintenance of tools is not permitted. Danger due to imbalance!
Handling
Handle tools safely to avoid injury:
■ Wear personal protective equipment, especially protective gloves.
■ Make sure that you have secure footing.
■ Always wear closely fitting clothing.
■ After you have fitted the tool, re-attach all of machine's safety devices,
if any, correctly.
■ Have an expert carry out a test run.
Icons
Wear protective gloves!
Wear a dust mask!
Wear safety goggles!
Wear ear muffs!
Attention! Risk of injury!
Do not reach towards the running saw blade!
2
1
1. Set the adjustable fence 3.
2. Set the bevel angle.
WARNING!
► The power tool creates an electromagnetic field during operation.
This field can, in certain circumstances, impair active or passive
medical implants.
To reduce the risk of serious or fatal injury, we recommend that
individuals with medical implants consult their physician and the
manufacturer of the medical implant before operating the power tool.
Safety guidelines for battery chargers
■ This appliance may be used by children aged 8 years
and above and by persons with limited physical,
sensory or mental capabilities or lack of experience
and knowledge, provided that they are under super-
vision or have been told how to use the appliance
safely and are aware of the potential risks. Do not
allow children to use the appliance as a toy. Cleaning
and user maintenance tasks may not be carried out
by children unless they are supervised.
■ To avoid potential risks, if the mains cable of this
appliance is damaged, it must be replaced by the
manufacturer, its customer service department or a
similarly qualified person.
The charger is suitable for indoor use only.
ATTENTION!
♦ This charger can only charge the following batteries:
PAP 20 A1/PAP 20 A2/PAP 20 A3.
♦ A current list of battery compatibility can be found at
www.Lidl.de/Akku.
WARNING!
■ Do not operate the appliance with a damaged cable, power cord or
mains plug. Damaged power cords can result in danger to life due to
electric shock.
Original accessories/attachments
Use only the accessories and additional equipment that are specified in
the operating instructions and are compatible with the appliance.
WARNING!
■ Do not use any accessories that are not recommended by PARKSIDE.
This can lead to an electric shock and fire.
Before use
Charging the battery pack
CAUTION!
► Always unplug the appliance before you remove the battery pack5
from or connect the battery pack to the battery charger.
NOTE
► Never charge the battery pack if the ambient temperature is below
10°C or above 40°C. If a lithium-ion battery is to be stored for an
extended period, the charge level should be checked regularly. The
optimum charge level is between 50% and 80%. The storage climate
should be cool and dry, and the ambient temperature should be
between 0°C and 50°C.
♦ Insert the battery pack 5into the battery charger .
♦ Insert the power plug into the socket. The red control LED *lights up.
♦ The green control LED )indicates that the charging process is complete
and the battery pack 5is ready for use.
♦ Always unplug the appliance before you remove the battery pack5
from the battery charger.

GB│CY │ 7 ■
PAKSP 20-Li A1
ATTENTION!
♦ If the red control LED *flashes, the battery pack 5has overheated
and cannot be charged.
♦ If the red and green control LEDs *) both flash, this means that
the battery pack 5is defective.
♦ Push the battery pack 5into the appliance.
■ Never recharge a battery pack5again immediately after rapid
charging. There is a risk that the battery pack will overheat and this
will reduce the lifespan of the battery.
♦ Switch off the battery chargerfor at least 15 minutes between
successive charging sessions. Also disconnect the power plug from
the mains power socket.
Checking the battery charge level
♦ To check the battery status, press the battery charge level button.
The status will be shown on the battery display LED 2as follows:
RED/ORANGE/GREEN = maximum charge
RED/ORANGE = medium charge
RED = low charge – charge the battery
Setting up the appliance
Always provide a stable set-up location for the appliance. Fix the appliance
using suitable bolts (not included in delivery) to a flat, stable base. Use the
drill holes+for this purpose.
NOTE
► In exceptional cases, you can position the baseplate on a solid support
for this purpose.
Transport
NOTE
► Only transport the appliance with the transport restraint #in place
and use the carrying handle /.
Removing transport restraint
♦ Apply a little pressure to the handleand pull out the transport
restraint#as far as it will go. The motor unitcan now be moved
upwards.
Inserting transport restraint
♦ First, press down the release button 0, then the handle . Then push
the transport restraint#into the appliance. The motor unitis now
fixed in place.
Check that the blade guard is functioning correctly
WARNING! RISK OF INJURY!
Always switch the appliance off and remove the battery
before carrying out any work on the appliance.
■ Make sure that all moving parts of the blade guard.move freely
without jamming. All devices that cover the saw blade must work
properly.
♦ First, press down the release button 0, then the handle . Allow the
blade guard .to slide completely upwards.
♦ When you release the handle, the blade guard.must move freely
back to its starting position.
WARNING!
► When the handle is released, the saw also springs back to its
starting position. Make sure that neither your hands or other parts
of your body are within the swivel range of the saw.
Fitting/changing the saw blade
WARNING!
► Always remove the battery pack 5before changing the saw
blade6!
► The arrow on the saw blade 6must correspond to the
arrow showing the direction of rotation (running direction shown on
the appliance).
♦ Press the release button0and slide the blade guard.upwards.
Hold the blade guard.firmly with one hand. Make sure that the
mounting screw ,is accessible. You can now let go of the release
button 0.
♦ Press the spindle lockall the way down with the same hand and
hold it in this position. If necessary, rotate the saw blade6with the
other hand until this is possible.
♦ Use the supplied hex keyto undo the mounting screw,.
♦ Remove the clamping flange (external)and the saw blade6.
♦ Insert the new saw blade.
♦ Proceed in reverse order in order to reassemble the appliance to a
usable condition.
♦ Check whether all the fastening elements are correctly fitted.
NOTE
► Ensure that the saw blade6can be rotated freely.
► Switch the appliance on for around 60 seconds to check that there are
no unusual vibrations. If this is not the case, you should check that the
saw blade6is fitted correctly.
Fitting the workpiece rest
♦ Loosen the respective screw for the workpiece rest with a standard
Phillips screwdriver (not supplied).
♦ Push the workpiece rest as far as possible into the corresponding
drill holes %.
♦ Retighten the screw for the workpiece rest. Make sure that the
workpiece rest remains horizontal.
♦ Proceed in the same way on the other side.
Fitting the tensioning clamps
♦ Loosen the respective clamping screw$and insert the shaft of the
tensioning clamp 1into the hole. Insert the shaft of the tensioning
clamp1only so far into the hole so that the adjustable fence 3can
move freely.
♦ Retighten the clamping screw$.
♦ Proceed in the same way on the other side.
Clamping the workpiece
♦ Place the workpiece under the respective tensioning clamp 1.
♦ Press the workpiece against the fence.
♦ First undo the setting screw for the tensioning clamp17aand adjust it
to fit the workpiece. Then retighten the setting screw for the tensioning
clamp 17a.
♦ Afterwards, tighten the threaded rod&by turning it clockwise.
♦ To release the workpiece, turn the threaded rod &anticlockwise.
NOTE
► Long and heavy workpieces must be underlaid or supported at the
free end to ensure stability.

■8 │ GB│CY PAKSP 20-Li A1
Fitting the dust collection bag
NOTE
► There is a risk of fire when working with electrical appliances that have
a dust collection bag or can be connected to the vacuum cleaner via
a dust extraction device! Under unfavourable conditions, wood dust in
the dust collection bag may ignite spontaneously. This can happen, for
example, due to flying sparks when grinding metal or metal residues in
wood. There is an increased risk if the wood dust is mixed with other
chemical substances and heat is generated by prolonged sanding.
Therefore, do not allow the workpiece to overheat and always empty
the dust collection bag or the dust bag of the vacuum cleaner before
taking a break from work.
► Check that the dust collection bag is fitted correctly.
► Observe the applicable regulations in your country regarding the
materials to be worked.
♦ Press together the two fastening clips 24a on the opening of the dust
collection bag "to widen the opening.
♦ Push the dust collection bag"onto the dust extraction connection
and release the fastening clips 24a . Make sure that the zip on the dust
collection bag "is facing downwards.
Use
WARNING! RISK OF INJURY!
Always switch the appliance off and remove the battery
before carrying out any work on the appliance.
Setting the table
♦ Undo the locking screw for the table.
♦ Turn the saw at the carrying handle /to the desired position.
You can determine the set angle using the mitre scale -and the
display arrowon the table.
♦ Retighten the locking screw for the table.
Make cuts without a mitre angle
♦ If necessary, adjust the table as described in the section "Setting the
table".
♦ Use the supplied hex key to turn the socket head screw !to set the
adjustable fence 3. Slide the adjustable fence 3inwards as far as
possible. Retighten the socket head screw!.
♦ Place the workpiece to be machined up against the adjustable fence3.
Fasten it as described in the section "Clamping the workpiece".
♦ Press the On/Off switchand keep it pressed in. The saw starts up.
Then press the release button 0and carefully lower the saw onto the
workpiece. Saw by applying moderate pressure.
♦ After completing the cut, release the On/Off switch. Allow the saw
to stop turning before moving it back to the starting position.
Carrying out mitre cuts
♦ If necessary, adjust the table as described in the section "Setting the
table".
♦ Set the desired saw bevel inclination from 0–45°. To do this, undo the
locking screwfor the bevel angle and tilt the saw to the desired
position. Retighten the locking screw. You can also check the set
inclination angle using the bevel scale 'and the bevel indicator (.
♦ Use the supplied hex key to turn the socket head screw !to set the
adjustable fence 3. The distance to the saw blade 6must not exceed
8 mm. Check the setting by lowering the saw. If necessary, adapt the
tensioning clamp1to the adjustable fence 3. Retighten the socket
head screw!.
♦ Place the workpiece to be machined up against the adjustable fence3.
Fasten it as described in the section "Clamping the workpiece".
♦ Press the On/Off switchand keep it pressed in. The saw starts up.
Then press the release button 0and carefully lower the saw onto the
workpiece. Saw by applying moderate pressure.
♦ After completing the cut, release the On/Off switch.
Allow the saw to stop turning before moving it back to the starting
position.
Cleaning and maintenance
WARNING! RISK OF INJURY!
Always switch the appliance off and remove the battery
before carrying out any work on the appliance.
■ Store the appliance and the saw blades in a dry and dust-free location.
■ The appliance must be kept clean and free of oil or grease.
■ Use a dry cloth to clean the housing.
■ Never obstruct the ventilation openings.
■ Remove any adhering sawdust with a brush.
■ Always keep the area around the blade guard clean. Remove dust and
shavings with a brush or compressed air.
NOTE
► Replacement parts not listed (such as switches) can be ordered via our
Service Hotline.
Disposal
The packaging is made from environmentally friendly material
which can be disposed of at your local recycling plant.
Do not dispose of power tools in the normal domestic
waste!
European Directive 2012/19/EU requires that worn-out power
tools are collected separately and recycled in an environmen-
tally compatible manner.
WARNING!
► Remove the battery from the appliance before disposal.
Do not dispose of batteries in your normal household
waste!
Defective or worn-out rechargeable batteries must be recycled
according to Directive 2006/66/EC. Return the battery pack
and/or the appliance via the collection facilities offered.
Please contact your local authority or town council for information about
disposal options for used power tools/battery packs.
Dispose of the packaging in an environmentally friendly manner.
Note the labelling on the packaging and separate the packaging
material components for disposal if necessary. The packaging
material is labelled with abbreviations (a) and numbers (b) with
the following meanings: 1–7: plastics, 20–22: paper and cardboard,
80–98: composites.
Your local community or municipal authorities can provide
information on how to dispose of the worn-out product.

GB│CY │ 9 ■
PAKSP 20-Li A1
Kompernass Handels GmbH warranty
Dear Customer,
This appliance has a 3-year warranty valid from the date of purchase. If this
product has any faults, you, the buyer, have certain statutory rights. Your
statutory rights are not restricted in any way by the warranty described
below.
Warranty conditions
The warranty period starts on the date of purchase. Please keep your
receipt in a safe place. This will be required as proof of purchase.
If any material or manufacturing fault occurs within three years of the date
of purchase of the product, we will either repair or replace the product for
you or refund the purchase price (at our discretion). This warranty service
requires that you present the defective appliance and the proof of purchase
(receipt) within the three-year warranty period, along with a brief written
description of the fault and of when it occurred.
If the defect is covered by the warranty, your product will either be repaired
or replaced by us. The repair or replacement of a product does not signify
the beginning of a new warranty period.
Warranty period and statutory claims for defects
The warranty period is not prolonged by repairs effected under the
warranty. This also applies to replaced and repaired components. Any
damage and defects present at the time of purchase must be reported
immediately after unpacking. Repairs carried out after expiry of the
warranty period shall be subject to a fee.
Scope of the warranty
This appliance has been manufactured in accordance with strict quality
guidelines and inspected meticulously prior to delivery.
The warranty covers material faults or production faults. The warranty does
not extend to product parts subject to normal wear and tear or to fragile
parts which could be considered as consumable parts such as switches or
parts made of glass.
The warranty does not apply if the product has been damaged, improperly
used or improperly maintained. The directions in the operating instructions
for the product regarding proper use of the product are to be strictly
followed. Uses and actions that are discouraged in the operating instruc-
tions or which are warned against must be avoided.
This product is intended solely for private use and not for commercial
purposes. The warranty shall be deemed void in cases of misuse or
improper handling, use of force and modifications/repairs which have not
been carried out by one of our authorised Service centres.
The warranty period does not apply to
■ Normal reduction of the battery capacity overtime
■ Commercial use of the product
■ Damage to or alteration of the product by the customer
■ Non-compliance with safety and maintenance instructions, operating
errors
■ Damage caused by natural hazards
Warranty claim procedure
To ensure quick processing of your case, please observe the following
instructions:
■ Please have the till receipt and the item number (e.g.IAN12345)
available as proof of purchase.
■ You will find the item number on the type plate on the product, an
engraving on the product, on the front page of the operating instructions
(below left) or on the sticker on the rear or bottom of the product.
■ If functional or other defects occur, please contact the service depart-
ment listed either by telephone or by e-mail.
■ You can return a defective product to us free of charge to the service
address that will be provided to you. Ensure that you enclose the proof
of purchase (till receipt) and information about what the defect is and
when it occurred.
You can download these instructions along with many other
manuals, product videos and installation software at
www.lidl-service.com.
This QR code will take you directly to the Lidl service page
(www.lidl-service.com) where you can open your operating
instructions by entering the item number (IAN) 123456.
Service
WARNING!
►Have the appliances repaired by the Service Centre or a qualified
electrician and only using genuine replacement parts. This will
ensure that the safety of the appliance is maintained.
►Ensure that the power plug or the mains cable is replaced only by
the manufacturer of the appliance or by an approved customer
service provider. This will ensure that the safety of the appliance is
maintained.
Service Great Britain
Tel.: 0800 404 7657
E-Mail: [email protected]
CY Service Cyprus
Tel.: 8009 4409
E-Mail: [email protected]
IAN 308526_1910
Importer
Please note that the following address is not the service address. Please use
the service address provided in the operating instructions.
KOMPERNASS HANDELS GMBH
BURGSTRASSE 21
44867 BOCHUM
GERMANY
www.kompernass.com

■10 │ GB│CY PAKSP 20-Li A1
Original declaration of conformity
We, KOMPERNASS HANDELS GMBH, document officer:
Mr Semi Uguzlu, BURGSTR. 21, 44867 BOCHUM, GERMANY, hereby
declare that this product complies with the following standards, normative
documents and EC directives:
Machinery Directive
(2006/42/EC)
EC Low Voltage Directive (charger only)
(2014/35/EU)
Electromagnetic Compatibility
(2014/30/EU)
RoHS Directive
(2011/65/EU)*
* The manufacturer bears the full responsibility for compliance with this conformity
declaration. The subject of the declaration described above meets the requirements
of Directive 2011/65/EU of the European Parliament and Council of 8 June 2011
on the limitations of use of certain dangerous substances in electrical and electronic
appliances.
Related harmonised standards
EN 62841-1:2015
EN 62841-3-9:2015/A11:2017
EN 55014-1:2006/A2:2011
EN 55014-1:2017
EN 55014-2:1997/A2:2008
EN 55014-2:2015
EN 60335-1:2012/A13:2017
EN 60335-2-29:2004/A11:2018
EN 62233:2008
EN 61000-3-2:2014
EN 61000-3-3:2013
EN 50581:2012
Type/appliance designation
Cordless Cross Cut Mitre Saw PAKSP 20-Li A1
Year of manufacture: 01–2020
Serial number: IAN 308526_1910
Bochum, 04.03.2020
Semi Uguzlu
- Quality Manager -
We reserve the right to make technical changes in the context of further
product development.
Ordering a replacement battery
If you want to order a replacement battery for your appliance, you can do
so easily via the Internet on www.kompernass.com or by telephone.
Due to limited stocks, this item may sell out in a relatively short time.
NOTE
► Online ordering of replacement parts is not possible in all countries.
In this case, please contact the Service hotline.
Telephone ordering
Service Great Britain Tel.: 0800 404 7657
CY Service Cyprus Tel.: 8009 4409
To ensure fast processing of your order, have the article number of your
appliance to hand (e.g. IAN 308526) in case of questions. The article
number can be found on the type plate or the title page of these instruc-
tions.

GR│CY │ 11 ■
PAKSP 20-Li A1
Περιεχόμενα
Εισαγωγή ..............................................................................................12
Προβλεπόμενη χρήση..................................................................................................... 12
Εξοπλισμός............................................................................................................. 12
Παραδοτέος εξοπλισμός .................................................................................................. 12
Τεχνικά χαρακτηριστικά.................................................................................................... 13
Γενικές υποδείξεις ασφαλείας για ηλεκτρικά εργαλεία ..........................................................13
1. Ασφάλεια στον χώρο εργασίας ........................................................................................... 13
2. Ηλεκτρική ασφάλεια .................................................................................................... 13
3. Ασφάλεια ατόμων ...................................................................................................... 14
4. Χρήση και χειρισμός του ηλεκτρικού εργαλείου ............................................................................... 14
5. Χρήση και χειρισμός του επαναφορτιζόμενου εργαλείου........................................................................ 14
6. Σέρβις............................................................................................................... 14
Υποδείξεις ασφαλείας για φαλτσοπρίονα και πριόνια κάθετης κοπής ............................................................... 15
Εικονογράμματα . . . . . . . . . . . . . . . . . . . . . . . . . . . . . . . . . . . . . . . . . . . . . . . . . . . . . . . . . . . . . . . . . . . . . . . . . . . . . . . . . . . . . . . . . . . . . . . . . . . . . . . . . 16
Υποδείξεις ασφαλείας για φορτιστές ......................................................................................... 16
Γνήσια εξαρτήματα/πρόσθετες συσκευές...................................................................................... 17
Πριν από τη θέση σε λειτουργία ............................................................................17
Φόρτιση συστοιχίας συσσωρευτών........................................................................................... 17
Έλεγχος κατάστασης συσσωρευτών .......................................................................................... 17
Τοποθέτηση συσκευής .................................................................................................... 17
Μεταφορά.............................................................................................................. 17
Έλεγχος λειτουργίας του προστατευτικού καλύμματος............................................................................ 17
Τοποθέτηση/Αλλαγή λεπίδας πριονιού . . . . . . . . . . . . . . . . . . . . . . . . . . . . . . . . . . . . . . . . . . . . . . . . . . . . . . . . . . . . . . . . . . . . . . . . . . . . . . . . . . . . . . . 18
Τοποθέτηση στηριγμάτων τεμαχίου επεξεργασίας ............................................................................... 18
Τοποθέτηση σφιγκτήρων ................................................................................................... 18
Σύσφιξη τεμαχίου επεξεργασίας............................................................................................. 18
Σύνδεση σάκου συλλογής σκόνης ........................................................................................... 18
Θέση σε λειτουργία ......................................................................................18
Ρύθμιση περιστρεφόμενου τραπεζιού ......................................................................................... 18
Εκτέλεση κοπών χωρίς φαλτσογωνία ......................................................................................... 19
Διεξαγωγή κοπών υπό γωνία ............................................................................................... 19
Καθαρισμός και συντήρηση ...............................................................................19
Απόρριψη..............................................................................................19
Εγγύηση της Kompernass Handels GmbH ...................................................................20
Σέρβις . . . . . . . . . . . . . . . . . . . . . . . . . . . . . . . . . . . . . . . . . . . . . . . . . . . . . . . . . . . . . . . . . . . . . . . . . . . . . . . . . . . . . . . . . . . . . . . . .20
Εισαγωγέας.............................................................................................20
Αυθεντική δήλωση συμμόρφωσης ..........................................................................21
Παραγγελία ανταλλακτικού συσσωρευτή ....................................................................21
Τηλεφωνική παραγγελία ................................................................................................... 21

■12 │ GR│CY PAKSP 20-Li A1
ΠΑΝΑΦΟΡΤΙΖΟΜΕΝΟ
ΦΑΛΤΣΟΠΡΙΟΝΟ PAKSP 20-Li A1
Εισαγωγή
Σας συγχαίρουμε για την αγορά της νέας σας συσκευής. Το προϊόν που
αποκτήσατε είναι ένα προϊόν υψηλής ποιότητας. Οι οδηγίες λειτουργίας
αποτελούν τμήμα αυτού του προϊόντος. Περιλαμβάνουν σημαντικές υπο-
δείξεις για την ασφάλεια, τη χρήση και την απόρριψη. Πριν από τη χρήση
του προϊόντος, εξοικειωθείτε με όλες τις υποδείξεις χειρισμού και ασφάλειας.
Χρησιμοποιείτε το προϊόν αποκλειστικά όπως περιγράφεται και για τους
αναφερόμενους τομείς χρήσης. Σε περίπτωση παράδοσης του προϊόντος
σε τρίτους, παραδώστε μαζί και όλα τα έγγραφα.
Προβλεπόμενη χρήση
Η συσκευή προβλέπεται για την κοπή ξύλου, προϊόντων από ξύλο ή πλα-
στικού. Δεν επιτρέπεται να χρησιμοποιείται για την κοπή υλικών από σίδηρο,
όπως ράβδοι, βραχίονες, βίδες, κλπ..
Κάθε άλλη χρήση ή μετατροπή της συσκευής θεωρείται μη σύμφωνη με
τους κανονισμούς και ενέχει σημαντικούς κινδύνους ατυχημάτων.
Μη χρησιμοποιείτε τη συσκευή για επαγγελματικούς σκοπούς.
Εξοπλισμός
Διακόπτης λειτουργίας
Χειρολαβή
Μονάδα μοτέρ
Ασφάλιση ατράκτου
Βίδα ασφάλισης γωνίας κλίσης
Βίδα ασφάλισης περιστρεφόμενου τραπεζιού
Στήριγμα τεμαχίου επεξεργασίας
Βίδα για το στήριγμα τεμαχίου επεξεργασίας
Περιστρεφόμενο τραπέζι
Βέλος ένδειξης στο περιστρεφόμενο τραπέζι
-Κλίμακα μοιρών
3Ρυθμιζόμενη ράγα αναστολέα
!Βίδα Άλεν
.Προστατευτικό κάλυμμα
0Πλήκτρο απασφάλισης
Εικόνα A
6Λεπίδα πριονιού
1Σφιγκτήρας
17a Βίδα ρύθμισης για τον σφιγκτήρα
%Οπές διάτρησης για τα στηρίγματα τεμαχίου επεξεργασίας
+Οπές διάτρησης
,Βίδα στερέωσης
Φλάντζα σύσφιξης (εξωτερικά)
Εικόνα B
/Λαβή μεταφοράς
Σύνδεση της διάταξης απορρόφησης σκόνης
"Σάκος συλλογής σκόνης
24a Συνδετήρες στερέωσης
#Ασφάλεια μεταφοράς
$Βίδα σύσφιξης
&Ράβδος με σπείρωμα
Εικόνα C
'Διαβάθμιση κλίσης
(Ένδειξη κλίσης
Εικόνα D
5Συστοιχία συσσωρευτών*
4Πλήκτρο απασφάλισης
Φορτιστής*
2LED ένδειξης συσσωρευτή
Πλήκτρο κατάστασης συσσωρευτή
*Κόκκινο LED ελέγχου
)Πράσινο LED ελέγχου
Εσωτερικό εξαγωνικό κλειδί
Παραδοτέος εξοπλισμός
1 Επαναφορτιζόμενο φαλτσοπρίονο
1 Λεπίδα πριονιού HW Ø 210 x 2,0 x Ø 30 mm 48Z (προεγκατεστημένο)
2 Σφιγκτήρες
1 Σάκος συλλογής σκόνης
1 Εσωτερικό εξαγωνικό κλειδί
2 στηρίγματα αντικειμένων εργασίας
1 Εγχειρίδιο οδηγιών χρήσης

GR│CY │ 13 ■
PAKSP 20-Li A1
Τεχνικά χαρακτηριστικά
Επαναφορτιζόμενο φαλτσοπρίονο PAKSP 20-Li A1
Τάση μέτρησης 20 V (συνεχές ρεύμα)
Αριθμός στροφών ρελαντί μέτρησης n04300 min-1
Μέγ. πλάτος/βάθος κοπής σε 90 x 90°120 x 60 mm
90 x 45°80 x 60 mm
45 x 90°120 x 35 mm
45 x 45°80 x 35 mm (δεξιά)
45 x 45°60 x 35 mm (αριστερά)
Τομέας περιστροφής (περιστρεφόμενο πιάτο) -45°/+45°
Κοπή υπό γωνία 0–45° προς τα αριστερά
Λεπίδα πριονιού
210 mm
Ø 210 x 30 mm, 48 οδοντώσεις,
μέγ. πλάτος οδόντωσης 2 mm
Συσσωρευτής PAP 20 A3*
Τύπος ΛΙΘΙΟΥ-ΙΟΝΤΩΝ
Τάση μέτρησης 20 V (συνεχές ρεύμα)
Χωρητικότητα 4 Ah (80 Wh)
Στοιχεία 10
Ταχυφορτιστής συσσωρευτών PLG 20 A3*
ΕΙΣΟΔΟΣ/Input
Τάση μέτρησης 230–240 V ∼ (εναλλασσόμενο
ρεύμα), 50 Hz
Ονομαστική κατανάλωση 120 W
Ασφάλεια (εσωτερικά) 3,15 A T3.15A
ΕΞΟΔΟΣ/Output
Τάση μέτρησης 21,5 V (συνεχές ρεύμα)
Ονομαστικό ρεύμα 4,5 A
Διάρκεια φόρτισης περ. 60 λεπτά
Κατηγορία προστασίας
II/ (διπλή μόνωση)
* Ο ΣΥΣΣΩΡΕΥΤΗΣ ΚΑΙ Ο ΦΟΡΤΙΣΤΗΣ ΔΕΝ ΠΕΡΙΛΑΜΒΑΝΟΝΤΑΙ ΣΤΟΝ
ΠΑΡΑΔΟΤΕΟ ΕΞΟΠΛΙΣΜΟ
Φοράτε προστασία για την ακοή!
Πριν από τη θέση σε λειτουργία,
διαβάστε τις οδηγίες χρήσης!
Τιμή εκπομπής θορύβου
Η τιμή μέτρησης θορύβου υπολογίστηκε σύμφωνα με το πρότυπο
EN 62841. Η Α-σταθμισμένη στάθμη θορύβου του ηλεκτρικού εργαλείου
παρουσιάζει συνήθως τα ακόλουθα στοιχεία:
Στάθμη ηχητικής πίεσης LPA = 83,2 dB (A)
Αβεβαιότητα K KPA = 3 dB
Στάθμη ηχητικής ισχύος LWA = 94,2 dB (A)
Αβεβαιότητα K KWA = 3 dB
Φοράτε προστασία για την ακοή!
Τιμή εκπομπής κραδασμών
Οι ολικές τιμές κραδασμών (διανυσματικό άθροισμα τριών κατευθύνσεων)
υπολογίστηκαν σύμφωνα με το πρότυπο EN 62841:
Πριόνισμα ξύλου ah,W = 2,03 m/s2
Αβεβαιότητα K = 1,5 m/s2
ΥΠΟΔΕΙΞΗ
► Οι αναφερόμενες συνολικές τιμές κραδασμών και οι αναφερόμενες
τιμές εκπομπής θορύβου έχουν μετρηθεί σύμφωνα με μια πρότυπη
διαδικασία ελέγχου και μπορούν να χρησιμοποιηθούν για τη σύγκριση
ενός ηλεκτρικού εργαλείου με ένα άλλο.
► Οι αναφερόμενες τιμές εκπομπής κραδασμών και οι αναφερόμενες
τιμές εκπομπής θορύβου μπορούν επίσης να χρησιμοποιηθούν για
μια αρχική εκτίμηση του φορτίου.
ΠΡΟΕΙΔΟΠΟΙΗΣΗ!
► Οι εκπομπές κραδασμών και θορύβου μπορεί, κατά τη διάρκεια της
πραγματικής χρήσης του ηλεκτρικού εργαλείου, να αποκλίνουν από
τις αναφερόμενες τιμές ανάλογα με το είδος και τον τρόπο που χρησι-
μοποιείται το ηλεκτρικό εργαλείο, κυρίως ανάλογα με το είδος του
τεμαχίου επεξεργασίας.
► Προσπαθείτε να διατηρείτε την επιβάρυνση σε όσο το δυνατόν χαμη-
λότερα επίπεδα. Παραδειγματικά μέτρα μείωσης της επιβάρυνσης
λόγω δονήσεων είναι η χρήση γαντιών κατά τη χρήση του εργαλείου
και ο περιορισμός του χρόνου εργασίας. Πρέπει να συνυπολογίζο-
νται όλα τα μέρη του κύκλου εργασίας (για παράδειγμα, χρόνοι κατά
τους οποίους το ηλεκτρικό εργαλείο είναι απενεργοποιημένο και χρό-
νοι κατά τους οποίους είναι μεν ενεργοποιημένο, αλλά λειτουργεί χω-
ρίς φορτίο).
Γενικές υποδείξεις ασφαλείας για
ηλεκτρικά εργαλεία
ΠΡΟΕΙΔΟΠΟΙΗΣΗ!
►Διαβάστε όλες τις υποδείξεις ασφαλείας, τις οδηγίες, τις εικόνες
και τα τεχνικά χαρακτηριστικά που συνοδεύουν αυτό το ηλεκτρικό
εργαλείο. Παραλείψεις κατά την τήρηση των παρακάτω οδηγιών μπο-
ρούν να προκαλέσουν ηλεκτροπληξία, πυρκαγιά και/ή σοβαρούς
τραυματισμούς.
Φυλάξτε όλες τις υποδείξεις ασφαλείας και τις οδηγίες για να μπορείτε
να ανατρέξετε σε αυτές μελλοντικά.
Ο χρησιμοποιούμενος σε αυτές τις υποδείξεις ασφαλείας όρος «Ηλεκτρικό
εργαλείο» αναφέρεται σε ηλεκτρικά εργαλεία (με καλώδιο ρεύματος) που
λειτουργούν με ρεύμα και σε ηλεκτρικά εργαλεία (χωρίς καλώδιο ρεύματος)
που λειτουργούν με συσσωρευτή.
1. Ασφάλεια στον χώρο εργασίας
α) Διατηρείτε τον χώρο εργασίας σας καθαρό και φροντίζετε να υπάρ-
χει επαρκής φωτισμός. Η ακαταστασία και οι μη φωτισμένοι χώροι
εργασίας μπορούν να οδηγήσουν σε ατυχήματα.
β) Μην εργάζεστε με το ηλεκτρικό εργαλείο σε περιβάλλον, όπου υπάρ-
χει κίνδυνος έκρηξης, εύφλεκτα υγρά, αέρια ή σκόνες. Τα ηλεκτρικά
εργαλεία δημιουργούν σπινθήρες, οι οποίοι μπορούν να προκαλέσουν
ανάφλεξη στη σκόνη ή στους ατμούς.
γ) Κρατάτε τα παιδιά και άλλα άτομα μακριά κατά τη χρήση του ηλε-
κτρικού εργαλείου. Σε περίπτωση διάσπασης της προσοχής, μπορεί
να χάσετε τον έλεγχο του ηλεκτρικού εργαλείου.
2. Ηλεκτρική ασφάλεια
α) Το βύσμα σύνδεσης του ηλεκτρικού εργαλείου πρέπει να ταιριάζει
στην πρίζα. Το βύσμα δεν επιτρέπεται να τροποποιηθεί με κανέναν
τρόπο. Μη χρησιμοποιείτε βύσματα προσαρμογέων μαζί με γειωμέ-
να ηλεκτρικά εργαλεία. Τα βύσματα που δεν έχουν τροποποιηθεί και
οι κατάλληλες πρίζες μειώνουν τον κίνδυνο ηλεκτροπληξίας.
β) Αποφεύγετε τη σωματική επαφή με γειωμένες επιφάνειες, όπως σωλή-
νες, θερμαντικά σώματα, εστίες και ψυγεία. Υπάρχει αυξημένος κίνδυ-
νος λόγω ηλεκτροπληξίας, όταν το σώμα σας είναι γειωμένο.
γ) Κρατάτε τα ηλεκτρικά εργαλεία μακριά από τη βροχή ή την υγρασία.
Η διείσδυση νερού σε ένα ηλεκτρικό εργαλείο αυξάνει τον κίνδυνο
ηλεκτροπληξίας.
δ) Μη χρησιμοποιείτε το καλώδιο σύνδεσης άσκοπα, π.χ. για να μετα-
φέρετε το ηλεκτρικό εργαλείο, να το κρεμάσετε ή για να αποσυνδέσετε
το βύσμα από την πρίζα. Κρατάτε το καλώδιο σύνδεσης μακριά από
υψηλές θερμοκρασίες, λάδια, αιχμηρές άκρες ή κινούμενα μέρη. Τα
φθαρμένα ή μπερδεμένα καλώδια σύνδεσης αυξάνουν τον κίνδυνο
ηλεκτροπληξίας.

■14 │ GR│CY PAKSP 20-Li A1
ε) Όταν εργάζεστε με ένα ηλεκτρικό εργαλείο σε εξωτερικό χώρο, χρη-
σιμοποιείτε μόνο καλώδια προέκτασης, τα οποία ενδείκνυνται για
εξωτερικούς χώρους. Η χρήση κατάλληλου καλωδίου προέκτασης
για εξωτερικό χώρο μειώνει τον κίνδυνο ηλεκτροπληξίας.
στ) Εάν δεν μπορεί να αποφευχθεί η λειτουργία του ηλεκτρικού εργαλείου
σε υγρό περιβάλλον, χρησιμοποιείτε διακόπτη ασφαλείας.
Η χρήση διακόπτη ασφαλείας μειώνει τον κίνδυνο ηλεκτροπληξίας.
3. Ασφάλεια ατόμων
α) Να είστε προσεκτικοί, προσέχετε τι κάνετε και χρησιμοποιείτε τη λογική
όταν εργάζεστε με ένα ηλεκτρικό εργαλείο. Μη χρησιμοποιείτε ηλε-
κτρικά εργαλεία, εάν είστε κουρασμένοι ή υπό την επήρεια ναρκωτι-
κών, αλκοόλ ή φαρμάκων. Ένα μόνο λεπτό απροσεξίας κατά τη χρή-
ση του ηλεκτρικού εργαλείου αρκεί για να οδηγήσει σε σοβαρούς
τραυματισμούς.
β) Φ
οράτε μέσα ατομικής προστασίας και πάντα γυαλιά προστασίας.
Όταν φοράτε μέσα ατομικής προστασίας, όπως μάσκα για τη σκόνη,
αντιολισθητικά υποδήματα ασφαλείας, κράνος ή προστασία για την
ακοή, ανάλογα με το είδος και τη χρήση του ηλεκτρικού εργαλείου,
μειώνεται ο κίνδυνος τραυματισμών.
γ) Αποφεύγετε τυχόν ακούσια έναρξη λειτουργίας. Βεβαιώνεστε ότι το
ηλεκτρικό εργαλείο έχει απενεργοποιηθεί, προτού το συνδέσετε στην
τροφοδοσία ρεύματος και/ή τον συσσωρευτή, το σηκώσετε ή το
μεταφέρετε. Όταν μεταφέρετε το ηλεκτρικό εργαλείο και έχετε το δάχτυλο
στον διακόπτη ή συνδέετε το ηλεκτρικό εργαλείο ενεργοποιημένο στην
παροχή ρεύματος, μπορεί να προκληθούν ατυχήματα.
δ) Απομακρύνετε εργαλεία ρύθμισης ή μηχανικά κλειδιά, πριν ενεργο-
ποιήσετε το ηλεκτρικό εργαλείο. Ένα εργαλείο ή κλειδί, το οποίο βρί-
σκεται σε ένα περιστρεφόμενο τμήμα του ηλεκτρικού εργαλείου, μπορεί
να οδηγήσει σε τραυματισμούς.
ε) Αποφεύγετε λανθασμένες στάσεις του σώματος. Φροντίζετε για
ασφαλή στάση και διατηρείτε πάντα την ισορροπία. Έτσι, μπορείτε να
ελέγχετε το ηλεκτρικό εργαλείο καλύτερα σε μη αναμενόμενες καταστάσεις.
στ)Φοράτε κατάλληλο ρουχισμό. Μη φοράτε μακριά ρούχα ή κοσμήμα-
τα. Κρατάτε τα μαλλιά και τα ρούχα μακριά από κινούμενα τμήματα.
Τα χαλαρά ρούχα, τα κοσμήματα ή τα μακριά μαλλιά μπορούν να
πιαστούν από κινούμενα τμήματα.
ζ) Εάν μπορούν να συναρμολογηθούν διατάξεις αναρρόφησης και
συλλογής σκόνης, αυτές θα πρέπει να συνδέονται και να χρησιμο-
ποιούνται σωστά. Η χρήση μιας διάταξης αναρρόφησης σκόνης
μπορεί να μειώσει τους κινδύνους από τη σκόνη.
η) Μην υπερεκτιμάτε τον εαυτό σας και μην αγνοείτε τους κανόνες
ασφαλείας για τα ηλεκτρικά εργαλεία, ακόμη και εάν έχετε εξοικειω-
θεί με το ηλεκτρικό εργαλείο μετά από συχνή χρήση. Απρόσεκτες
ενέργειες μπορούν να οδηγήσουν μέσα σε κλάσματα του δευτερολέ-
πτου σε σοβαρούς τραυματισμούς.
4. Χρήση και χειρισμός του ηλεκτρικού εργαλείου
α) Μην καταπονείτε το ηλεκτρικό εργαλείο. Χρησιμοποιείτε για την
εργασία σας το αντίστοιχο ηλεκτρικό εργαλείο. Με το κατάλληλο
ηλεκτρικό εργαλείο εργάζεστε καλύτερα και ασφαλέστερα στο δοθέν
πεδίο απόδοσης.
β) Μη χρησιμοποιείτε ηλεκτρικά εργαλεία, των οποίων ο διακόπτης έχει
υποστεί βλάβη. Ένα ηλεκτρικό εργαλείο, το οποίο δεν μπορεί πλέον
να ενεργοποιηθεί ή απενεργοποιηθεί, είναι επικίνδυνο και πρέπει να
επισκευαστεί.
γ) Τραβάτε το βύσμα από την πρίζα και/ή απομακρύνετε τον αποσπώ-
μενο συσσωρευτή, πριν διεξάγετε ρυθμίσεις στη συσκευή, πριν αλλά-
ξετε μέρη εργαλείων χρήσης ή πριν αποθηκεύσετε το ηλεκτρικό εργα-
λείο. Αυτό το μέτρο ασφαλείας εμποδίζει τη μη ηθελημένη εκκίνηση του
ηλεκτρικού εργαλείου.
δ) Φυλάσσετε τα ηλεκτρικά εργαλεία που δεν χρησιμοποιούνται μακριά
από παιδιά. Μην επιτρέπετε να χρησιμοποιούν το ηλεκτρικό εργα-
λείο άτομα, τα οποία δεν έχουν εξοικειωθεί μαζί του ή δεν έχουν
διαβάσει αυτές τις οδηγίες. Τα ηλεκτρικά εργαλεία είναι επικίνδυνα,
όταν χρησιμοποιούνται από άτομα χωρίς εμπειρία.
ε) Φροντίζετε τα ηλεκτρικά εργαλεία και τα εργαλεία χρήσης με προσο-
χή. Ελέγχετε εάν τα κινούμενα μέρη λειτουργούν σωστά και δεν κολ-
λάνε, εάν κάποια μέρη έχουν σπάσει ή παρουσιάζουν τέτοια βλάβη,
ώστε να επηρεάζεται η λειτουργία του ηλεκτρικού εργαλείου. Τα
εξαρτήματα που έχουν υποστεί βλάβη πρέπει να επισκευάζονται
πριν από τη χρήση του ηλεκτρικού εργαλείου. Πολλά από τα ατυχή-
ματα οφείλονται στην κακή συντήρηση των ηλεκτρικών εργαλείων.
στ)Διατηρείτε τα εργαλεία κοπής αιχμηρά και καθαρά. Τα εργαλεία
κοπής, των οποίων η φροντίδα έχει εκτελεστεί με προσοχή και τα οποία
διαθέτουν αιχμηρές ακμές κοπής, μαγκώνουν λιγότερο και είναι ευκολό-
τερα στον χειρισμό.
ζ) Χρησιμοποιείτε το ηλεκτρικό εργαλείο, τα εργαλεία χρήσης, κλπ.,
σύμφωνα με αυτές τις οδηγίες. Λαμβάνετε υπόψη τις συνθήκες εργα-
σίας και την προς διεξαγωγή ενέργεια. Η χρήση ηλεκτρικών εργαλείων
για διαφορετικές από τις προβλεπόμενες χρήσεις μπορεί να οδηγήσει
σε επικίνδυνες καταστάσεις.
η) Οι χειρολαβές και οι επιφάνειες των εργαλείων πρέπει να είναι στεγνές,
καθαρές, χωρίς λάδια και γράσα. Οι ολισθηρές λαβές και επιφάνειες
δεν επιτρέπουν τον ασφαλή χειρισμό και έλεγχο του ηλεκτρικού εργαλείου
σε απρόβλεπτες καταστάσεις.
5. Χρήση και χειρισμός του επαναφορτιζόμενου
εργαλείου
α) Φορτίζετε τους συσσωρευτές μόνο με φορτιστές που προτείνει ο
κατασκευαστής. Σε περίπτωση χρήσης φορτιστών κατάλληλων για
συγκεκριμένο τύπο συσσωρευτών με διαφορετικούς συσσωρευτές,
υπάρχει κίνδυνος πυρκαγιάς.
β) Χρησιμοποιείτε μόνο τους προβλεπόμενους συσσωρευτές στα ηλε-
κτρικά εργαλεία. Σε περίπτωση χρήσης διαφορετικών συσσωρευτών,
ενδέχεται να προκληθούν τραυματισμοί και πυρκαγιά.
γ) Όταν δεν χρησιμοποιείται ο συσσωρευτής, πρέπει να φυλάσσεται
μακριά από συνδετήρες, νομίσματα, κλειδιά, καρφιά, βίδες ή άλλα
μικρά μεταλλικά αντικείμενα, τα οποία θα μπορούσαν να προκαλέ-
σουν γεφύρωση των επαφών. Τυχόν βραχυκύκλωμα μεταξύ των επαφών
του συσσωρευτή μπορεί να έχει ως επακόλουθο εγκαύματα ή πυρκαγιά.
δ) Σε περίπτωση εσφαλμένης χρήσης, ενδέχεται να εξέλθει υγρό από
τον συσσωρευτή. Αποφεύγετε την επαφή με το υγρό. Σε περίπτωση
τυχαίας επαφής, ξεπλύνετε με νερό. Εάν το υγρό έλθει σε επαφή με
τα μάτια, ζητήστε ιατρική βοήθεια. Το εκρέον υγρό των συσσωρευτών
μπορεί να προκαλέσει δερματικούς ερεθισμούς ή εγκαύματα.
ε) Μη χρησιμοποιείτε κατεστραμμένους ή τροποποιημένους συσσωρευ-
τές. Οι κατεστραμμένοι ή τροποποιημένοι συσσωρευτές έχουν απρόβλε-
πτη συμπεριφορά και ενδέχεται να προκαλέσουν φωτιά, έκρηξη ή τραυ-
ματισμούς.
στ)Μην εκθέτετε τους συσσωρευτές σε φωτιά ή υψηλές θερμοκρασίες.
Η φωτιά ή θερμοκρασίες άνω των 130°C (265°F) μπορεί να οδηγή-
σουν σε έκρηξη.
ζ) Τηρείτε όλες τις οδηγίες σχετικά με τη φόρτιση και μη φορτίζετε ποτέ
τον συσσωρευτή ή το επαναφορτιζόμενο εργαλείο εκτός του εύρους
θερμοκρασιών που αναγράφεται στις οδηγίες χρήσης. Λανθασμένη
φόρτιση ή φόρτιση εκτός του επιτρεπόμενου εύρους θερμοκρασίας
μπορεί να προκαλέσει ζημιά στον συσσωρευτή και να αυξήσει τον
κίνδυνο πυρκαγιάς.
ΠΡΟΣΟΧΗ! ΚΙΝΔΥΝΟΣ ΕΚΡΗΞΗΣ!
Μη φορτίζετε ποτέ μη επαναφορτιζόμενες μπαταρίες.
Προστατεύετε τον συσσωρευτή από υψηλές
θερμοκρασίες, καθώς και π.χ. από συνεχή ηλιακή ακτινοβολία, φωτιά,
νερό και υγρασία. Υπάρχει κίνδυνος έκρηξης.
6. Σέρβις
α) Το ηλεκτρικό εργαλείο σας πρέπει να επισκευάζεται αποκλειστικά
από καταρτισμένο και εξειδικευμένο προσωπικό και μόνο με γνήσια
ανταλλακτικά. Κατά αυτό τον τρόπο, διατηρείται η ασφάλεια του ηλε-
κτρικού εργαλείου.
β) Μη συντηρείτε ποτέ συσσωρευτές που έχουν υποστεί βλάβη. Οποιαδή-
ποτε εργασία συντήρησης συσσωρευτών πρέπει να διεξάγεται αποκλειστικά
από τον κατασκευαστή ή εξουσιοδοτημένα σημεία εξυπηρέτησης πελατών.

GR│CY │ 15 ■
PAKSP 20-Li A1
Υποδείξεις ασφαλείας για φαλτσοπρίονα και
πριόνια κάθετης κοπής
■Τα φαλτσοπρίονα και τα πριόνια κάθετης κοπής προβλέπονται για την
κοπή ξύλου ή προϊόντων από ξύλο και δεν μπορούν να χρησιμοποι-
ηθούν για την κοπή υλικών από σίδηρο, όπως ράβδοι, βραχίονες,
βίδες, κλπ.. Η σκόνη τριβής οδηγεί σε μπλοκάρισμα κινούμενων τμημά-
των, όπως είναι το κάτω προστατευτικό κάλυμμα. Σπινθήρες από την
κοπή καίνε το κάτω προστατευτικό κάλυμμα, την πλάκα εισαγωγής και
άλλα πλαστικά τμήματα.
■Εάν είναι δυνατόν, στερεώνετε το τεμάχιο επεξεργασίας με μέγγενη.
Όταν κρατάτε σφιχτά το τεμάχιο επεξεργασίας με το χέρι, πρέπει να
έχετε πάντα το χέρι σας τουλάχιστον σε απόσταση 100 mm από
κάθε πλευρά της λεπίδας πριονιού. Μη χρησιμοποιείτε αυτό το πριό-
νι για την κοπή τεμαχίων που είναι πολύ μικρά, για να τα σφίξετε ή
να τα κρατήσετε με το χέρι. Όταν το χέρι σας βρίσκεται πολύ κοντά
στη λεπίδα πριονιού, υπάρχει αυξημένος κίνδυνος τραυματισμού λόγω
επαφής με τη λεπίδα πριονιού.
■Το τεμάχιο επεξεργασίας πρέπει να είναι ακίνητο και είτε να έχει
σφιχτεί καλά είτε να πιέζεται κόντρα στον αναστολέα και το τραπέζι.
Μην ωθείτε το τεμάχιο επεξεργασίας στη λεπίδα πριονιού και ποτέ
μην κόβετε χωρίς υποστήριξη. Χαλαρά ή κινούμενα τεμάχια επεξεργα-
σίας μπορούν να εκτοξευτούν προς τα έξω με υψηλή ταχύτητα και να
οδηγήσουν σε τραυματισμούς.
■Μην σταυρώνετε ποτέ το χέρι, μπροστά ή πίσω από τη λεπίδα πριο-
νιού, πάνω από την προβλεπόμενη γραμμή κοπής. Υποστήριξη του
τεμαχίου επεξεργασίας «με σταυρωμένα χέρια», ήτοι συγκράτηση του
τεμαχίου επεξεργασίας δεξιά δίπλα από τη λεπίδα πριονιού με το
αριστερό χέρι ή ανάποδα, είναι πολύ επικίνδυνη.
■Όταν περιστρέφεται η λεπίδα πριονιού, μην πιάνετε πίσω από τον
αναστολέα. Η απόσταση ασφαλείας μεταξύ χεριού και περιστρεφό-
μενης λεπίδας πριονιού (ισχύει και για τις δύο πλευρές της λεπίδας
πριονιού, π.χ. κατά την απομάκρυνση απορριμμάτων ξύλου) δεν
πρέπει ποτέ να είναι μικρότερη από 100 mm. Μπορεί να μην αντιλαμ-
βάνεστε πόσο κοντά βρίσκεται το χέρι σας στην περιστρεφόμενη λεπίδα
πριονιού και να τραυματιστείτε σοβαρά.
■Πριν την κοπή, ελέγχετε το τεμάχιο επεξεργασίας. Εάν το τεμάχιο
επεξεργασίας είναι λυγισμένο ή στραβό, στερεώστε το προς τον
αναστολέα με την κυρτωμένη πλευρά προς τα έξω. Εξασφαλίζετε
πάντα ότι κατά μήκος της γραμμής κοπής δεν υπάρχει κενό μεταξύ
του τεμαχίου επεξεργασίας, του αναστολέα και του τραπεζιού. Λυγι-
σμένα ή στραβωμένα τεμάχια επεξεργασίας μπορούν να συστραφούν ή
να μετατοπιστούν και να προκαλέσουν μάγκωμα της περιστρεφόμενης
λεπίδας πριονιού κατά την κοπή. Στο τεμάχιο επεξεργασίας δεν επιτρέ-
πεται να υπάρχουν καρφιά ή ξένα σώματα.
■Χρησιμοποιήστε το πριόνι μόνο εάν στο τραπέζι δεν υπάρχουν εργα-
λεία, απορρίμματα ξύλου, κλπ.. Στο τραπέζι επιτρέπεται να υπάρχει
μόνο το τεμάχιο επεξεργασίας. Μικρά απορρίμματα, χύδην τεμάχια
ξύλου ή άλλα αντικείμενα που έρχονται σε επαφή με την περιστρεφόμε-
νη λεπίδα, μπορούν να εκτοξευτούν μακριά με υψηλή ταχύτητα.
■Κόβετε κάθε φορά μόνο ένα τεμάχιο επεξεργασίας. Τεμάχια επεξεργα-
σίας σε στοίβα δεν σφίγγονται ή δεν συγκρατούνται κατάλληλα και
μπορούν να προκαλέσουν μάγκωμα της λεπίδας κατά το πριόνισμα
ή να γλιστρήσουν.
■Φροντίζετε πριν τη χρήση ώστε το φαλτσοπρίονο/πριόνι κάθετης
κοπής να ακουμπάει επάνω σε μια ίσια, σταθερή επιφάνεια εργασίας.
Όταν η επιφάνεια εργασίας είναι ίσια και σταθερή, μειώνεται ο κίνδυνος
αστάθειας του φαλτσοπρίονου/πριονιού κάθετης κοπής.
■Προγραμματίζετε την εργασία σας. Σε κάθε αλλαγή της κλίσης της
λεπίδας πριονιού ή της φαλτσογωνίας, προσέχετε ώστε ο προσαρ-
μοζόμενος αναστολέας να είναι σωστά ρυθμισμένος και το τεμάχιο
επεξεργασίας να υποστηρίζεται, χωρίς να υπάρχει επαφή με τη
λεπίδα ή το προστατευτικό κάλυμμα.
Χωρίς να ενεργοποιήσετε το μηχάνημα και χωρίς το τεμάχιο επεξεργασί-
ας στο τραπέζι, προσομοιώστε μια πλήρη κίνηση κοπής της λεπίδας
πριονιού, για να βεβαιωθείτε ότι δεν προκύπτουν εμπόδια ή κίνδυνος
κοπής στον αναστολέα.
■Σε τεμάχια επεξεργασίας που είναι πιο φαρδιά ή μακριά από την
άνω πλευρά του τραπεζιού, φροντίζετε για κατάλληλη υποστήριξη,
π.χ. μέσω επεκτάσεων τραπεζιού ή καβαλέτων. Τεμάχια επεξεργασίας
που είναι πιο μακριά ή φαρδιά από το τραπέζι του φαλτσοπρίονου/
πριονιού κάθετης κοπής, μπορεί να γείρουν εάν δεν στηρίζονται καλά.
Εάν ένα κομμένο τεμάχιο ξύλο ή το τεμάχιο επεξεργασίας γείρει, μπορεί
να ανυψώσει το κάτω προστατευτικό κάλυμμα ή να εκτοξευτεί ανεξέλε-
γκτα μακριά από την περιστρεφόμενη λεπίδα.
■Μη χρησιμοποιείτε άλλα άτομα αντί για επέκταση του τραπεζιού
ή ως επιπλέον υποστήριξη. Μια ασταθής υποστήριξη του τεμαχίου
επεξεργασίας μπορεί να οδηγήσει σε μάγκωμα της λεπίδας.
Επίσης, το τεμάχιο επεξεργασίας μπορεί να μετατοπιστεί κατά τη διάρ-
κεια της κοπής και να τραβήξει εσάς και τον βοηθό σας στην περιστρε-
φόμενη λεπίδα.
■Το κομμένο τεμάχιο δεν επιτρέπεται να πιέζεται κόντρα στην περι-
στρεφόμενη λεπίδα πριονιού. Όταν δεν υπάρχει αρκετός χώρος, π.χ.
κατά τη χρήση κατά μήκος αναστολέων, το κομμένο τεμάχιο μπορεί να
μπλοκάρει με τη λεπίδα και να εκτοξευθεί με δύναμη μακριά.
■Χρησιμοποιείτε πάντα μια μέγγενη ή κατάλληλη διάταξη για να υπο-
στηρίξετε σωστά στρογγυλά υλικά, όπως ράβδους ή σωλήνες.
Οι ράβδοι τείνουν να κυλάνε μακριά κατά την κοπή, οπότε και η λεπίδα
μπορεί να μαγκώσει και το τεμάχιο επεξεργασίας μπορεί να τραβηχτεί
μαζί με το χέρι σας στη λεπίδα.
■Αφήστε τη λεπίδα να φτάσει στις πλήρεις στροφές, προτού κόψετε
μέσα στο τεμάχιο επεξεργασίας. Έτσι, μειώνεται ο κίνδυνος εκτόξευ-
σης μακριά του τεμαχίου επεξεργασίας.
■Εάν το τεμάχιο επεξεργασίας μαγκώσει ή η λεπίδα μπλοκάρει, απε-
νεργοποιήστε το φαλτσοπρίονο/πριόνι κάθετης κοπής. Περιμένετε
μέχρι να ακινητοποιηθούν όλα τα κινούμενα εξαρτήματα, τραβήξτε
το φις δικτύου ή/και βγάλτε έξω τον συσσωρευτή. Στη συνέχεια,
απομακρύνετε το υλικό που έχει μαγκώσει. Εάν συνεχίσετε την κοπή,
παρά την έμφραξη, μπορεί να προκύψει απώλεια του ελέγχου ή ζημιές
στο φαλτσοπρίονο/πριόνι κάθετης κοπής.
■Όταν ολοκληρωθεί η κοπή, αφήστε ελεύθερο τον διακόπτη, κρατή-
στε κάτω την κεφαλή πριονιού και περιμένετε να ακινητοποιηθεί η
λεπίδα, προτού απομακρύνετε το κομμένο τεμάχιο. Είναι πολύ επικίν-
δυνο να πλησιάσετε με το χέρι κοντά στη λεπίδα που συνεχίζει ακόμα
να κινείται.
■Κρατάτε καλά τη χειρολαβή όταν εκτελείτε μια ατελή κοπή ή όταν
αφήνετε τον διακόπτη, προτού η κεφαλή πριονιού φτάσει στην κατώ-
τερη θέση της. Μέσω της επίδρασης φρεναρίσματος του πριονιού, η
κεφαλή πριονιού μπορεί να τραβηχτεί απότομα προς τα πίσω και έτσι
να οδηγήσει σε κίνδυνο τραυματισμού.
■Διατηρείτε τον χώρο εργασίας σας καθαρό. Αναμίξεις υλικών είναι
ιδιαίτερα επικίνδυνες. Η σκόνη ελαφριών μετάλλων μπορεί να αναφλεγεί
ή να εκραγεί.
■Μη χρησιμοποιείτε λεπίδες πριονιού που είναι στομωμένες, με ρωγ-
μές, στραβές ή φθαρμένες. Λεπίδες πριονιού με στομωμένες ή λαν-
θασμένα ευθυγραμμισμένες οδοντώσεις προκαλούν, λόγω πολύ
μικρού κενού πριονίσματος, αυξημένη τριβή, μάγκωμα της λεπίδας
πριονιού και αντεπιστροφή.
■Μη χρησιμοποιείτε λεπίδες πριονιού από ταχυχάλυβα υψηλής αντο-
χής (χάλυβας HSS). Τέτοιες λεπίδες πριονιού μπορούν να σπάσουν
εύκολα.
■Χρησιμοποιείτε πάντα λεπίδες πριονιού σωστού μεγέθους και με
αντίστοιχη οπή υποδοχής (π.χ. σε σχήμα ρόμβου ή στρογγυλές).
Οι λεπίδες πριονιού, οι οποίες δεν ταιριάζουν στα εξαρτήματα συναρ-
μολόγησης, κινούνται ακανόνιστα και οδηγούν σε απώλεια του ελέγχου.
■Μην απομακρύνετε ποτέ υπολείμματα κοπής, πριονίδια, κτλ., από την
περιοχή κοπής, ενώ το ηλεκτρικό εργαλείο λειτουργεί. Βάζετε πάντα
τον βραχίονα του εργαλείου πρώτα σε θέση ηρεμίας και απενεργοποιείτε
το ηλεκτρικό εργαλείο.
■Μετά την εργασία, μην πιάνετε τη λεπίδα πριονιού, προτού κρυώσει.
Η λεπίδα πριονιού υπερθερμαίνεται κατά την εργασία.

■16 │ GR│CY PAKSP 20-Li A1
Συμπληρωματικές οδηγίες
■ Χρησιμοποιείτε μόνο λεπίδες με διαμέτρους που συμφωνούν με τα
αναγραφόμενα στο πριόνι.
■ Κατά την επεξεργασία ξύλου ή υλικών, από τα οποία δημιουργείται
σκόνη επικίνδυνη για την υγεία, η συσκευή πρέπει να συνδέεται σε μια
αντίστοιχη, ελεγμένη διάταξη απορρόφησης.
■ Κατά το πριόνισμα ξύλου, φοράτε μάσκα προστασίας από τη σκόνη.
■ Χρησιμοποιείτε μόνο τις προτεινόμενες λεπίδες πριονιού.
■ Να φοράτε πάντα προστασία για την ακοή.
■ Αποφεύγετε υπερθέρμανση των ακμών των οδοντώσεων.
■ Αποφεύγετε, κατά το πριόνισμα πλαστικού, το λιώσιμο του πλαστικού.
■ Χρησιμοποιείτε τη σωστή λεπίδα, ανάλογα με το υλικό που πρόκειται
να πριονίσετε.
Συμπληρωματικές υποδείξεις σύμφωνα με το πρότυπο EN 847-1
■ Τα εργαλεία αντιστοιχούν στο πρότυπο EN 847-1.
■ Τα εργαλεία επιτρέπεται να χρησιμοποιούνται αποκλειστικά από εκπαι-
δευμένα και έμπειρα άτομα που είναι εξοικειωμένα με τον χειρισμό εργα-
λείων.
■ Δεν επιτρέπεται η υπέρβαση του μέγιστου αριθμού στροφών που ανα-
γράφεται στο εργαλείο. Εφόσον αναγράφεται, τηρείτε το εύρος αριθμού
στροφών.
■ Απαγορεύεται η χρήση λεπίδων δισκοπρίονου με ρωγμές στο σώμα
(δεν επιτρέπεται η επισκευή).
■ Δεν επιτρέπεται η χρήση εργαλείων με ορατές ρωγμές.
■ Τα εργαλεία πρέπει να καθαρίζονται τακτικά.
■ Τμήματα εργαλείων από κράματα ελαφρού μετάλλου που έχουν λερω-
θεί, π.χ. με ρητίνη, επιτρέπεται να καθαρίζονται μόνο με διαλυτικά, τα
οποία δεν επηρεάζουν τις μηχανικές ιδιότητες αυτών των υλικών.
■ Χρησιμοποιείτε μόνο καθορισμένες από τον κατασκευαστή λεπίδες, οι
οποίες, εάν προορίζονται για την κοπή ξύλου ή παρόμοιων υλικών,
πληρούν το πρότυπο EN847-1.
■ Χρησιμοποιείτε μόνο λεπίδες πριονιού που επισημαίνονται με ίδιο ή
υψηλότερο αριθμό στροφών από τον αναφερόμενο επάνω στο ηλεκτρι-
κό εργαλείο.
Συναρμολόγηση και στερέωση εργαλείων και εξαρτημάτων εργαλείων
■ Τα εργαλεία και τα σώματα αυτών πρέπει να είναι έτσι στερεωμένα, ώστε
να μην μπορούν να λασκάρουν κατά τη λειτουργία.
■ Κατά τη συναρμολόγηση των εργαλείων, πρέπει να εξασφαλίζεται ότι η
σύσφιξη γίνεται στην πλήμνη του εργαλείου ή στην επιφάνεια σύσφιξης
του εργαλείου και ότι οι λεπίδες δεν έρχονται σε επαφή μεταξύ τους ή
με τα στοιχεία σύσφιξης.
■ Οι βίδες και τα παξιμάδια στερέωσης πρέπει να σφίγγονται με τη χρή-
ση κατάλληλων κλειδιών κλπ. και με την καθορισμένη από τον κατασκευ-
αστή ροπή στρέψης (9–12 Nm).
■ Μια επιμήκυνση του κλειδιού ή το σφίξιμο με τη βοήθεια χτυπημάτων
σφυριού δεν επιτρέπεται.
■ Οι επιφάνειες σύσφιξης πρέπει να καθαρίζονται από ρύπους, γράσα,
λάδια και νερό.
■ Οι βίδες σύσφιξης πρέπει να σφίγγονται σύμφωνα με τις οδηγίες του
κατασκευαστή.
■ Για τη ρύθμιση της διαμέτρου οπής των λεπίδων δισκοπρίονων στη
διάμετρο ατράκτου του μηχανήματος, επιτρέπεται να χρησιμοποιούνται
μόνο σταθερά τοποθετημένοι δακτύλιοι, π.χ. πρεσαρισμένοι δακτύλιοι ή
δακτύλιοι που συγκρατούνται μέσω κόλλησης. Η χρήση χύδην δακτυλίων
δεν επιτρέπεται.
Επισκευή των εργαλείων
■ Η επισκευή των εργαλείων δεν επιτρέπεται. Κίνδυνος λόγω έλλειψης
ισορροπίας!
Χειρισμός
Χειρίζεστε τα εργαλεία με ασφάλεια προς αποφυγή τραυματισμών:
■ Φοράτε μέσα ατομικής προστασίας και ιδιαίτερα γάντια προστασίας.
■ Προσέχετε να έχετε μια ασφαλή στάση.
■ Να φοράτε εφαρμοστό ρουχισμό.
■ Μετά την τοποθέτηση του εργαλείου, να τοποθετείτε πάλι σωστά τις
διατάξεις προστασίας του μηχανήματος, εφόσον υπάρχουν.
■ Ένας ειδικός πρέπει να διεξάγει δοκιμαστική λειτουργία.
Εικονογράμματα
Φοράτε προστατευτικά γάντια!
Φοράτε προστασία για την αναπνοή!
Φοράτε γυαλιά προστασίας!
Φοράτε προστασία για την ακοή!
Προσοχή! Κίνδυνος τραυματισμού!
Μην πιάνετε στην κινούμενη λεπίδα πριονιού!
2
1
1. Ρυθμίστε τη ρυθμιζόμενη
ράγα αναστολέα 3.
2. Ρυθμίστε τη γωνία κλίσης.
ΠΡΟΕΙΔΟΠΟΙΗΣΗ!
► Κατά τη διάρκεια λειτουργίας, δημιουργείται ένα ηλεκτρομαγνητικό
πεδίο από το ηλεκτρικό εργαλείο. Υπό ορισμένες συνθήκες, αυτό το
πεδίο μπορεί να επηρεάσει ενεργά ή παθητικά τυχόν ιατρικά εμφυτεύ-
ματα.
Προς αποφυγή κινδύνου σοβαρών ή θανατηφόρων τραυματισμών,
συστήνουμε τα άτομα με ιατρικά εμφυτεύματα να συμβουλεύονται τον
γιατρό και τον κατασκευαστή του ιατρικού εμφυτεύματος, προτού
χρησιμοποιήσουν το ηλεκτρικό εργαλείο.
Υποδείξεις ασφαλείας για φορτιστές
■ Αυτή η συσκευή επιτρέπεται να χρησιμοποιείται από
παιδιά από 8 ετών και άνω, καθώς και από άτομα με
περιορισμένες φυσικές, αισθητηριακές ή νοητικές ικα-
νότητες ή ελλείψεις από άποψη εμπειρίας και γνώσεων,
εφόσον επιβλέπονται ή έχουν ενημερωθεί αναφορικά
με την ασφαλή χρήση της συσκευής και κατανοούν
τους πιθανούς κινδύνους. Τα παιδιά δεν επιτρέπεται
να παίζουν με τη συσκευή. Ο καθαρισμός και η συ-
ντήρηση χρήστη δεν επιτρέπεται να διεξάγονται από
παιδιά χωρίς επίβλεψη.
■ Εάν το καλώδιο σύνδεσης δικτύου της συσκευής
υποστεί βλάβη, πρέπει να αντικατασταθεί από τον
κατασκευαστή ή το τμήμα εξυπηρέτησης πελατών ή
ένα αντιστοίχως εξειδικευμένο άτομο, ώστε να απο-
φευχθούν τυχόν κίνδυνοι.
Ο φορτιστής είναι κατάλληλος για λειτουργία μόνο σε
εσωτερικούς χώρους.
This manual suits for next models
1
Table of contents
Languages:
Other Parkside Performance Saw manuals

Parkside Performance
Parkside Performance PAKSP 20-Li A1 User manual

Parkside Performance
Parkside Performance PSSAP 20-Li C3 User manual

Parkside Performance
Parkside Performance PAKSP 20-Li A1 User manual

Parkside Performance
Parkside Performance PSSAP 2028 A1 User manual

Parkside Performance
Parkside Performance PAKSP 20-Li A1 User manual