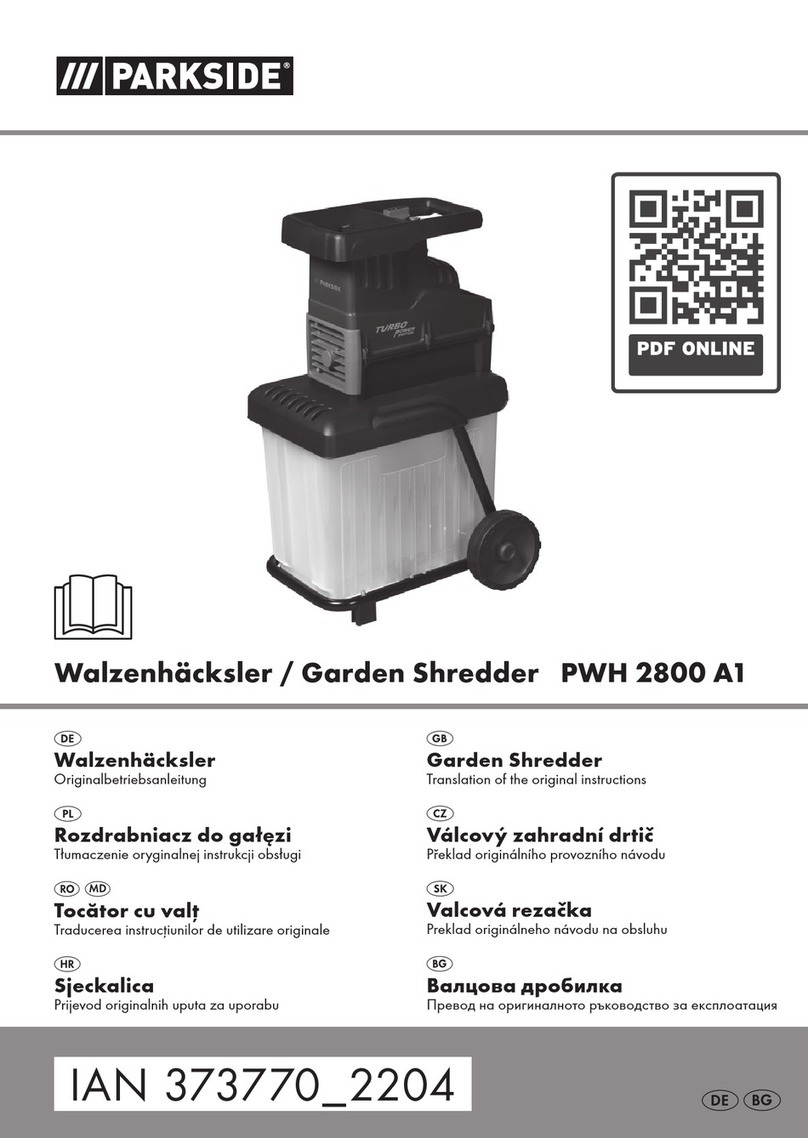
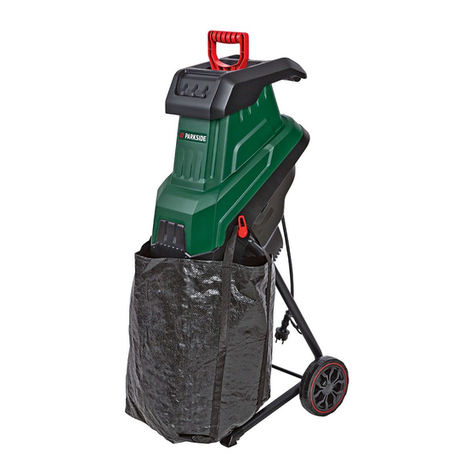
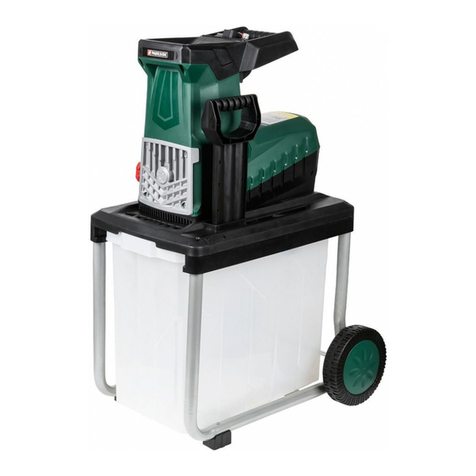
Parkside PWH 2800 B2 User manual

8
IAN 374132_2104
CHAT
WALZENHÄCKSLER
Bedienungs- und Sicherheitshinweise
Originalbetriebsanleitung
DE
BE
WALSHAKSELAAR
Bedienings- en veiligheidsinstructies
Vertaling van de originele handleiding
NL
GARDEN SHREDDER
Operating and Safety Instructions
Translation of Original Operating Manual
GB IE
BE
BROYEUR DE VÉGÉTAUX À ROTOR
Consignes d‘utilisation et de sécurité
Traduction des instructions d’origine
FR
ROZDRABNIACZ WALCOWY
Wskazówki dotyczące obsługi i bezpieczeństwa
Tłumaczenie oryginalnej instrukcji obsługi
PL
VALCOVÁ REZAČKA
Pokyny pre obsluhu a bezpečnostné pokyny
Preklad originálneho návodu na obsluhu
SK
VÁLCOVÝ ZAHRADNÍ DRTIČ
Pokyny pro obsluhu a bezpečnostní pokyny
Překlad originálního provozního návodu
CZ
TRITURADORA DE RAMAS
Instrucciones de utilización y de seguridad
Traducción del manual de instrucciones original
ES
KVÆRN
Drifts- og sikkerhedsinstruktioner
Oversættelse af den originale driftsvejledning
DK
VÁGÓHENGERES APRÍTÓGÉP
Kezelési és biztonsági útmutató
Az eredeti használati útmutató fordítása
HU
SEKLJALNIK V OBLIKI VALJA
Navodila za upravljanje in varnostna opozorila
Prevod originalnega navodila za uporabo
SI
TRITURATORE
Indicazioni per l’uso e per la sicurezza
Traduzione delle istruzioni d’uso originali
IT MT
GARDEN SHREDDER PWH 2800 B2
WALZENHÄCKSLER PWH 2800 B2
BROYEUR DE VÉGÉTAUX À ROTOR PWH 2800 B2

GB / IE Operating and Safety Instructions Page 01
DE / AT / CH Bedienungs- und Sicherheitshinweise Seite 14
FR / BE Consignes d‘utilisation et de sécurité Page 28
NL / BE Bedienings- en veiligheidsinstructies Pagina 42
CZ Pokyny pro obsluhu a bezpečnostní pokyny Strana 56
PL Wskazówki dotyczące obsługi i bezpieczeństwa Strona 69
SK Pokyny pre obsluhu a bezpečnostné pokyny Strana 84
ES Instrucciones de utilización y de seguridad Página 98
DK Drifts- og sikkerhedsinstruktioner Side 112
IT / MT Indicazioni per l’uso e per la sicurezza Pagina 125
HU Kezelési és biztonsági útmutató Oldal 139
SI Navodila za upravljanje in varnostna opozorila Stran 154
Klappen Sie vor dem Lesen die Seite mit den Abbildungen aus und machen Sie sich anschließend mit allen Funktionen des Gerätes vertraut.
DE AT CH
Avant de lire le mode d‘emploi, ouvrez la page contenant les illustrations et familiarisez-vous ensuite avec toutes les fonctions de l‘appareil.
FR BE
Vouw vóór het lezen de pagina met de afbeeldingen open en maak u vertrouwd met alle functies van het apparaat.
NL BE
Před čtením si otevřete stranu s obrázky a potom se seznamte se všemi funkcemi přístroje.
CZ
Before reading, unfold the page containing the illustrations and familiarise yourself with all functions of the device.
GB IE
Antes de empezar a leer abra la página que contiene las imágenes y, en seguida, familiarícese con todas las funciones del dispositivo.
ES
Przed przeczytaniem proszę rozłożyć stronę z ilustracjami, a następnie proszę zapoznać się z wszystkimi funkcjami urządzenia.
PL
Pred čítaním si odklopte stranu s obrázkami a potom sa oboznámte so všetkými funkciami prístroja.
SK
Før du læser, vend siden med billeder frem og bliv bekendt med alle apparatets funktioner.
DK
Prima di leggere aprire la pagina con le immagini e prendere confidenza con le diverse funzioni dell’apparecchio.
IT MT
Olvasás előtt kattintson az ábrát tartalmazó oldalra és végezetül ismerje meg a készülék mindegyik funkcióját.
HU
Pred branjem odprite stran s slikami in se nato seznanite z vsemi funkcijami naprave.
SI

1
1
2
3
4
5
6
7
8
9
10
11
12
19
SCHUTZSCHALTER
ZUM ZURÜCKSETZEN
DRÜCKEN
CIRCUIT BREAKER
PRESS TO RESET
DISJONCTEUR
APPUYEZ POUR
RÉINITIALISER
SCHUTZSCHALTER
ZUM ZURÜCKSETZEN
DRÜCKEN
CIRCUIT BREAKER
PRESS TO RESET
DISJONCTEUR
APPUYEZ POUR
RÉINITIALISER
2
11
12
2
3
3
6 6
c
a b
c
18

5
13 16 14
15
46
13
616 15 717
14
7
8
b
9
16
16

89
8
9
11
20
10
5b
13
22
23
5a
5
12
21
5
21a
21a

1GB/IE
Table of contents: Page:
1. Explanation of the symbols on the device.........................................................................................................................................................2
2. Introduction..........................................................................................................................................................................................................4
3. Device description...............................................................................................................................................................................................4
4. Scope of delivery................................................................................................................................................................................................4
5. Proper use............................................................................................................................................................................................................4
6. Safety information...............................................................................................................................................................................................5
7. Technical data.....................................................................................................................................................................................................8
8. Before commissioning.........................................................................................................................................................................................8
9. Assembly..............................................................................................................................................................................................................9
10. Operation............................................................................................................................................................................................................9
11. Electrical connection.........................................................................................................................................................................................10
12. Cleaning and maintenance..............................................................................................................................................................................11
13. Storage..............................................................................................................................................................................................................12
14. Disposal and recycling .....................................................................................................................................................................................12
15. Troubleshooting.................................................................................................................................................................................................12
16. Warranty certificate..........................................................................................................................................................................................13
17. Exploded view................................................................................................................................................................................................167
18. Declaration of conformity..............................................................................................................................................................................168

2GB/IE
1. Explanation of the symbols on the device
GB IE Observe all safety instructions before use.
GB IE Read the whole text of the operating instructions thoroughly before start up.
GB IE Wear safety goggles and hearing protection.
GB IE Wear work gloves.
GB IE Do not use as a step.
GB IE Keep other people away.
GB IE Protect the device from rain and do not leave outdoors in the rain!
GB IE Danger! Switch off the machine and unplug the mains plug before making any adjust-
ments, cleaning the machine or if the cable is tangled or damaged.
GB IE Danger! Rotating blades. Keep hands and feet outside of the openings when the ma-
chine is running.
GB IE Guaranteed sound power level.
GB IE Locking mechanism opened.
GB IE Locking mechanism closed.
GB IE The product complies with the applicable European directives.
GB IE Protection class II - double insulation

3GB/IE
GB IE Setting of the pressure plate
GB IE
Direction of roller rotation
- Entry
- Stop
- Reverse
GB IE Weight
GB IE Branch diameter
GB IE Roller rpm
GB IE Wait until all machine parts have come to a complete stop before touching them.
mAttention! GB IE We have marked points in these operating instructions that impact your safety with this
symbol.

4GB/IE
2. Introduction
MANUFACTURER:
Scheppach GmbH
Günzburger Straße 69
D-89335 Ichenhausen
DEAR CUSTOMER,
We hope your new tool brings you much enjoyment and suc-
cess.
NOTE:
In accordance with the applicable product liability laws, the
manufacturer of this device assumes no liability for damage to
the device or caused by the device arising from:
• Improper handling,
• Failure to comply with the operating instructions.
• Repairs carried out by third parties, unauthorised special-
ists.
• Installing and replacing non-original spare parts,
• Application other than specified,
• Failure of the electrical system in the event of the electrical
regulations and VDE provisions 0100, DIN 13 / VDE0113
not being observed.
Please consider:
Read through the complete text in the operating manual be-
fore installing and commissioning the device.
This operating manual should help you to familiarise yourself
with your device and to use it for its intended purpose.
The operating manual includes important instructions for safe,
proper and economic operation of the device, for avoiding
danger, for minimising repair costs and downtimes, and for
increasing the reliability and extending the service life of the
device.
In addition to the safety instructions in this operating manual,
you must also observe the regulations applicable to the opera-
tion of the device in your country.
Keep the operating manual package with the machine at all
times and store it in a plastic cover to protect it from dirt and
moisture. They must be read and carefully observed by all
operating personnel before starting the work.
The device may only be used by personnel who have been
trained to use it and who have been instructed with respect
to the associated hazards. The required minimum age must
be observed.
In addition to the safety instructions in this operating manual
and the separate regulations of your country, the generally
recognised technical rules relating to the operation of such
machines must also be observed.
We accept no liability for accidents or damage that occur due
to a failure to observe this manual and the safety instructions.
3. Device description
1. Filling funnel
2. On switch
3. Off switch
4. Upper section of machine
5. Adjusting screw
5a. Fixing screw (pre-mounted)
5b. Handle for the adjusting screw
6. Support foot
7. Wheel
8. Drip tray
9. Safety switch
10. Mains cable
11. Switch for direction of roll rotation
12. Overload switch
13. Wheel axle
14. Locknut
15. Wheel sleeve
16. Washer
17. Wheel cap
18. Status LED
19. Stopper holder
20. Strain relief
21. Gearing cover
21a. Screws
22. Cutting roller
23. Pressure plate
a.) Spanner
b.) Allen key
c.) Plunger
4. Scope of delivery
• Upper section of machine
• Plunger
• Wheel axle
• Collecting container with safety switch
• Wheel (2x)
• Wheel cap (2x)
• Locknut (2x)
• Wheel sleeve (2x)
• Washer (4x)
• Spanner
• Allen key (5 mm)
• Handle for the adjusting screw
• Operating manual
5. Proper use
The device is designed for shredding fibrous or woody garden
waste, such as hedge and tree cuttings, branches, bark or fir
cones.
Proper use includes the shredding of:
• All types of branches up to a maximum diameter of 42
mm (depending on the type of wood and freshness)
• Wilting, moist, garden waste that has already been stored
for several days, alternating with branches.

5GB/IE
Any other use not expressly permitted in these instructions may
result in damage to the device and pose a serious danger to
the user.
The roller shredder must not be filled with stones,
glass, metal, bones, plastics, or fabric waste.
The device is not suitable for the shredding of household, bed-
ding and flower waste.
The machine may only be used in the intended manner. Any
use beyond this is improper. The user/operator, not the manu-
facturer, is responsible for damages or injuries of any type
resulting from this.
An element of the intended use is also the observance of the
safety instructions, as well as the assembly instructions and
operating information in the operating manual.
Persons who operate and maintain the machine must be fa-
miliar with it and must be informed about potential dangers.
The liability of the manufacturer and resulting damages are
excluded in the event of modifications of the machine.
The machine may only be operated with original parts and
original accessories from the manufacturer.
The safety, operating and maintenance specifications of the
manufacturer, as well as the dimensions specified in the techni-
cal data, must be observed.
Please observe that our equipment was not designed with the
intention of use for commercial or industrial purposes. We as-
sume no guarantee if the equipment is used in commercial or
industrial applications, or for equivalent work.
6. Safety information
IMPORTANT:
READ CAREFULLY BEFORE USE.
KEEP FOR YOUR RECORDS.
This device can cause serious injuries in the
event of misuse. Before working with the
device, read the operating manual care-
fully and familiarise yourself with all control
parts. If you are uncertain, ask a specialist
for advice. Store the operating manual in a
safe place and pass them on to any subse-
quent user so that the information is avail-
able at any time.
This device is not intended to be used by
children, persons with reduced physical,
sensory or mental capabilities or lack of ex-
perience and knowledge, or persons who
are not familiar with the instructions.
Children may not play with the device.
Cleaning and user maintenance must not be
carried out by children.
The device must not be used at altitudes
higher than 2000 m.
Training:
• Read through the instructions carefully.
Familiarise yourself with the control de-
vices and the proper use of the machine.
• Never allow persons who are not famil-
iar with these instructions or children to
use the machine. Local regulations may
restrict the age of the user.
• It should be noted that it is the user who
is responsible for accidents or hazards to
other persons or their property.
• Children must not be left unattended, to
ensure they do not play with the device.
• Never allow children or other persons
who do not know the operating manual
to use the device. Local provisions can
determine the minimum age of the opera-
tor.
• Avoid abnormal posture.
• Switch the device off and pull out the
mains plug. Wait until all machine parts
have come to a complete stop before
touching them.
• Do not work with the device when you
are tired or are unfocused or after taking
alcohol or tablets. Always take breaks
from work in good time.
Observe the noise protection and local reg-
ulations.
Attention!
The following basic safety measures must
be observed when using power tools for
protection against electric shock, and the
risk of injury and fire:
Preparation:
• Hearing protection and safety goggles
must always be worn while the machine
is in operation.
• Always wear sturdy footwear and long
trousers when operating the machine. Do
not operate the machine barefoot or in
light sandals. Avoid wearing loose cloth-
ing or clothing with hanging strings or
ties.
• Only use the device outdoors (i.e. not
against a wall or another rigid object)
and on a solid, level surface.
• Do not use the machine on a surface
paved with gravel where ejected mate-
rial could cause injuries.

6GB/IE
• Before switching on the machine, always
check that the shredding unit, shredding
unit screws and other attachments are
well secured and that the protective de-
vices and shields are in place. Replace
worn and damaged parts in sets to avoid
imbalance. Worn or damaged labels
must be replaced.
• Before use, always inspect the connec-
tion and extension lead for signs of dam-
age or ageing. If the lead is damaged
during use, it must be disconnected from
the mains supply immediately. DO NOT
TOUCH THE LEAD BEFORE IT IS DIS-
CONNECTED FROM THE MAINS. Do
not use the machine if the lead is dam-
aged or worn.
• Never use the device when persons and
especially if children or animals are near-
by.
• Only use spare or accessory parts which
are supplied or recommended by the
manufacturer. Using third-party parts
leads to a loss of guarantee claims.
• Do not leave the device running unat-
tended and store the device in a dry
place, out of the reach of children.
• Only connect the device to a properly
earthed mains. Sockets and extension
cables must have a functional protective
conductor.
• When using outdoors, the device must
be connected to a socket with a residual
current device (RCD) with a rated leak-
age current of no more than 30mA.
• Always stay outside of the ejection zone
when commissioning the machine.
Operation:
• Before starting the device, make sure that
the filling funnel is empty.
• Keep your face, head, hair and body a
safe distance from the filling funnel.
• Do not place hands, other parts of the
body and clothing in the filling chamber,
the ejector chute or in the vicinity of other
moving parts.
• Always pay attention to your balance
and firm footing. Do not overreach.
When feeding material, never stand on
a higher level than the level of the base
of the machine.
• Do not stay in the ejection area when op-
erating the machine.
• Ensure that hard objects such as metal,
stones, glass, bottles, cans or other for-
eign objects are not contained in the ma-
terial being thrown in.
• If foreign objects get into the cutting tool
or the machine makes unusual noises or
vibrates abnormally, switch the motor off
immediately and allow the machine to
run down. Disconnect the machine from
the mains and take the following steps
before restarting and operating the ma-
chine:
-Check the machine for damage
-Check the parts for firm seating, retight-
en them if necessary.
-Repair or replace any parts with parts
that are of equivalent quality.
• Do not let processed material pile up
within the ejection area; this could pre-
vent proper ejection and cause a kick-
back of the material through the filling
funnel.
• In the event of blockages in the loading
or discharge area of the machine, switch
off the motor and pull the mains plug be-
fore removing material remaining in the
filling funnel or ejector chute. Make sure
that the motor is free of waste and other
accumulations to safeguard the motor
from damage or possible fire. Remem-
ber that when the starter mechanism with
motorised machines is commissioned, the
cutting tool also starts operating.
• Do not reach into the filling funnel during
operation. The device continues to run
for a short time after switching off.
• Warning! Never operate the machine
with faulty protective devices or covers
or without protective devices or with a
damaged or worn cable.
• Keep the motor clean of debris and other
accumulations to prevent damage to it or
possible fire.
• Do not transport or tilt the device with the
motor running.
• Stop the machine and remove the plug
from the power socket. Ensure that all
moving parts have come to a complete
stop:
-when the device is not in use, is being
transported or is unattended;
-before freeing a jammed blade.
-before clearing a blockage or cleaning
blocked ducts;
-when checking the device, it is raining or
when removing blockages;
-when cleaning or performing mainte-
nance or changing accessories;
-when the power or extension cable is
damaged or tangled;
-when you want to move or lift the device;
-when foreign bodies get into the device,
in the event of unusual noises or vibra-
tions (check the device for damage be-
fore restarting).

7GB/IE
Maintenance and storage:
• When the machine is stopped for ser-
vicing, inspection, storage or for replac-
ing accessories, switch off the power
source, disconnect the machine from the
mains and ensure that all moving parts
have run out. Allow the machine to cool
down before inspections, adjustments,
etc. Maintain the machine with care and
keep it clean.
• Store the machine in a dry place and out
of reach of children.
• Always allow the machine to cool down
before storing it.
• When servicing the shredder, be aware
that even though the motor is switched
off due to the interlocking function of the
guard, the shredder can still be moved.
• Replace worn or damaged parts for
safety reasons. Only use original spare
parts and accessories.
• Never attempt to bypass the interlocking
function of the safety guard.
Additional safety instructions for
machines with collecting contain-
ers:
• Switch off the machine before attaching
or removing the collecting container.
Recommendation
• The machine should be supplied via a re-
sidual current device (RCD) with a trigger
current of no more than 30 mA.
• Do not use the device when it is raining
or in bad weather conditions. Only work
in daylight or with good lighting.
• Make sure all covers and deflectors are
in their place and in good working condi-
tion.
• Warning! Danger of injury from moving
dangerous parts!
• Have a secure footing at all times on
slopes and to walk, not run.
• Do not touch moving dangerous parts
until the machine has been disconnected
from the mains power connection and
the moving dangerous parts have come
to a complete stop.
• Be careful not to connect a damaged
cable to the power supply or touch a
damaged cable before it has been dis-
connected from the power supply, as
damaged cables can cause active parts
to be touched.
• Avoid operating the machine in bad
weather conditions, especially when
there is a risk of lightning.
Caution!
In this way you avoid damage to the device
and any personal injury resulting from it:
• Clean the ventilation openings regularly
and follow the maintenance instructions.
• Do not overload your device. Only work
in the specified power range. Do not use
low-output machines for heavy work.
Do not use your device for purposes for
which it is not intended.
• Do not switch off the device until the fill-
ing funnel is completely empty, otherwise
the device could become blocked and
may not start up again.
• Do not try to repair the device yourself
unless you have been trained to do so.
All work that is not specified in this oper-
ating manual may only be carried out by
our service centre.
Electrical safety
Caution:
To avoid accidents and injuries due to elec-
tric shock:
• Use the intended strain relief for attach-
ing the extension cable.
• Check the condition of the machine,
power supply and extension leads regu-
larly before starting work. If the device is
damaged, it must not be put into opera-
tion.
• Keep extension cables away from dan-
gerous moving parts to avoid damage to
the extension cable, which can lead to
contact with active parts.
• Do not use damaged cables, couplings
and connectors or connection cables
that do not comply with the regulations.
If the mains cable is damaged, pull the
plug out of the socket immediately. Nev-
er touch the mains cable as long as the
mains plug is plugged in.
• If the connection cable is damaged then
it must be replaced by the manufacturer
or their customer services personnel or
by a similarly qualified person, in order
to avoid hazards.
• Do not use the device if the switch can-
not be switched on and off. Damaged
switches must be replaced by our service
centre.
• Only use splash-proof extension cables
that are approved for outdoor use. The
conductor core cross-section of the ex-
tension cable must be at least 2.5 mm2.
Always unroll a cable drum completely
before use. Check the cable for damage.
• Do not use the cable to pull the plug out
of the outlet. Protect the cable from heat,
oil and sharp edges.

8GB/IE
• Only have damage to extension cables
repaired by a qualified electrician.
Warning!
This power tool generates an electromag-
netic field during operation. This field can
impair active or passive medical implants
under certain conditions. In order to pre-
vent the risk of serious or deadly injuries,
we recommend that persons with medical
implants consult with their physician and the
manufacturer of the medical implant prior to
operating the power tool.
Residual risks
The machine has been built according to the
state-of-the-art and the recognised technical
safety requirements. However, individual re-
sidual risks can arise during operation.
• Health hazard due to electrical power,
with the use of improper electrical con-
nection cables.
• Before performing setting or mainte-
nance work, release the start button and
pull out the power plug.
• Furthermore, despite all precautions hav-
ing been met, some non-obvious residual
risks may still remain.
• Residual risks can be minimised if the
“Safety instructions” and “Proper use”
are observed along with the whole of the
operating instructions.
• Avoid accidental start-ups of the ma-
chine: The operating button may not
be pressed when inserting the plug in a
socket.
• Use the tool that is recommended in this
operating manual. This is how to ensure
that your machine provides optimum per-
formance.
• Keep your hands away from the work
area, when the machine is in operation.
Behaviour in an emergency
Initiate the necessary first aid measures for
the injury and seek medical assistance as
quickly as possible.
Protect the injured person from further harm
and keep them calm. A first-aid kit accord-
ing to DIN 13164 should always be avail-
able at the workplace in the event of an ac-
cident. Any material taken from the first aid
kit must be refilled immediately.
When you request assistance, provide the
following information
1. Place of the accident
2. Nature of the accident
3. Number of injured
4. Nature of the injuries
5. Wait for further questions
7. Technical data
Dimensions L x W x H .............................630 x 450 x 910 mm
Cutting roller Ø.................................................................87 mm
Number of blades ..................................................................... 8
Capacity of the collection container....................................60 l
Weight .............................................................................20.5 kg
max. branch diameter......................................................42 mm
Motor............................................................. 220-240V∼50Hz
Nominal consumption P1..............................................2800 W
Cutting roller speed........................................................60 min-1
Operating mode*..................................................................P40
Protection category ..............................................................IPX4
Protection class .......................................................................... II
Technical changes reserved!
* Continuous operation with intermittent load (4 min. load - 6
min. idle)
Wear hearing protection.
Excessive noise can result in a loss of hearing.
Noise data
Sound pressure level LpA............................................82.9 dB(A)
Uncertainty KpA .................................................................... 3 dB
Measured sound power level LWA.............................95.1 dB(A)
Guaranteed sound power level LWA ............................98 dB(A)
Uncertainty KWA ................................................................... 3 dB
Note:
The specified sound levels have been determined in accord-
ance with a standardised test procedure and can be used to
compare different power tools with one another. In addition,
these values are suitable for estimating the stresses for the user
resulting from the noise in advance.
8. Before commissioning
m ATTENTION!
Always make sure the device is ful-
ly assembled before commission-
ing!
• Open the packaging and carefully remove the device.
• Remove the packaging material, as well as the packaging
and transport safety devices (if present).
• Check whether the scope of delivery is complete.
• Check the device and accessory parts for transport dam-
age.
• In the event of complaints the carrier must be informed im-
mediately. Later claims will not be recognised.
• If possible, keep the packaging until the expiry of the war-
ranty period.
• Familiarise yourself with the product by means of the oper-
ating instructions before using for the first time.

9GB/IE
• With accessories as well as wearing parts and replace-
ment parts use only original parts. Replacement parts can
be obtained from your dealer.
• When ordering please provide our article number as well
as type and year of manufacture for your equipment.
• Before connecting the machine, make certain that the data
on the type plate matches with the mains power data.
mDANGER
The device and the packaging are
not children‘s toys! Do not let chil-
dren play with plastic bags, films
or small parts! There is a danger of
choking or suffocating!
9. Assembly
mWARNING!
Always pull out the mains plug before carry-
ing out adjustments on the device.
9.1 Fitting the support feet (Fig. 3/4)
1. Position the roller shredder so that the support feet (6) can
be folded out by 180°.
2. Guide the wheel axle (13) into the intended position on
the support feet (6). (Fig. 4)
9.2 Fitting the wheels (7) (fig. 5/6)
1. Assemble both wheels (7), as shown in fig. 6, using the
lock nuts (14), the wheel sleeves (15) and the wash-
ers (16). Use the tool supplied to tighten the wheels (7).
NOTE: If the axle rotates when tightening, use the Allen
key (b) to hold in place.
2. After tightening the locknut (14), fit the wheel cap (17) on
the wheel (7).
9.3 Installing the collecting container (Fig. 7, 8, 9)
1. Set the safety switch (9) on the collecting container (8) to
its lowest position (Fig. 7).
2. Slide the collecting container (8) along the guide rail into
the machine stand. The collecting container (8) can only
be pushed in one direction.
3. To lock the collecting container (8), push the safety switch
(9) on the collecting container (8) back up as far as it will
go (Fig. 8; 9).
9.4 Fitting the handle for the adjusting screw (5b)
(Fig. 10)
The adjusting screw (5) can be used to adjust the pressure
plate (23) inside the device. The exact setting of the pressure
plate (23) is explained under point 10.9.
1. Remove the pre-fitted fixing screw (5a).
2. Put the handle for the adjusting screw (5b) on the free end
of the adjusting screw (5).
3. Tighten the pre-fitted fixing screw (5a).
10. Operation
The roller shredder has a powerful electric motor, overload
protection and a restart lock for additional safety. A roller sys-
tem is used as the cutting system, which works very quietly and
automatically pulls in the chopped material. The robust chassis
provides stability and good mobility of the device.
Please refer to the following descriptions for the function of
the controls.
Attention!
The roller shredder can only be
started when the collecting con-
tainer (8) is pushed into the ma-
chine stand and the safety switch
(9) is in the top position.
10.1 Connecting the extension cable (Fig. 11)
1. Form a loop from the end of the extension cable and hook
it into the strain relief (20) on the mains cable (10).
2. Connect the extension cable.
10.1.1 Status LED (18) (Fig . 2)
The status LED (18) shows you whether your device is con-
nected to the power supply.
If the status LED (18) lights up, your device is supplied with
power and can start up.
10.2 Switching on and off (Fig. 2)
1. On switch (2): The roller shredder is started when this but-
ton is pressed.
2. Off switch (3): The roller shredder is stopped when this
button is pressed.
10.3 Switch for direction of roller rotation (11)
(Fig. 2)
• Switch position “I” Entry:
-By pressing this button, the device runs in continuous op-
eration. Material is drawn in.
• Switch position “0” Stop:
-Device stops.
• Switch position “II” Reverse:
-You can change the direction of rotation of the cutting
roller (Reverse) to remove jammed chopped material. Set
the switch for the roller rotation direction to “II”. As soon
as you press and hold the on switch (2) (jog mode), the
device runs in reverse. Trapped chopped material is re-
leased.
10.4 Overload switch (12)
The motor is equipped with an overload switch (12). If the
roller shredder is overloaded, the overload switch switches off
automatically to protect the roller shredder from overheating.
1. If the overload switch has triggered, switch the roller
shredder off at the off switch (3) and wait until the roller
shredder has cooled down.
2. Now press the overload switch (12) and switch the roller
shredder on again.

10 GB/IE
10.5 Overload protection
If the motor is overloaded, e.g. if the roller is blocked by
branches that are too thick, the device switches off automati-
cally.
10.6 Working notes
mAttention!
Keep a sufficient distance from the
device when shredding, as long
branches can kick out when being
pulled in. There is a danger of in-
jury.
• Ensure that the collecting container (8) is pushed properly
into the machine stand and that the safety switch (9) is in
the top position.
• Connect the roller shredder to the power supply (see
10.1).
• Put the roller shredder into operation using the on switch
(2) (see 10.2).
• Hold branches when feeding them into the device until
they are automatically drawn in.
• Alternate the chopping of wilting garden waste and
branches that have been stored for several days with
branches in order to prevent clogging.
• Before shredding, remove roots from attached soil debris
and stones.
• Do not shred soft, moist material such as kitchen waste,
but compost it directly.
• Allow the roller shredder to fully shred the
chopped material introduced before you in-
troduce any new materials.
• Do not use your hands to push down the chopped mate-
rial, only use a specialist plug (c) for this or other chopped
material.
• Switch off the roller shredder after the work has been com-
pleted and disconnect it from the power supply.
• Save a few dry branches until the end to use them to help
clean the device.
• Do not switch off the device until all the chopped material
has passed through the cutting roller area. Otherwise, the
cutting roller may jam when restarting.
10.7 Unblocking
ATTENTION:
If the material becomes jammed, first press
the off switch (3) to stop the device.
1. Press the roller rotation direction switch (11) to position
“II”.
2. Start the device by pressing the on switch (2).
3. The device runs in jog mode. As long as the switch for the
roller rotation direction is held in position “II”, the cutting
roller runs in reverse.
4. Trapped chopped material is released.
5. Replace the direction of rotation again to continue shred-
ding (see 10.3).
10.8 Emptying the collecting container
Empty the collecting container in good time. Note that the col-
lecting container under the ejector chute fills unevenly!
1. Switch off the device and remove the plug from the socket.
2. Place the safety switch (9) on the collecting container (8)
in its lowest position.
3. Pull out the collecting container (8) and empty it.
4. Make sure that the area of the safety switch (9) is free of
wood splinters before you push the collecting container
(8) back in.
5. Replace the collecting container (8) and push the safety
switch (9) back up to the stop.
10.9 Adjusting the pressure plate
The pressure plate has been preset at the factory.
The running-in process of a new machine may
make it necessary to readjust the pressure plate
at shorter intervals at the beginning.
You can recognise the right time to readjust the
pressure plate by the fact that the chopped mate-
rial is only slightly crushed and still hangs togeth-
er in a chain.
1. Empty the collection container (8) and put the roller shred-
der into operation.
2. Slowly rotate the adjusting screw (5) clockwise until slight
grinding noises can be heard. The cutting roller is brought
approx. 0.50 mm closer to pressure plate with a clock-
wise half-turn of the adjusting screw (5).
3. The pressure plate is correctly set, as soon as no grinding
noise is audible.
4. Note: Metal chips may be produced by adjusting the
pressure plate. Chopped material with metal chips is haz-
ardous waste and must NOT be composted. To avoid this
hazardous waste, empty and clean the collection contain-
er (8) immediately after setting the pressure plate.
5. Check the setting of the pressure plate by shredding a few
branches on a trial basis. Properly dispose this chopped
material, which could possibly contain metal chips.
Note:
If the shredder blade touches the
pressure plate, the pressure plate
is recut and small metal chips can
fall out of the ejection opening. This
is not a defect, but readjustment
may only be made to the extent
necessary, otherwise the pressure
plate will wear out prematurely.
11. Electrical connection
The electrical motor installed is connected and
ready for operation. The connection complies
with the applicable VDE and DIN provisions. The
customer‘s mains connection as well as the exten-
sion cable used must also comply with these regu-
lations.

11GB/IE
11.1 Damaged electrical connection cable
The insulation on electrical connection cables is often dam-
aged.
This may have the following causes:
• Pressure points, where connection cables are passed
through windows or doors.
• Kinks where the connection cable has been improperly
fastened or routed.
• Places where the connection cables have been cut due to
being driven over.
• Insulation damage due to being ripped out of the wall
outlet.
• Cracks due to the insulation ageing.
Such damaged electrical connection cables must not be used
and are life-threatening due to the insulation damage.
Check the electrical connection cables for damage regularly.
Ensure that the connection cables are disconnected from elec-
trical power when checking for damage.
Electrical connection cables must comply with the applicable
VDE and DIN provisions. Only use connection cables with the
designation H07RN-F.
The printing of the type designation on the connection cable
is mandatory.
Connection type Y
If the mains connection cable of this device is damaged, it
must be replaced by the manufacturer, their service depart-
ment or a similarly qualified person to avoid dangers.
11.2 AC motor
• The mains voltage must be 220-240 V∼.
• An extension cable with too small a conductor cross-sec-
tion causes a significant reduction in the performance of
the gardening tool. Cables up to 25 m long must have a
cross section of at least 3 x 1.5 mm2, cables over 25 m
long must have a cross section of at least 2.5 mm2.
Connections and repair work on the electrical equipment may
only be carried out by electricians.
• The product fulfils the requirements of EN 61000-3-11
and may only be used at the following connection points:
This means that use of the product at any freely selectable
connection points is not allowed.
• Given unfavourable conditions in the power supply the
product can cause the voltage to fluctuate temporarily.
• The product is intended exclusively for use at connection
points that have a continuous current carrying capacity of
the mains of at least 100A per phase.
• As the user, you are required to ensure, in consultation
with your electric power company if necessary, that the
connection point at which you wish to operate the product
meets the requirement named above.
For single-phase AC motors, we recommend a fuse rating of C
16A or K 16A for machines with a high starting current (from
3000 watts)!
12. Cleaning and maintenance
Attention!
Pull out the mains plug before all mainte-
nance and cleaning work.
Have work which is not described in these operat-
ing instructions carried out by one of our author-
ised customer service centres. Use only original
parts.
Wear gloves when handling the cutting roller.
Before all maintenance and cleaning work, switch the device
off, pull out the mains plug and wait for the cutting roller to
come to a standstill.
12.1 Replacingthecuttingrollerandpressureplate
(Fig. 12 + 13)
WARNING! Risk of cuts!
Always wear work gloves before working
on the blade.
1. Switch off the device and remove the plug from the socket.
2. Turn the adjusting screw (5) approx. 2 turns anti-clock-
wise.
3. Loosen the four screws (21a) with the Allen key provided
and remove the gear cover (21) from the device.
4. Carefully pull the cutting roller (22) off the motor shaft.
5. Remove the pressure plate (23).
6. Remove dirt from the motor shaft and lightly lubricate it.
7. Place the new cutting roller (22) in the same position on
the shaft. When doing so, ensure that the cutting roller
(22) is correctly aligned (note the curvature of the blade
teeth).
8. Re-insert the pressure plate (23).
9. Insert the gearbox cover (21) and retighten the screws
(21a).
10. Adjust the pressure plate as described in point 10.9.
General cleaning and maintenance work
Do not splash the roller shredder with water.
Danger due to electric shock!
• Always keep the device, the wheels and the ventilation
openings clean. Use a brush or cloth to clean, but do not
use cleaning agents or solvents.
• Check the device, in particular the protective devices, for
damage such as loose, worn or damaged parts before
each use. Check all nuts, pins and screws for firm seating.
• Check the covers and protective devices for damage and
correct seating. Replace them if necessary.
• Keep the device dry and out of the reach of children. Do
not cover the device with nylon bags as moisture could
form.
Connections and repairs
Connections and repair work on the electrical equipment may
only be carried out by electricians.

12 GB/IE
Please provide the following information in the
event of any enquiries:
• Type of current for the motor
• Data of machine type plate
• Data of motor type plate
Service information
With this product, it is necessary to note that the following
parts are subject to natural or usage-related wear, or that the
following parts are required as consumables.
Wearing parts*: Carbon brushes, cutting roller, pressure plate
* may not be included in the scope of supply!
With accessories as well as wearing parts and replacement
parts use only original parts:
Carbon brushes: 3904409008
Cutting roller: 3904409009
Pressure plate: 3904409010
13. Storage
Store the device and its accessories in a dark, dry and frost-
free place that is inaccessible to children. The optimum stor-
age temperature lies between 5 and 30 ˚C.
Store the power tool in its original packaging.
Cover the power tool to protect it from dust or moisture. Store
the operating manual with the power tool.
14. Disposal and recycling
The device is supplied in packaging to avoid transport dam-
ages. This packaging is raw material and can thus be used
again or can be reintegrated into the raw material cycle.
The device and its accessories are made of different materi-
als, such as metals and plastics. Take defective components to
special waste disposal sites. Check with your specialist dealer
or municipal administration!
The packaging is wholly composed of environ-
mentally-friendly materials that can be disposed
of at a local recycling centre.
Contact your local refuse disposal authority for
more details of how to dispose of your worn-out
electrical devices.
Old devices must not be disposed of with house-
hold waste!
This symbol indicates that this product must not be dis-
posed of together with domestic waste in compliance
with the Directive (2012/19/EU) pertaining to waste
electrical and electronic equipment (WEEE). This product must
be handed over at the intended collection point. This can be
done, for example, by returning it when purchasing a similar
product or delivering it to an authorised collection point for the
recycling of old electrical and electronic devices. Improper
handling of waste equipment may have negative consequenc-
es for the environment and human health due to potentially
hazardous substances that are often contained in electrical
and electronic equipment. By properly disposing of this prod-
uct, you are also contributing to the effective use of natural
resources. You can obtain information on collection points for
waste equipment from your municipal administration, public
waste disposal authority, an authorised body for the disposal
of waste electrical and electronic equipment or your waste
disposal company.
15. Troubleshooting
Fault Possible cause Remedy
Motor does not start Collecting container not in correct position Insert collecting container correctly and check safety
switch
Motor is overloaded Switch the roller shredder on again
No mains voltage Have the socket, cable, lead and plug checked by a
qualified electrician (see Electrical connection)
Garden waste is not being
drawn in
Cutting roller moves counterclockwise Switch direction of rotation
Chopped material is too soft Push in the chopped material with a special plug for the
roller shredder
Cutting roller is blocked Unblock
Chopped material hang-
ing together like a chain
Pressure plate not adjusted correctly Readjusting the pressure plate

13GB/IE
16. Warranty certificate
Dear Customer,
All of our products undergo strict quality checks to ensure that they reach you in perfect condition. In the unlikely event that your device devel-
ops a fault, please contact our service department at the address shown on this guarantee card. Of course, if you would prefer to call us then
we are also happy to offer our assistance under the service number printed below. Please note the following terms under which guarantee
claims can be made:
• These guarantee terms cover additional guarantee rights and do not affect your statutory warranty rights. We do not charge you for this
guarantee.
• Our guarantee only covers problems caused by material or manufacturing defects, and it is restricted to the rectification of these defects
or replacement of the device. Please note that our devices have not been designed for use in commercial, trade or industrial applications.
Consequently, the guarantee is invalidated if the equipment is used in commercial, trade or industrial applications or for other equivalent
activities. The following are also excluded from our guarantee: compensation for transport damage, damage caused by failure to comply
with the installation/assembly instructions or damage caused by unprofessional installation, failure to comply with the operating instruc-
tions (e.g. connection to the wrong mains voltage or current type), misuse or inappropriate use (such as overloading of the device or use
of non-approved tools or accessories), failure to comply with the maintenance and safety regulations, ingress of foreign bodies into the
device (e.g. sand, stones or dust), effects of force or external influences (e.g. damage caused by the device being dropped) and normal
wear resulting from proper operation of the device.
The guarantee is rendered null and void if any attempt is made to tamper with the device.
• The guarantee is valid for a period of 3 years starting from the purchase date of the device. Guarantee claims should be submitted be-
fore the end of the guarantee period within two weeks of the defect being noticed. No guarantee claims will be accepted after the end
of the guarantee period. The original guarantee period remains applicable to the device even if repairs are carried out or parts are re-
placed. In such cases, the work performed or parts fitted will not result in an extension of the guarantee period, and no new guarantee
will become active for the work performed or parts fitted. This also applies when an on-site service is used.
• In order to assert your guarantee claim, please contact the service partner shown below. If the complaint is within the guarantee period,
we will provide you with a return slip, with which you can return your defective device free of charge to us. It would help us if you could
describe the nature of the problem in as much detail as possible. If the defect is covered by our guarantee then your device will either
be repaired immediately and returned to you, or we will send you a new device.
Of course, we are also happy offer a chargeable repair service for any defects which are not covered by the scope of this guarantee or for
units which are no longer covered. To take advantage of this service, please send the device to our service address.
Service-Hotline (GB): Service-Hotline (IE):
00800 4003 4003 00800 4003 4003
(0,00 EUR/Min.) (0,00 EUR/Min.)
Service-Email (GB): Service-Email (IE):
Service Address (GB): Service Address (IE):
Forest Park & Garden LetMeRepair
Coed Court, Taffsmead Road 1 Langlands Court / Kelvin South Business Park
Treforest, Ind. Estate, Pontypridd CF375SW East Kilbride G75 0YB
At www.lidl-service.com you can download this and many more manuals, product videos plus installation soft-
ware.
The QR code takes you directly to the Lidl service page (www.lidl-service.com) and you can open your operat-
ing manual by entering the article number (IAN) 374132_2104.

14 DE/AT/CH
Inhalt: Seite:
1. Erklärung der Symbole auf dem Gerät............................................................................................................................................................15
2. Einleitung ...........................................................................................................................................................................................................17
3. Gerätebeschreibung.........................................................................................................................................................................................17
4. Lieferumfang......................................................................................................................................................................................................17
5. Bestimmungsgemäße Verwendung..................................................................................................................................................................17
6. Sicherheitshinweise ...........................................................................................................................................................................................18
7. Technische Daten..............................................................................................................................................................................................22
8. Vor Inbetriebnahme ..........................................................................................................................................................................................22
9. Montage............................................................................................................................................................................................................22
10. Bedienung..........................................................................................................................................................................................................23
11. Elektrischer Anschluss........................................................................................................................................................................................24
12. Reinigung und Wartung ...................................................................................................................................................................................25
13. Lagerung............................................................................................................................................................................................................25
14. Entsorgung und Wiederverwertung.................................................................................................................................................................25
15. Störungsabhilfe .................................................................................................................................................................................................26
16. Garantieurkunde...............................................................................................................................................................................................27
17. Explosionszeichnung...................................................................................................................................................................................... 167
18. Konformitätserklärung.................................................................................................................................................................................... 168

15DE/AT/CH
1. Erklärung der Symbole auf dem Gerät
DE AT CH Beachten Sie vor dem Gebrauch sämtliche Sicherheitshinweise.
DE AT CH Lesen Sie vor der Inbetriebnahme den kompletten Text der Bedienungsanleitung durch.
DE AT CH Schutzbrille und Gehörschutz tragen.
DE AT CH Arbeitshandschuhe tragen.
DE AT CH Nicht als Stufe verwenden.
DE AT CH Andere Personen fernhalten.
DE AT CH Gerät vor Regen schützen und bei Regen nicht im Freien stehen lassen!
DE AT CH
Gefahr! Schalten Sie die Maschine aus und ziehen Sie den Netzstecker, bevor Sie
Einstellungen vornehmen, die Maschine reinigen oder wenn das Kabel verwickelt oder
beschädigt ist.
DE AT CH Gefahr! Rotierende Messer. Halten Sie Hände und Füße außerhalb der Öffnungen,
während die Maschine läuft.
DE AT CH Garantierter Schallleistungspegel.
DE AT CH Verriegelung geöffnet.
DE AT CH Verriegelung geschlossen.
DE AT CH Das Produkt entspricht den geltenden europäischen Richtlinien.
DE AT CH Schutzklasse II - Doppelisolierung
This manual suits for next models
1
Table of contents
Languages:
Other Parkside Paper Shredder manuals
Popular Paper Shredder manuals by other brands

ATIKA
ATIKA AMF 2500 Original instructions

Fellowes
Fellowes AutoMax AutoMax 200C instructions

Hurricane
Hurricane HMH 200 Original operating instructions

Swingline
Swingline Stack-and-Shred 250X instruction manual

KRUG+PRIESTER
KRUG+PRIESTER IDEAL 5009-2 CC operating instructions

Vicko
Vicko PC101 instruction manual