manuals.online logo
Brands
  1. Home
  2. •
  3. Brands
  4. •
  5. Parkside
  6. •
  7. Power Tools
  8. •
  9. Parkside 312142 User manual

Parkside 312142 User manual

IAN 312142
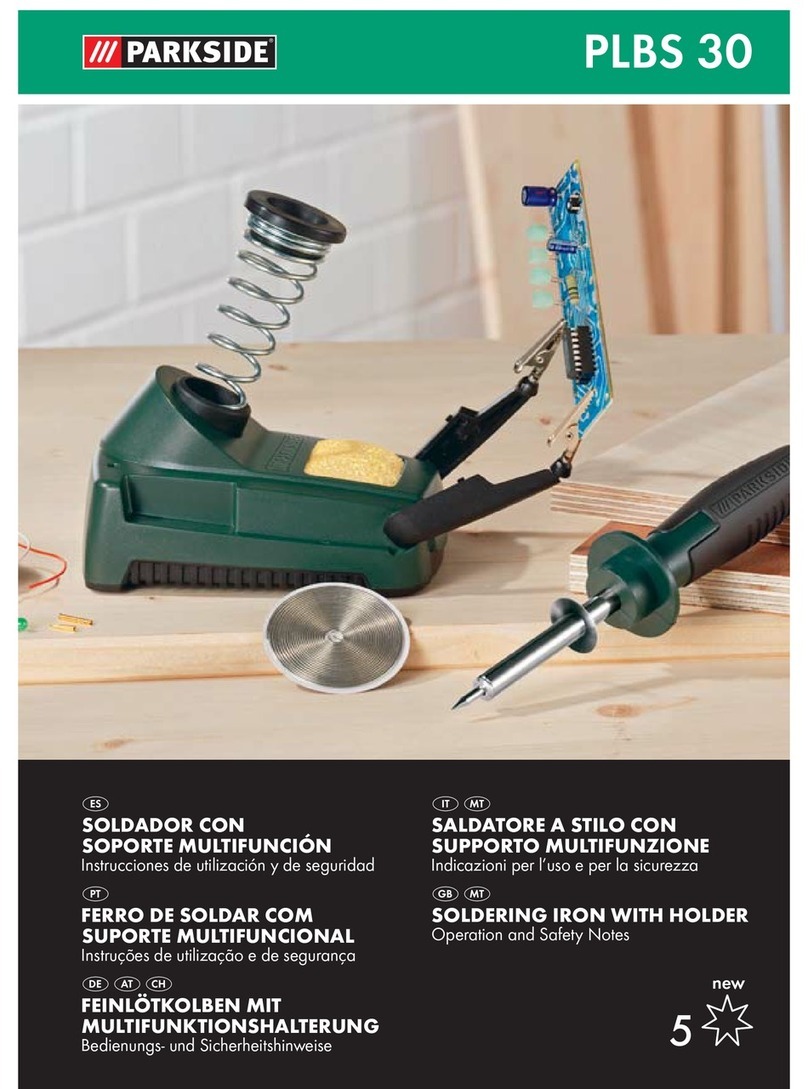
SOLDERING IRON SET
PLBS 30 B2
Operation and Safety Notes
E
D
A
B
C

4
1
5
2
3
15
13
14
12
11
6
8
9
10
7
03
Important!
Read these instructions carefully so as to familiarise yourself with the
appliance. Keep these instructions for future reference. In case the user
changes, the operating instructions must also be passed on to the new user.
Table of contents
Symbols used..........................................................................................................................................................................................05
1. Introduction......................................................................................................................................... 06
2. Technical specifications................................................................................................................ 08
Contents.......................................................................................................................................................................................................08
Features........................................................................................................................................................................................................08
Technical specifications for mod. no. PLBS 30 B2.................................................................................................08
Scope of use............................................................................................................................................................................................08
3. Before use............................................................................................................................................ 09
Assembling the soldering stand (fig. A/B)....................................................................................................................09
Cleaning sponge and adjustable workpiece holders.........................................................................................09
Accessory compartment................................................................................................................................................................09
Fitting and replacing tips (fig. C)...........................................................................................................................................09
4. Using the soldering iron ............................................................................................................. 10
Switching on and off........................................................................................................................................................................10
Working with the device (fig. D / E).................................................................................................................................. 10
Woodburning pen...............................................................................................................................................................................11
Storage conditions ..............................................................................................................................................................................11
Cleaning.......................................................................................................................................................................................................11
Troubleshooting..................................................................................................................................................................................... 12
5. Disposal..................................................................................................................................................12
6. Warranty...............................................................................................................................................13
7. Service .....................................................................................................................................................14
Follow the warnings and safety
instructions! Caution hot
Read the operating manual Caution risk of fire
Wear eye protection No eating or drinking
Wear protective gloves No smoking
Risk of electric shock Do not inhale poisonous
fumes
Symbols used
h

04
Congratulations on the purchase of your new product. You have chosen a high quality
product with this purchase. These operating instructions form an integral part of this product.
They contain important instructions on safety, use and disposal of the product. Please
familiarise yourself with all operating and safety instructions before using the product. Only
use the product as described and for the stated purpose. If the product is passed on to a
third party, please provide all documents to the third party together with the product.
1. Introduction
- This appliance may be used by children aged from 8 years
and above and by persons with reduced physical, sensory
or mental capabilities or lack of experience and knowledge
if they have been given supervision or instruction concerning
use of the appliance in a safe way and understand the
hazards involved. Children must not play with the tool.
Cleaning and user maintenance shall not be made by
children without supervision.
To prevent the risk of injury, damaged mains cables may only
be replaced by the manufacturer, by customer service or by a
similarly qualified person.
Allow the soldering iron to cool down completely after use
before you put it away. WARNING! The soldering iron must
be stored in the soldering stand when not in use.
Do not use the soldering iron if the handle, the mains cable or
the mains plug are damaged. Never open the soldering gun's
housing!
Safety instructions for your soldering iron
Follow the safety instructions contained in this
manual. Failure to follow the safety warnings and
instructions may result in electric shock, burns, fire or
toxic fumes.
h
05
Do not expose the soldering iron to moisture or rain.
- We recommend that you work in the vicinity of the mains socket
so that you can quickly pull the plug from the socket in the event
of an emergency.
Make sure that the tip is correctly fitted before heating the
soldering iron. The tip must be screwed in as far as it will go and
tightened by hand.
Never heat up the soldering iron without a soldering tip fitted.
- The soldering tip may only be removed or changed when it is
cold and when the soldering iron is off.
- Avoid contact between the hot parts of the soldering iron and
the plastic parts of the soldering iron stand.
- Do not touch the hot soldering iron tip, melted solder or hot
components while soldering: risk of burns! The soldering stand
can become hot when the soldering iron is placed on it. Danger
of burns!
Only use the device in well ventilated rooms. Toxic fumes can
be produced when soldering, which can lead to damage to
the mucous membranes and/or chronic respiratory illness.
Additionally, we recommend that you wear eye protection,
respiratory protection, protective gloves and protective clothing.
Solder can contain lead. Do not eat, drink or smoke while
soldering. Always wash your hands thoroughly after finishing
work.
Always disconnect the appliance from the mains after finishing
work!
Do not cool the soldering iron by rinsing it with water!
06
Contents
2. Technical specications
Soldering iron
Soldering stand
Soldering iron holder
Solder wire
• Cleaning sponge
• 2 soldering tips (1x pre-assembled)
• 4 Woodburning tips
Features
Soldering stand
Cleaning sponge
Adjustable workpiece holders
Accessory compartment
Handle
Mains cable with BS plug
Solder
Tip holder
Pointed soldering tip
Flat soldering tip
Universal woodburning tip I
Woodburning tip
Universal woodburning tip II
Tapered burning tip
Soldering iron holder
3
1
4
2
5
6
7
8
9
14
15
12
13
11
10
Rated voltage 230 V ~ / 50 Hz
Rated power 30 W
Solder Ø max. 2 mm
Technical specifications for mod. no. PLBS 30 B2
Scope of use
The soldering iron is designed for soft soldering of electrical wires and circuit boards as well
as use as a woodburning pen.
The soldering iron set may be used for only in accordance with its intended purpose. Any
other use is forbidden.
07
Assembling the soldering stand (fig. A/B)
Cleaning sponge and adjustable workpiece holders
3. Before use
• Fit the soldering iron holder (15) to the soldering stand (1).
• After sliding the soldering iron holder (15) as far as it will go into the hole (1), turn it
clockwise to fix it in place.
• For convenience the cleaning sponge (2) can be placed in the space provided on the
soldering stand (1). Moisten the soldering sponge (2) slightly before use.
• The soldering stand (1) is equipped with two adjustable workpiece holding clamps (3),
which are handy when working an wires and similar workpieces.
Accessory compartment
• The soldering stand is fitted with a useful accessory compartment for instance for storage
of the soldering tips.
Fitting and replacing tips (fig. C)
deCAUTION - DANGER OF BURNS!
Always allow the soldering iron to cool down completely before
changing the tip!
Select a suitable tip for your application.
• The pointed soldering tip is particularly suitable for point soldering and thin cables.
• The flat soldering tip is particularly suitable for light electrical work.
• The woodburning tips are suitable for a wide range of woodburning jobs.
The tip holder (8) and the tips (9-14) are threaded. This ensures quick and easy fitting and
replacement of the tips.
• Screw the required tip (9-14) firmly into the tip holder.
08
Switching on and off
• Connect the soldering iron to the mains to switch it on and to heat it up.
• Disconnect the soldering iron from the mains to switch it off and to cool it down.
4. Using the soldering iron
deCAUTION DANGER OF BURNS!
The soldering iron, the soldering tip and the soldering iron holder
remain hot for some time after disconnection from the mains!
Working with the device (fig. D / E)
• Connect the mains cable (6) with a suitable mains supply and store the soldering iron with
the tip in the tool holder (15) of the tool stand (1). Allow the soldering iron to heat up. This
can take approximately 3 to 5 minutes depending on the required working temperature.
• Before soldering the soldering tip has to be tinned. Heat up a new or a soldering tip that
has been cleaned with the cleaning sponge (2) and coat it by making contact with the
solder wire.
• Before starting work on the a particular workpiece and/or type of material, check for
suitability by testing the soldering iron on a similar piece of (scrap) material.
• Clean the parts you wish to join before starting to solder.
- Touch the edge of the flux-cored solder wire on to the very end of the soldering tip (6) to
melt the solder wire. The workpiece is coated with the flux, which flows out of the solder
wire, allowing the solder to join the metal.
• If the soldering iron is used for longer periods we recommend that you clean the tip
occasionally with the cleaning sponge (2) and re-tin the tip if necessary. Use a de-
soldering braid (not supplied) to clean the joint, to de-solder and to remove excess
solder from the joint. Cover the excess solder with the de-soldering braid and heat up the
soldering tip (9). The melting solder is soaked up by the de-soldering braid.
09
Woodburning pen
• Firstly, make a sketch of the desired pattern on your workpiece with a pencil or
alternatively apply a ready-made template to the workpiece.
• Types of wood with smooth surfaces are particularly suitable for marking.
• When marking wood with a rough surface, be aware that it can be difficult to guide the tip
along the line required. In this case the surface should be sanded first.
• A wide variety of patterns can be created with the marking tips and stamps supplied.
• A sooty deposit can build up on the tip or the stamp during use. Use fine sandpaper to
remove the deposits and to keep the tips clean. A clean tip is essential for precise and
accurate work.
• If the soldering iron set is not to be used keep it at a safe, cool, dry and well-ventilated
place out of the reach of children.
• Allow the appliance to cool down completely before cleaning.
Storage conditions
deCAUTION - DANGER OF BURNS! Allow the
soldering iron to cool completely before cleaning. To avoid
damage, do not use aggressive cleaning material, metal brushes
or sharp objects such as knives, etc.
• Clean the device with a soft, slightly damp cloth if required. Ensure that no moisture enters
the device.
• Clean the soldering tips with the help of the cleaning sponge included in the contents.
Cleaning
10
This product was manufactured and tested with care. In the unlikely event of a fault the
machine must be repaired by an authorised customer service centre.
This symbol indicates that this product may not be disposed of together with domestic
waste in compliance with the (2012/19/EC) directive pertaining to waste electrical
and electronic devices (WEEE). This product must be handed in at an designated
collection point. This can occur, for example, by returning it when a similar product
is purchased or by handing it in at an authorised collecting point for the recycling
of waste electrical and electronic equipment. Owing to potentially hazardous
substances that are frequently contained in waste electronic equipment, incorrect
handling of waste equipment may have a negative impact on the environment and
on the health of human beings. By disposing of this product correctly, you are also
contributing towards an efficient use of natural resources. Information on collecting
points for waste equipment can be obtained from your local authority, the public
waste disposal authority, an authorised institution for the disposal of waste electrical
and electronic equipment or the waste collection services.
5. Disposal
Troubleshooting
Fault Possible cause Troubleshooting
Soldering iron does not
heat up.
No power supply. Check that the mains supply
(socket) functions correctly.
Ask a competent person for advice
if necessary.
Mains cable or
plug damaged.
Have the mains cable replaced
by the manufacturer or the
manufacturer's representative.
The temperature of the
soldering tip is too low.
Soldering tip is loose. Disconnect the machine from the
mains. Allow the soldering iron to
cool down. Screw the soldering tip
firmly into the tip holder.
The solder does not run
smoothly on the soldering
iron.
The soldering tip is not
hot enough.
Wait until the soldering iron is hot
enough.
Allow the machine
to cool down completely and
check whether the soldering tip is
loose.
11
Warranty provided by Walter Werkzeuge Salzburg GmbH
Dear customer,
This appliance comes with a 3 year warranty from the date of purchase. In case of defects in
the product you may be entitled to legal claims against the seller of the product. These legal
claims are not restricted by the following warranty.
Conditions of warranty
The warranty period begins with the date of purchase. Please preserve the original sales
receipt. This document is required as proof of purchase. If a material or fabrication defect
occur in this product within three years from the date of purchase, the product shall be
repaired or replaced free of cost at our discretion. Within the three year period the warranty
requires the defective product and the purchase document (sales receipt) to be provided with
a brief written description of where the defect lies and when it occurred.
If the defect is covered by our warranty, the repaired product or a new product shall be
returned to you. A new warranty period does not begin with the repair or exchange of the
product.
Warranty period and legal claims based on defects
The warranty period is not extended by the warranty. This also applies to replaced and
repaired parts. Any damages and defects that may exist at the time of purchase must be
notified immediately after removal from packaging. Any repairs arising after the expiry of the
warranty period are chargeable.
Scope of the warranty
The appliance has been manufactured according to strict quality guidelines and tested
diligently before delivery. The warranty applies to material or fabrication defects. This
warranty does not cover product parts that are subject to normal wear and tear and
therefore can be considered as parts subject to wear and tear or for the damage to fragile
parts, e.g switch, batteries or those made of glass.
This warranty is void if the product is damaged, not used or maintained properly. All the
instructions provided in the operating manual must be followed exactly for proper use of
the product. The purpose of use and actions which are advised or warned against must
necessarily be avoided.
The product is intended solely for private use and not for professional use. The warranty is
void in case of misuse or improper handling, use of force and changes that have not been
carried out by our authorised service centre.
6. Warranty
12
Processing a warranty case
To ensure quick processing of your issue, please follow the below instructions:
• Please be ready with the sales receipt and the product number (e.g. IAN 12345) as proof
or purchase for all queries.
• You can refer the product number from the type label, , an engraving, on the cover sheet
of your operating instructions (below left) or as sticker on the back or lower side.
• If functional or other defects occur, first call or email the following service department.
• You can then send a product recorded as defective postage free along the the sales
receipt and information about where the defect lies and when it has occurred, to the
service centre address provided to you.
This and many other manuals, product videos and software can be downloaded at www.
lidl-service.com
7. Service
Walter Werkzeuge Service Center
E-Mail: service@walteronline.com
Tel.: 00800 925 837 88
IAN 312142
Supplier:
Please note that the following address is not a service centre address. Please contact the
above-mentioned service centre first.
Walter Werkzeuge Salzburg GmbH
Gewerbeparkstr. 9
5081 Anif
Austria
IAN 312142
Walter Werkzeuge Salzburg GmbH
Gewerbeparkstr. 9
5081 Anif, Austria
V. 1.0
Last Information Update:
05/2019

This manual suits for next models

1

Other Parkside Power Tools manuals

Parkside 331116 1907 User manual

Parkside

Parkside 331116 1907 User manual

Parkside PHKSA 18-Li B2 Owner's manual

Parkside

Parkside PHKSA 18-Li B2 Owner's manual

Parkside PFBS 9.6V Quick guide

Parkside

Parkside PFBS 9.6V Quick guide

Parkside POFA 12 A2 User manual

Parkside

Parkside POFA 12 A2 User manual

Parkside 437518 2304 User manual

Parkside

Parkside 437518 2304 User manual

Parkside PDRP 6.2 B2 User manual

Parkside

Parkside PDRP 6.2 B2 User manual

Parkside PLBS 30 B2 User manual

Parkside

Parkside PLBS 30 B2 User manual

Parkside PHET 15 A1 User manual

Parkside

Parkside PHET 15 A1 User manual

Parkside PSTD 800 A1 Owner's manual

Parkside

Parkside PSTD 800 A1 Owner's manual

Parkside PSSSA 20-Li B2 User manual

Parkside

Parkside PSSSA 20-Li B2 User manual

Parkside PAT 12 B2 User manual

Parkside

Parkside PAT 12 B2 User manual

Parkside PHLG 2000 B1 User manual

Parkside

Parkside PHLG 2000 B1 User manual

Parkside 71600 Owner's manual

Parkside

Parkside 71600 Owner's manual

Parkside PBH 1500 A1 Owner's manual

Parkside

Parkside PBH 1500 A1 Owner's manual

Parkside PFBS 12 C5 User manual

Parkside

Parkside PFBS 12 C5 User manual

Parkside PMFW 310 C2 User manual

Parkside

Parkside PMFW 310 C2 User manual

Parkside PAP 6 A1 User manual

Parkside

Parkside PAP 6 A1 User manual

Parkside PAR 10.8 B1 User manual

Parkside

Parkside PAR 10.8 B1 User manual

Parkside PDT 40 E4 Use and care manual

Parkside

Parkside PDT 40 E4 Use and care manual

Parkside PAR 10.8 A1 User manual

Parkside

Parkside PAR 10.8 A1 User manual

Parkside PSTDA 20-Li A2 User manual

Parkside

Parkside PSTDA 20-Li A2 User manual

Parkside PLKA 3.6 A2 Service manual

Parkside

Parkside PLKA 3.6 A2 Service manual

Parkside 311369 1904 User manual

Parkside

Parkside 311369 1904 User manual

Parkside PES 200 B1 User manual

Parkside

Parkside PES 200 B1 User manual

Popular Power Tools manuals by other brands

Grizzly G0727 owner's manual

Grizzly

Grizzly G0727 owner's manual

Makita DHR182ZJ instruction manual

Makita

Makita DHR182ZJ instruction manual

Bosch FNS138-23 Operating/safety instructions

Bosch

Bosch FNS138-23 Operating/safety instructions

Makita JV0600 instruction manual

Makita

Makita JV0600 instruction manual

Makita 4326 instruction manual

Makita

Makita 4326 instruction manual

Hilti TE 30 operating instructions

Hilti

Hilti TE 30 operating instructions

Porter-Cable 6603 instruction manual

Porter-Cable

Porter-Cable 6603 instruction manual

Ethicon Endo-Surgery Contour CS40B instructions

Ethicon Endo-Surgery

Ethicon Endo-Surgery Contour CS40B instructions

Makita HM1140C instruction manual

Makita

Makita HM1140C instruction manual

Sealey E5188.V2 instructions

Sealey

Sealey E5188.V2 instructions

AEG Atlas Copco HBS 65 Instructions for use

AEG

AEG Atlas Copco HBS 65 Instructions for use

Von Arx DTF 25 SH operating manual

Von Arx

Von Arx DTF 25 SH operating manual

Altrad BELLE PCX 13/40E+ Operator's manual

Altrad

Altrad BELLE PCX 13/40E+ Operator's manual

DeWalt XR Li-Ion DCS355-XE instruction manual

DeWalt

DeWalt XR Li-Ion DCS355-XE instruction manual

Lematec AS118-2 user manual

Lematec

Lematec AS118-2 user manual

Powerfix Profi PAWSO A1 operating instructions

Powerfix Profi

Powerfix Profi PAWSO A1 operating instructions

EINHELL TE-CD 12/1 X-Li operating instructions

EINHELL

EINHELL TE-CD 12/1 X-Li operating instructions

Kyocera TJEP GRF 34/100 HP quick start guide

Kyocera

Kyocera TJEP GRF 34/100 HP quick start guide

manuals.online logo
manuals.online logoBrands
  • About & Mission
  • Contact us
  • Privacy Policy
  • Terms and Conditions

Copyright 2025 Manuals.Online. All Rights Reserved.