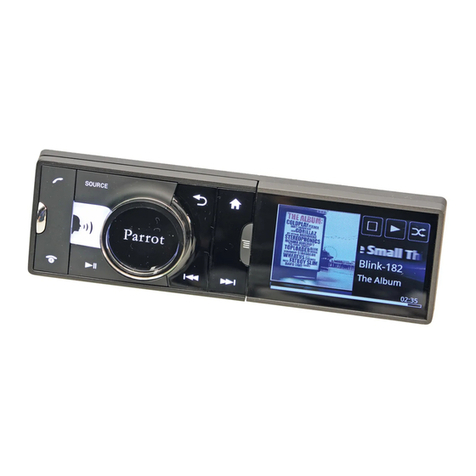
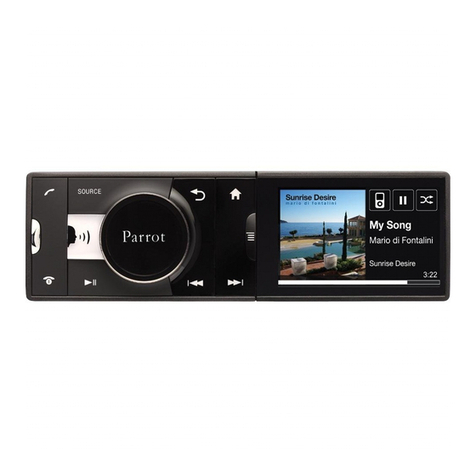
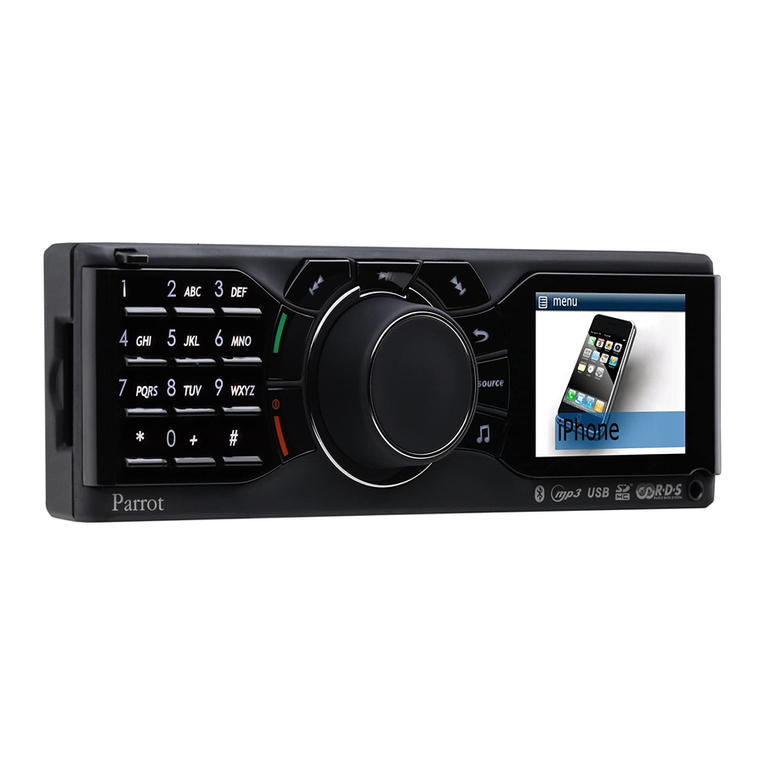
Parrot RKi8400 User manual

PARROT
RKi8400
Quick start guide
Hurtiginstallasjonsveiledning
Snabb installationsguide
Hurtig installationsguide
Käyttöopas


www.parrot.com
Parrot RKi8400
Diagrams..........................................
English..............................................
Norsk................................................
Dansk...............................................
Svenska............................................
Suomi...............................................
Technical specification....................
General Information.........................
p.06
p.11
p.19
p.27
p.35
p.43
p.50
p.54

4

Warning : The Parrot RKi8400 includes NdFeB ma-
gnets which can damage objects sensitive to magnetic
elds (pacemakers, credit cards, mechanical clocks…).
To avoid these effects, keep the front panel in its case
and keep a safe distance between the front panel and
all objects that can be damaged by magnetism.
Advarsel : Parrot RKi8400 inneholder magneter av ty-
pen NdFeB som kan skade gjenstander med følsomhet
overfor magnetiske felt (pacemakere, kredittkort, meka-
niske ur osv.). For å unngå disse virkningene anbefales
det å la frontpanelet ligge i etuiet når du har tatt det ut
av boksen. Ikke la frontpanelet ligge nær gjenstander
som er følsomme for magnetiske felt.
Varning : Parrot RKi8400 innehåller NdFeB-magneter
som kan skada föremål som är känsliga för magnetfält
(pacemaker, kreditkort, mekaniska klockor...). För att
undvika dessa effekter rekommenderar vi att förvara
manöverpanelen i dess etui så fort du tar ut den ur
enheten. Låt inte manöverpanelen vara i närheten av
föremål som är känsliga för magnetfält.
Advarsel : Parrot RKi8400 har magneter af typen Nd-
FeB, som kan beskadige genstande, der er følsomme
over for magnetiske felter (pacemaker, kreditkort,
mekaniske ure...). Vi anbefaler at opbevare fronten
i sit etui, så snart den tages af kassen for at undgå
denne påvirkning. Sørg for at fronten ikke bender sig
i nærheden af genstande, der er følsomme over for
magnetiske felter.
Parrot RKi8400 sisältää NdFeB-tyyppisiä magneetteja,
jotka voivat vahingoittaa magneettikentille herkkiä esi-
neitä (sydämentahdistimia, luottokortteja, mekaanisia
kelloja…). Näiden vahinkojen välttämiseksi suositte-
lemme, että säilytät etupaneelin suojakotelossaan aina
kun otat sen pois paikaltaan. Älä säilytä etupaneelia
magneettikentille herkkien esineiden läheisyydessä.
5

6
1. Car antenna
2. Car accessory
3. Double microphone
4. Fuse 15A
5. Connector
6. External car amplifier
7. ISO plug
8.Terminal bullet
a. Right rear speaker + (purple)
b. Right rear speaker - (purple black)
c. Right front speaker + (grey)
d. Right front speaker - (grey black)
e. Left front speaker + (white)
f. Left front speaker - (white black)
g. Left rear speaker + (green)
h. Left rear speaker - (green black)
a. Tel. Mute (pink)
d. Ignition key +12 V (yellow)
e. AMP/ANT Remote (blue)
f. Illumination (orange)
g. Battery + (red)
h. Ground Lead (black)
Line out (Grey)
Line in (Brown)
78
Amplifier
R (Red)
L (white)
R (Red)
L (white)
(optional)
(optional)
a
a
b
c
d
d
e
e
f
f
g
g
h
h

7
OK!
OK
!
O
K
!
OK
!
O
O
O
OK!
OK
!
O
K
!
OK
!
O
O
O
Se till att inte kapa kablarna när du sätter
tillbaka bilradiohållaren.
Varo taittamasta johtoja kun asetat autora-
dion tuen paikalleen.
Make sure you do not cut the cables
while sliding the car stereo support.
Sørg for ikke å kutte kablene når du setter
holderen til bilradioen på plass.
Pas på ikke at adskille kablerne, når de
sættes på plads i holderen til bilradioen.

- Installing the fitting screw
- Installere justeringsskruen
- Montera låsskruven
- Installer blokeringsskruen
- Kiinnitysruuvin laitto paikalleen
12
ABCDEF
JKLGHI MNO
TUVPQRS WXYZ
3
456
789
*
0#
+
SOUR
clic
1
8
- Removing the faceplate
- Fjerne det avtakbare frontpanelet
- Ta bort den avtagbara panelen
- Tag den aftagelige front af
- Etupaneelin irrotus

- Pairing your phone
- Pare telefonen
- Ihopparning av telefonen
- Tilkobling af din telefon
- Puhelimen paritus
OK Back
0000
0000
12
ABC DEF
JKLGHI MNO
TUVPQRS WXYZ
3
456
789
*
0#
+
SOURCE
9

10
- Using the music function
- Bruke musikkfunksjonen
- Använda musikfunktionen
- Brug af musikfunktionen
- Musiikkitoiminnon käyttö
1 Go
USB
12
ABCDEF
JKLGHIMNO
TUVPQRS WXYZ
3
456
789
*
0#
+
SOURCE
SD
12
ABCDEF
JKLGHIMNO
TUVPQRS WXYZ
3
456
789
*
0#
+
SOURCE

This simplified guide of the Parrot RKi8400 gives you the
main instructions to easily use this product. For further
information, refer to the user guide available on our website
www.parrot.com.
The availability of some functionality only depends on
your mobile phone.
Contents
Installing the Parrot RKi8400
► Refer to the installation diagram on page 6.
We advise our customers to have the Parrot RKi8400
fitted by a professional.
1. Remove your old car stereo from your vehicle.
2. Insert the Parrot RKi8400 cage and fix it into the dash
board using the bracket mounting tabs.
3. Access the vehicles car stereo wiring harness from behind
the dashboard.
4. Connect the audio and power connectors to the
connectors of your Parrot RKi8400.
►If this connection is impossible, you have to obtain
an ISO cable to adapt your car radio to the ISO
connectors of the Parrot RKi8400.
5. Compare the Parrot RKi8400 antenna connector to the
antenna connector of your vehicle. If an adapter is
necessary, contact your local car audio specialist.
6. Check the vehicles wiring with a multimeter before
connecting the Parrot RKi8400’s wiring loom to ensure
everything is correct. The red wire of the power cable
must be connected to the permanent 12V, the yellow
English
Using the Parrot RKi8400 for the first time......................
Installing the Parrot RKi8400...........................................
Using the anti-theft system.............................................
Browsing through the menus..........................................
Connecting a phone via Bluetooth....................................
Pairing and connecting a phone by Bluetooth................
Synchronization of the phonebook.................................
Using the Telephone function...........................................
Receiving a call...............................................................
Making a call...................................................................
Transfering a call to the phone........................................
Using the voice recogntition function..............................
Making a call via voice recognition ................................
Receiving a call via voice recognition.............................
Using the Music Function.................................................
Using the Radio function.................................................
Using the Parrot RKi8400 with an iPod..........................
Using the Parrot RKi8400 with a USB flash drive...........
Using the Parrot RKi8400 with an SD card ....................
Using the Parrot RKi8400 with an audio player
connected via Bluetooth................................................
Commands ....................................................................
11
11
12
12
13
13
13
14
14
14
14
15
15
15
16
16
16
16
17
17
17
English
11
Using the PARROT RKi8400 for the first time

wire to the 12V ignition and the black wire to the
ground. If correct the Parrot RKi8400 will display
‘Goodbye’ when the vehicles ignition is switched off.
If it is the case, you can skip to step 7.-
If it is not the case, You may need to switch the-
location of the yellow and red wires. This can be done
simply by reversing both terminal spade tags
located on the Parrot wiring.
Do not connect the yellow wire to the permanent
12V, otherwise you will cause the vehicle battery to
discharge.
7. Mount the microphone between the driver side visor and
the rear view mirror. The microphone must be aimed
at the driver.
8. Slide the car stereo into the Parrot RKi8400 cage and
attach the faceplate.
Using the anti-theft system
► Refer to the installation diagram on page 7.
To avoid any risk of theft, do not forget to remove the face-
plate of your Parrot RKi8400 when you leave your vehicle.
Without this front, the Parrot RKi8400 cannot be used.
- To remove the faceplate, press the eject button in the
top left.
- To replace the faceplate, put it on the right side of
the car stereo. Once the faceplate and the car stereo
magnets get in touch, press the left side.
Always make sure the Parrot RKi8400 is switched off
before removing the faceplate.
Browsing through the menus
• Press the jog wheel to access the main menu.
• Browse through the menus by turning the jog wheel and
confirm by pressing the jog wheel.
• Press the button to go back to previous menu. Press
the red button to get to the main menu.
• While playing a song, press the button to get to the
menus. While navigating through the menus, press the
Play button to get to the Now Playing screen.
Selecting the language
1. Press the jog wheel and select Settings > Language.
2. Select your language and press the jog wheel to confirm.
12

Pairing and connecting a phone by Bluetooth
To add a new phone for the first time the two devices will•
need to be paired, this process is only required once for
each phone. To pair a phone for the first time:
1. Make sure the Parrot RKi8400 is set so that it is visible by
all Bluetooth ® devices. To do so, press the jog wheel
and select Settings > Bluetooth > Visibility. The Parrot
RKi8400 is visible by default.
2. Press the jog wheel and select Settings > Pair with...
> If your mobile phone’s model appears in the list, select it
and confirm.
> If your mobile phone model doesn’t appear in the list,
select the Other phones option.
3. From your phone, search for Bluetooth devices. Refer
to your phone user guide for more information.
4. Select «Parrot RKi8400» in the list.
> You are prompted to enter a PIN code.
5. Enter «0 0 0 0» on your phone.
> «Pairing successful» is displayed on the screen of the
Parrot RKi8400.
> Once your phone is paired to the Parrot RKi8400, the
connection between both devices will be automatically
established each time you enter your vehicle.
Some phones may require you to set the Parrot
RKi8400 as a trusted device.
• You can pair up to 10 devices with the Parrot RKi8400. If
you attempt to pair an 11th phone, you will get the
« Memory full » message. You must then delete a phone
from the paired devices list. To do so:
1. Press the jog wheel and select Settings > Bluetooth
> Paired devices.
2. Select the phone you want to delete from the list.
3. Select Delete.
Synchronization of the phonebook
• With most Bluetooth phones, the phonebook will be
automatically synchronized in the Parrot RKi8400 memory.
Only contacts stored in the phone memory will be
memorized. If your contacts are stored in the SIM card
memory, transfer them into the phone memory.
If your phone doesn’t support automatic synchronization,•
you can also use the Object Push function of your phone
to send contacts from your mobile to the
Parrot RKi8400 via Bluetooth. To do so, press the jog
wheel and select Telephone > Receive contacts.
Refer to your phones’ user guide for more
information about sending contacts via Object Push.
13
Connecting a phone via Bluetooth

Receiving a call
• Receiving a call is possible whatever source is selected.
• An incoming call is indicated by a ringtone.
The name of the caller is announced and displayed
if his details are stored in the phonebook of the phone
connected to the Parrot RKi8400.
- Press the green button to accept this call. Then, press
the red button to end the call.
- Press the red button to reject this call.
Making a call
To access the telephone function, press the
SOURCE
button
repeatedly to select Telephone or press the red button.
• If the contact you want to call is in the phonebook of the
Parrot RKi8400:
1. Press the jog wheel to enter the main menu and
select Phonebook.
2. Select the contact you wish to call from the phone
book within the RKi8400
• If the contact you want to call is not in the phonebook of
the Parrot RKi8400, stop your vehicle in an appropriate
place, then:
1. Press the
SOURCE
button repeatedly to
select Telephone.
2. Dial your contact phone number using your phone or
the numerical pad of the Parrot RKi8400.
3. Press the green button.
• To redial the last dialled number, hold down the green
button of the Parrot RKi8400 for two seconds.
• The Parrot RKi8400 allows you to assign a key of the
numerical pad to one of your contact. To do so:
1. Press the jog wheel and select Telephone >
Speed dialing.
2. Select the key using the jog wheel.
3. Select the contact to which you want to assign the
selected key.
4. Press the green button to confirm.
> You can now call this contact by holding down the
selected key for 2 seconds to make the call.
Transfering a call to the phone
During a call, if you want to continue the con-•
versation on your phone (private conversation),
press the green button of the Parrot RKi8400.
> The call is transferred to the phone.
• If you want to switch back to the Parrot RKi8400, press the
green button again.
14
Using the telephone function

The Parrot RKi8400 voice recognition function is available
whatever source is selected.
Making a call via voice recognition
You can make a call using voice recognition directly after
automatic synchronization or Object Push process. The
Parrot RKi8400 will automatically recognize the contact you
wish to call.
1. Press the green button to launch the voice
recognition feature.
> The Parrot RKi8400 asks you the name of the contact
you want to call.
2. Say the name of the contact and the type of number if
there are several numbers associated to this contact
(ex : Home, Work, Cellphone...).
> The call is automatically launched if the voice tag is
correctly understood.
> If it is not the case, the system asks for a confirmation.
You can make a call via voice recognition using
several combinations of keywords. For example,
« call ‘Bob’» or simply « ‘Bob’ ». You can also
associate the type of number you want to call:
«call ‘Bob’ at home», «’Bob’ home », etc.
3. Confirm by saying « Yes » or « Call » or precise the type
of number («mobile», «work», «home»... )
> The call is initiated.
Receiving a call via voice recognition
To receive a call via voice recognition, magic words must
be activated. Magic words are activated by default.
• While receiving a call:
- Say «Accept» to answer the call
- Say «Reject» to refuse the call.
• To activate / deactivate the magic words:
1. Press the jog wheel and select Telephone > Voice
Commands > Magic words.
2. Press the jog wheel to activate/deactivate the
magic words.
15
Using the voice recognition function

Using the Radio Function
Press the•
SOURCE
button repeatedly to select the
Tuner source.
Press briefly the• buttons to change manually
the radio station. Hold down the buttons to
tune to the next available radio station.
• To assign a station to a key on the numerical pad, select
the frequency and hold down the key for 2 seconds.
> The station is then assigned to the selected key.
> To select the station, press the corresponding key briefly.
Using the Parrot RKi8400 with an iPod / iPhone
Make sure your iPod is updated before using it with
the Parrot RKi8400.
• Use the iPod connector to connect your iPod / iPhone
to the Parrot RKi8400 then press the
SOURCE
button
repeatedly to select the iPod source.
• If you are using the Parrot RKi8400 with the iPod Mini,
iPod Photo, iPod 3G and iPod Shuffle, then connect your
iPod to the Parrot RKi8400 using the Jack cable.
Using the Parrot RKi8400 with a USB flash drive
If your Parrot RKi8400 is connected to an iPod /
iPhone and a USB flash drive, the iPod / iPhone has
priority: you can only browse through your iPod /
iPhone content.
1. Connect the USB flash drive using the USB cable.
2. Press the
SOURCE
button repeatedly to select the USB
source.
3. Press the jog wheel to access the content of the selected
source.
- If the tags of your audio files are correctly defined
or if the device connected to the Parrot RKi8400 is
an iPod, select one of these classification features:
playlist, artist, album, songs, genres and years, and
press the jog wheel.
- If the tags of your audio files are not defined:
a. Select Browse by directory and use the jog wheel
to browse through the content of your audio
player.
b. Press the jog wheel to play the selected music file.
Album cover display : if no picture is included in the
tags of your audio files (MP3 ID3v2), you can add a
picture in .jpg format in the corresponding folder. The
picture size needs to be less than 1Mb
16
Using the music function

Using the Parrot RKi8400 with an SD card
Switch off your Parrot RKi8400 before inserting or
removing an SD card.
1. Insert the SD card into the appropriate slot.
2. Press the
SOURCE
button repeatedly to select the
SD source.
Using the Parrot RKi8400 with an audio player
connected via Bluetooth
• The streaming audio feature lets you play the music tracks
recorded on your Bluetooth audio player over the vehicle’s
speakers. Your mobile phone must support the Bluetooth®
A2DP profile.
• If you are using a Bluetooth audio player for the 1st time,
you have to pair both devices.
►Refer to the Pairing and connecting a phone via
Bluetooth section.
• If both devices are already paired :
1. Press the jog wheel and select Settings > Bluetooth
> Paired devices.
2. Choose an audio player and press the jog wheel.
3. Select Play Bluetooth audio.
4. Get back to main menu and select Audio Bluetooth.
5. Start playing a song on your audio player.
Using the Parrot RKi8400 with an analogue
audio player
1. Connect your audio player to the Parrot RKi8400 using
the Jack connector.
2. Press the
SOURCE
button repeatedly to select the Line in
source.
3. Start playing a song on your audio player.
Commands
Buttons Functions
Adjust the volume
Pause / resume playback
Access to the audio effects menu
Short press: Get to previous / next track *
Long press : Fast rewind / forward *
* Unavailable for analogue audio players
17

18

19
19
20
20
21
21
21
22
22
22
23
23
23
24
24
24
24
25
25
25
25
Bruke Parrot RKi8400 for første gang.................................
Installere Parrot RKi8400..................................................
Bruke tyverisikringen........................................................
Navigere i menyene..........................................................
Koble til en telefon via Bluetooth®......................................
Pare og tilkoble en mobiltelefon til Parrot RKi8400..........
Synkronisere telefonens adresseliste..............................
Bruke telefonfunksjonen.....................................................
Motta et anrop.................................................................
Foreta et anrop................................................................
Bruke funksjonen talegjenkjenning.....................................
Foreta et anrop ved hjelp av stemmegjenkjenning...........
Bruke de magiske ordene................................................
Bruke musikkfunksjonen.....................................................
Bruke radiofunksjonen.....................................................
Bruke Parrot RKi8400 sammen med en iPod / iPhone....
Bruke Parrot RKi8400 sammen med en USB-nøkkel......
Bruke Parrot RKi8400 sammen med et SD-kort..............
Bruke Parrot RKi8400 sammen med en
Bluetooth-lydavspiller......................................................
Bruke Parrot RKi8400 sammen med en
analog lydavspiller............................................................
Kommandoer...................................................................
19
NO
Denne forenklede veiledningen for Parrot RKi8400 gir deg
hovedinstruksjonene du trenger for å bruke apparatet på en
enkel måte. Se brukerhåndboken på vårt webområde
www.parrot.com for ytterligere informasjon.
Bruken av visse funksjoner avhenger utelukkende av
din telefon.
Innhold
Installere Parrot RKi8400
For riktig lagring av innstillingene til RKi8400 må du
sjekke at apparatet er slått av før du fjerner
frontpanelet.
► Se installasjonsskjemaet på s.6.
Fjern den opprinnelige bilradioen.1.
Sett inn montasjestøtten, og fest den i kupéen ved å2.
brette inn flikene.
Trekk kablene mot utsiden av instrumentbordet, gjen-3.
nom montasjestøtten.
Koble bilens lyd- og strømtilførselsplugger til kontaktene4.
på din Parrot RKi8400.
► Hvis denne koblingen er umulig, må du bruke en ISO-
adapter for å tilpasse Parrot RKi8400 til bilens spesifikke
koblingssystem.
Sammenlign antennekontakten på din Parrot PK82005.
med bilens.
►Hvis du trenger en antenneadapter, ta kontakt med en
fagperson innen bilbransjen for ytterligere informasjon.
Norsk
Bruke PARROT RKi8400 for første gang

20
Sjekk polariteten til bilradioens strømtilførsel. Du må da6.
slå av tenningen når Parrot RKi8400 er installert. Meldin-
gen ”Vi ses” skal da vises på skjermen.
Er dette tilfelle, har du avsluttet installasjonen av Parrot-
RKi8400, og du kan gå videre til trinn 7.
Hvis dette ikke er tilfelle, må du bytte om posisjonen-
til den gule og den røde ledningen. Den røde lednin-
gen på strømledningen skal kobles til 12V permanent,
den gule ledningen til 12V etter tenning og den svarte
ledningen til jordingen. Denne operasjonen utføres
ganske enkelt ved å bytte om de to kabelskoene på
Parrot-kablingen.
Den dobbelte mikrofonen skal være vendt mot føreren7.
og helst installeres mellom solskjermen og det midtre
bakspeilet.
Sett bilradioen inn i montasjestøtten, og sett frontpanelet8.
på plass.
Bruke tyverisikringen
For å unngå fare for tyveri må du huske å fjerne frontpanelet
på din Parrot RKi8400 når du forlater bilen. Parrot RKi8400
kan ikke fungere uten dette frontpanelet.
For å fjerne frontpanelet trykker du på utløsningsknap--
pen øverst til venstre.
For å installere frontpanelet plasserer du det på høyre-
side på bilradioen. Når magnetene på frontpanelet og
bilradioen er i kontakt, trykker du på høyre side.
For riktig lagring av innstillingene til RKi8400 må du
sjekke at apparatet er slått av før du fjerner frontpa-
nelet.
Navigere i menyene
Trykk på hjulet i midten for å få tilgang til menyene.•
> Settet sier navnet på den aktuelle menyen.
Naviger i menyene ved å dreie på hjulet, og godkjenn ved•
å trykke på hjulet.
For å gå tilbake til forrige meny, trykk på knappen• . For
å gå tilbake til hovedmenyen, trykk på den røde knappen
eller vent noen sekunder.
Under avspilling av en musikkfil, så trykk på knappen•
for å gå tilbake til menyen. Og omvendt, når du navigerer i
menyene, så trykk på knappen Play for å gå tilbake til avs-
pilleren.
Other manuals for RKi8400
3
Table of contents
Languages:
Other Parrot Car Receiver manuals

Parrot
Parrot Asteroid Classic User manual

Parrot
Parrot ASTEROID Smart User manual

Parrot
Parrot ASTEROID Tablet User manual

Parrot
Parrot RHYTHM N'BLUE User manual

Parrot
Parrot Asteroid Classic User manual

Parrot
Parrot MKi9200 RU User manual

Parrot
Parrot RKi8400 User manual

Parrot
Parrot ASTEROID Tablet User manual

Parrot
Parrot RKi8400 User manual

Parrot
Parrot ASTEROID Tablet User manual