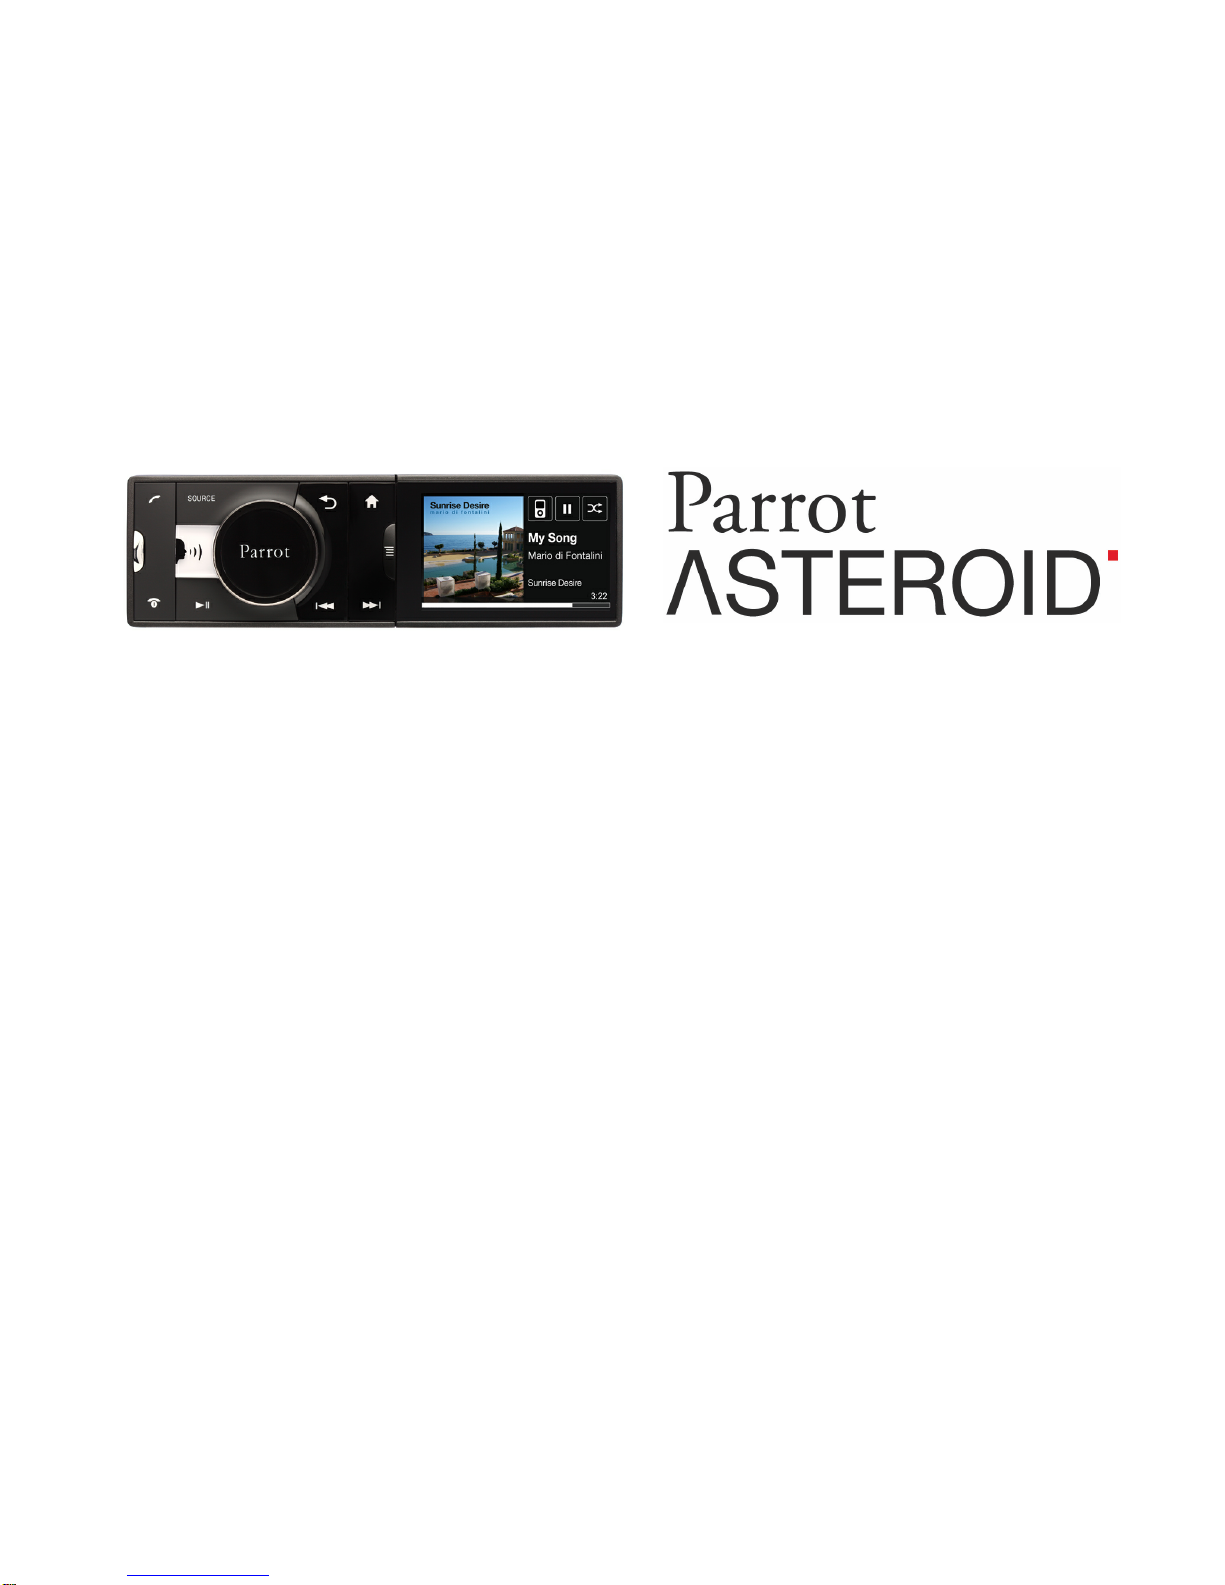
Parrot ASTEROID Tablet User manual

User guide

Parrot ASTEROID
.........................................................................................................................4
Before you begin
.........................................................................................................................................................4Software updates
.........................................................................................................................................................4Warnings
.........................................................................................................................................................4Steering wheel control interface
.........................................................................................................................5
Installation
.........................................................................................................................................................5Safetyinstructions
.........................................................................................................................................................5Before youbegin
.........................................................................................................................................................6Installing the car stereo
.........................................................................................................................................................7Final check
.........................................................................................................................................................7Installing the cables
.........................................................................................................................................................8Installing the microphone
.........................................................................................................................................................9Installing the GPS antenna
.........................................................................................................................................................9Basic operations
.........................................................................................................................10
Getting started
.........................................................................................................................................................10Navigating throughthe menus
.........................................................................................................................................................10Turning the Parrot ASTEROID on / off
.........................................................................................................................................................11Using the virtual keyboard
.........................................................................................................................................................11Connecting a phone to the Parrot ASTEROID
.........................................................................................................................................................13Synchronising the phonebook
.........................................................................................................................15
Phone.........................................................................................................................................................15Receiving a call
.........................................................................................................................................................15Making a call
.........................................................................................................................................................17Using the Parrot ASTEROID while ona call
.........................................................................................................................19
Music .........................................................................................................................................................19Using the voice recognitionfunction
.........................................................................................................................................................19Radio
.........................................................................................................................................................21iPod
.........................................................................................................................................................22USB storage device
.........................................................................................................................................................23SD card
.........................................................................................................................................................24Analogue audio player
.........................................................................................................................................................24Audio player connected via Bluetooth
.........................................................................................................................26
Internet
.........................................................................................................................................................26Connecting the Parrot ASTEROID to the internet

.........................................................................................................................................................28Using the Parrot ASTEROID applications
.........................................................................................................................................................29Closing an application
.........................................................................................................................................................29Managing applications
.........................................................................................................................30
Settings
.........................................................................................................................................................30Clock
.........................................................................................................................................................30Phone
.........................................................................................................................................................31Audio
.........................................................................................................................................................34Music
.........................................................................................................................................................34Display
.........................................................................................................................36
Troubleshooting
.........................................................................................................................................................36Before youbegin
.........................................................................................................................................................36Problems while using the phone function
.........................................................................................................................................................37Problems while using the music function
.........................................................................................................................................................37For more information
.........................................................................................................................38
General information

4
Before you begin
Software updates
Download the latest update for free (and check the update procedure) on our website.
These updates will enable you to receive new features and improve the product’s
compatibility.
Warnings
Allfunctions requiring anincreased attention should only be used while the vehicle
is stationary. Your safety and the one of the other road users prevails over phone
calls, music and navigationinstructions. Be responsible: drive carefully and pay full
attention to your surrounding. Parrot denies any liability should you choose not to
respect this warning.
Use the Parrot ASTEROID witha reasonable volume level so that you can hear all
external noises while driving.
The Parrot ASTEROID includes NdFeB magnets which can damage objects
sensitive to magnetic fields (pacemakers, credit cards, mechanical clocks…).
Steering wheel control interface
A steering wheel control interface can be used to connect your vehicle’s steering
wheel controls to your Parrot car stereo. Withthis interface (available in2012),you will
be able to make phone calls via the steering wheel controls while keeping your hands
onthe wheel. Refer to our website www.parrot.com for more information.

5Before you begin
Installation
Note: We advise our customers to have the Parrot ASTEROID fitted by a
professional.
Safety instructions
Turnthe ignitionoff before installing the Parrot ASTEROID.
Install the Parrot ASTEROID onlyonvehicles witha 12 V battery.
Place all cables awayfrom hot places (heater outlet) and moving parts (gear shift,
seat rails...).
Before you begin
Remove your car stereo from your vehicle.Youmayneed release keys to do so.
Try to connect the audio and power connectors of the Parrot ASTEROID to the
connectors of your vehicle. If this connection is impossible, you have to obtain an
ISO adapter before installing the Parrot ASTEROID.
Parrot ASTEROID antenna connector

6 Installation
Example of antenna adaptor -DIN / Fakra (not provided)
Compare the Parrot ASTEROID antenna connector to the antenna connector of
your vehicle. If an adapter is necessary, contact your local car audio specialist.
Make sure you also supply power to your antenna if it is amplified. Power to the
antenna canbe supplied using the Parrot ASTEROID ISO cable.
Installing the car stereo
1. Insert the cage and fixit into the dashboard using the bracket mounting tab.
2. Pull audio and power cables of the vehicle to the outside of the dashboard,
throughthe mounting bracket.
3. Connect the audio and power connectors of the Parrot ASTEROID to the ones of
your vehicle.
4. Check the wiring (as explained inthe Final check section).
5. Installthe audio cables (as explained inthe Installing the cables section).
6. Install the double microphone (as explained in the Installing the microphone
section)
7. Slide the car stereo into the Parrot ASTEROID cage and install the faceplate.

7Installation
Final check
Once all the connections are made, turn the ignition on then off to perform the
installationtest.The "Goodbye" message must be displayed.
If it is not the case, it is necessary to swap the positions of the red and yellow
wires. Indeed, the red wire of the power cable must be connected to the 12V
ignition, the yellow wire to the permanent 12V and the black wire to the ground.
This can be done simply by reversing both fuse holders located on the Parrot
wiring.
Installing the cables
Connect the iPod / iPhone®, USB, Jack cables and the GPS Antenna to the
Parrot ASTEROID. We recommend you connect all audio cables to the Parrot
ASTEROID even if you do not plan on using them. Route the audio cables to a
suitable locationin your vehicle such as the glove box or arm rest compartment. It
may be necessary to drill a hole in your dashboard to do so. Avoid using USB
extension cables.
Make sure youconnect the iPod / iPhone cable to its specific USB port. "iPod" is
writtenabove it.
Use the double-sided tape to stick the GPS Antenna to your dashboard. Once you
have stuck the dongle to the dashboard, wait for approximately 2 hours to make
sure the adhesive tape adheres well.
To guarantee anoptimal receptionqualitywe recommend youdo not connect your
internet USB key 3G on the Parrot ASTEROID directly : use the USB cable to
installyour device onthe dashboard (or anyother openarea).
Use the provided cable ties to make sure the cables are well fixed to the car
stereo. Insertone of the cable ties into the slot in the top left of the back of the car
stereo (refer to the diagram).

8 Installation
Installing the microphone
We recommend that you slide the cable into the
groove behind the door seal.
If the cable runs above the pedals, ensure that it is
properlysecured.
Warning: Do not run the microphone cable through the heating, ventilation or air
conditioning systems or in front ofthe side airbags.
Make sure the microphone is installed as close to the mouth of the user as
possible. The ideal distance is 60 cm. The best possible location for the
microphone is near the rear-view mirror.
The microphone needs to be pointed towards the user.

9Installation
Installing the GPS antenna
Install the GPS Antenna inanunobstructed area.
Clean the dashboard, then use the adhesive located on the back of the GPS
Antenna to attachit to the dashboard. Then wait for approximately 2 hours without
handling the dongle to ensure that it adheres properly.
Athermic windshields and windows with a built-in antenna can interfere with GPS
receptionand reduce the reliabilityof informationfrom navigationapplications.
Basic operations
To remove the faceplate, press the eject button on its left. Place the faceplate into
the provided carrying case in order to protect it from scratches and dust.
To attach the faceplate, put it on the right side of the car stereo. Once the
faceplate and the car stereo magnets connect, press the leftside.
To remove the car stereo from the dashboard, insert the provided extraction key
until they click into place.

10 Installation
Getting started
Navigating through the menus
Press the buttonto access the main menu.
Browse throughthe menus byturning the wheel and confirm bypressing the wheel.
Press the buttonto get back to previous menu.
Press the button to access the pop-up menu corresponding to the current
application. The pop-up menu allows you to change several settings or browse
more easilythroughthe content ofyour audio source or phonebook.
Press the buttonto get to the track list if a song is currently being played. While
navigating through the menus, press the SOURCE button to get to the Now
Playing screen.
Press the button for 2 seconds to display the last 6 applications used or
currentlyinuse.
Press the SOURCE buttonto selectthe source of your audio files.
Note: With the exception of the Line Input source, audio sources that you use with
the Parrot ASTEROID only appear in the SOURCE menu when they are
connected. You have the possibility of deactivating display of the Line Input in the
source menu.
Turning the Parrot ASTEROID on / off
Press the buttonfor 2 seconds to turnthe Parrot ASTEROID on / off.
Note: To deactivate the greeting music, select Settings > Audio and uncheck
the Startup sound option.

11Getting started
Using the virtual keyboard
The digital keyboard appears whenyouare asked to enter the PIN
code of your 3G keyor whenyou would like to enter a number or a
DTMF.
The alphanumeric keyboard appears when you enter your login info, which is
required whenusing Internetapplications.
Use the knob to select letters / numbers. Pushthe knob to confirm. Pushthe knob for
2 seconds to displaythe accented characters that correspond to the selected letter.
The button displays special numbers and characters on the alphanumeric
keyboard.
To validate your entry, select OK.
If your entrycontains anerror, select .
Connecting a phone to the Parrot ASTEROID
Compatibility
Refer to the compatibility section of our website to check if your phone is compatible
withthe Parrot ASTEROID.
Adjusting the Parrot ASTEROID visibility
Before pairing your phone with the Parrot ASTEROID, make sure that it is visible
by all Bluetooth devices. To do so, select Settings > Telephony > Visibility then
make sure the option is checked. If it is not the case, check it by pressing the
jogwheel.
Note: The Parrot ASTEROID is visible by default.
Pairing a phone
Prior to using the Parrot ASTEROID with your phone for the very first time, you
must initiallypair bothdevices. To do so:
1. From your phone, search for Bluetooth® peripherals and select “Parrot
ASTEROID “.
2. The pairing procedure depends onwhichtelephone model youhave:

12 Getting started
- If the phone asks youto enter the BluetoothPIN code, enter “0000”.
- If the Parrot ASTEROID and your telephone display two codes, verify that
the codes are identical,theneither confirm or invalidate.
> The Parrot ASTEROID screenwilldisplay“Pairing successful”.
Note: Pairing procedures for the most common phones are available on the
compatibility section of our website.
Automatic connection
Once your telephone is paired with the Parrot ASTEROID, the 2 devices will
automaticallyconnect whentheyare turned onand inproximityof eachother.
Note: Depending on the model of your phone, you may have to authorize the
connection to the Parrot ASTEROID to allowthe automatic connection.Refer
to your phone user guide for more information.
Defining a phone as preferred phone
The phone which you will define as Preferred is the one whose connection with the
Parrot ASTEROID will take priority. This optionmay be useful if several phones paired
with the Parrot ASTEROID are simultaneously in the vehicle. To define a phone as
preferred :
1. Select Settings > Telephony> Paired devices.
2. Select the phone youwantto define as Preferred.
3. Check the Preferred phone option.
Disconnecting a phone
1. Select Settings > Telephony> Paired devices.
2. Select the phone youwant to disconnect from the Parrot ASTEROID.
3. Select Disconnect.
Deleting a phone from the paired devices list
1. Select Settings > Telephony> Paired devices.
2. Select the phone youwantto delete.

13Getting started
3. Select Delete.
Managing the "Memoryfull" problem
Youcanpair up to 10 devices withthe Parrot ASTEROID. If you attempt to pair an
11th phone, you will get the « Memory full » message. You must then delete a
phone from the paired devices list.To do so:
1. Select Settings > Telephony> Paired devices.
2. Select the phone thenselect Delete.
Note: The problem of full memory may also be related to an installation
problem: inversion of ignition 12V and permanent 12V or absence of after-
contact 12V.
Synchronising the phonebook
Automatic synchronisation
With most of the Bluetooth phones, the phonebook is automatically synchronized in
the system’s memory.
Warning: Only the contacts stored in the phone memory are synchronized. If your
contacts are stored in your SIM card memory, transfer them onto your phone
memory.
The automatic synchronization is limited to 2000 contacts for each paired phone
and to 8000 contacts for allpaired phones.
Eachtime youchange your directory, synchronisationwillstart automaticallythe
next time it is connected.
Disabling automatic synchronisation
If you have too many contacts in your phonebook, you have the possibility to
choose the contacts you want to send. To do so, you must disable the automatic
synchronisation in order to send the selected contacts via Bluetooth manually. To
do so:
1. Delete your phone from the paired devices list. Refer to the Deleting a phone
from the paired devices list sectionfor more information.

14 Getting started
2. Select Settings > Telephone > Special pairing > Disable automatic sync.
3. Re-pair your phone to the Parrot ASTEROID. Refer to the Pairing a phone
sectionfor more information.

15Getting started
Phone
Receiving a call
An incoming callis indicated bya ringtone.The name of the caller is announced if his
number is recorded in the phonebook of the phone connected to the Parrot
ASTEROID.
- If you want to answer the call, press the button. Then press the button to
end the call.
- If you want to refuse this call, press the button.
Making a call
Making a callvia voice recognition
Note : You can make a call using voice recognition directly after automatic
synchronization or Object Push process. The Parrot ASTEROID will automatically
recognize the contactyou wish to call.
To make a call via voice recognition:
1. Press the buttonto launchthe voice recognitionfeature.
> The Parrot ASTEROID asks youthe name of the contact youwant to call.
2. Saythe name of the contact and the type of number («Work», «Cellphone»...)
if there are several numbers associated to your contact.
> The callis automatically launched if the voice tag is correctly understood. If it
is not the case, a confirmationmessage is asked. Confirm by saying «Yes» or
«Call».
Note: At any time, press the button to exit voice recognition mode.
If there are severalphone numbers associated to the contactyouwant to call, you

16 Phone
canspecifythe type of number:
- Home
- At home
- Work
- At work
- Office
- At office
- At the office
- Mobile
- Cellular
- Cell
- Onmobile
- Oncellular
- Oncell
- Onmobile phone
- Oncellular phone
- Oncell phone
- Mobile phone
- Cellular phone
- Cell phone
- Other
- General
- Default
- Preferred
Youcancombine severalwords from the list above to make a call. For instance, «
call ‘Paul’», « call‘Paul’ onmobile phone », or just « Paulcellphone».
Calling a contact from the phonebook
To make a call manually:
1. Select Phonebook.
2. Select the contact.
Note : To browse your phonebook more easily, press the button and select
the first letter of the contact you want to call.
3. Press the to call this contact or use the jog wheel to choose between
different numbers of the same contact.
Bringing up the last dialled number
Hold downthe buttonto redial the last dialled number.
Dialling a number

17Phone
To diala number:
1. Select Phonebook.
2. Press the buttonand select Dial.
3. Select a number using the jogwheel and press the jogwheelto confirm.
4. Select OK to make the call.
Using the Parrot ASTEROID while on a call
Adjusting the volume
Use the jog wheel during a call to adjust the communication volume. The volume
setting is saved for subsequent calls.
Note : You can also change this setting by selecting Settings > Audio > Volume.
Transfering a callto the phone
During a call, if you want to continue the conversation on your phone (private
conversation), press the button.
> The callis automaticallytransferred to the phone.
If youwant to switchback to the kit, press the button.
The call is automaticallytransferred to your phone:
- whenthe faceplate is removed ;
- after a 30 minutes communicationif the ignitionis turned off.
Muting a call
If youwantto deactivate the microphone during a call,press the button: you will
still hear your caller but your caller will not be able to hear you.
Press the buttonto reactivate it.
Managing voice mail

18 Phone
The Parrot ASTEROID allows youto send DTMF while oncall. To do so, press the
jogwheel.Thenselect the numbers using the jogwheel.
Note: DTMF is a mechanism for navigating voice user interfaces using the
phone's numeric keypad. This signal allows you to manage your voice mail using
the Parrot ASTEROID.
Managing a second call
During a call,youcanreceive another callif your phone supports this functionality.
Press the buttonto accept the second incoming call.
> The first call is automatically put on hold.
Press the button to decline the second incoming call. You can also hang up
directlyfrom your phone.
Press the buttonto switchfrom a callto another.

19Phone
Music
Using the voice recognition function
The voice recognition function allows you to select the artist / album you want to
hear via voice recognition. This functionis onlyavailable if youare using the Parrot
ASTEROID witha USB / SD / iPod peripheral.
Note : Several minutes of loading may be necessary when connecting your audio
peripheral (USB / SD / iPod) to the Parrot ASTEROID for the first time, particularly
if you are using audio peripheral with a large capacity or containing many audio
files. This loading time will allow your audio files to be accessible via voice
recognition.
Press the buttonthen saythe name of the artist / album.
Check the albums and artists names in the metadatas of your music files. These
names maybe differentfrom the ones displayed onyour music files titles.
The list of audio sources connected to the Parrot ASTEROID which contain the
artist / album that youselected will appear.
Radio
Display
1
Clock
2
Band (AM or FM)
3
Manual or Preset mode
4
Activated options (Traffic alert / RDS scan)
5
Stationname
6
Stationfrequency
7
Radiotext (text sent via RDS signal)
Selecting a frequency

20 Music
To select a frequency:
1. Press the SOURCE buttonuntilthe Radio source is selected.
2. Press briefly the buttons to change manually the radio station. Hold
downthe buttons to tune to the next available radio station.
Launcha frequencies search
To get the list of all available stations:
1. Press the SOURCE buttonuntilthe Radio source is selected.
2. Press the buttonand select Fullscan.
Note: A Fullscan is proposed while using the Parrot ASTEROID for the 1st time. If
so, select Yes.
At any time you can refresh the list of available stations. To do so, press the
buttonand select Refresh.
Memorizing a station
To memorize a station:
1. Press the SOURCE button until the Radio source is selected.
2. Select the frequency manuallyor in Fullscanmode.
3. Press the buttonthenselect Add to presets.
> To select a stored station,selectthe Presets mode.
Note: You can store as many stations as you want.
Mute / Unmute
Press the buttonto mute / unmute the system.
Modifying the radio parameters
Press the SOURCE buttonuntil the Radio source is selected then press the button
and select Settings.
Traffic alert
The Traffic alert option allows the Radio source to be automatically
activated and selected when the current station starts broadcasting
traffic informations.
Other manuals for ASTEROID Tablet
9
Table of contents
Other Parrot Car Receiver manuals

Parrot
Parrot ASTEROID Smart User manual

Parrot
Parrot RKi8400 User manual

Parrot
Parrot ASTEROID Tablet User manual

Parrot
Parrot CK5100 User manual

Parrot
Parrot RK8200 User manual

Parrot
Parrot RKi8400 User manual

Parrot
Parrot RHYTHM N'BLUE User manual

Parrot
Parrot Asteroid Classic User manual

Parrot
Parrot ASTEROID Tablet User manual

Parrot
Parrot RKi8400 User manual