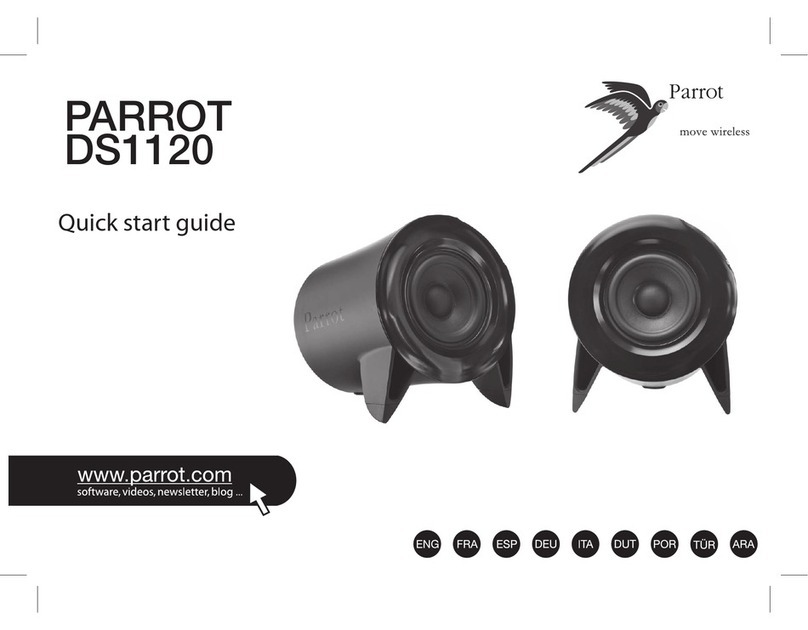
Parrot DS1120 User manual

For Bluetooth® enabled computers,
Bluetooth mobile phones,
smartphones, PDAs
Pour PC, téléphones portables,
smartphones, PDA
compatibles Bluetooth ®
Para PC, teléfono móvil,
smartphones, PDA
compatible con Bluetooth ®
Parrot
DS1120
USER MANUAL
GUIDE UTILISATEUR
MANUAL DEL USUARIO
FRA
ENG ITA DEU
DUT
ESP POR HEB
日本語
TÜR ˃ˉˉ
ARA 㻘幼
NOR
SVE ČES PYC
POL
DAN
FRA
ENG ESP
30W Sensitive
touch
Bluetooth

English 5
Français 19
Español 35

General Information
FCC Compliance Statement
This device complies with part 15 of the FCC rules.
Operation is subject to the following two conditions:
(1). this device may not cause harmful interference, and
(2). this device must accept any interference received, including interference that may cause undesired operation.
Note: the maNufacturer is Not respoNsible for aNy radio or tv iNterfereNce caused by uNauthorized modificatioNs to this equipmeNt. such modificatioNs could
void the user’sauthority to operate the equipmeNt.
Declaration of Conformity
We, Parrot S.A. of 174 quai de Jemmapes, 75010 Paris, France,
declare under our sole responsibility that our product, the Parrot DS1120
to which this declaration relates is in conformity with appropriate standards EN300328, EN301489-1,
IEC60065 following the provision of Radio Equipment and Telecommunication Equipment directive,
with requirements covering EMC directive 89/336/EEC and Low Voltage directive 73/23/EEC.
Identication N. 394 149 496 R.C.S. PARIS
Parrot S.A.
Protection and personal safety
Carefully read the user guide and follow the indicated procedure when setting up the device. Do not dismantle or open the device and do not touch
the electronic components or the drivers. Do not attempt to dismantle or modify either of the speakers.
Never introduce any metal object to avoid the risks of electric shocks, re, short circuits or dangerous emissions. If your device shows signs of faulty
operation, call the approved Parrot technical support centre or an approved retailer. Never leave the Parrot DS1120 exposed to rain or chemical products;
do not place them in a damp area or where they are likely to be splashed with water. Never place your device on a recipient containing any type of liquid,
which might seep inside the device. Doing so will reduce the risks of electric shocks, short circuits, re and injury.

Copyrights
Copyright © 2007 Parrot. All rights reserved. The total or even partial reproduction, transmission or storage of this guide in any form or by
any process whatsoever (electronic, mechanical, photocopy, recording or otherwise) is strictly prohibited without prior consent from Parrot.
Licences
The Bluetooth ® word mark and logos are owned by the Bluetooth SIG, Inc. and any use of such marks by Parrot S.A. is under license. Other
trademarks and trade names are those of their respective owners.
Data Security
Parrot and its suppliers shall not be held liable for any lost data or any other damage resulting directly or indirectly from the use
or malfunction of this product.

5
English

6
Contents
General Information 7
Important safety instructions 8
Kit contents 9
Caution : Wireless technology 9
Introduction 9
Use cases 10
Setting up the Parrot DS1120 10
1. Selecting a place for the Parrot DS1120 10
2. Installing the Parrot USB Dongle 11
3. Connecting the Parrot DS1120 to a PC 12
4. Connecting the Parrot DS1120 to a Bluetooth audio
player 13
5. Standalone mode 13
6. Using several Bluetooth audio players 13
7. Meaning of the LEDs 14
Audio Streaming 15
1. Using an audio player with a Jack audio cable 15
2. Volume control 15
3. Mute mode 16
4. Audio effect 16
5. Using the Parrot Audio Conguration
Tool software 16
Software update 16
Troubleshooting 17
Hotline 18
Technical specication 18
1
1 2
2

English
7
General Information
1. Modifications
The explanations and specifications in this guide are given
for information purposes only and may be modified without prior
notice. They are deemed to be correct at time of going to press.
The utmost care has been taken when writing this guide,
as part of the aim to provide you with accurate information.
However, Parrot shall not be held responsible for any conse-
quences arising from any errors or omissions in the guide, nor for
any damage or accidental loss of data resulting directly
or indirectly from the use of the information herein.
Parrot reserves the right to amend or improve the product design
or user guide without any restrictions and without any obligation
to notify users. As part of our ongoing concern to upgrade
and improve our products, the product that you have purchased
may differ slightly from the model described in this guide.
If so, a later version of this guide might be available
in electronic format at Parrot’s website at www.parrot.com.
2. Correct Disposal of This Product
(Waste Electrical & Electronic Equipment)
(Applicable in the European Union and other European countries
with separate collection systems).
This marking shown on the product or its literature,
indicates that it should not be disposed
with other household wastes at the end of its wor
king life.
To prevent possible harm to the environment or human health
from uncontrolled waste disposal, please separate this from
other types of wastes and recycle it responsibly to promote
the sustainable reuse of material resources.
Household users should contact either the retailer where
they purchased this product, or their local government office,
for details of where and how they can take this item
for environmentally safe recycling. Business users should
contract their supplier and the terms and conditions
of the purchase contract. This product should not be mixed
with other commercial wastes for disposal.

8
Important safety instructions
TO REDUCE THE RISK OF FIRE OR ELECTRIC SHOCK, DO NOT EXPOSE THIS APPARATUS TO RAIN OR MOISTURE AND OBJECTS FILLED WITH LIQUIDS,
SUCH AS VASES, SHOULD NOT BE PLACE ON THIS APARATUS.
1. This apparatus shall not be exposed to dripping or splashing and no object lled with liquid,
such as vases, shall be placed on the apparatus.
2. The AC/DC adaptor which provides disconnection from mains supply shall remain readily operable.
Unplug this apparatus when unused for long periods of time.
3. Read these instructions
4. Keep these instructions
5. Heed all warnings
6. Follow all instructions
7. Do not use this apparatus near water
8. Clean only with dry cloth
9. Do not block any ventilation openings. Install in accordance with the manufacturer’s instructions.
10. Do not install near any heat as radiators. Heat registers, stoves or other apparatus (including ampliers) that produce heat.
11. Do not defeat the safety purpose of the polarized or grounding type plug. A polarized plug has two blades with one wider
than the other. A grounding type plug has two blades and a third grounding prong. The wide blade or the third prong are
provided for your safety. If the provided plug does not t into your outlet, consult an electrician for replacement
of the obsolete outlet.
12. Only use attachments/accessories specied by the manufacturer
13. Unplug this apparatus during lightning storms or when unused for long periods of time.
14. Refer all servicing to qualied service personnel. Servicing is required when the apparatus has been damaged in any way,
such as power supply cord or AC/DC adaptor is damaged, liquid has been spilled or objects have fallen into the apparatus,
the apparatus has been spilled or objects have fallen into the apparatus, the apparatus has been exposed to rain or
moisture, does not operate normally, or has been dropped.
15. WARNING: To reduce the risk of re or electric shock, do not expose this apparatus to rain or moisture.
This apparatus is designed for indoor use only.
An equilateral triangle, is intended to alert the user to the presence of uninsulated «dangerous voltage»
within the product’s enclosure that may be of sufcient magnitude to constitute a risk of electric shock to persons.
The exclamation point within an equilateral triangle is intended to alert the user to the presence of important operating
and maintenance (servicing) instructions in the literature accompanying the product.
S3125A
S3125A

English
9
Kit contents
The kit includes :
• Two Parrot DS1120 speakers
• A Jack audio cable (3.5mm)
• A Parrot Bluetooth USB Dongle
• Two mains cables
• Two removable black magnetic speaker covers.
• A CD-ROM containing :
- Parrot Audio Configuration Tool
- Acrobat Reader
- Parrot Software Update Tool
- User guide in pdf format
- Parrot Audio Conguration Tool user guide
in pdf format
- the installation software of the Parrot Bluetooth USB
DONGLE
• Quick start guide of the Parrot DS1120.
• Parrot products guide
Caution : Wireless technology
Interference can be caused by devices that emit waves.
Devices such as Wi-Fi routers and microwave ovens can
affect audio transmissions with your Parrot DS1120 and also
degrade your system’s audio quality.
Introduction
The Bluetooth wireless technology enables audio information
and data to be sent via a short-distance radio link. Parrot
draws on its long years of experience in the Bluetooth tech-
nology to offer you an innovative system, the Parrot DS1120.
The Parrot DS1120 is a wireless sound system based on the
Bluetooth technology.
Plug in the speakers and use your Bluetooth-compatible
computer, mobile phone, smartphone, PDA, or MP3 player to
stream your MP3 tracks to the speakers. Your audio device
acts as the transmitter and the speakers act as the receiver.
Transmitting music in this way is known as streaming.
The Parrot DS1120 also features a line-in socket that can
be used to stream any music stored on an MP3 player, CD
player, and so on. In this case, an audio cable is required to
connect the device to either of the two speakers (supplied).

Optimal conditions
• 1 = 2 = 3
• 4 > 40 cm
• 5 ~ 60°
1 2
3
4
5
10
Use cases
- Streaming Audio from a PC (A2DP prole). Refer to the
“Using the Parrot Bluetooth USB Dongle” section for more
information.
- Streaming audio from any kind of audio player with the Jack
socket (Jack-Jack audio cable supplied)
- Streaming Audio from a mobile phone / PDA / Smartphone
(A2DP prole)
Note : ifyou waNt to fiNd out which devices are equipped with
the a2dp techNology, visit the support sectioN oN our website
at www.parrot.com
Setting up the Parrot DS1120
1. Selecting a place for the Parrot DS1120
The Parrot DS1120 is designed to be placed on a desk,
a table or a stable shelf. To get the best possible sound
performances, we advise you to respect the following
recommendations:
• Make sure that you correctly installed the speakers at
their respective positions (the “Right” and “Left” labels are
located on the back of the speakers).
• Install your speakers at the same distance
from the listening point.
• Make sure there are no obstacles between the speakers
and you. Avoid corners if possible.
• Turn the speakers towards the listening point by establishing
a 60 degree angle (refer to the diagram) as most
of the stereo recordings are realized for this conguration.
• Install your speakers at ear level: by doing so,
the frequency response will be optimal.
• To get the best possible reproduction of the bass frequencies,
make sure there is a minimal distance of 40 cm between the
back and lateral walls and the speaker. Bass frequencies
will get louder if you place your speakers closer to the walls.

English
11
2. Installing the Parrot USB Dongle
If your PC is already Bluetooth compatible, the use of the
Parrot USB Dongle and the installation procedure below are
not necessary.
System requirements:
• Min. processor speed 200 MHz
• RAM: Min. 64 MB, recommended 128 MB
• Free USB port (USB 1.1 and 2.0 standards)
• Windows® 2000, XP or Vista
1. Insert the software installation CD in the CD-ROM drive
of the computer.
> If you are using Windows 2000 or Windows XP, the
installation process will start automatically.
> If you are using Windows Vista, click on Execute Setup.
exe.
> If the installation does not start automatically, double
click on the drive letter associated to your CD-ROM drive
and double click on Setup.exe.
2. Click on Install Parrot Audio Suite.
> The Bluetooth installation window is displayed.
3. Click OK if you wish to use the Parrot USB Dongle.
> The «InstallShield Wizard» software will then install the
various functions available with the Parrot USB Dongle.
4. Follow the instructions on the screen.
> During the installation process you may be asked to
connect the Parrot USB Dongle. If the dongle is not yet
plugged into the computer, you must connect it to a USB
1.1/2.0 - compatible port on your PC or laptop. Then click
on OK to continue. If you want to continue the installation
without connecting the Bluetooth peripheral, click on
Cancel.
5. You will then see a message conrming that the driver has
been installed.
> Click on Finish to end the installation process.
importaNt: the usb adapter is seNsitive to static
electricity. the highly seNsitive electrical adapter compoNeNts
caN be damaged by static. toprotect the peripheral, always
touch the metal case of the computer before haNdliNg the
usb adapter. this eNsures that you discharge aNy static
electricity. you should avoid aNy coNtact with the metal
coNNector wheN haNdliNg the usb adapter. very dry weather
or simply walkiNg across the floor caN cause astatic charge
to build up oN your body.

12
1. Make sure your speakers are connected and correctly
synchronized.
2. Launch the Parrot Audio Conguration Tool application.
> The connection window appears.
3. If you’re using the Parrot DS1120 with your computer for
the rst time, select the option New to display the list of the
available Bluetooth peripherals. If it’s not the case, select
directly your device.
4. Push the Conguration key on one of your speakers.
> The LEDs blink rapidly.
5. Once you selected the Parrot DS1120 among the available
Bluetooth peripherals, click on Connect.
> A window appears at the bottom right of your screen.
6. Click on this window and enter « 0000 » in the Bluetooth
Security Code eld.
Note: this actioN is oNly required for the first use of the
parrot ds1120 with your computer.
> The Parrot DS1120 is now connected to your computer. You
can begin to listen to music les.
> you caN Now start the audio streamiNg.
> refer to the «usiNg parrot audio coNfiguratioN
tool» sectioN iif you wish to chaNge audio parameters.
3. Connecting the Parrot DS1120 to a PC
- If your computer isn’t compatible with the Bluetooth techno-
logy, refer to the « Installing the Parrot USB Dongle » section.
- To connect easily your computer to the Parrot DS1120, use
the Parrot Audio Suite software. If you have not installed this
software yet, you can nd it on the CD-ROM provided
or download it from our website www.parrot.com, in the
Support section.
1
1 2
2
1
1 2
2
1
1 2
2

English
13
4. Connecting the Parrot DS1120 to a
Bluetooth audio player
1. Switch the speakers ON and wait for the LEDs to ash
in blue.
2. Press the Conguration button.
> The blue LEDs start ashing quickly.
> The system is ready: you can now connect
your Bluetooth device.
3. On your Bluetooth audio source device, search for peri
pherals and select « Parrot DS1120 ».
> Refer to your audio player user guide for more informa
tion.
4. You are prompted to enter a PIN code : enter « 0000 » on
your source device.
> The Parrot DS1120 is ready to receive music.
> Subsequent connections will be established from
your device without any need to re-enter the PIN code.
Note : holdiNg dowN the coNfiguratioN buttoN for 5
secoNds restores the factory settiNgs aNd re-performs aN
auto-coNfiguratioN.
5. Standalone mode
• The Parrot DS1120 works as two independent speakers
if the auto-conguration phase does not occur correctly.
In that case, only one speaker is active and the LEDs are
red.
• To return to normal mode, bring the speakers close together
(less than 10m) and they automatically switch back to
normal mode by restarting the auto-setup phase.
6. Using several Bluetooth audio players
• The Parrot DS1120 can be paired up to 10 audio players.
• Several audio players cannot stream music at the same
time. You must rst stop the player currently streaming to
use other audio players.

14
7. Meaning of the LEDs
• The blue LED means that the system is being used in normal mode.
colour meaNiNg
Alternating blue/red The two speakers are in the auto-configuration phase.
Dim blue No device is connected.
Bright blue One or several audio players are connected and the streaming is in progress.
Blue – Flashing quickly The speakers are ready to be paired with the source.
Blue – Flashing slowly Streaming is in progress, but the system has been muted (no sound).
> Press + or – to unmute the Parrot DS1120.
• The red LED means that the system is being used in standalone mode.
colour meaNiNg
Alternating blue/red The two speakers are in the auto-configuration phase.
Dim red No device is connected.
Bright red One or several audio players are connected and the streaming is in progress.
Red – Flashing quickly The speaker is ready to be paired the source.
Red – Flashing slowly Streaming is in progress, but the system has been muted (no sound).
> Press + or – to unmute the Parrot DS1120.

English
15
1
1 2
2
Audio Streaming
1. Using an audio player with a Jack audio cable
Make sure the Parrot DS1120 is switched off before
connecting it to your PC or audio placer using the
jack/jack cable.
You can connect your audio player to the Parrot DS1120
via a jack / jack audio cable to stream music : connect the
Jack cable to one of the speakers - the music will be sent via
Bluetooth to the other speaker.
Make sure that the connectors are inserted properly to avoid
any disruption.
Nb: wheN the parrot ds1120 is coNNected by meaNs of a
jack audio cable to aN audio player, you caN also play your
tracks via Bluetooth from aNother audio player. streamiNg by
Bluetooth will take priority over the liNe-iN coNNectioN.
2. Volume control
The volume can be adjusted as follows:
• Keep your nger on the touch-sensitive keys
to increase/decrease the volume
• If this function is supported by your audio player
you can control the volume remotely.
• You can also use the Parrot Audio Conguration Tool
software to adjust the volume settings.

16
3. Mute mode
Touch simultaneously the + and – keys to mute
the Parrot DS1120. Use the + or – key to unmute it.
4. Audio effect
You can enjoy the VSBass function (bass frequencies
amplication) with the Parrot Audio Conguration Tool
software which you will nd in the CD-ROM supplied
with your Parrot DS1120. For more information,
refer to the user guide of this software.
5. Using the Parrot Audio Conguration Tool software
The Parrot Audio Conguration Tool is part of the Parrot Audio
Suite on the CD-ROM supplied with the Parrot DS1120. It
allows you to congure the Parrot DS1120 on a computer
running Windows XP or Windows Vista with the following
softwares :
• Microsoft’s Bluetooth software
• Broadcom’s Widcomm software
• Toshiba Bluetooth software.
Prior to launch the Parrot Audio Conguration Tool, you must
ensure that no music is currently being streamed to the Parrot
DS1120. Once you have started the application, you need to
select your Parrot DS1120 before you can congure it.
Once the Bluetooth connection has been established
with your Parrot DS1120, you can :
• Control the volume of your Parrot DS1120.
• Adjust the music settings via the equaliser function
and the audio effect (VS Bass).
• Enable the volume ramp option to set up the time the sound
will take to get to the dened volume.
• Adjust the time delay of the Parrot DS1120. This option
is used to synchronise your audio system with your PC.
• Find out the software version used by your Parrot DS1120.
Software update
You can update the software of your Parrot DS1120 by
Bluetooth. Upgrading offers you new features and improves
compatibility with a larger number of phones. Updates are
performed via the Parrot Software Update Tool. You will nd
this software, along with instructions on how to use it in the
Support section of our website at www.parrot.com

English
17
Troubleshooting
problems solutioNs
No sound is coming
through the Parrot DS1120.
- Check that your device supports the Bluetooth A2DP profile and the source role.
- If your audio player is a PC, Check that the «Sound playback» option is set to
«Highquality Bluetooth Audio». You can find this option by selecting
Start/Settings/Control panel/Sound and Audio Devices/ Audio on your computer.
- Check the volume of the speakers
I cannot connect my
audio player to the Parrot
DS1120.
- Hold down the Configuration button on the Parrot DS1120 for two seconds,
then restart the search and connect.
I used a Jack audio cable
to connect
my audio player,
but I get no sound.
- Check that the jack audio cable is properly plugged in to the Parrot DS1120 and
audio player.
- Check that there is no Bluetooth connection with an audio player.
The Bluetooth connection will take priority over the Jack connection.
- Check the volume of the speakers.
My Parrot DS1120 makes a
noise when
I use a jack audio cable.
- Check that the jack audio cable is properly plugged
in to the Parrot DS1120 and audio player.
When I watch a video,
the sound from the Parrot
DS1120 is not synchronised
with the image.
- Use the Parrot Audio Configuration Tool to check that your system’s audio delay
is correctly configured for this type of use.

18
Hotline
Our hotline is at your disposal to provide you with any
assistance required. You can contact the hotline by email or
telephone. Open from Monday to Friday between 9 am and
6 pm (GMT+1).
• Italy : [+39] 02 86 39 14 63
• Spain : [+34] 902 404 202
• UK : [+44] (0)870 112 5872
• Germany : 0900 172 77 68
• USA : [+1] (877) 9 Parrot (toll free)
• China : [+86] (0)21 6460 1944
• Hong Kong: [+852] 2736 1169
• France : 01 48 03 60 69
• Europe : [+33] 1 48 03 60 69 (Spoken languages :
French, English, Spanish and German).
Check out our website at www.parrot.com
for further information.
Technical specication
• Class D digital audio amplier
• Output power: 2 x 15 W (RMS)
• Two wideband drive units
- Frequency range: 100Hz – 18kHz
• Jack connector for analog line-in
• CPU : Parrot P5 with ARM9 core
• Memory :
- Flash : 4MB
- RAM : 8MB
• Power supply :
- AC: 100-240V ~ 50/60Hz
- DC: 12V / 2A
• Dimensions: 153 x 144 x 131 mm
• Weight : 2 x 950g
Bluetooth
• Bluetooth 2.0+EDR
• Proles : A2DP, AVRCP, FTP, OPP, SPP
• PIN code: 0000
• QD ID :
- Parrot DS1120: B012780
- Parrot Host Subsystem: B012423
- Parrot Prole Subsystem: B012424
• Friendly Name : «Parrot DS1120»

Notes
English
19

20
Other manuals for DS1120
2
Table of contents
Languages:
Other Parrot Speakers manuals

Parrot
Parrot Zikmu User manual

Parrot
Parrot DS1120 User manual

Parrot
Parrot BOOMBOX User manual

Parrot
Parrot PARTY User manual

Parrot
Parrot DS1120 User manual

Parrot
Parrot PARTY-BLACK User manual

Parrot
Parrot DS3120 User manual

Parrot
Parrot ZIKMU SOLO User manual

Parrot
Parrot MKi9000 User manual

Parrot
Parrot ZIKMU SOLO User manual