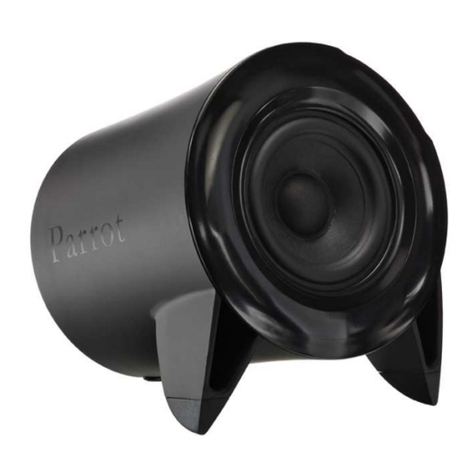
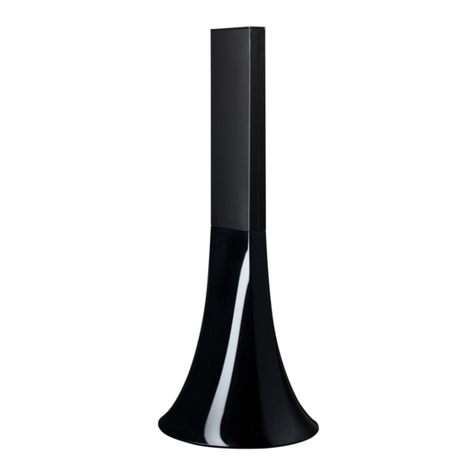
Parrot ZIKMU SOLO User manual

User Guide

2
Table of contents
............................................
...........................................................................................................................................5Getting started
..................................................................................................................................................................................5Positioningthe Zikmu Solo
..................................................................................................................................................................................5Connection to mainssupply
..................................................................................................................................................................................6Remote control
..................................................................................................................................................................................6Turning the ParrotZikmu Solo on / off
..................................................................................................................................................................................7Removingthe front grid
..................................................................................................................................................................................8Lights
..................................................................................................................................................................................8Selecting an audio source
..................................................................................................................................................................................8Controlling the volume
..................................................................................................................................................................................9Controlling the music playback
..................................................................................................................................................................................9Maintenance and precautions
...........................................................................................................................................10iPod ..................................................................................................................................................................................10Compatibility
..................................................................................................................................................................................10Using the dock adapter
..................................................................................................................................................................................10Connecting the iPod
..................................................................................................................................................................................11Using the application
...........................................................................................................................................12Wi-Fi ..................................................................................................................................................................................12Before you begin
..................................................................................................................................................................................12Identifyingthe connection type
..................................................................................................................................................................................12Connection with WPS
..................................................................................................................................................................................13Connection with an RJ45cable
..................................................................................................................................................................................14Connection with an iPhone
..................................................................................................................................................................................14Manual connection
..................................................................................................................................................................................14Using the web interface
..................................................................................................................................................................................15Transferringmusic via a UPnP / DLNA server
...........................................................................................................................................................................15With Windows Media Player
...........................................................................................................................................................................15With web interface
..................................................................................................................................................................................15Accessing shared folders on your computer
..................................................................................................................................................................................16Accessing available servers
...........................................................................................................................................17Bluetooth
..................................................................................................................................................................................17Using the ParrotZikmu Solo with a Smartphone
..................................................................................................................................................................................18Usingthe Parrot Zikmu Solo with a computer
...........................................................................................................................................................................18Establishing a connection with a PC
...........................................................................................................................................................................18Establishing a connection with a Mac
...........................................................................................................................................20Jack
...........................................................................................................................................21Settings
..................................................................................................................................................................................21Web interface
...........................................................................................................................................................................21Using the random and repeat options
...........................................................................................................................................................................22Using the equaliser
...........................................................................................................................................................................22Balancing the volume levels
3
...........................................................................................................................................................................22Defining the compensation level for the room
...........................................................................................................................................................................22Using the volume ramp
...........................................................................................................................................................................22Using the Bass Extender option
...........................................................................................................................................................................22Disable all sound effects
...........................................................................................................................................................................23Changing the Internet settings
..................................................................................................................................................................................23Parrot Audio Suite
...........................................................................................................................................................................23Defining the compensation level for the room
...........................................................................................................................................................................23Using the volume ramp
...........................................................................................................................................................................23Using the Bass Extender option
...........................................................................................................................................................................24Using the equaliser
...........................................................................................................................................................................24Using the mixer
...........................................................................................................................................................................24Connecting to the Wi-Fi network
...........................................................................................................................................................................24Disable all sound effects
...........................................................................................................................................................................24Select a source
..................................................................................................................................................................................25Changingthe Bluetooth settings
...........................................................................................................................................................................25Changing the Bluetooth name
...........................................................................................................................................................................25Changing the PIN code
...........................................................................................................................................26Updating
..................................................................................................................................................................................26Check the Parrot Zikmu Solo software version
..................................................................................................................................................................................26Check the Parrot Zikmu Solo latestsoftware version available
..................................................................................................................................................................................26Updating the Parrot Zikmu Solo via Wi-Fi or Ethernet
..................................................................................................................................................................................26Updatingthe Parrot Zikmu Solo usinga shared folder
...........................................................................................................................................28Troubleshooting
..................................................................................................................................................................................28Resettingthe ParrotZikmu Solo
..................................................................................................................................................................................28Pairing the remote control
..................................................................................................................................................................................29Compatibility
..................................................................................................................................................................................29For more information
..................................................................................................................................................................................29General information

4

5Gettingstarted
Getting started
.........................................................................................................................................................
Note : To make this guide easier to read, the iPod touch® and iPhone® (in music mode) shall be designated by the term "iPod" in
this manual. Compatible telephones or tablet PCs shall be designated by the term "Smartphone".
Positioning the Zikmu Solo
To install your Parrot Zikmu Solo, we recommend the following:
To ensure the low frequencies are reproduced accurately, leave a distance of at least 40 cm from rear or side walls.
Positioning near walls has the effect of increasingthe level of the low frequencies.
When your Parrot Zikmu Solo is installed and working, download the Parrot Audio Suite App in order to define the
characteristics of the environment for the Parrot Zikmu Solo (dimensions of the room, distance away from walls). Refer
to the Settings section for more information.
Connection to mains supply
Plugthe speaker into an electrical outlet using the provided power cable.
>The speaker turns on automatically. The iconblinks for afew seconds then becomes steady.

6Gettingstarted
Remote control
Insert the provided remote control battery into the specific battery compartment.
Note: Use only a CR2032 battery.
Note: Disposeof used batteries in compliance with current recycling legislation in the country ofuse.
To pair the remote control to the Parrot Zikmu Solo :
1. Reboot the speaker.
2. Wait for the light to stop flashing.
3. Press the SOURCE and buttons simultaneously to pair the remote control
to the speaker. You have one minute after rebooting the speaker to perform
this action.
>The , and lights flash simultaneously to indicate that the pairing
was successful.
Note: The pairing of the remote control is necessary after a reset of the speaker (long press on the Reset button).
Turning the Parrot Zikmu Solo on / off
Press the button of the remote control or control panel to turn the speaker on / off.

7Gettingstarted
Removing the front grid
The Wi-Fi,
Bluetooth
and Reset buttons are accessible byremoving the magnetic Parrot Zikmu Solo front grid.
Button
Function
Short press: Establish Wi-Fi connection with a modem / router supporting WPS
technology (refer to the Wi-Fi > Connection with WPS section).
Longpress : Reset Wi-Fi and Ethernet parameters.
Short press: Make the Parrot Zikmu Solo visible via
Bluetooth
. Press this button before
connecting a
Bluetooth
device to the speaker for the first time (refer to the
Bluetooth >
Connection section)
.
Longpress : Delete all pairings (except the one of the currently connected device).
Reset
Longpress: Reboot the speaker.
Note: For a long press, you must keep the button pressed down for at least 5 seconds.

8Gettingstarted
Lights
Note: The lights turn off automatically after 5 seconds without the need to press any button.
Indicator
Behaviour
Meaning
Wi-Fi (green)
Off
Wi-fi not enabled
Pale
Wi-Fi network generated by the speaker
(SoloNET) available.
Flashing slowly
Connecting to the Wi-Fi network
Flashing quickly
AwaitingaWPS connection
Constantly on
Successfully connected to the Wi-Fi
network.
Bluetooth (blue)
Off
Speaker not visible via
Bluetooth
.
Flashing quickly
Speaker visible via
Bluetooth
.
Constantly on
Speaker connected via
Bluetooth
.
Ethernet (white)
Off
Ethernet interface not connected.
Flashing slowly
Connecting.
Pale
Point-to-point connection established.
Lit
Successfully connected to the Ethernet
network.
Selecting an audio source
The Parrot Zikmu Solo allows you to use several types of audio sources: computer connected via Wi-Fi, computer or
Smartphone connected via
Bluetooth
, iPod/iPhone, analogue audio player, TV or DVDplayer with an optical audio output.
Press the SOURCE button of the remote control to switch amongthe active audio sources.
If youstart playing a music file from a second source, this source is automatically selected. The music currently played from
the first source is automatically suspended except if the first source is ananalogue audio player connected viaaJack cable.
Controlling the volume
Button
Function
Increase the volume.
Decrease the volume.
Mute the speaker / Stop the source*
* : This function marked with an asterisk is only available if you use the Parrot Zikmu Solo with controllable sources (iPod,
Bluetooth, UPnP, Samba).

9Gettingstarted
Controlling the music playback
Buttons
Functions
Quickpress: Move onto the next track
Quickpress: Pause/play
Quickpress: Return to the start of a track/return to the previous track
Maintenance and precautions
To remove dust or fingerprints from the speaker, use a slightly damp cloth.
Avoid the use of chemical products to cleanthe speaker.
The Parrot Zikmu Solo is a high technology product and should be handled with particular care.

10 iPod
iPod
.........................................................................................................................................................
Compatibility
Please refer to the iPod/iPhone compatibility page for more information onthe iDevices compatible with the speaker.
Using the dock adapter
Two dockadapters provided with the Parrot Zikmu Solo allow you to use the speaker with iPhone 3/3GS/4 & 4S. To use the
Parrot Zikmu Solo with another iDevice, use the dock adaptor supplied with the iDevice.
To insert the dock adapter:
1. Position the adapter above the connector.
2. Insert the front part with the tabs.
3. Lockby pressing the bottom part.
Note: The dock cover dust cap supplied with your Parrot Zikmu Solo protects your dock from dust. Remove it when you want to
connect your device.
Connecting the iPod
Once the dockadapter is inserted on the speaker:
1. Unplug the earphones from your iPod.
2. Connect your iPod to the speaker.
>The iPodbattery charges until it is fully charged.
> You can now browse for atrack on your iPod.

11iPod
Using the application
Login to the App StoreSM or Google Play
®
and download the free Parrot Audio Suite application.
This application will allow you to:
control the playbackof your audio files
modify several audio settings
checkwhether a new update is available
connect the speaker to your Wi-Fi network easily.
Refer to the Settings section for more information.

12 Wi-Fi
Wi-Fi
.........................................................................................................................................................
Before you begin
You can stream music via Wi-Fi to the Parrot Zikmu Solo from anycomputer with the following operating systems : Windows®
XP (SP2or SP3), Windows Vista®, Windows®7, Windows 8 and MacOS X 10 (and later versions).
To stream music via Wi-Fi on the Parrot Zikmu Solo while keeping an Internet connection, you need to have a wireless access
point and to connect the Parrot Zikmu Solo to your Wi-Fi network. If you do not need an Internet connection on the computer
you are using with the Parrot Zikmu Solo, you can simply connect it to the Wi-Fi network generated by the Parrot Zikmu Solo:
SoloNet-xx.xx.
Note : The performance of the Parrot Zikmu Solo depends highly on the performance of your modem / router. The sound quality of
the Parrot Zikmu Solo may be affected if there is an obstacle or a wall between the speaker and your modem / router. Reposition
your speakers if necessary.
There are several ways to connect the Parrot Zikmu Solo to your Wi-Fi network. The detailed connection procedures are
available on the Parrot Zikmu Solo complete user guide on our website www.parrot.com.
Identifying the connection type
The type of connection you need to establish with the Parrot Zikmu Solo depends on your configuration:
If you have amodem which supports WPS technology, read the section Connection with WPS.
If you have aWi-Fi access point and an iPhone, read the section Connection with an iPhone.
If you have an Ethernet cable, read the section Connecting with an RJ45 cable.
If you have aWi-Fi access point, read the section Manual connection.
Connection with WPS
WPS (Wi-Fi Protected Setup) technology allows you to establish a secured connection between several Wi-Fi devices simply
bypressingabutton.
To find out whether your modem supports WPStechnology, refer to the documentation of your device. If you do not have this
documentation:
-your modem / router cannot support this technology if you were equipped with it before 2007 ;
-there is aWPS button on WPS modems or routers. On some routers, the following logo is located
near the button.

13Wi-Fi
Warning: Make sure you do not mistake the WPS button with a pairing button. (ex : Livebox).
If your modem / router supports WPS technology:
1. Press the WPS button of your modem / router. Refer to the documentation of your device for more information.
2. Press the
button of the Parrot Zikmu Solo, located behind the grid.
> The green light located next to this button blinks quickly when searching the WPS router.
>The green light blinks slowly when the router is found and the connection is awaiting the IPadress.
> The green light remains steady when the connection is established.
Connection with an RJ45 cable
Note: The RJ45 cable, also known as a network cable or Ethernet cable, is not supplied with the Parrot Zikmu Solo.
1. Connect your computer to the Parrot Zikmu Solo using an RJ45 cable.
> The white light blinks when the connection is in progress.
>The white light remains steadywhen the connection is established.
2. On your computer, open your web browser andenter http://zikmu-solo.local/wifi in the address bar.
>The list of available Wi-Fi networks will be displayed.
3. ClickScan and select your Wi-Fi network.
Note: The technical term used to denote the network name is SSID (Service Set Identifier). This can usually be found printed on the
underside of your router. If you have already changed the name of your Wi-Fi network, use the new name.
4. Enter the WEP / WPA / WPA2key, if it is not greyed out, andthen clickApply.
> The white light blinks when the connection is in progress.
>The white light remains steadywhen the connection is established.
Note: You will find the WEP, WPA or WPA2 key on the underside of your modem / router or in the documentation provided with
your system. If you have already changed the key for your wireless network, use the new key.

14 Wi-Fi
Note: The Parrot Zikmu SOLO will recommend by default the appropriate settings for the selected SSID. In most cases, there is no
need to modify the proposed configuration (Mode, Encryption, DHCP type, IP address).
Connection with an iPhone
If you have aniPod Touch 2G (or later version) or iPhone 3(or later version):
1. Login to the App StoreSM and download the Parrot Audio Suite free application.
2. Dock your iPhone on the Parrot Zikmu Solo or connect it to the speaker via
Bluetooth
(refer to the Bluetooth section).
3. Launch the Parrot Audio Suite application and press Wi-Fi.
>The list of available Wi-Fi networks will be displayed.
4. Select your Wi-Fi network.
5. Enter the WEP/ WPA / WPA2key if necessary.
6. Press Join.
> The Parrot Zikmu Solo is now connected to your Wi-Fi network.
> The green light located next to this button blinks when the connection is in progress.
> The green light remains steady when the connection is established.
Manual connection
The Parrot Zikmu Solo creates a Wi-Fi network by default (SoloNet-xx.xx). You can connect your computer or Smartphone to
this network in order to connect the Parrot Zikmu Solo to your Wi-Fi network.
Note : Ifthe Parrot Zikmu Solo hasalready been connected to a Wi-Fi network, it will not create its own Wi-Fi network. To do so,
you first need to reset the Parrot Zikmu Solo Wi-Fi parameters by holding down the button for 6 seconds.
1. On your computer, scan for available Wi-Fi networks.
2. Join the "SoloNet-xx.xx" Wi-Fi network (as if you were trying to establish a connection with a router / modem).
Note : You will temporarily lose your Internet access. You can reconnect your computer to your Wi-Fi network at the end of this
procedure.
3. Launch your web browser on your computer or Smartphone andenter http://zikmu-solo.local/wifi (or http://[new-name]
.local/wifi if you changed the speaker name) in the address bar.
4. Click on Scan and select your Wi-Fi network.
5. Enter the WEP/ WPA / WPA2if necessary then clickon Apply.
Using the web interface
The Parrot Zikmu Solo web interface allows you to:
checkwhether a new update is available
control the playbackof your audio files
modify several audio settings.
You can access this interface from your computer, Smartphone or Tablet.
1. Connect the Parrot Zikmu Solo to your Wi-Fi networkusingone of the previously described methods.
2. On your computer or Smartphone, launch your web browser.
3. Enter http://zikmu-solo.local in the address bar (or http://[new-name].local if you changed the speaker name).
Note: Ifyou have an Android Smartphone, you must download the Zeroconf Browser app from Google Play. This application will
search for the connection between the name assigned to the Parrot Zikmu Solo and the IP address. Enter the resulting URL it
provides in the address bar.

15Wi-Fi
Transferring music via a UPnP / DLNA server
The Parrot Zikmu Solo can connect to UPnP/ DLNA servers via Wi-Fi or via an Ethernet connection. You must be connected
to the same local network as your Parrot Zikmu Solo. You can listen to music on your Parrot Zikmu Solo using Windows Media
Player or by using the web interface. You can also listen to music on your Parrot Audio Suite application. The list of UPnP /
DLNA servers appears on the Player menu.
With Windows Media Player
To listen to music on your Parrot Zikmu Solo from
Windows Media Player (version 12 and subsequent
versions):
1. Open your player.
2. Create aplaylist.
3. Click the button "Playon" on the top right of the
player.
4. Select Zikmu-SOLO.
>The window opposite is displayed.
> You can select the music you want to play
from your list.
Note: The Parrot Zikmu Solo is compatible with all DLNA certified players.
With web interface
To listen to music on your Parrot Zikmu Solo from the web interface:
1. Start the web interface for Parrot Zikmu Solo.
2. Select the UPnP tab.
3. ClickRefresh.
>The list of UPnPservers is displayed.
4. Select one of the UPnPservers.
5. Select the Browsingtab.
6. Select your UPnP server from the drop-down list.
>The list of folders present on your server is displayed.
Note: All commands can be executed from the web interface.
Note: From 2.00.01 version, select directly the Browsing tab to access the list of UPnP servers.
Accessing shared folders on your computer
Sambalets you access the shared folders on your computer from the web interface. To do this:
1. Select the Sambatab.
2. ClickRefresh.
>The list of shared folders present on your computer is displayed.
3. Select a shared folder.
Note: Ifyour computer is connected to a network which uses a domain, click Advanced Config and enter the name ofyour domain,
login and password.
You can also access your shared folders from the Parrot Audio Suite application. To do so:
1. Select the System menu.
2. Select Disc selection.
>The list of shared folders present on your computer is displayed.

16 Wi-Fi
3. Select a shared folder.
>The shared folder appears in the Player menu.
Note: If your computer is connected to a domain, or if you use password-protected sharing, click Configuration and enter the
necessary information (domain, user, password). If an option is not required, leave the field empty.
Accessing available servers
If you connect an iPod to your speaker, the iPod appears in the list of available servers. When you select the iPod, the
folders present on your iPod are displayed.
If aUPnP server is selected on the UPnPtab, it appears in the list of available servers.
If ashared folder is selected on the Sambatab, it appears in the list of available servers.
Note: The time it takes for your shared folder to appear in the list of available servers depends on the number of files in the shared
folder and on the quality of the Wi-Fi or Ethernet connection. You can listen to tracks asthey are imported into the shared folder.

17Bluetooth
Bluetooth
.........................................................................................................................................................
Using the Parrot Zikmu Solo with a Smartphone
You can use the Parrot Zikmu Solo to listen to music files stored on your Smartphone. For this to work, your Smartphone must
support the
Bluetooth
® A2DP profile (Advanced Audio Distribution Profile). Consult the documentation provided with your
telephone for more information.
Note : Refer to the compatibility page of our website to check if your phone is compatible with the Parrot Zikmu Solo and to
consult the specific pairing procedures for the most common phones : www.parrot.com/uk/compatibility.
Before using the Parrot Zikmu Solo with your Smartphone, you must first connect the two devices. If this is your first time
usingthis equipment, you must pair the two devices before connectingthem. This process is only necessary once per device.
1. Turn on the Parrot Zikmu Solo.
2. Remove the magneticspeaker grid.
3. Press the button .
>The blue light next to this button blinks. The Parrot Zikmu Solo
is now visible to other
Bluetooth
devices for 2minutes.
4. From your Smartphone, search for
Bluetooth
devices. Consult your
Smartphone's manual for more information.
5. Select " Zikmu-Solo ".
6. Enter "0000" if a PIN code is requested.
> The Parrot Zikmu Solo is now paired with your Smartphone.
> You can now refit the speaker grid of your Parrot Zikmu Solo.
7. Connect the two devices. Consult your Smartphone's manual for more information.
8. Play amusic file on your computer.
If your Smartphone supports NFC, you can also connect the devices by touching the Parrot Zikmu Solo against the iPhone
connector. Where you have to touch your Smartphone against the speaker depends on the model. Consult your Smartphone's
manual for more information.
Note: You can pair the Parrot Zikmu Solo with up to 10 devices (mobile phone, PC, Bluetooth audio player...). If you pair an
eleventh device, the pairing of the device with the oldest last connection date will be deleted.
Note: It not possible to transfer music from multiple devices simultaneously. If an audio player is transferring a track, other
devices will not be able to play music through the Parrot Zikmu Solo at the same time. You will have to stop the current transfer.
You will also need to disconnect the device in order to connect a new one.

18 Bluetooth
Using the Parrot Zikmu Solo with a computer
You can stream music via
Bluetooth
to the Parrot Zikmu Solo from any PC supporting
Bluetooth
technology and MAC OS X 10
(and later versions).
Note : Ifyour PC is not Bluetooth enabled, usea Bluetooth dongle after having installed the necessary drivers.
Establishing a connection with a PC
The Parrot Zikmu Solo is compatible with all PCs supporting
Bluetooth
technology.
1. Turn on the Parrot Zikmu Solo.
2. Remove the front grid.
3. Press the button of the Parrot Zikmu Solo.
>The blue light next to this button blinks. The Parrot Zikmu Solo is now visible to other
Bluetooth
devices for 2minutes.
4. Clickthe
Bluetooth
icon on the bottom right of your screen.
5. Click Add a peripheral.
6. Select "Zikmu-SOLO" from the list and click Next.
7. Clickthe
Bluetooth
icon on the bottom right of your screen again.
8. ClickDisplay Bluetooth peripherals.
9. Double clickthe "Zikmu-SOLO" peripheral.
10.ClickConnect.
11.Select Parrot Zikmu Solo as the external speaker for your computer. To do this:
a. Clickthe icon at the bottom right of your screen.
b. ClickMixer.
c. Select Loudspeakers (Bluetooth Audio) from the peripherals.
Note: To useyour Parrot Zikmu Solo subsequently, your device just needs to be turned on, near your computer. You must also have
selected it as external speaker for the computer as shown in step 11. All devices paired with the computer remain in memory and
therefore do not require any additional action.
Establishing a connection with a Mac
You can use the Parrot Zikmu Solo with a MacOS X Leopard (or later version).
1. Turn on the Parrot Zikmu Solo.
2. Remove the front grid.
3. Press the button of the Parrot Zikmu Solo.
>The blue light next to this button blinks. The Parrot Zikmu Solo is now visible to other
Bluetooth
devices for 2minutes.
4. Clickthe
Bluetooth
icon at the top right of your screen.
5. Ensure that the
Bluetooth
function is enabled on your computer. If not, click on Enable Bluetooth.
6. ClickConfigure a Bluetooth device.
>The computer will look for available peripherals.
7. Select " Zikmu-Solo " from the list andclickContinue.
>The window opposite is displayed.
8. ClickClose to finalise the connection.
> Your computer and the Parrot Zikmu Solo are now connected and ready to be used.
9. Select your Parrot Zikmu Solo as the external speaker for your computer. To dothis:
a. Clickthe
Bluetooth icon
.
b. Select Zikmu Solo.

19Bluetooth
c. Select the option Use as an audio device (Stereo).
Note: To useyour Parrot Zikmu Solo subsequently, your device just needs to be turned on and near your computer, and you must
have selected it as external speaker for the computer as shown in step 9. All devices paired with the computer remain in memory
and therefore do not require any additional action.

20 Jack
Jack
.........................................................................................................................................................
You can connect your analogue audio player (ex: CD player, TV) to the Parrot Zikmu Solo via ajack/ jack cable to stream music.
To do so, connect the cable to the jack connector located under the speaker and start playing a track.
If you wish to connect the Parrot Zikmu Solo to an audio player with an optical audio output (TV or DVD player), use the
provided toslink / jackadapter.
The standard configuration of a SPDIF source may be configured to reproduce the original sound of the source.The Parrot
Zikmu Solo only supports PCM format. Compressed formats (dolby digital or DTS) are not supported. Refer to the
documentation of your source to configure the optical output to PCM only.
Note : Make sure that the connectors are inserted properly to avoid any disruption.
Note : To avoid any problem of sound saturation, increase the volume on the Parrot Zikmu Solo rather than on your audio player.
The audio mixer available on the Parrot Audio Suite application allows you to define a volume level by default for each source to
avoid problems such as a too high volume level after an audio source change.
Other manuals for ZIKMU SOLO
5
Table of contents
Other Parrot Speakers manuals

Parrot
Parrot Zikmu User manual

Parrot
Parrot ZIKMU SOLO User manual

Parrot
Parrot DS1120 User manual

Parrot
Parrot DS1120 User manual

Parrot
Parrot PARTY User manual

Parrot
Parrot MKi9000 User manual

Parrot
Parrot DS3120 User manual

Parrot
Parrot BOOMBOX User manual

Parrot
Parrot DS1120 User manual

Parrot
Parrot ZIKMU SOLO User manual