PARRY 7072 User manual

INSTRUCTION REF: IN146-7
DATE - 25/02/16
PAGE 1 of 14
www.parry.co.uk
INSTRUCTIONS
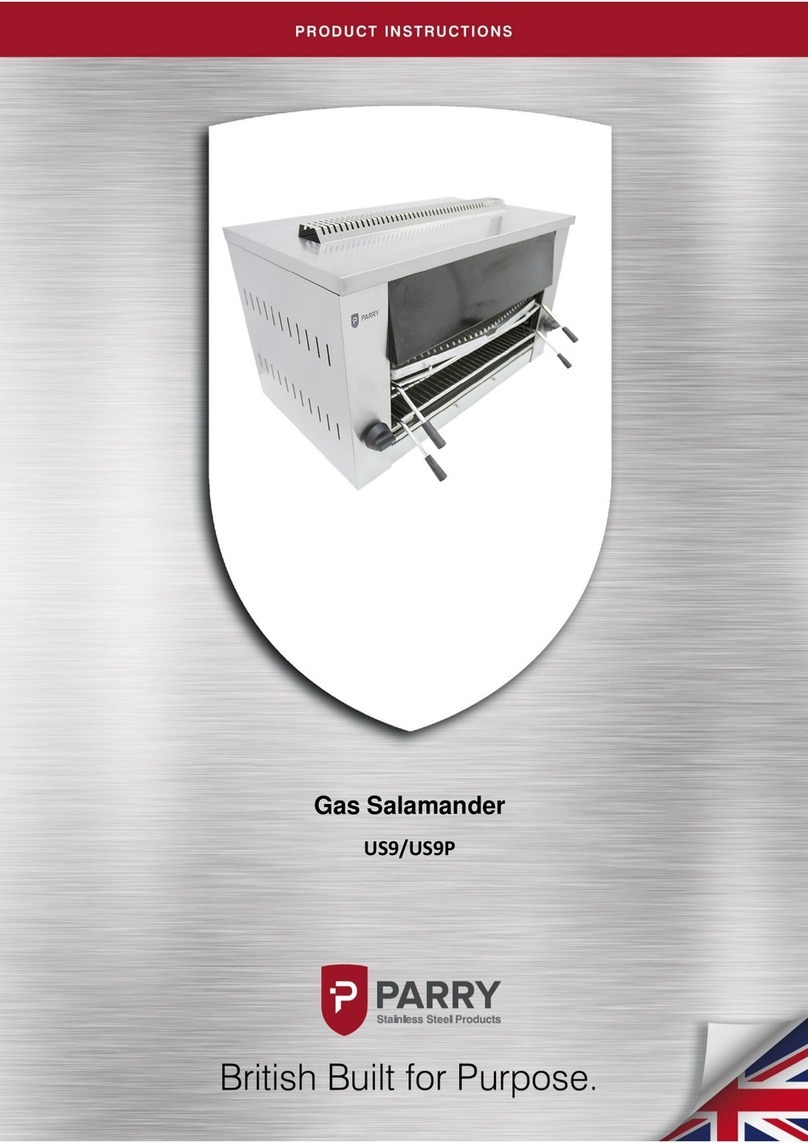
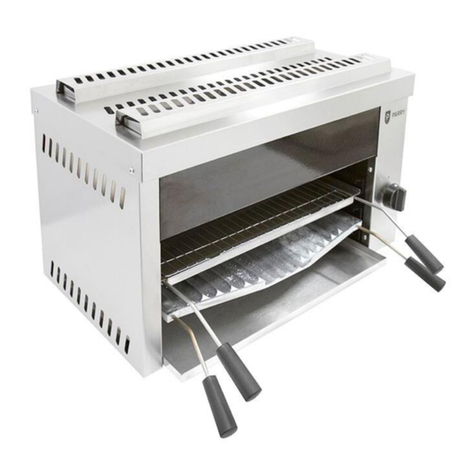
GAS SALAMANDER GRILL
MODEL: 7072, 7073
Customer Information
MODEL NUMBER:
______________________
SERIAL NUMBER:
______________________
PURCHASE DATE:
______________________
DISTRIBUTOR:
______________________

INSTRUCTION REF: IN146-7
DATE - 25/02/16
PAGE 2 of 14
www.parry.co.uk
CONTENTS
SAFETY INSTRUCTIONS
INSTALLATION INSTRUCTIONS
OPERATION INSTRUCTIONS
MAINTENANCE INSTRUCTIONS
CONVERSION INSTRUCTIONS
TECHNICAL DETAILS
PARTS LIST
SPARES LIST
WARRANTY INFORMATION
MODEL
7072 & 7073 Gas Salamander Grill
The products stated above are designed and built to comply with the following
standards:
BS EN 203-1
BS EN 203-2-7
The products have been CE-marked in compliance with the European Gas
Directive (90/396/EEC)

INSTRUCTION REF: IN146-7
DATE - 25/02/16
PAGE 3 of 14
www.parry.co.uk
SAFETY INSTRUCTIONS
IMPORTANT, PLEASE READ INSTRUCTIONS FULLY BEFORE USE
THIS APPLIANCE IS ONLY FOR PROFESSIONAL USE AND MUST ONLY BE
USED BY QUALIFIED PEOPLE.
THIS APPLIANCE MUST BE FITTED AND TESTED BY A REGISTERED FITTER
BEFORE USE. ANY GAS CONVERSIONS NEEDED TO BE MADE TO THE
PRODUCT MUST BE CARRIED OUT BY A REGISTERED ENGINEER
The unit should be installed in compliance with the INSTALLATION INSTRUCTIONS
and the NATIONAL REGULATIONS in force at the time. Particular attention should
be paid to the Gas Safety (Installation and Use) Regulations and the Health and
Safety at Work Act.
Attention should be drawn to the fact that parts of this unit by necessity, will get
VERY HOT, and will cause burns if touched accidentally. Therefore it is the
responsibility of the supervisor or equivalent to provide SUITABLE PROTECTIVE
CLOTHING for the user. Users too should be aware of the regulations governing the
use of gas appliances, particularly with respect to the need for regular servicing
(recommended annually).
Each appliance requires a flow of fresh air for combustion. Under no circumstances
should air vents on the appliances, or air vents installed by the fitter in the room of
the appliance to supply combustion air, be altered or omitted in any way. This
appliance must be installed and used in a well ventilated area.
To prevent shocks, all appliances whether gas or electric, must be earthed.
To avoid scratching the highly polished exterior surface of this equipment whilst in
transit, the protective film on the exterior surfaces has NOT been removed. It is
IMPORTANT that this protective film is peeled off before the equipment is used.

INSTRUCTION REF: IN146-7
DATE - 25/02/16
PAGE 4 of 14
www.parry.co.uk
INSTALLATION INSTRUCTIONS
ALL APPLIANCES MUST BE FITTED AND OR CONVERTED BY A REGISTERED
INSTALLER, IN ACCORDANCE WITH CURRENT REGULATIONS.
INSTALLATION
Before installation check data plate on rear of unit to ensure appliance is suitable for
gas supply available.
Appliances are supplied for use with either Natural Gas or LPG. The required gas
type must be specified at the point of order. Natural Gas appliances have an LPG
conversion kit included as standard. LPG Gas appliances have an Natural
conversion kit included as standard.
Your attention is drawn to the gas safety regulations current issue and rules in force.
This appliance must only be installed and used in a well ventilated area.
This appliance MUST be installed by a competent person in accordance with these
and any other relevant regulations. Users too should be aware of the regulations
governing the use of gas appliances, particularly with respect to the need for regular
servicing (recommended annually)
During installation provision must be provided for combustion air to the appliance
through the right hand side and rear of appliance. This should not be blocked at any
time.
This appliance should be installed with sufficient ventilation to prevent the
occurrence of unacceptable concentrations of substances harmful to health in the
room in which it is installed.
POSITIONING
The appliance must not be installed on or against combustible surfaces –minimum
clearances must be :
CEILING/SHELF 900mm
REAR 75mm
SIDES 75mm
The appliance must be fitted securely on a non-combustible shelf or surface.
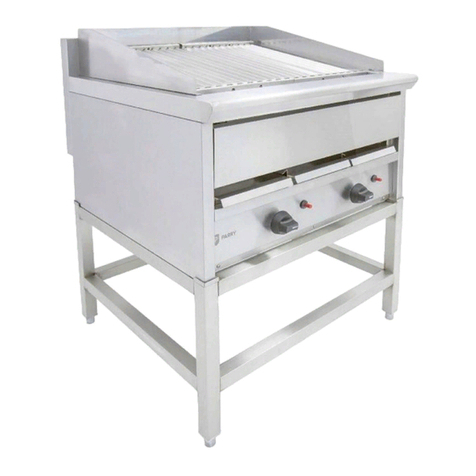
Parry sell a wall shelf, bench stand and floor stand to accompany these units
All local fire regulations should be observed.

INSTRUCTION REF: IN146-7
DATE - 25/02/16
PAGE 5 of 14
www.parry.co.uk
GAS CONNECTION
The size of the supply pipe should be no less than ½” B.S.P. and an easily
accessible isolation tap fitted close to the appliance in the gas line. Although a rigid
connection is recommended. An approved armoured flexible pipe may be used in
conjunction with a straining cable.
Before the appliance is commissioned the gas safety regulations require that all
connections on the gas line are tested for gas soundness between the gas meter
and the appliance.
All packing and protective film must be removed from panels etc. prior to
commissioning the appliance.
All gas appliances must be fitted by a competent person to gas safety regulations in
force.
Ensure whoever is operating appliance is fully conversant with its operation and
aware of dangers involved in incorrect operation and cleaning, especially the danger
of burns or scalds from the cooking medium and hot surfaces of working areas.
OPERATION INSTRUCTIONS
ALL WALL GRILLS ARE FITTED WITH SPARK IGNITION TO PILOT AND FLAME
FAILURE DEVICE FOR SAFETY.
TO LIGHT PILOT:-
Push in and turn knob to spark position, pilot should light, if not repeat; hold in for 15-
20 seconds then release, pilot should stay lit.
TO LIGHT BURNER:-
After pilot is lit turn knob to large flame symbol , main burner will ignite; the
smaller flame symbol is lower rate setting.
To turn burner off, turn knob in clockwise direction a slight stop will be felt when back
to pilot position, press in slightly to turn to off.
We advise this appliance should not be left unattended when switched on.
This appliance is for use by qualified people only,
There are no user serviceable parts.

INSTRUCTION REF: IN146-7
DATE - 25/02/16
PAGE 6 of 14
www.parry.co.uk
It is recommended the Grill be given approximately 10 minutes on full rate to warm
up. Then cooking may commence. The Grill is best used on full rate and cooking
varied by using shelf positions.
COOKING GUIDE
The centre of the burner plaques are intentionally blank to create an even heat
distribution.
There are 4 shelf positions for the grill pan, numbered 1-4, No1 being the nearest to
the burner. This shelf is normally only used for rare cooking and searing the surface
of meat.
Toast is normally done on the shelf positions 2 or 3 where a better distribution is
obtained: the time for toast is approximately 1 minute per side.
Parry recommend that the maximum load, in respect of the loading of accessories
used with the 7072 and 7073 Salamander Grills is a total of 20KG
Operators should take care to systematically check and clean the cooking zone in
particular the grill pan and receptacles before lighting to avoid the risk of fire.
It will be found that it takes less time and effort to clean the unit every time it has
been used, particularly whilst still warm before grease and spillages are burnt on.
Proprietary cleaners must be used with care –they are highly corrosive and may
cause damage to surfaces and components. The stainless outer panels require a
wipe down with warm soapy water.
DO NOT USE SCOURING PADS.
MAINTENANCE INSTRUCTIONS
MAINTENANCE AND SERVICE MUST ONLY BE UNDERTAKEN BY
REGISTERED FITTERS.
Parry recommends that this unit is serviced at least every 12 month
PLEASE NOTE THE LOW RATE ADJUSTER ON THE PILOT HAS BEEN
FACTORY SET AND SHOULD NOT BE ADJUSTED UNLESS BY A QUALIFIED
ENGINEER IN WHICH CASE THE LOW RATE ADJUSTER SHOULD BE RE-
SEALED.
Before commencing any maintenance or repair isolate appliance and disconnect
from gas supply.

INSTRUCTION REF: IN146-7
DATE - 25/02/16
PAGE 7 of 14
www.parry.co.uk
To gain entry to components-
Remove top flue cover (4 screws on top), next remove 2 screws from front of right
hand side panel, pull off gas control knob, remove 3 screws from rear of side panel
and panel will lift off.
To change the thermocouple-
Thermo-couple is retained by pilot/ignition bracket. Loosen the 2 screws on this
bracket, to withdraw thermocouple disconnect nut on back of gas tap to remove
thermocouple, assemble in reverse.
To replace ignition electrode-
Loosen the 2 screws on pilot/ignition bracket and withdraw electrode, disconnect
lead.
To clean pilot injector-
Remove the 2 screws on bracket. Remove pilot head from inside cooking area.
Clean and reassemble in reverse order.
To replace gas tap/ffd unit-
Undo inlet and outlet unions, remove thermocouple from rear of tap unit, undo
locknut on tap bracket and remove tap/ffd. Reassemble in reverse order.
Check for gas soundness and correct operation of flame failure unit. Refit side panel
and flue cover.
PLEASE NOTE:
IF THE BURNER PLAQUES ARE CRACKED THEY WILL NOT BE COVERED BY
WARRANTY

INSTRUCTION REF: IN146-7
DATE - 25/02/16
PAGE 8 of 14
www.parry.co.uk
CONVERSION INSTRUCTIONS
This conversion must only be carried out by a Gas Registered engineer.
Natural to LPG
Remove side cover. (4 screws)
Disconnect the gas feed at injector elbow
Undo back nut holding injector to burner
Remove existing injector and replace with LPG injector supplied
Adjust pilot throttle to give an appropriate sized flame, by adjusting screw on end of
pilot assembly. Check visually that the thermocouple sits within the flame.
Replace the existing labels with LPG labels provided.
Re-assemble in reverse order (5-1)
LPG to Natural
Remove side cover (4 screws)
Disconnect the gas feed at injector elbow
Undo back nut holding back nut to burner
Remove existing injector and replace with NAT injector supplied
Adjust pilot throttle to give an appropriate sized flame, by adjusting screw on end of
pilot assembly. Check visually that the thermocouple sits within the flame.
Replace the existing labels with NAT labels provided.
Re-assemble in reverse order (5-1)
Connect to gas, and soundness test
Model
Injector Code
7072
Butane G30 @28mbar 11.2” W.G.
Propane G31 @ 37mbar 14.8” W.G.
INJECT119
7072
Nat Gas G20 @ 20mbar 8” W.G.
Nat Gas G25 @ 25mbar 10” W.G.
INJECT193
7073
Butane G30 @28mbar 11.2” W.G.
Propane G31 @ 37mbar 14.8” W.G.
INJECT135
7073
Nat Gas G20 @ 20mbar 8” W.G.
Nat Gas G25 @ 25mbar 10” W.G.
INJECT220

INSTRUCTION REF: IN146-7
DATE - 25/02/16
PAGE 9 of 14
www.parry.co.uk
TECHNICAL DETAILS
MODEL: 7072 SALAMANDER GRILL
Total Unit
GAS
OPERATING PRESSURE
HEAT INPUT
NATURAL G20
20mb/8” W.G.
5.43 KW = 18527 Btu/h
BUTANE G30
29mb/11.2” W.G.
5.43 KW = 18527 Btu/h
PROPANE G31
37mb/14.8” W.G.
5.43 KW = 18527 Btu/h
G25
25mb/10” W.G.
5.6 KW = 19107 Btu/h
GAS RATE
NATURAL G20
0.5 M³/HR
= 17.95 FT³/HR
BUTANE G30
0.397 kg/HR
= 0.875 Lb/HR
PROPANE G31
0.391 kg/HR
= 0.862 Lb/HR
G25 @ 25mb
0.62 M³/HR
= 22.32 FT³/HR
AIR FLOW RATE FOR COMBUSTION 20m³/HR
= 5 M³/HR –180 FT³/HR
LOW RATE
NATURAL G20
0.332 M³/HR
BUTANE G30
0.480 Kg/HR
PROPANE G31
0.480 Kg/HR
G25 @ 25mb
0.332 M³/HR
INJECTORS
Natural G20 = INJECT193
Butane G30 = INJECT119
Propane G31 = INJECT119
G25 @ 25mb = INJECT193

INSTRUCTION REF: IN146-7
DATE - 25/02/16
PAGE 10 of 14
www.parry.co.uk
MODEL 7073 SALAMANDER GRILL
Total Unit
GAS
OPERATING PRESSURE
HEAT INPUT
NATURAL G20
20mb/8” W.G.
6.87 KW = 23500 Btu/h
BUTANE G30
29mb/11.2” W.G.
7.26 KW = 24800 Btu/h
PROPANE G31
37mb/14.8” W.G.
7.03 KW = 24000 Btu/h
G25
25mb/10” W.G.
7.22 KW
GAS RATE
NATURAL G20
0.633 M³/HR
= 22.35 FT³/HR
BUTANE G30
0.522 Kg/HR
= 1.149 Lb/HR
PROPANE G31
0.506 Kg/HR
= 1.113 Lb/HR
AIR FLOW RATE FOR COMBUSTION 20m³/HR
= 6.5 M³/HR –225 FT³/HR
INJECTORS
Natural G20 = INJECT220
Butane G30 = INJECT135
Propane G31 = INJECT135
G25 @ 25mb = INJECT220
LOW RATE
NATURAL G20
0.360 M³/HR
BUTANE G30
0.549 Lb/HR
PROPANE G31
0.549 Lb/HR
G25 @ 25mb
0.360 M³/HR

INSTRUCTION REF: IN146-7
DATE - 25/02/16
PAGE 11 of 14
www.parry.co.uk
EXPLODED VIEW

INSTRUCTION REF: IN146-7
DATE - 25/02/16
PAGE 12 of 14
www.parry.co.uk
Parts List
*Metal work components
IDENT
DESCRIPTION
7072
7073
1
*Drip Tray
2
Branding Plate
PLBR00001
PLBR07074
3
Handle
HAND01306
HAND01306
4
Handle
HAND01306
HAND01306
5
*Grill Pan Crumb Tray
Assembly
6
Grill Pan Grid
TRWG00001
GRIDGRPAN
7
LH Side Insulation
ASPC07072
ASPC07072
8
*LH Side Panel
9
*Vitreous Enamel Wall Parts
10
Burner
BURNR7072
BURNR7073
11
*Inner Flue Assembly
12
*Exterior Top
13
*Back Panel
14
Insulation Rear
RKWL07072
RKWL07072
15
Elbow Injector CW nut
INJECT119 (LPG)
INJECT193 (NAT)
INJECT135 (LPG)
INJECT220 (NAT)
15a
8mm Olive
OLVCOMPR8
OLVCOMPR8
16
Pilot Assembly
PILOT3WAY
PILOT3WAY
17
Electrode
ELECTRODE
ELECTRODE
18
Thermocouple
THCP450MM
THCP450MM
18a
M9 Split Nut
GWBSPLITNUT
GWBSPLITNUT
19
Insulation RH Side
RKWL07072
RKWL07072
20
*RH Side Panel
21
*Inspection Cover
22
Pressure Test Nipple
PRESSNIPP
PRESSNIPP
23
Gas Rail 3/4" Connection
TUBES7072
TUBES7072
24
4mm Soft Copper Tube
COPTUB4MM
COPTUB4MM
25
8mm Bundy Tube from Tap to
Burner
PIPE70723
PIPE70723
26
8mm x ¼” BSP Taper
Compression Coupling
COUPLE8MM
COUPLE8MM
27
8mm Bundy Tube from Tap to
Burner
PIPE70723
PIPE70723
28
Gas Valve CW Ignition and HT
Lead
GWBGASVALVE
GWBGASVALVE
29
Control Knob
KNOBPRO07
GWBGASVALVE

INSTRUCTION REF: IN146-7
DATE - 25/02/16
PAGE 13 of 14
www.parry.co.uk
WARRANTY POLICY
The manufacturer’s warranty is only valid in the UK mainland. Northern Ireland,
Western Isles, Inner Hebrides and Islands are parts only warranty.
All service calls will be carried out between the hours of 8.00am –5.00pm Monday to
Friday only.
We accept no responsibility for delays in replacing or repairing the equipment due to
circumstances beyond our control.
Your warranty can be immediately invalid if the installation of the equipment has not
been installed in accordance with the manufactures instruction. (See installation
details). Also the miss-use, alteration or unauthorized repairs of the equipment will
invalidate the warranty.
During the warranty period it is at Parry’s discretion to repair or replace the
equipment.
Warranty only applies if the equipment has been used in a professional manor
following the manufactures instructions and maintenance guide lines.
The warranty covers defects in the material and component failure only. We are not
liable for trading loss, loss of perishable items, water damage, loss due to injury or
fire damage.
Please be aware that the warranty starts from the date of purchase from Parry and
not the sale or installation date of the equipment.
WARRANTY REQUEST
Please ensure you have referred to the manufacturers’ instruction before placing a
warranty call. Or contact our warranty department on 01757 213909 for technical
assistance, ensure you obtain the model number before calling.
Please ensure you have read the section not covered under warranty to avoid any
unnecessary warranty charges.
It’s vital that all warranty requests be submitted to Parry via email to
It is at the discretion of PARRY whether to honour a service call which is out of the
warranty period.
Not Covered Under Warranty
• Fault due to poor maintenance.
• Resetting of equipment or circuit breakers.

INSTRUCTION REF: IN146-7
DATE - 25/02/16
PAGE 14 of 14
www.parry.co.uk
• Abuse of the equipment
• Foil should never be used on racks
• Blockages eg, drains, condensers, pumps etc
• Lime scale related issues
• Installed incorrect
• Access arranged for service call and engineer refused access or customer not
there.
• No faults with the machine.
• Setting up of equipment eg, dishwasher detergents, levelling and setting up of
doors on a 6 burner cooker.
• Excessive carbon build up on griddle plates.
• Over use of lava rock on the chargrills recommended use by Parry 2kg only.
• Faulty electrics – eg, customers plug socket, plug, wiring, junction box fault, wrong
fuse.
• Any damages caused by the customer.
• Lamps, glass, door gaskets, Perspex, baskets, knobs all perishable items are not
covered.
This appliance should be routinely serviced to prolong it’s lifetime. Parry
Recommends that the appliance is serviced every 12 months by a Parry authorised
engineer. Failure to service your product within the initial 12 month warranty period,
will cause the 24 month warranty to become void.
www.parry.co.uk
Parry Group Ltd,
Town End Road,
Draycott,
Derby,
England,
DE72 3PT
Other manuals for 7072
1
This manual suits for next models
1
Table of contents
Other PARRY Grill manuals
Popular Grill manuals by other brands

Inoksan
Inoksan PERFECT 700 Series instruction manual

Ducane
Ducane Affinity 31-3200 owner's manual

West Bend
West Bend Chris Freytag instruction manual

Coleman
Coleman 8450 Series Assembly manual

Trisa electronics
Trisa electronics 7590.42 Instructions for use

King Kooker
King Kooker 9090 Assembly instructions and use and care manual