Recording
05
Video Recording
To record a video from standby, press the record button (located on
the front of the device). The device will beep five times and the activity
indicator LED will turn solid red, indicating that the camera is now
recording.
Press and hold the record button for 2 seconds to stop recording. The
device will beep seven times and the activity indicator will turn off and
the standby indicator will now turn green.
One Touch Recording
When the unit is powered off, press and hold the record button for 2
seconds until you hear a beep. The device will turn on and
automatically start video recording.
Pre and Post Recording
When pre or post event recording is enabled, the activity LED will blink
red. Pre record event recording can be set for up to two minutes while
post event recording can be set for up to one minute. To start normal
recording while in pre event recording mode, press the record button
and the activity LED will go from blinking red to solid red.
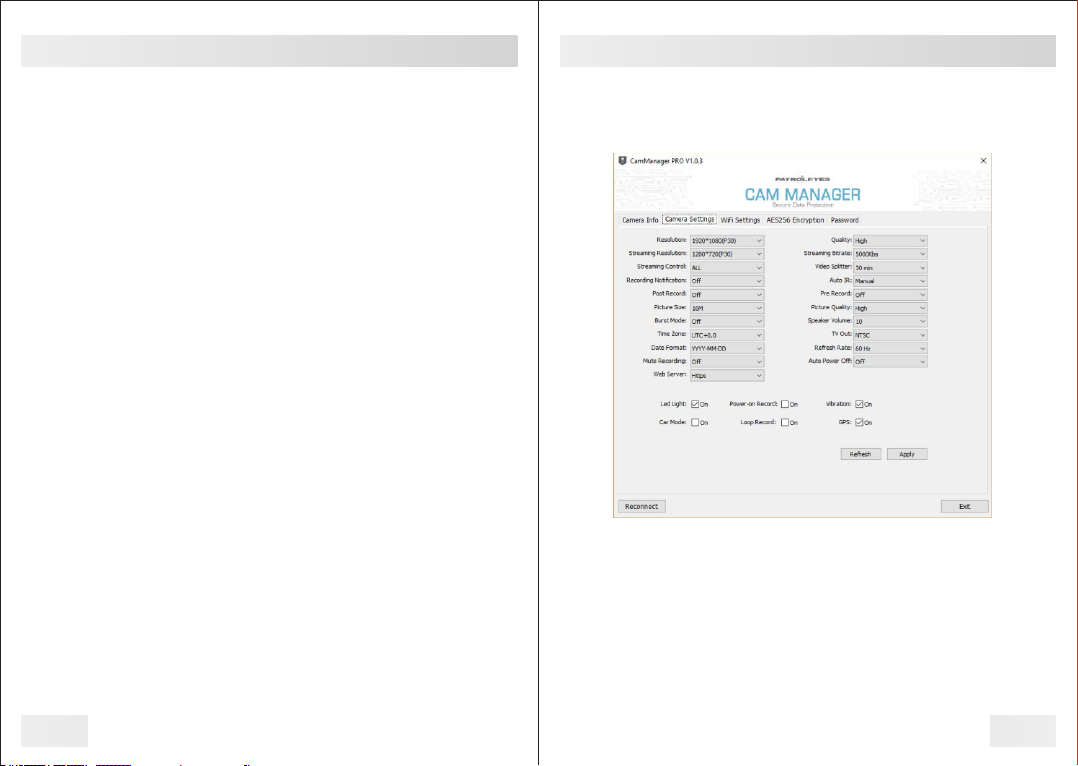
Power on Auto-Record
When the "Power on Auto-Record" function is switched on in Cam
Manager, the device will automatically start recording video when the
device is powered on.
Photograph Feature
To take a photo, press the photo button once. The activity indicator
will switch from green to red and the camera will beep 3 times.
Camera Management Software
06
To take pictures while video recording, press the Photo button. The
camera will beep one time and the camera will take a picture without
interrupting the video recording.
WiFi Feature
When powered on, you can turn the WiFi on or off without interruption
even while the camera is recording. Press the power button once in
order to turn WiFi on. A flashing white LED will indicate that the device
is searching for or creating a WiFi connection. When the device has
established a connection, the white LED will turn solid. To turn WiFi off,
press the power button once and the white LED will turn off.
Stealth Mode Feature
When powered on, you can turn the stealth mode feature on or off
without interruption even while the camera is recording. To turn stealth
mode on, press and hold the photo button down for 2 seconds. All LED
indicators and vibration sounds will be disabled, however the device
will still be operating. To turn stealth mode off, press and hold the
photo button down for 2 seconds. The camera will beep twice and the
LED indicators and vibration (if enabled in settings) will be re-enabled.
Transfer & Manage Files on Your Computer
(Compatible with Windows 7, 8 and 10)
Drop the camera into the charging station and connect it to your
computer via the included USB cable. You can also connect the cable
to your cameras USB-C port to connect to your PC. Open Cam
Manager and enter your password to sign in (instructions on page 8).
Note: Installing Cam Manager allows for managing saved data
and changing device settings.