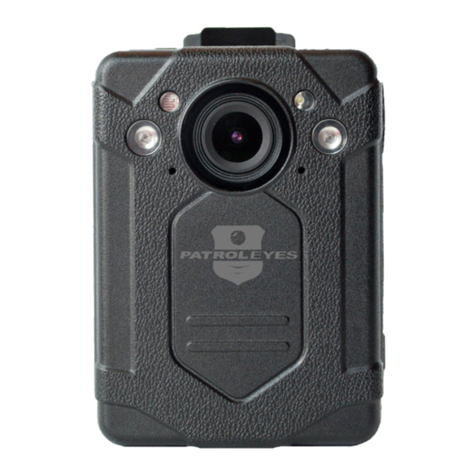
Patroleyes EDGE User manual

USER MANUAL
EDGE

01
OVERVIEW
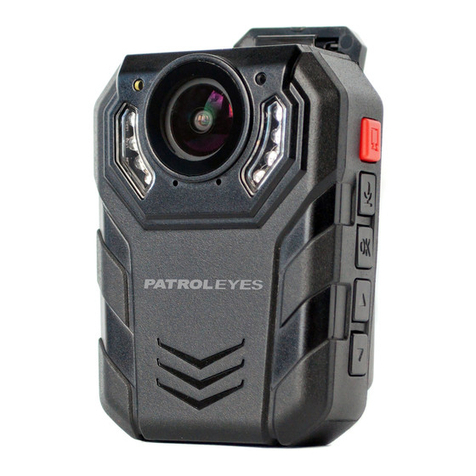
The EDGE body camera is an advanced recording system with
many options and features available. Please review the manual
to familiarize yourself with the functions of this camera.
Troubleshooting: If you are having problems with your
camera, please first fully charge it and power it on, then press
the reset button. Pressing the reset button will force the camera
to shut off. Press the power button to turn the device back on
and your device should now be working properly.
Note: Resetting the device will not delete any files on the
camera.
OVERVIEW
02

03 04
LED Indicators
Charging Indicator: Blue = Charging (will turn off when fully
charged)
Activity Indicator: Red and Blue = Recording + Charging
Solid Red = Recording
Green = Standby
Blinking Red = Pre/Post Event recording
Transferring files to your computer:
(compatible with Windows XP, Vista, 7, 8, 10 & Mac)
1. Connect your camera to your PC by directly connecting the
USB cable to your camera or by putting the camera into the
docking station. Make sure your camera is on.
2. Enter the password on the device. The default password is
888888.
3. Navigate to “My Computer” and you will see the camera show
as a removable device. Usually the E, F or G drive.
4. After clicking on the removable drive, double click on the DCIM
folder and then double click on the 100MEDIA folder and you will
see a list of all files recorded.
5. Select all the files on your camera you would like to copy to
your computer. After the files have been copied to your computer
feel free to delete the files still on your camera to free up storage
space.
GETTING STARTED
Fully charge the camera using the included USB cable and
charging dock for 3-4 hours. The charging indicator will turn
blue when charging. When the device is fully charged, the
blue light will turn off.
Confirm that the date and time on your device are correct and
enter your device ID and badge ID through the camera setup
menu.
Wearing your Body Camera Properly
On your chest (uniform):
Attach the camera clip to the front of your uniform.
Rotate the camera clip 45° and clip it to the top of your
uniform.
On your shoulder:
Using the optional epaulette mount, clip the camera to the
bracket on the mount and attach the mount to your uniform.
KlickFast Mounts:
Optional magnet, molle, and epaulette mounts now available.
Basic Operation
Power ON: Press the power button to turn on the camera and
enter into Preview Mode. The green LED on the top of the
camera will turn on.
Power OFF: Press and hold the power button to turn the
camera off. Before shutting down, any video being recorded
will be saved.
BEFORE USE

05 06
SYSTEM SETTINGS
Video Recording
In Preview Mode, single-press the record button to start
recording video, press the button again to stop recording.
When recording the Red LED indicator on the top of the
camera will be solid red.
One Touch Recording
When the unit is powered off, press and hold the record button
for 2 seconds. The device will turn on and automatically
record.
File Tagging
While video recording, press the file tag button. A warning icon
( ) will appear on the LCD. The video will be saved in the
“Event” folder. To cancel file tagging, press and hold the
function button until the warning icon is removed.
Audio Recording
In Preview Mode, single-press the audio button to record an
audio file, press again to stop recording.
Photograph Feature
In Preview Mode, single-press the photo button, and the unit
will start taking pictures.
To capture a picture while video is being recorded, single-
press the photo button.
RECORDING
Switch Between Video Recording and Audio
Recording
When video is being recorded, press the audio record button
to stop recording video and start audio recording, the video
will be saved.
When an audio file is being recorded, press the video record
button to stop audio recording and start video recording, the
audio file will be saved.
Playback
Press the back button and you will see Video, Photo, Audio.
Use the up/down buttons to select the category and then
press the confirm button to enter the media directory. Use the
up and down buttons to navigate your files and press the
“confirm” button to view the file. Pressing the up/down buttons
will allow you to fast forward or rewind the video. Up to x64
speed.
Settings for Video Recording
In Preview Mode, single-press the menu button to enter the
camera’s main menu and press the menu button again to
enter the Video Settings.
Flashlight LED Light
Press and hold the flashlight button for 2 seconds to turn on
the flashlight LED. The light will provide minor illumination to
improve image quality when necessary. Press and hold the
flashlight button again to turn the flashlight LED off.

VIDEO SETTINGS
07 08
VIDEO SETTINGS
In preview mode, press the menu button to enter into setup
menu, select the first icon and press the confirm button.
Resolution
There are six options to select from:
1440p@30fps / 1080p@60fps / 1080p@30fps / 720p@60fps
/ 720p@30fps / 480p@30fps
Video Quality
There are three options to select from:
High / Medium / Low
This refers to the video bitrate. The higher the setting, the
better the video quality and the larger the video size.
Video Length
There are five options to select from:
Off / 2 min / 5 min / 10 min / 15 min
Video length refers to the length of video segments while the
device is recording. The minute amount is the length of each
video segment before device begins a new video file. This will
NOT stop device from recording, it will just split your videos
into smaller, more manageable files.
H.265 Encoding
There are two options to select from:
Off / On
H.265 saves over 50% on storage space, and improves video
quality.
Photo Size
There are six options to select from:
4M / 8M / 12M / 16M / 32M / 40M
Burst Mode
There are eight options to select from:
Off / 2 / 3 / 5 / 10 / 15 / 20 / 30
Pre-record
There are two options to select from:
Off / On
Post-record
There are six options to select from:
Off / 5 sec / 10 sec / 20 sec / 30 sec / 60 sec
Mute Recording
There are three options to select from:
Off / Pre-recording / On
Audio won’t be recorded when mute recording is on.
Record Notification
There are six options to select from:
On / 5 sec / 10 sec / 15 sec / 30 sec / 60 sec
When enabled, the body camera will vibrate and beep at the set
intervals.

10
09
SYSTEM SETTINGS SYSTEM SETTINGS
Connection Mode
There are two options to select from:
Password Mode / Software Mode
Password mode means to enter the password on the camera
after connected to PC to view data in camera. Default
password is 888888.
Software mode means to use CamManager after the camera is
connected to PC to view data in camera. See page 13 for more
information.
LCD Brightness
There are multiple options to select from:
1-10: 1 being the dimmest and 10 being the brightest.
LCD Auto Off
There are six options to select from:
Off / 10 sec / 30 sec / 1 min / 3 min / 5 min
LCD Auto Off will turn off the LCD display of the camera when it
has been in standby mode for the selected interval. This will
NOT power off the device.
Key Tone
There are two options to select from:
On / Off
When enabled the camera will emit a beep every time a button
is pressed.
Vibration
There are two options to select from:
On / Off
IR Filter
There are four options to select from:
Off / Manual / Auto / During Recording
Off = The infrared lights will not be active.
Manual = The Manual IR button must be pressed manually to
turn on/off IR.
Auto = The IR lights will be turned on/off automatically once
the amount of light becomes too low for daytime recording.
During Recording = The IR lights will be turned on/off
automatically during recording.
Auto Power Off
There are seven options to select from:
Off / 30 sec / 1 min / 3 min / 5 min / 10 min / 30 min
Auto Power Off will only power off the device when it has been
in standby mode for the selected interval. This will NOT power
off the device during recordings.
Enhanced Standby
There are two options to select from:
On / Off
Enhanced Standby puts the camera into a low power usage
state which enables the camera to be instantly powered on
and begin recording.

11 12
SYSTEM SETTINGS
In preview mode, press the menu button to enter the setup
menu, select the second icon and press confirm button.
GPS
There are two options to select from:
On/Off
GPS Alert
There are two options to select from:
Off / Beep
When enabled, the camera will beep when a GPS signal is
achieved.
Time Zone
There is a range of numbers to select from. The GPS will
change the date and time accordingly. For example, New York
City is EST and will be set to UTC-4.0. Central time zones are
UTC-3.0.
Auto Update Time
There are two options to select from:
Off / On
Note: Will set the date and time via GPS
Date Format
There are three options to select from:
DD-MM-YYYY / MM-DD-YYYY / YYYY-MM-DD
Date & Time
Allows the user to change the date and time on the camera.
You must enter your current password first to edit the date and
time.
Volume
Controls the camera’s internal speaker. 10 being the highest
and 1 being the lowest.
Recording Alert Type
There are three options to select from:
Off / Beep / Voice
When enabled, the camera will give either a beep or a voice
command stating the camera is recording.
LED Indicators
There are two options to select from:
On / Off
Disables the top LED indicators on the camera.
Stealth Mode
There are two options to select from:
On/Off
Stealth Mode puts your camera into a special mode where no
LED lights or audible notifications are enabled.
Change Password
Allows you to change your password. You must enter your
current password to change the password.
Change Device ID
Allows you to change your device ID. You must enter your
current password to change the password.
SYSTEM SETTINGS

Change User ID
Allows you to change your User ID. You must enter your
current password to change the password.
Restore Defaults
Restores all camera settings to default. You must enter your
current password to restore the camera.
Location System Info
When GPS is enabled this screen allows you to see the GPS
status in detail.
Cam Manager
PatrolEyes Cam Manager is a desktop application that
allows you to transfer files and edit certain settings on your
camera. You can download the latest version from our
FAQ page at:
www.stuntcams.com/edge
To login to Cam Manager first connect your camera to your
PC. Once connected, select the user Administrator and enter
the default password of 888888 and press Login. Once logged
in you can use the drop down menus to select your settings.
Once your settings are set, simply exit the program and your
changes will be saved.
SYSTEM SETTINGS
13 14
CAM MANAGER
Device ID & Police ID
The device ID can be up to 5 characters long while the
Police ID can be up to 6 characters long.
Firmware Version:
Shows the current firmware verison of the camera.
For firmware updates please visit patroleyes.com/edge-faqs
Username:
Assigns a username to the camera.
Watermark:
Allows the user to set a custom watermark on the video up to 20
characters long.
Sync PC Date/Time:
Snycs the cameras date and time with that of the PC.
Default Settings:
Will reset all camera settings to default.
Format Disk:
Will erase all data on the camera
Open File Explorer:
Allows you to access the camera storage to view evidence.
ABOUT THIS DEVICE

15 16
The included drop-in charging cradle allows you to charge the
camera and transfer data.
Connect the USB charger to the cradle, and the red light on the
dock will turn on. Insert the camera by pushing the camera into
the cradle until it clicks into place. The camera will then start
charging.
For transferring data, make sure the camera is in the USB
Mode menu setting before connecting the camera to the
cradle.
Optional Accessories:
Please take some time to review our most popular add on
products below, which will help manage all of your cameras data
and also protect your investment.
•PatrolEyes 8 camera data transfer & charging station
•PatrolEyes protection plus program
•PatrolEyes magnet mount camera clips
•PatrolEyes drop lock mount
•PatrolEyes suction cup mount
Managing your cameras data:
•PatrolEyes digital evidence management software (local only)
•PatrolEyes advanced cloud storage & management (cloud)
•PatrolEyes automatic video redaction software (14 day trial)
We also have a wide variety of PatrolEyes accessories available
here: www.stuntcams.com/patroleyesone
Need further assistance - please call or email us at
SOCIAL MEDIA
For a complete list of accessories and pricing visit:
www.stuntcams.com/patroleyesone
For the latest news and firmware upgrades, please follow us at:
www.facebook.com/patroleyes
www.twitter.com/patroleyes
DROP-IN CHARGING CRADLE & ACCESSORIES
Table of contents
Other Patroleyes Digital Camera manuals

Patroleyes
Patroleyes SC-DV6 User manual

Patroleyes
Patroleyes SC-DV7 Ultra User manual

Patroleyes
Patroleyes MAX User manual

Patroleyes
Patroleyes Ultra 1296P User manual

Patroleyes
Patroleyes SC-DV1 User manual

Patroleyes
Patroleyes DV10-PRO User manual

Patroleyes
Patroleyes PE-MAX User manual

Patroleyes
Patroleyes DV5-2 User manual