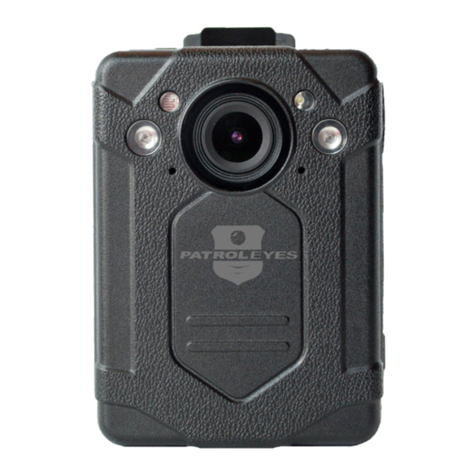
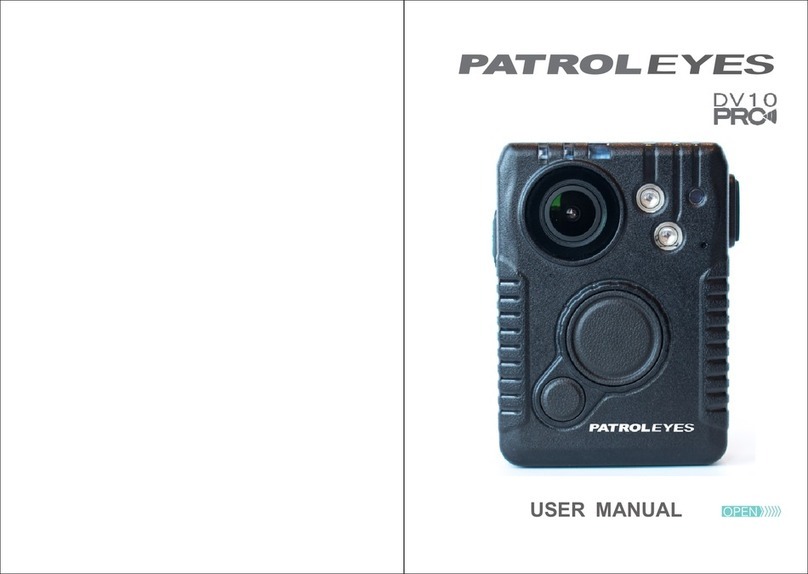
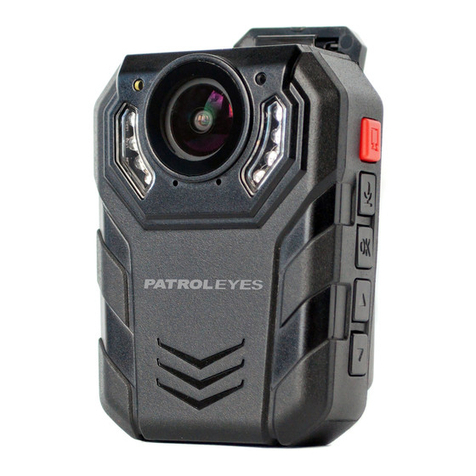
Patroleyes SC-DV7 Ultra User manual

SC-DV7 Ultra
USER MANUAL


Before Use:
The PatrolEyes Ultra SC-DV7 body camera is an advanced recording device
with many options and features available. We have already configured
your camera to the optimal settings. Please review the manual to
familiarize yourself with the functions of this camera.
Fully charge the camera using the included USB cable and charger for 3-4 hours.
The charging indicator will turn green when charging. When the camera is fully
charged the green light will turn off.
LED Indicators:
Activity Indicator: Power/Charging Indicator:
Blinking Red – recording video Green – powered on
Blinking Yellow – - recording audio Yellow – powered on & charging
Red – powered off & charging
On Screen Display:

1) To record a video, press the Video Recording button (located on the top of
the left side of the device.) The unit will vibrate briefly. The red dot symbol on
the LCD display will appear indicating that the camera is currently recording.
2) To protect the videos from deletion, press the OK button while recording. A
lock icon will appear at the top of the screen to confirm that the file was
protected. (This feature is only needed if you are using the Loop REC option.)
3) Press the Video Recording button again to stop recording. The device will
vibrate once and the red dot symbol will disappear. The device will stop
recording and save the video.
To take a photo, press the Camera button located on the top right side of the
device. You can also take a snapshot while you’re recording a video by
pressing the Camera button. The camera will vibrate and show a small capture
screen on the bottom right. The photo will be saved in your photos file.
To record only audio, press the Audio Recording button located on the left side
of the device. The unit will vibrate once briefly and a microphone icon will
appear on the LCD display. Press and hold the Audio Recording button for 3
seconds to stop recording. The recording will be saved as an audio file.
1) Press and hold the Power button (located on the bottom right side of the
camera) for about 3 seconds. The camera will make a sound and vibrate. A
green indicator light on the top of the camera will turn on and remain green
while powered on. The camera and LCD monitor will turn on and enter into
standby mode. The video preview mode will then be displayed on the LCD.
2) The video preview mode displays recording time, battery indicator, device
ID, storage capacity and camera view.
3) Press and hold the Power button for about 3 seconds, the camera will make
a sound and vibrate before turning off. The green indicator light will also turn
off.
Basic Operation:
Video Recording:
Taking Photos:
Audio Only Recording:
Insert the clip of your choice by sliding the bracket down until it locks into
place. Each clip can swivel 360 degrees to give you versatile mounting
options. To remove the clip push in the tab and push/pull the clip upward.
Confirm that the date and time on your device are correct and enter your
police ID in the menu.

1) Via USB port
A. You can charge the camera via any power outlet using the included USB cable
and wall charger.
B. You can also charge the camera and transfer data by connecting the camera
to your computer via the USB cable.
2) Via Charging Dock
A. Push the camera down firmly into the dock. Connect the charging dock via the
USB cable to either the USB wall charger or the USB port on your PC. Once
connected, the camera LCD screen will say “USB connected.”
B. You can also charge the camera and transfer data by connecting the charging
dock to your computer via the USB cable. Once connected the Power/Charging
indicator will turn red.
1) While in standby mode, hold the OK button for 2 seconds to enter into the Playback
menu.
2) There are three sub menus: Video, Photo, and Audio. Use the Up/Down buttons to
move from one tab to the next and then press the OK button to display all saved files
of that type.
3) Use the Up/Down buttons to scroll through files. Press the OK button on the desired
files to view on the screen and press OK to play the file. To return to the Playback
menu, press the OK button again.
4) To return to the preview display, press the Power button.
Tip: While viewing video, press the Up button to rewind and the Down button
to fast forward. Press the Up/Down buttons again while rewinding/fast
forwarding to increase the speed (from 2X to max speed 64X).
To enter into the menu from standby mode, press and hold the Down button for 2
seconds. There are three sub-menus: Video Setup, Camera Setup, and System Settings.
Press and hold the Down button to move from one tab to the next then press the Down
button to enter the submenus. To select an option press the OK button. To exit the menu
and return to standby mode, press and hold the Down button while on the settings icon
or press any recording function (Video, Photo, Audio).
Video, Photo, and Audio Playback:
Charging:
Menu Settings:
Transfer and Manage Files on Your Computer:
(Compatible with Windows XP, Vista, 7, 8, 9, 10 & Apple)
1) Connect your camera or docking station to your computer via the included USB
cable.
2) Open the related Removable Disk Drive (usually D: or E: drive) in “My Computer.”
3) Open the folder named “DCIM”. From here you can view, transfer or delete files to
your computer.

1) In the Video Setup menu, select the option that displays the current resolution and
press the OK button.
2) There are seven resolution options to select from:
A. 2560 x 1080p (30fps 21:9) (ultra wide/theater mode)
B. 2304 x1296p (30fps 16:9)
C. 1920 x 1080p (30fps 16:9)
D. 1920 x 1080p (45fps 16:9) (recommended)
E. 1280 x 720p (60fps 16:9)
F. 1280 x720p (30fps 16:9)
G. 848 x 480p (30fps 16:9)
3) Select the resolution you prefer and press the OK button.
1) In the Video Setup menu, select “Quality” and press the OK button.
2) There are three options to choose from:
A. S. Fine
B. Fine
C. Normal
3) Select the option you prefer and press the OK button.
Tip: This refers to the videos bit rate. The higher the setting,
the better the video quality and the larger the video size. To
achieve the best battery life, set to Normal.
Pre-Record:
1) In the Video Setup menu, select “Pre-record” and press the OK button.
2) There are two options to select from:
A. Off: pre-recording will be disabled.
B. On: the device will pre-record up to 1 minute (length depends on the video
resolution.)
3) Select the option you prefer and press the OK button.
Tip: In standby mode, press the Video Recording button to start pre-
recording (when it’s enabled). Press the Video Recording button again
to start normal recording. The footage captured during pre-recording
Video Settings:
Resolution:
Quality:
1) In the Video Setup menu, select “Delay Record” and press the OK button.
2) There are two options to select from:
A. Off: delay recording will be disabled.
B. On: device will continue recording for up to 10 seconds after recording has
been stopped (length depends on the video resolution).
Delay Record (Post-Recording):

Video files will be split up into segments as large as 30 minutes or as small as 5 minutes.
This allows for smaller file sizes and easier viewing. This will NOT stop the device
from recording. It will simply allow you to split your videos into smaller more
manageable files.
1) In the Video Setup menu, select, “Split time” and press the OK button.
2) There are four options to select from:
A. 5 min
B. 10 min
C. 20 min
D. 30 min
3) Select the option you prefer and press the OK button.
1) In the Video Setup menu, select “IR LED”and press the OK button.
2)There are two options to choose from:
A. Off: disables infrared LEDs
B. On: enables infrared LEDs
3) Select the option you prefer and press the OK button.
Tip: Disabling the infrared LEDs enables you to stay covert while still
recording in B/W mode. When the infrared LEDs are disabled you will not
achieve the same night vision range.
IR LED (Controls infrared LEDs only):
Split Time:
Motion Detection:
1) In the Video Setup menu, select “Motion Detection” and press the OK button.
2) There are two options to select from:
A. Off: motion detection will be disabled
B. On: device will automatically begin recording when it detects motion
3) Select the option you prefer and press the OK button.
1) In the Camera Setup menu, select “Filter” and press the OK button.
2) There are two options to select from:
A. Manual: the night vision filter and infrared LEDs will have to be manually
activated by pressing and holding the UP/Night Vision button
B. Auto (recommended): the night vision filter and infrared LEDs will automatically
be activated when the device detects low light conditions
3) Select the option you prefer and press the OK button.

1) In the Camera Setup menu, select the option that shows “Resolution” and press
the OK button.
2) There are seven options to select from:
A. 32MP (7552 x 4284 16:9)
B. 30MP (6400 x4800 4:3)
C. 23MP (6400 x 3600 16:9)
D. 20MP (5120 x 3840 4:3)
E. 18.5MP (4976 x 3732 4:3)
F. 16MP (5376 c 3024 16:9)
G. 4MP (2688 x 1512 16:9)
3) Select the option you prefer and press the OK button.
1) In the Camera Setup menu, select “Quality” and press the OK button.
2) There are three options to select from:
A. S.Fine
B. Fine
C. Normal
3) Select the option you prefer and press the OK button.
Camera Settings:
Quality:
Multi Capture (Burst Capture):
1) In the Camera Setup menu, select “Multi Capture” and press the OK button.
2) There are four options to select from:
A. Multi Capture 1
B. Multi Capture 5 (takes 5 pictures in a row)
C. Multi Capture 10 (takes 10 pictures in a row)
D. Multi Capture 20 (takes 20 pictures in a row)
3) Select the option you prefer and press the OK button
System Settings:
1) In the System Settings menu, select, “Stamp” and press the OK button.
2) There are two options to select from:
A. Off: Date/time/police ID stamp will not be embedded into each file.
B. On: device will record videos and take photos with date/time/police ID
embedded into each file that is recorded.
3) Select the option you prefer and press the OK button.
Stamp:

1) In the System Setting menu, select “Record Mode Setting” and press the OK button.
2) There are two options to select from:
A. Auto: device will start recording automatically the moment the camera is
powered on
B. Manual: device will only start recording when you manually start recording
3) Select the option you prefer and press the OK button.
Record Mode (One Touch Recording):
Time Setup:
1) In the System Setting menu, select the “Time Setup” and press the OK button.
2) Press the Up/Down buttons to set the date and time. Press the OK button to cycle
through the options.
3) When finished, press the OK button again to return to the System Settings menu.
Note: Time is in military time
Loop Record:
1) In the Systems Settings menu, select “Loop Record” and press the OK button.
2) There are two options to choose from:
A. Off: (recommended) The camera will stop recording when the memory
becomes full
B. On: When the memory becomes full, the camera will save the new video and
automatically delete over the oldest video file unless the video was locked.
Police ID:
1) In the System Setting Menu, select “Police ID Setting” and press the OK button.
2) Use the Up/Down buttons to navigate the on-screen keyboard.
3) Press the OK button to select desired character and move on to the next character.
4) Repeat steps 2-3 to complete your desired ID.
5) Press and hold the Down button to return to the menu.
LCD Display:
1) In the System Settings menu, select the “LCD Display” option and press the OK
button. Then select the “LCD Brightness” option and press the OK button.
2) The options range from 0-15:
A. 0 being the least bright
B. 15 being the most bright
3) Select the option you prefer and press the OK button.
1) In the System Settings menu, select the “Auto Power Off” option and press the OK
button.
2) There are three options to select from:
A. Off: device will only power off manually
B. 3 min: device will power off after 3 minutes of inactivity/no recording
C. 5 min: device will power off after 5 minutes of inactivity/no recording
3) Select the option you prefer and press the OK button.
Auto Power Off:

Power Saver:
1) In the System Setting Menu, select “Power Saver” and press the OK button.
2) There are two options to choose from:
A. Off
B. On the device will enter a low power consumption mode, slowing the
processing speed in order to save on battery life. When the device is turned on
again in this mode it will take a few extra seconds to start up
3) Select the option you prefer and press the OK button.
Silent Mode (Device Sound and Vibration Alerts):
1) In the Systems Settings menu, select “Silent Mode” and press the OK button.
2) There are four options to select from:
A. Vibrate + Beep Sound On
B. Vibrate + Beep Sound Off
C. Vibrate Only
D. Beep Sound Only
3) Select the option you prefer and press the OK button.
Card Volume:
1) In the System Settings menu, select “Card Volume” and press the OK button.
2) This option shows you the available capacity on your internal memory.
Card Volume:
Total: 6147MB (6.147GB)
Used: 1302MB (1.302GB)
Reserved: 6169MB (6.169GB)
3) Press the OK button to return to System Settings menu.
Version Info:
Tip: Download the latest firmware upgrades and more.
please visit:
www.patroleyes.com/sc-dv7
1) In the System Settings menu, select “Version Info”.
2) This will display the current firmware version, which includes the model number,
firmware release date and mode.
Version Info
DV7.20161103.USB (’USB’ indicates USB mode FW)

Advanced Functions & Alerts
Low Power Warning:
When your battery level is low the battery icon will flash red. The camera will alert
you with a beeping tone when it reaches this level until it is plugged into power. If the
camera is not plugged in, it will power off 5 minutes after the low power warning
initiates.
Laser:
While in standby mode, press the Power button to turn on/off the red laser light. Your
camera will emit a red laser beam for pointing out objects or aiming your camera.
White LED:
While in standby mode, press the Down button to turn on/off the white LED light. Your
camera will emit a white LED beam for lighting purposes.
Firmware Options:
There are two versions of camera firmware available:
PTT (push-to-talk / walkie talkie):
Connect the device with your walkie talkie via the PTT cable (sold separately). Press
down the PTT button to talk & release when finished.
1. USB Version (USB): This is the default version that is pre-installed on your
camera. This firmware allows you to connect it to any computer directly like a USB
drive to manage your files. No special drivers required.
2. Software Encrypted Version (ENC): Multiple cameras can be managed using our
optional DEMS, optimal for police departments. This firmware version removes the
date/time/police ID, disables the loop recording option, blocking an officer from
tampering with the cameras settings. This also locks down the camera only allowing
an administrator with a password to transfer and manage files.
The wireless remote control allows for recording audio, video or taking pictures
without ever needing to touch it. Your remote is already paired with your device,
however if it is not working, please try to set it up using the pairing process. Turn on
your device and press and hold the photo/camera button on the remote and press the
power button on the camera simultaneously. When the device is taking a picture from
the camera screen release the photo/camera button and the pairing is complete. There
are three buttons on the remote control. A red LED will indicate when any of the three
functions are performed.
1. Picture: (Top button) Press to take a photo
2. Video: (Middle button) Press to record a video. Press again to stop the recording
3. Audio: (Bottom button) Press to start an audio only recording
Wireless Remote Control:

www.twitter.com/patroleyes
www.facebook.com/patroleyes
For the latest news and firmware updates, please follow us at:
www.patroleyes.com/sc-dv7
For a complete list of available accessories and pricing, please visit:
Optional Accessories:
•8 Camera Docking Station
•PatrolEyes Digital Evidence Management Software
•PatrolEyes Protection Plus Program
•Epaulette Mount
•Carrying Case
•Lanyard
Accessories:
•Wall Charger
•USB Cable
•Wireless Remote Control
•Charging Dock
•Short Metal Alligator Camera Clip
•Long Plastic Alligator Camera Clip
•Car Charger
Troubleshooting:
Resetting the Device:
Open the USB rubber cover to locate the reset hole. Using a
small pin or paperclip, press and hold the reset button for 1
second while the device is turned on or charging. The device
will automatically turn off. Connect it to the charger and allow
the device to fully charge for 3-4 hours, then your camera will
be ready for use again.
Note: Resetting the camera will NOT delete any
video files or change your settings.
Table of contents
Other Patroleyes Digital Camera manuals

Patroleyes
Patroleyes DV5-2 User manual

Patroleyes
Patroleyes MAX User manual

Patroleyes
Patroleyes EDGE User manual

Patroleyes
Patroleyes Ultra 1296P User manual

Patroleyes
Patroleyes SC-DV6 User manual

Patroleyes
Patroleyes SC-DV1 User manual

Patroleyes
Patroleyes DV10-PRO User manual

Patroleyes
Patroleyes PE-MAX User manual