manuals.online logo
Brands
  1. Home
  2. •
  3. Brands
  4. •
  5. Pawleys Island
  6. •
  7. Indoor Furnishing
  8. •
  9. Pawleys Island Durawood Essentials User manual

Pawleys Island Durawood Essentials User manual

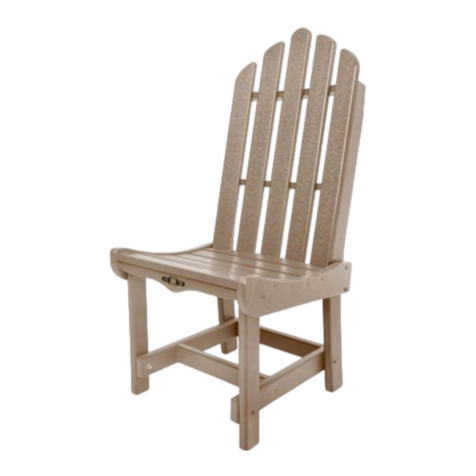
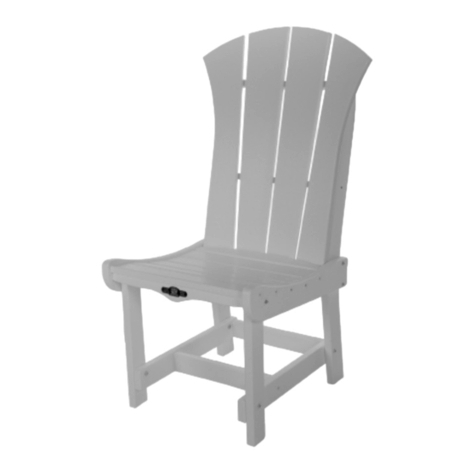
Congratulations on purchasing this Durawood Essentials/Sunrise Adirondack Chair! You’re going to love the quality,
durability and simple assembly — plus the full Residential Lifetime Warranty. QUESTIONS REGARDING THIS PRODUCT?
Call our customer-service line toll-free at (800) 643-3522.
ASSEMBLY INSTRUCTIONS continue, back of page; Residential Lifetime Warranty, back of page
where the two
sets of drilled
holes in both the Chair Seat and Chair Back roughly
line up (FIGURE 1).
NOTE: Chair parts are made to connect precisely, so
you may nd the t a little tight during assembly. If
so, lightly tap parts into place with a Rubber Mallet.
sunrise
chair back
HARDWARE PACK
Before beginning assembly, make sure you have all parts. Note that
not all parts pictured are to scale.
8 - 1.5" Barrel Bolt Assemblies
2 - 2" Flathead Screws
2 - 1.5" Pegs
1 - Allen Wrench
1 - Square-Head Drill Bit SUGGESTED TOOLS (NOT PROVIDED)
• Rubber Mallet
•Standard Phillips Head Screwdriver
•Drill (Square-Head Drill Bit
provided in HARDWARE PACK)
CHAIR PARTS
FIGURE 1
FIGURE 2
HOLES
STEP 3.Fine-adjust
one set of holes
between the Chair
Seat and Chair
Back. Insert a
Barrel Bolt into the
lined-up holes
(FIGURE 2), keeping
track of the Bolt
Fastener, which
you'll need in the
next step. If the
Barrel Bolt doesn't
go in easily, push it
all the way in using
the Allen Wrench
or tap it gently with a Rubber Mallet, if
necessary.
Line up the other set of holes, repeating this step
with a second Barrel Bolt parts.
HOLES
HOLES
HOLES
EXTREMELY IMPORTANT: Use ONLY a Standard Phillips
Head Screwdriver to tighten Barrel Bolt Assemblies; do NOT use
a drill tted with a Phillips head bit, as you can strip the Barrel
Bolt head, marring the appearance of your Durawood Sunrise/
Essentials Adirondack Chair.
then
USING BARREL BOLTS
To correctly thread Barrel Bolts to Bolt Fasteners: Fit
the Fastener over the bottom of the Bolt, turning the
Fastener at first counterclockwise, until you hear a slight
click, which means the Bolt is in its groove. Now begin
tightening clock-wise as you normally would. NOTE: Holes for
bolts may seem too big, this tolerance will not impact joint,
once both barrel bolt halves are properly secured.
chair arm spreader chair arm
Durawood Essentials/Sunrise
Adirondack Chair
essentials
chair back
chair seat
STEP 2.On a flat
surface, set the
Chair Seat up
on one side, the
wide end of the
slats facing right.
With the Chair
Back's seating
side facing left,
slide its short legs
between the
two slats of the
Chair Seat, to
ASSEMBLY
STEP 1. Your Durawood
Furniture comes
with several pegs to
increase sturdiness.
Wherever you find a
peg hole, insert peg.
You may need to use
a small mallet to tap
the plug into place.
Hardware pack
weight: 6.08 oz
#5212 / 1015
STEP 6.
With the
complet-
ed chair
body still
on its side,
locate the
circular
peg to-
ward the
outside
of the
Chair Seat
(FIGURE
5), then t
the cor-
respond-
ing peg
hole in the
Chair Arm
over the
peg, tapping gently with a Rubber Mallet, if
necessary.
STEP 7 Line up the top drilled hole in the
Chair Arm slat with the hole toward the right
side of the Chair Seat. Insert the Barrel Bolt (FIGURE 6), pushing it all the way into the
paired holes using the Allen Wrench, or tapping it gently with a Rubber Mallet, if
necessary.
STEP 4.
Fit Bolt
Fasten-
ers over
the
bottom
of each
Barrel
Bolt,
careful
to fol-
low the
instruc-
tions on
Using
Barrel
Bolts on
the other
side
of this
page.
Tighten using the Allen Wrench and a
Standard Phillips Head Screwdriver (FIG-
URE 4). Do not over-tighten.
STEP 5.Flip the Chair Seat onto its oppo-
site side and connect the other side of
the Chair Back to it, following STEPS 3-4,
to complete the chair body.
STEP 8Line up the hole
at the top of the Chair
Arm with the one in the
Chair Back slat fac-
ing you
(
see
FIGURE
6,
above right)
. Insert
Barrel Bolt into the
hole in the back of
the Chair Arm, using
the Allen Wrench to
push it all the way into
the Chair Back slat. Fit
the Bolt Fastener over
the end of the Barrel
Bolt, carefully following
the Using Barrel Bolts
instructions on the
other side of this page.
Tighten using the Allen
Wrench and a
Standard Phillips Head Screwdriver (FIGURE 7),careful
not to over-tighten.
STEP 9.
Using the Allen Wrench and a Standard Phillips
Head Screwdriver, go back and fully tighten the Barrel
Bolt Assembly from STEP 7, careful not to over-tighten.
STEP 10. Flip the chair body over onto its opposite side, re-
peating STEPS 6-9 with the second Chair Arm.
STEP 11.
Stand the
chair up,
facing
you. Fit the
tongue
piece of
one end
of the
Spreader
into the
groove on
the inside
of one
chair leg
(FIGURE
8). Do the
same
for the op-
posite side of
the Spreader and chair, though you may have to pull the second leg
backward gently to get the second tongue piece of the Spreader to
slide into the groove.
STEP 12.Using a Drill fitted with the Square-Head Drill Bit provided,
screw one Flathead Screw into the hole opposite the Spreader on the
outside of one chair leg (FIGURE 9). Repeat with the remaining Flat-
head Screw and other leg to complete assembly.
STEP 13.Have a seat in your new chair — you've earned it!
FIGURE 6
FIGURE 7
HOLE
HOLES
FIGURE 4
HOLE
FIGURE 5
FIGURE 8 FIGURE 9
PEG
PEG HOLE
TONGUE
GROOVE
RESIDENTIAL WARRANTY | This quality product includes a FULL LIFETIME WARRANTY for RESIDENTIAL CUSTOMERS. In the un-
likely event any splintering, rotting, cracking, peeling, chipping, insect infestation or other damage should ever occur, The Ham-
mock Source will replace this furniture, at no charge to you. Note that an original sales receipt must accompany any returned
product, along with a Return Authorization Number from Hammock Source customer service; call toll-free at (800) 643-3522.
CONTRACTOR WARRANTY | CONTRACTORS receive a FULL 7-YEAR WARRANTY. Follow the same steps outlined above.
FIGURE 7
This manual suits for next models

1

Other Pawleys Island Indoor Furnishing manuals

Pawleys Island ESSENTIALS User manual

Pawleys Island

Pawleys Island ESSENTIALS User manual

Pawleys Island Durawood Essentials User manual

Pawleys Island

Pawleys Island Durawood Essentials User manual

Pawleys Island Durawood Essentials User manual

Pawleys Island

Pawleys Island Durawood Essentials User manual

Pawleys Island DT2-K User manual

Pawleys Island

Pawleys Island DT2-K User manual

Pawleys Island dt96 User manual

Pawleys Island

Pawleys Island dt96 User manual

Pawleys Island Durawood User manual

Pawleys Island

Pawleys Island Durawood User manual

Pawleys Island COASTAL CHAIR User manual

Pawleys Island

Pawleys Island COASTAL CHAIR User manual

Pawleys Island DSST-K User manual

Pawleys Island

Pawleys Island DSST-K User manual

Pawleys Island ROUND COFFEE TABLE User manual

Pawleys Island

Pawleys Island ROUND COFFEE TABLE User manual

Popular Indoor Furnishing manuals by other brands

Regency LWMS3015 Assembly instructions

Regency

Regency LWMS3015 Assembly instructions

Furniture of America CM7751C Assembly instructions

Furniture of America

Furniture of America CM7751C Assembly instructions

Safavieh Furniture Estella CNS5731 manual

Safavieh Furniture

Safavieh Furniture Estella CNS5731 manual

PLACES OF STYLE Ovalfuss Assembly instruction

PLACES OF STYLE

PLACES OF STYLE Ovalfuss Assembly instruction

Trasman 1138 Bo1 Assembly manual

Trasman

Trasman 1138 Bo1 Assembly manual

Costway JV10856 manual

Costway

Costway JV10856 manual

moss DESIGN Caisson Credenza Assembly instructions

moss DESIGN

moss DESIGN Caisson Credenza Assembly instructions

Aquaglide FULL DECK 15.0 owner's manual

Aquaglide

Aquaglide FULL DECK 15.0 owner's manual

AREBOS AR-HE-SW30 user manual

AREBOS

AREBOS AR-HE-SW30 user manual

Till-Hilft Fulda 87005.330 Assembly instructions

Till-Hilft

Till-Hilft Fulda 87005.330 Assembly instructions

Twoey Outside 2010 quick start guide

Twoey Outside

Twoey Outside 2010 quick start guide

Hettich Easys 200 operating instructions

Hettich

Hettich Easys 200 operating instructions

The bedboss RELAX 404 Series owner's manual

The bedboss

The bedboss RELAX 404 Series owner's manual

Oeseder Möbelindustrie Bern 991 720 Assembly instructions

Oeseder Möbelindustrie

Oeseder Möbelindustrie Bern 991 720 Assembly instructions

Costway HW68469 user manual

Costway

Costway HW68469 user manual

Next ALIX A27743 Assembly instructions

Next

Next ALIX A27743 Assembly instructions

BROSA Hans Assembly guide

BROSA

BROSA Hans Assembly guide

Prodigg MINIKA PBA015T-FUR installation manual

Prodigg

Prodigg MINIKA PBA015T-FUR installation manual

manuals.online logo
manuals.online logoBrands
  • About & Mission
  • Contact us
  • Privacy Policy
  • Terms and Conditions

Copyright 2025 Manuals.Online. All Rights Reserved.