manuals.online logo
Brands
  1. Home
  2. •
  3. Brands
  4. •
  5. Paxton
  6. •
  7. Controllers
  8. •
  9. Paxton Switch2 Troubleshooting guide

Paxton Switch2 Troubleshooting guide

How to program a Switch2 to use a PROXIMITY KP
Keypad
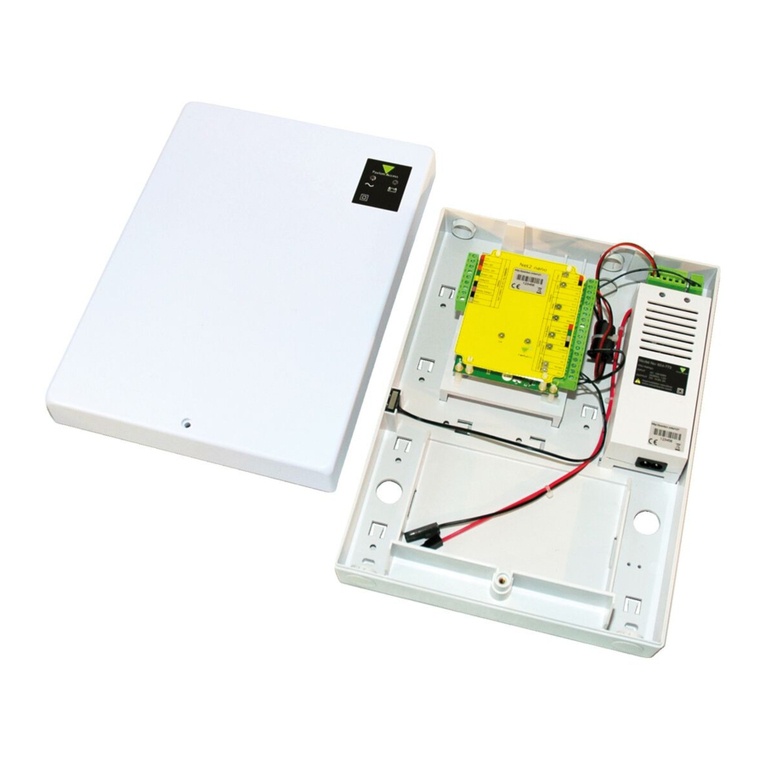
What is a Switch2 system?
A Switch2 system is a step up in security and
versatility from the compact range. Still operating
as a standalone system it uses a control unit that is
separate from the user interface; a simple data cable
linking them together. This means that the control
unit can be mounted on the 'safe' side of the door
with only the keypad or reader outside.
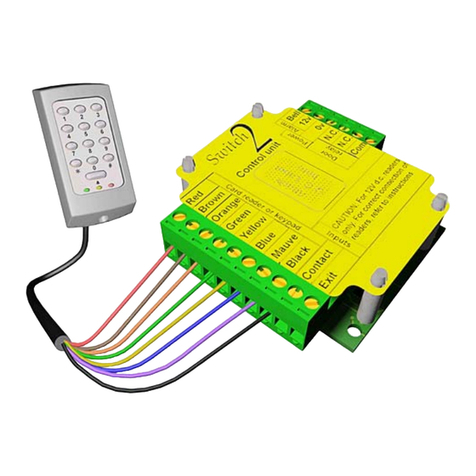
A Switch2 control unit can be used with any of the
readers in the Paxton range. It has inputs for a door
contact and an exit button and has an output for an
alarm sounder. Lock control is via a volt free relay
which can be wired to operate fail closed and fail
open locks.
Initialising the keypad
When the system is powered up for the rst time the keypad will beep 3 times a second. This indicates that
the keypad is waiting to be initialised. The red LED will be steady, the amber LED will ash slowly and the
green LED will ash quickly.
Conrm your programming code by entering the same 6 digit code and pressing the bell button (The green
LED goes out and the unit will acknowledge that the programming code has been accepted by beeping
twice after a short pause. All the LED's are now on)
Enter your chosen 6 digit programming code and press the bell button (The green LED will ash faster still)
NOTE: The programming code should NOT contain the sequence of numbers 1234, as this is the default user
code for unlocking the door.
The keypad has a default user code of 1234. The programming code you just entered will now let you into
the menu where additional alterations can be made.
AN1069-US
Switch2
1
AN1069-US
Switch2
The KP reader must rst be initialised as a TOUCHLOCK keypad. (as above)
Next, put the keypad into 'Card plus code' mode by keying in the following sequence.
Card plus Code
A PROXIMITY card pack must now be enrolled by simply presenting the PROXIMITY enrolment card to the
reader. All of the cards in the pack will now be valid.
4 digit user codes are entered using the TOUCHLOCK programming chart. If more than one user code is to
be used, activate 'Multiple codes' before programming the user codes.
Entry will now be granted with the presentation of any valid card followed by any valid user code.
Card plus Code
2
1
Enter 6 digit Programming
Code
Hold down for 3 secs
2
Card or Code' mode is programmed in the same way as 'Card plus Code' except for using the following
program sequence to set up 'Card or Code'.
Card or Code
Entry now requires the presentation of a card or by entering a valid user code.
Card or Code
1
Enter 6 digit Programming
Code
Hold down for 3 secs
3
AN1069-US
Switch2
3
Present the enrolment card to the keypad; the reader will start to beep and the
amber LED will ash
To assign a PIN to a card:
Present the user card, the amber and green LED's will ash
Enter the PIN number to be associated with the user card (Maximum 4 digits)
Press the bell button, the LED's will ash faster
Enter the PIN again to conrm
Press the bell button
The user card and related PIN are now valid. When the user card is presented at the keypad the amber LED
will light indicating that the keypad is waiting for the PIN. When the correct PIN is entered the door will open.
A User card must have a PIN assigned to be active.
The KP reader must rst be initialised as a TOUCHLOCK keypad.
Next, put the keypad into 'Card plus PIN' mode by keying in the following sequence.
Card plus PIN
Card plus PIN
1
Enter 6 digit Programming
Code
Hold down for 3 secs
1
A PROXIMITY card pack must now be enrolled by simply presenting the PROXIMITY enrolment card to the
reader.
Entry now requires the presentation of a valid card followed by its related user PIN.
4 digit PIN's are assigned as follows.
AN1069-US
Switch2
4
Single or multiple codes
Silent operation
20 wrong keystrokes
= 60 second lockout
Door open time
(seconds)
Change Programming
Code
Exit Button
Set a user
code
Data Reset (except
Programming code)
OR
OR
OR
OR
One code only Multiple codes allowed
Silent
Beep on
ONOFF
Enter time in seconds (default =
07, max = 60)
Open door for time
in option 5
Toggle door open until
pressed again or toggle
code entered
Enter user code 4-8
digits
Re-enter user
code
Enter 6 digit
Programming
Code
OR
OR
OR
= Delete
= Normal
= Toggle
= Duress
Enter 6 digit
Programming Code
Re-enter 6 digit
Programming Code
Combined Card and
Keypad modes OR
Card
plus
PIN
Card
plus
Code
Card
or
Code
OR
X
6
X
2
4
6
8
2
2
2
2
2
3
4
7
5
6
9
8
6
6
START - Enter the 6 digit Programming Code and hold down a function key for 3
seconds. - The unit beeps and the LED ashes faster.
Continue the key sequence to set the option - The keypad returns to operating mode.
= Hold down for 3 secs
Function keys
4
123
1
9
TOUCHLOCK programming guide
For further information about programming user codes etc. please see: AN1004-US - How to
program a Switch2 with TOUCHLOCK. < http://paxton.info/3419 >

Other manuals for Switch2

3

Other Paxton Controllers manuals

Paxton 010-052 User manual

Paxton

Paxton 010-052 User manual

Paxton Net2 Entry User manual

Paxton

Paxton Net2 Entry User manual

Paxton Switch2 Troubleshooting guide

Paxton

Paxton Switch2 Troubleshooting guide

Popular Controllers manuals by other brands

Texmate Tiger 320 Series manual

Texmate

Texmate Tiger 320 Series manual

Controlli Energon Mounting instructions

Controlli

Controlli Energon Mounting instructions

Ascon tecnologic X34 operating instructions

Ascon tecnologic

Ascon tecnologic X34 operating instructions

SKYDANCE ES32-V manual

SKYDANCE

SKYDANCE ES32-V manual

Toa DI-1616 Specifications

Toa

Toa DI-1616 Specifications

ascon Z31 operating instructions

ascon

ascon Z31 operating instructions

RBH Sound UNC100 installation manual

RBH Sound

RBH Sound UNC100 installation manual

ADTRAN Total Access 750 BCU DSX-1 Installation and Maintenance

ADTRAN

ADTRAN Total Access 750 BCU DSX-1 Installation and Maintenance

Kelly KLS2412ND user manual

Kelly

Kelly KLS2412ND user manual

Grundfos VGA-113 Installation and operating instructions

Grundfos

Grundfos VGA-113 Installation and operating instructions

Dwyer Instruments DHII Digihelic II Series Installation and operating instructions

Dwyer Instruments

Dwyer Instruments DHII Digihelic II Series Installation and operating instructions

LINK-MI LM-TV09P user manual

LINK-MI

LINK-MI LM-TV09P user manual

KNX GIRA 2015 00 operating instructions

KNX

KNX GIRA 2015 00 operating instructions

Honeywell N20010 manual

Honeywell

Honeywell N20010 manual

Southwest Windpower AIR-X datasheet

Southwest Windpower

Southwest Windpower AIR-X datasheet

Compit SOLARCOMP 951 Installation and operating instructions

Compit

Compit SOLARCOMP 951 Installation and operating instructions

Osram DALIeco BT RTC operating instructions

Osram

Osram DALIeco BT RTC operating instructions

IMI SENSORS 683A101000 Installation and operating manual

IMI SENSORS

IMI SENSORS 683A101000 Installation and operating manual

manuals.online logo
manuals.online logoBrands
  • About & Mission
  • Contact us
  • Privacy Policy
  • Terms and Conditions

Copyright 2025 Manuals.Online. All Rights Reserved.