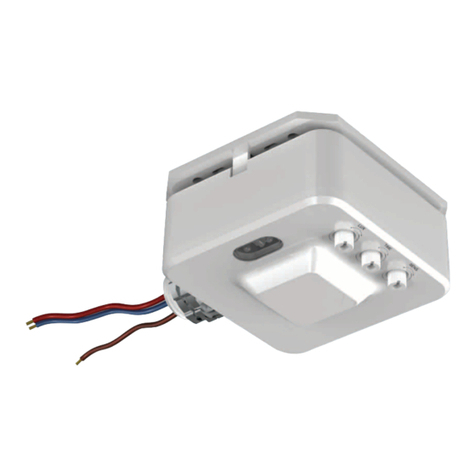
pdlux PD-LED2045-D User manual

Specifications
Summary
As a modern illuminant, LED has become a development trend in the lighting
industry due to the characteristics of high efficiency, long life expectancy and
relatively low energy consumption. How to use it reasonably and efficiency is
the key issue in the lighting industry. PD-LED2045-D is a microwave sensor
switches controlled LED lights,the microwave sensor was built into the light ,it
has 60pcs high brightness LEDs inside ,with total power of 12 watts. The
reasonable LED layout makes a homogeneous heat flow and achieves the
most optimized luminous efficiency.The luminance is higher than 60W
incandescent lamp when it works, and the life time is much longer than the
common halogen lamp. We adopt this sensitive advanced sensor switchs in
lighting control, enabling the light to turn on automatically when one comes ,
automatically turn off when one goes out. It’s a very ideal substitute as an
energy-saving illuminant. The light IP rating is IP65, it's good Waterproof
product and can be widely installed in the outdoor.
Power source: 100-130VAC
220-240VAC
Power frequency: 50/60Hz
Rated load: 12W Max.
Detection range: 2m-4m-6m-8m(radii.) (adjustable)
Time setting: 10sec/2min/6min/12min (adjustable)
Light-control: 50LUX (night light)
2000LUX(day light) (adjustable)
Luminous flux: 930 lm (100% Brightness)
110 lm (10% Brightness)
Color temperature: 3800-4200K
Material: Boden:PC Lampshade:PC
Protection: IP65
Standby power: <0.5W
LED quanlity: 60PCS
LED specifications: T2835
Working temperature: –10°C ~ +40°C
Working humidity: <95%RH
Installation height: 1.5-3m (wall installation)
The names of each part
Lamps shell PC lampshade
Lampshade
fixed hole Lampshade
fixed hole
TOP LED
The screw hole
Microwave sensor
Threading hole The screw hole
Digital intelligent microwave sensor
LED lights
LEDS 60PCS
IP 65
1X
2X
2X
2X
Quantity
Packing list in
Φ6 Plastic expansion
3x30 Screw
Screw stopper
Threading hole
Power source
Wiring
Black White
280mm
132mm
93.3mm
69.03mm
60mm
50mm
80mm
180mm
4mm
89mm
Digital intelligent microwave sensor
LED lights PD-LED2045-D instruction

Fig.1
1
0
Function
Setting manner one:DIP switch
As below shown, by S1,S2 to set the detection range, S3,S4 the delay time, S5 the light-control value,S6 the
brightness percentage function . It may take times to adjust values before they satisfy your need.
SENS:S1,S2
1
0
(1)Detection range setting (sensitivity)
Detection range is the term used to describe the radii of the
roughly circle casting on the ground when installed at the
height of 2.5 m. To set the switch to ON is “1”, to OFF is
“0”. Read through the right shown the corresponding table
of the switch position to the detection range.
S1 S2 Detection range
0 0 2m(radii)
0 1 4m(radii)
1 0 6m(radii)
1 1 8m(radii)
Notice: when using this product, please adjust the sensitivity (detection range) to an
appropriate value but the maximum to avoid the abnormal reaction caused by the easy
detection of the wrong motion by the blowing leaves & curtains, small animals or the
interference of power grid & electrical equipment. All the above mentioned will lead to the
error reaction. When the product does not work normally, please try to lower the sensitivity
appropriately, and then test it.
Human movement will cause the sensor induction,so when you under the function
testing,please leave the induction region and don't make movement to prevent the sensor
continuous work.
Friendly reminder: when installing two or more microwaves together, you are required to
keep 4 meters one from another, otherwise the interference among them will lead to error
reaction.
(2)Time setting
It can be defined from 10 seconds to 12minute.
Any movement detected before this time
elapse will re-start the timer. It is
recommended to select the shortest time for
adjusting the detection range and for
performing the walk test. To set the switch to
ON is “1”, to OFF is “0”. Read through the right
shown the corresponding table of the switch
position to the delay time.
It is mainly for the adjustment of the delay time from the moment the signal detected and light
auto-on till the light auto-off. You can define the delay time to your practical need. But you’d
better lower the delay time for the sake of energy saving, since the microwave sensor has the
function of continuous sensing, that is, any movement detected before the delay time
elapses will re-start the timer and the light will keep on only if there is human in the detection
range.
TIME:S3,S4
1
0
S3 S4 Time setting
0 0 10sec
0 1 2min
1 0 6min
1 1 12min

Step2 Mark the hole position with a pencil after determining where you want to install the product.
Step1 Remove the lampshade and the LED board before you install the lamp.(as Fig.2)
Fig.2 Fig.3
Procedure of installation
Note:If it is a wooden wall,there is no need to use plastic expansion screw,just fasten the screw with the
screwdriver.
Step3 Drill holes on the walls where there is pencil mark with an electric drill and get the plastic expansion
inside the hole.
Step4 Connect the cable to the lamp through the cable entry openings.(as Fig.3)
Step5 If it is a wooden wall,there is no need to use plastic expansion ,just drive the screw with the
screwdriver.
Step6 Set the LED board on the base and adjust the DIP switch.(as Fig.4)
Step7 Fasten the cover to the lamp base which has been installed on the wall.(as Fig.5)
(3)Light-control setting
(4)Brightness percentage function
Brightness Percentage Enter/Exit function
It can be defined in the range of 50LUX / 2000
LUX. To set the switch to ON is “1”, to OFF is
“0”. Read through the right shown the
corresponding table of the switch position to
the light-control value.
To set the switch to ON is “1”, to OFF is “0”.
Read through the right shown the
corresponding table of the switch position to
the brightness percentage function.
When the ambient light is less than 60lux, the system starts dimming mode. If there is no signal detected
during the delay time, it will enter the percentage lighting. Once signal detected, it recovers to 100% lighting. It
will auto exit dimming mode, when the ambient light is over 100 lux. The dimming mode works digitally and
independently.
Warning!
1、Being installed on the rocking object will lead to error reaction.
2、The shaking curtain blown by wind will lead to error reaction. Please select the suitable place to install.
3、Being installed where the traffic is busy will lead to error reaction.
4、The sparks produced by some equipment nearby will lead to error reaction.
The following situations will lead to error reaction.
S5 Light-control
0 50LUX
1
2000LUX
S6 Brightness percentage function
0 OFF
1 ON
Brightness Percentage:S6
1
0
N
L
LUX:S5
1
0

1.The LEDS in serial can function when all the seals installed in place.
2.Please don’t remove or connect with other lamp when powered on.
3.When the LEDS in serial are damaged ,you need experienced technician to repair using
the same rating LEDS.
The screws used on the light case are common ones when sent out from the factory.The
specific Y type stainless screws in the plastic bag for screws are used for fixing the lampshade
after the technician has finished the installation.It is for protecting aganist the electric shock.
Warning!
● Please confirm with prefessional installation.
● Please cut off power supply before installation and removal operations.
● Make sure that you have cut off the power for safety purposes.
● Improper operation caused losses, the manufacturer does not undertake any responsibility.
We are committed to promoting the product quality and reliability, however, all the electronic
components have certain probabilities to become ineffective, which will cause some
troubles.When designing, we have paid attention to redundant designs and adopted safety
quota to avoid any troubles.
This instruction, without our permission, should not be copied for any other purposes.
Warning!
1. Please keep it away from the children when installation.
2. Please avoid to be installed where the temperature is high.
3. Please cut off the power before installation.
Fig.4 Fig.5
www.pdlux.com Tel: 86-574-83008608
Add: 17F,Commerce Building of NingBo,
No 588, South Tiantong Rode,Yinzhou District,Ningbo,China
Tel: 86-574-83008608(20 lines) Fax: 86-574-83008609
Table of contents
Other pdlux Accessories manuals
