CIRRUS CEILING FAN
Installation Manual
REV 2022 1018
SPECIFICATIONS AND DETAILS ARE SUBJECT TO CHANGE WITHOUT NOTIFICATION. CONTACT PEACOCK FAN COMPANY FOR UP TO DATE DETAILS.
PEACOCK FAN COMPANY • PEACOCKFAN.COM
SAVE THESE INSTRUCTIONS 3
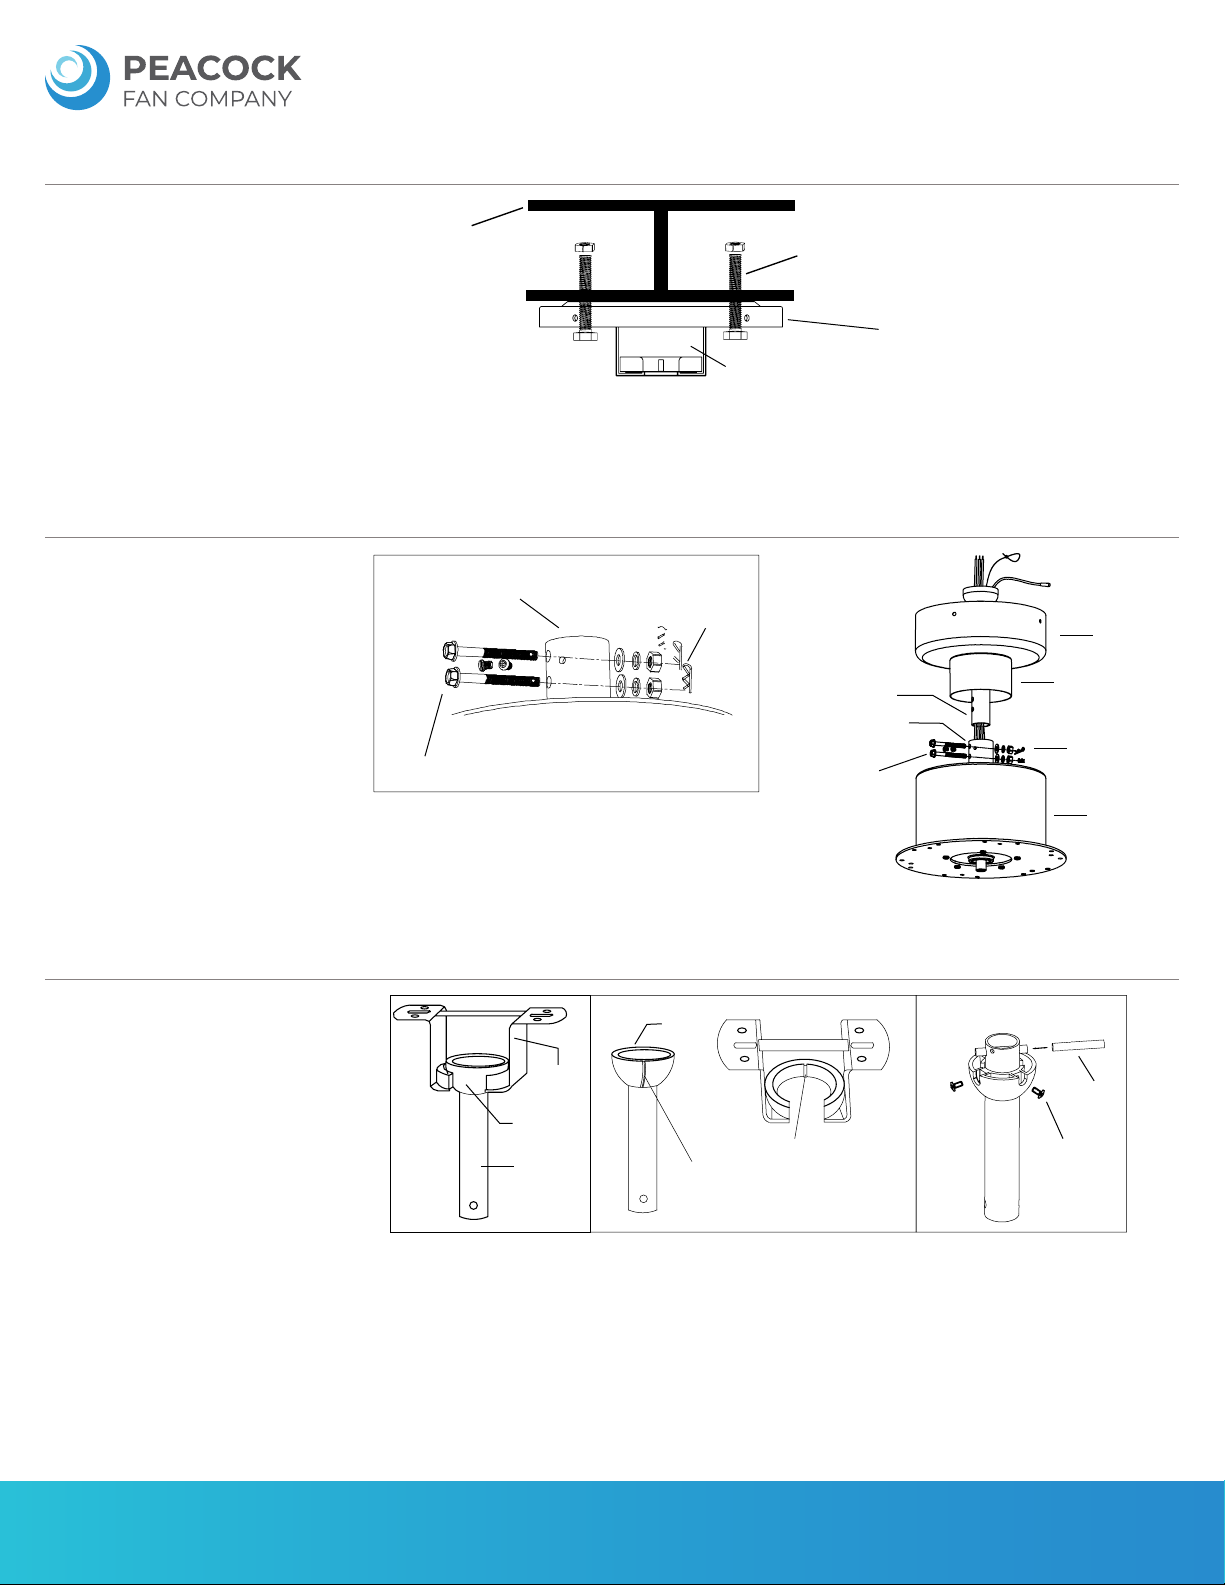
INSTALL THE HANGER
A) Secure the hanger bracket to the steel
bracket on ceiling with M5 or M8 mounting
screws and nuts. (See Figure 1)
INSTALLATION OF DOWNROD AND MOTOR BODY
A) First remove the safety pins on the
connection head, and then remove the two
fixed downrod pipe screws located in the
connection head on top of the motor body.
(See Figure 2);
B) Orient and insert the downrod pipe in
the right direction through the canopy and
decorative cover and then thread the power
wires through the downrod pipe;
C) Insert the downrod pipe into the connec-
tion head and install the safety pins, then
lock the fixed downrod pipe screws firmly
and cover the connection head with the
decorative cover.
A) Place the drop ball in the hanger bracket
and turn the pipe so that the groove on the
drop ball engages the slot on the hanger
bracket. The drop ball groove must engage
the hanger bracket slot. (See Figure 4 and 5)
B) Replacing the downrod pipe (if
applicable): first remove 2 screws, then
remove the horizontal pin, then replace the
standard downrod with the desired downrod
pipe, then reinsert the horizontal pin, and
lock the 2 screws. (See Figure 6)
HANGING THE CEILING FAN
FIGURE 1
FIGURE 2
FIGURE 3
FIGURE 4 FIGURE 5 FIGURE 6
Hanger Bracket
Connection Head
Connection Head
Downrod
Downrod
Hanger
Bracket Slot
Groove
Screws
Pin
Drop Ball
Drop
Ball
Hanger
Bracket
Canopy
Decorative Cover
Safety Pins
Safety Pins
Motor Body
Downrod Pipe Screws Downrod
Pipe Screws
M5 or M8 mounting screw
Lift the ball
Steel bracket