– 5–
P E A R L A B R A S I V E C O . - E A S H A M M E R ® M A N U A L
The versatile Easy Hammer® packs a punch, saving you
a lot of hard work and effort. Let the Easy Hammer® take
the workload off your back!
No more struggling or bending trying to handle heavy
hammers, the Easy Hammer® takes the pain out of
demolition and renovation.
The Easy Hammer® enables your demolition hammer to
lift most types of linoleum and tile, break rocks and blocks,
crack concrete and sandstone, all with a minimum of effort.
With a wide range of angles the Easy Hammer® adapts to
any situation with maximum leverage.
WARRANTY
1. PEARL® provides a Limited One Year Warranty that
applies to Easy Hammer® Trolley only (this excludes the
Jack Hammer and any othe rattachments and
consumables).
2. Warranty does not cover wear and tear, breakage, misuse
or theft. Warranty coverage is at the manufacturer’s
discretion.
3. Any unauthorized repair or part replacement will void
warranty. Refer to manufacturer for all repairs.
4. Regular service must be carried out by competent persons
only; failure to comply will void warranty.
5. Jack Hammer (where purchased) is to be covered by
original manufacturer. See appendix.
6. Warranty does not cover consumables. Warranty does not
cover attachments.
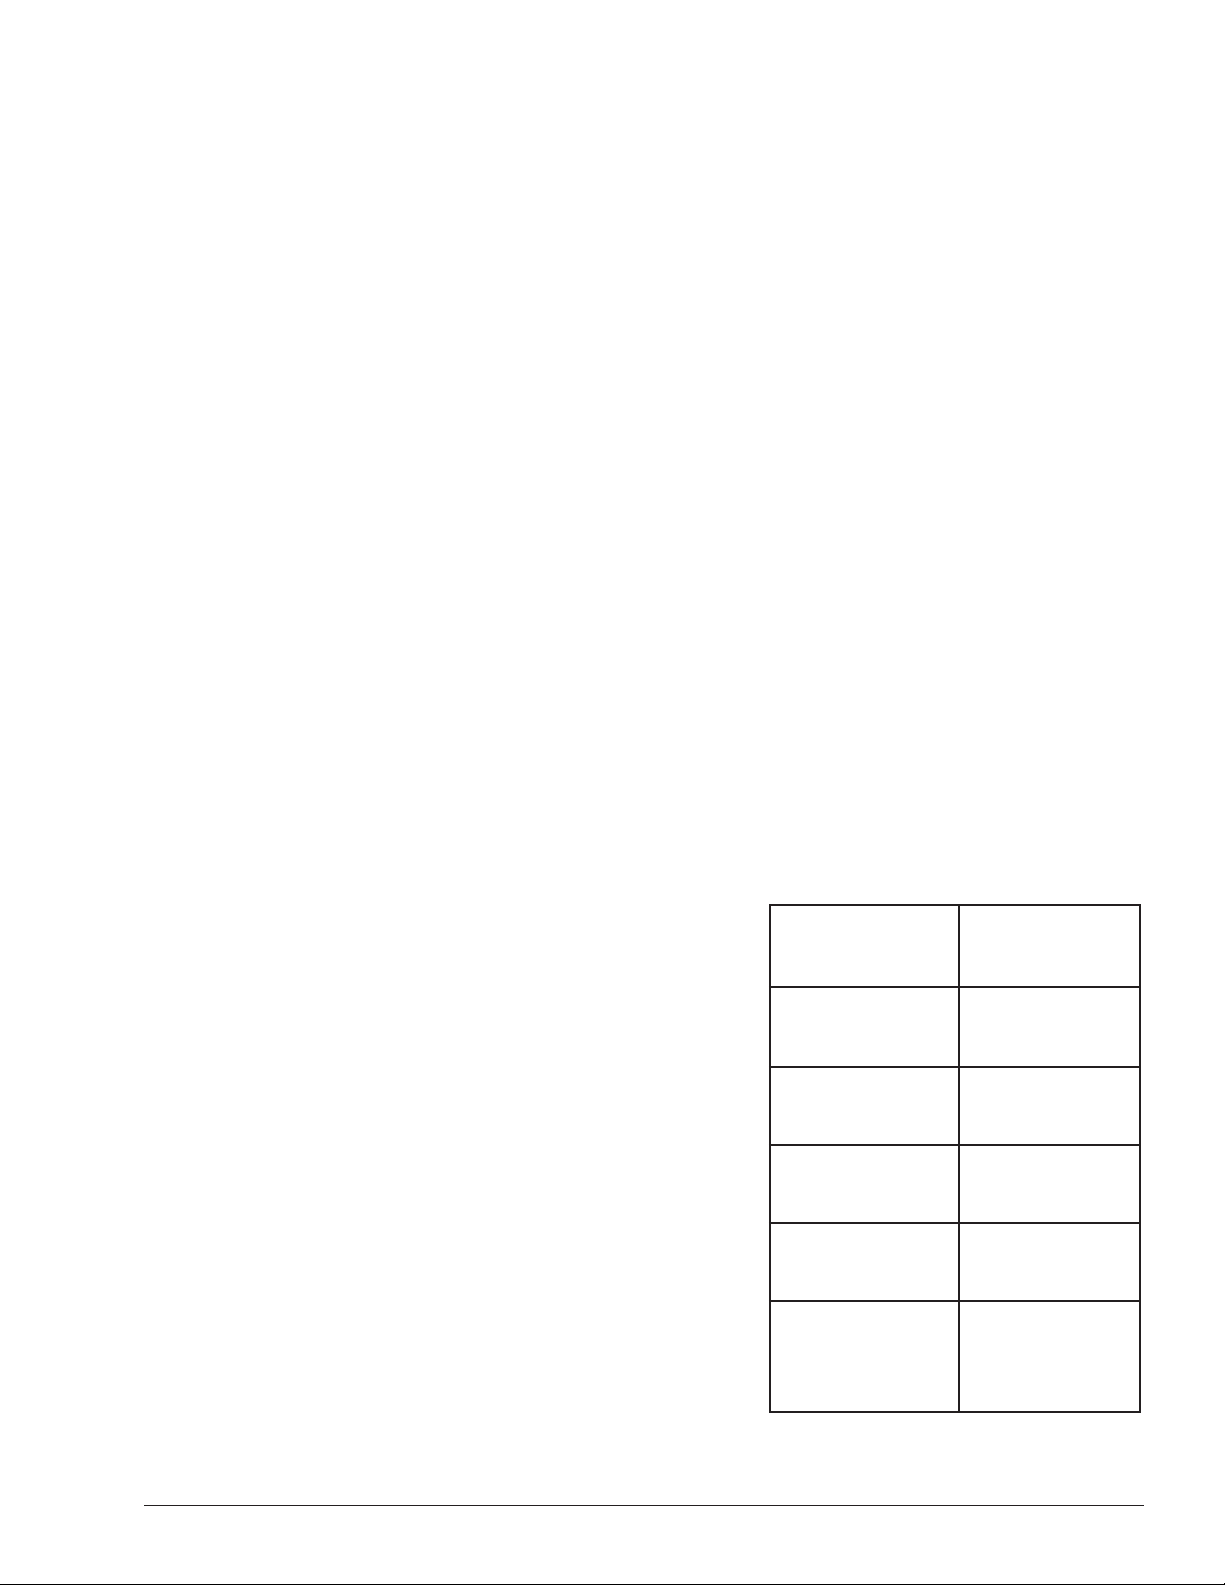
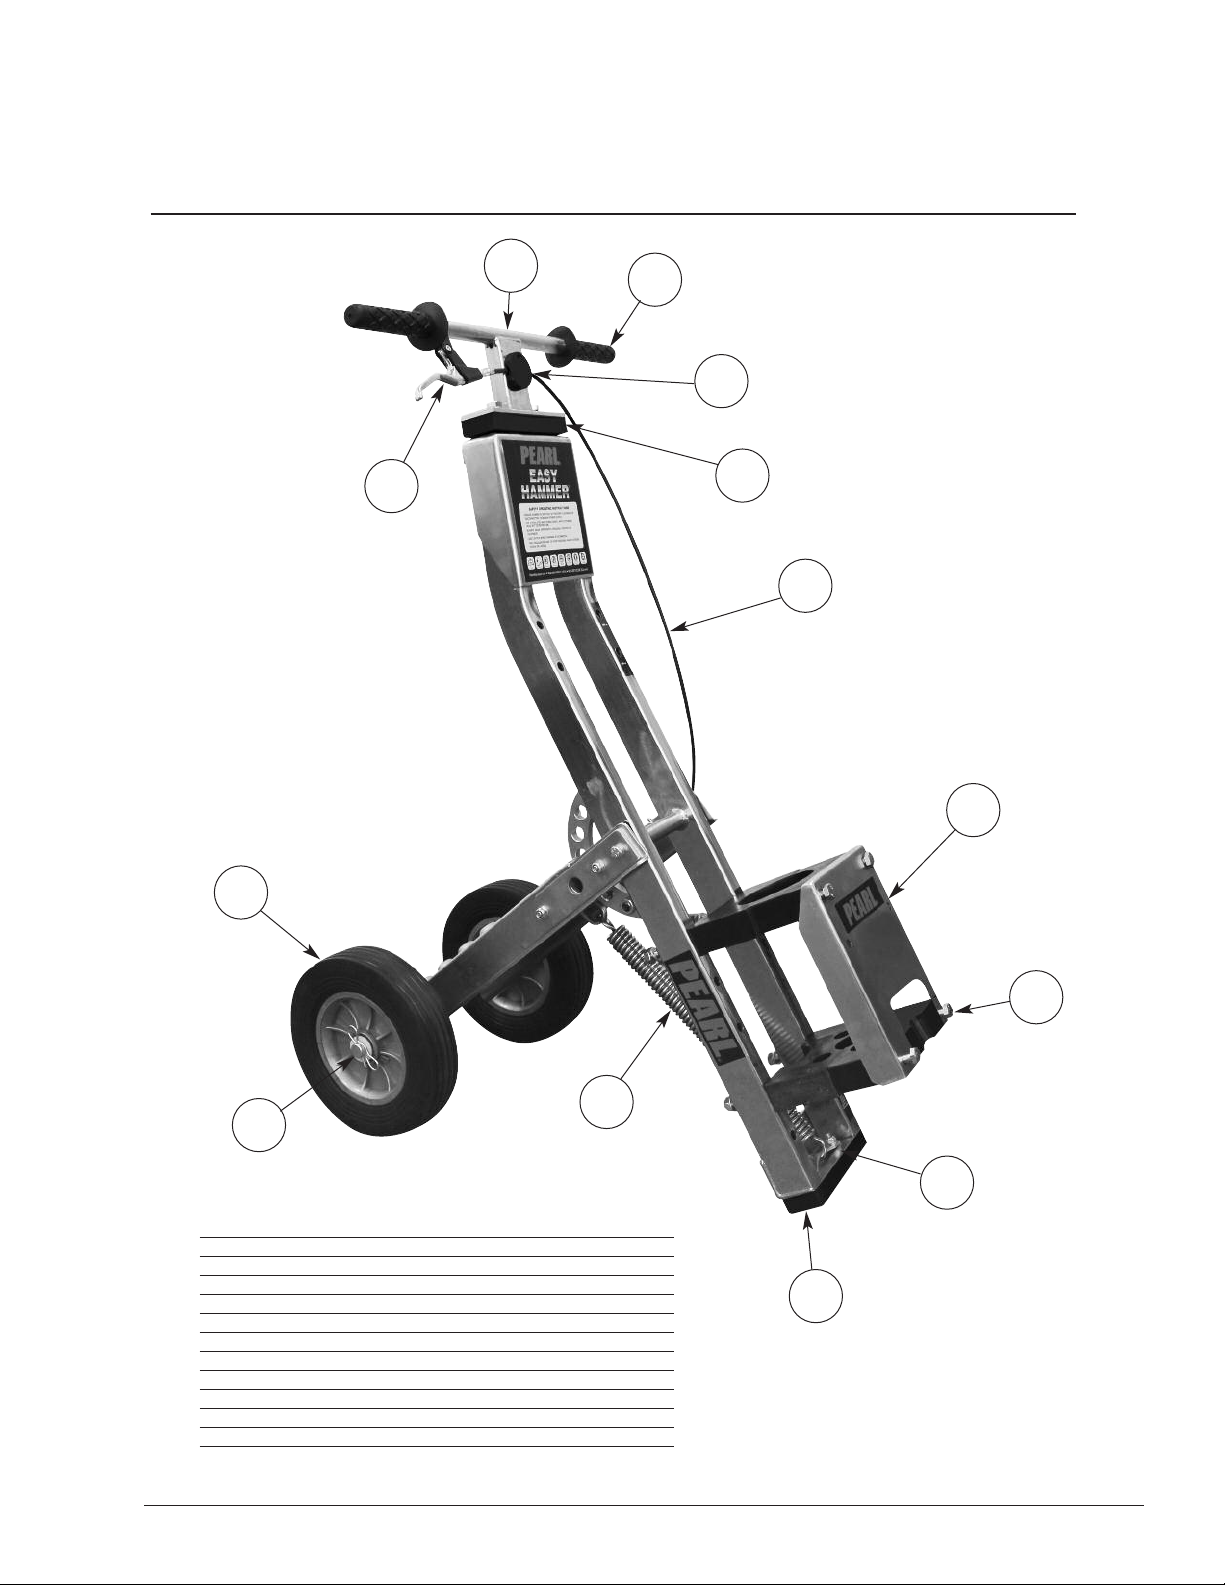
FEATURES
• Durable zinc-coated frame
• Angle adjustment – with huge angle range
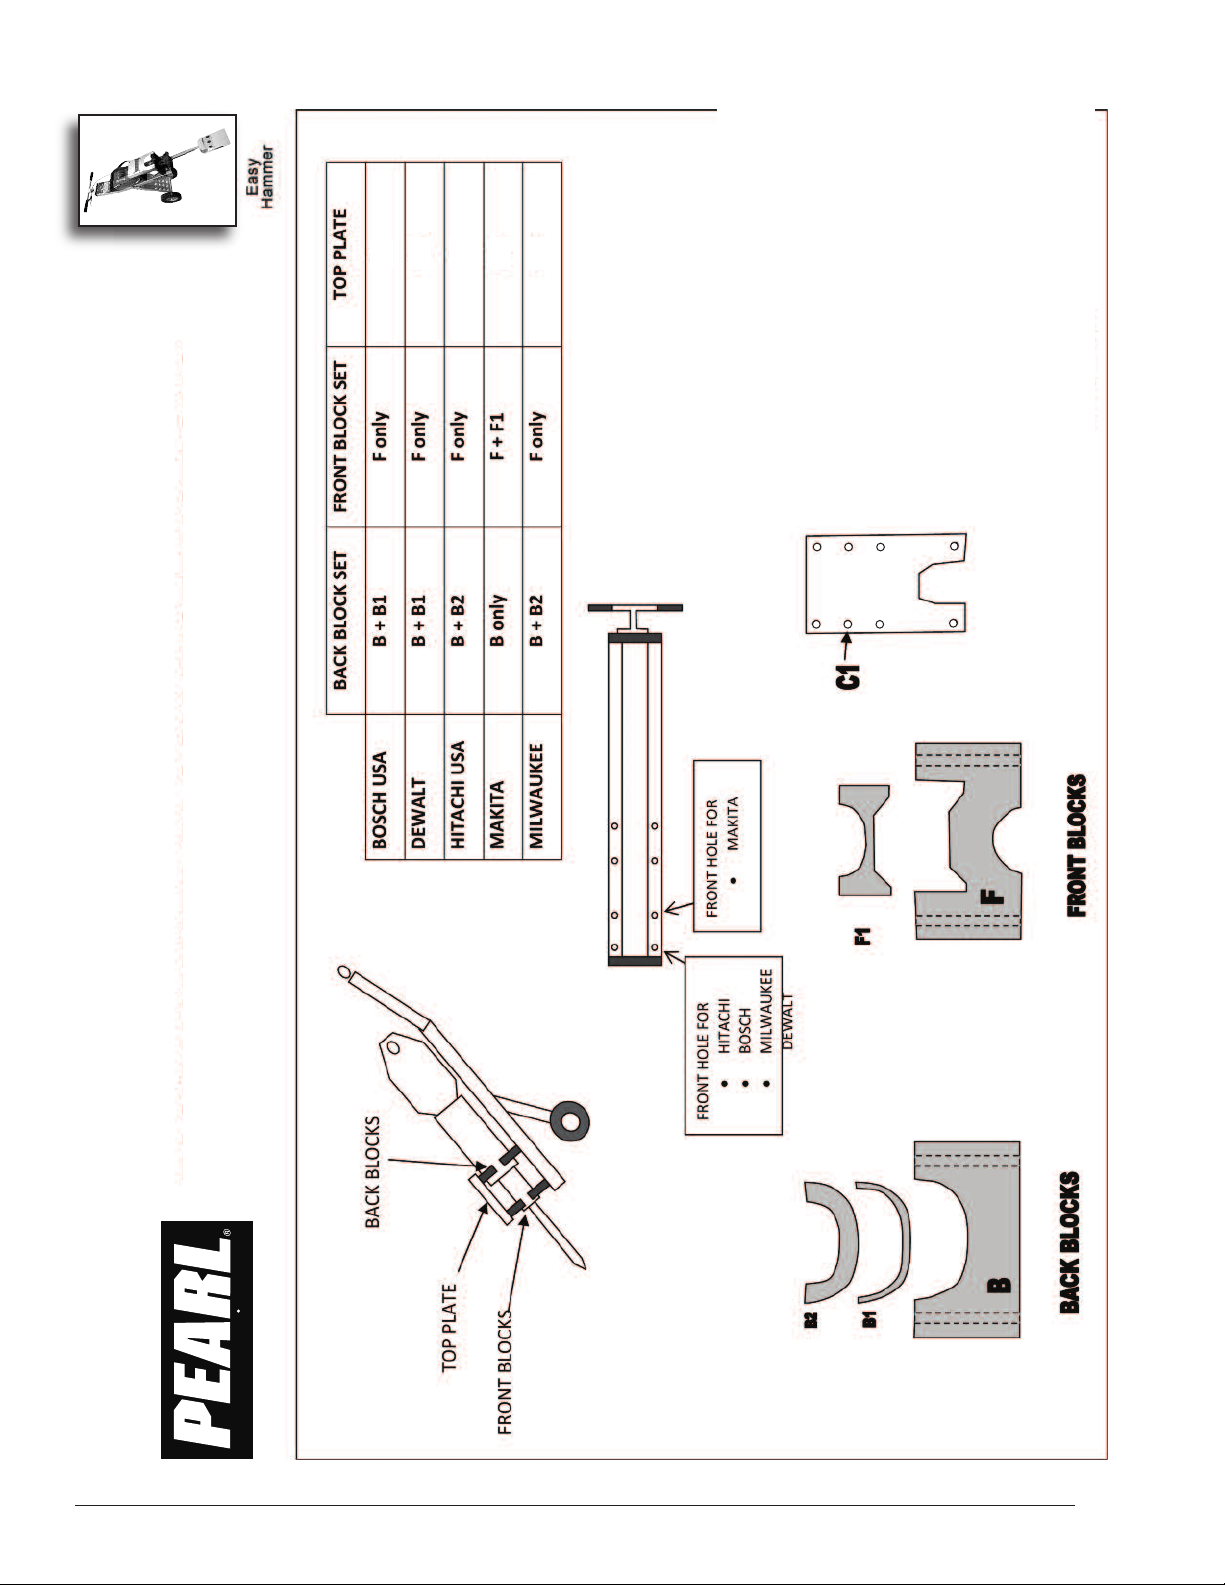
• Choice of popular brand hammers; will suit
most hammers
• Anti-vibration ergonomic design
• Large wheels
TABLE 2: #PA01HT Product Specifications
PRODUCT DESCRIPTION AND SPECIFICATIONS
HEIGHT WHEN
RAISED
HEIGHT WHEN
LOWERED
OVERALL
WIDTH
OVERALL
LENGTH
ANGLE OF
ADJUSTMENT
WEIGHT
(WITHOUT
JACKHAMMER)
1100mm / 43.3”
600mm / 23.6”
510mm / 20.1”
1100mm / 43.3”
73˚ (93˚ closed)
(20˚ open)
28kg / 61.8lb