manuals.online logo
Brands
  1. Home
  2. •
  3. Brands
  4. •
  5. Pearl
  6. •
  7. Music Pedal
  8. •
  9. Pearl P-1000 User manual

Pearl P-1000 User manual

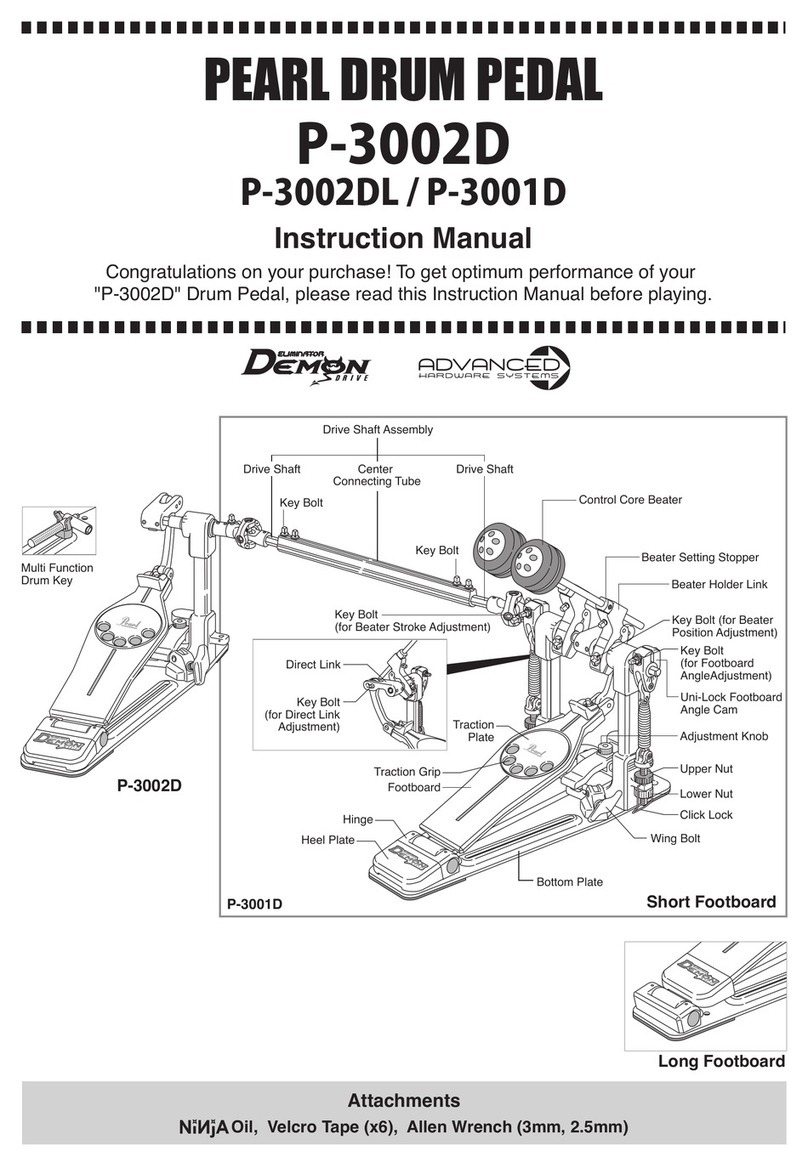
Instruction Manual
Congratulations on your purchase!
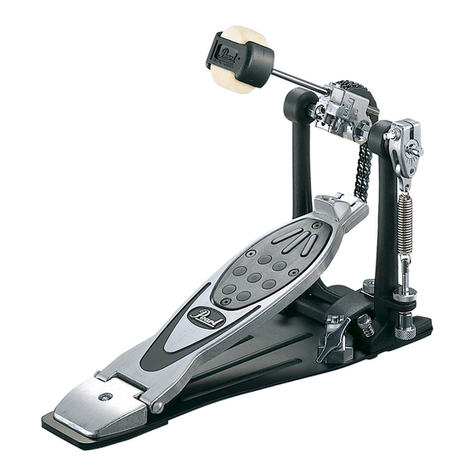
To get optimum performance of your PowerShifter ProStock Pedal,
please read this Instruction Manual before playing.
P-1000
PEARL DRUM PEDAL
Quad Beater Beater Holder Link
Key Bolt (for Beater
Angle Adjustment)
Uni-Lock Beater
Angle Cam
Spring
Upper Nut
Lower Nut
Belt Guide
Anchor Screw
Wing Bolt
(for Hoop Clamp)
Adjustment Knob
Power Plate
Heel Plate
Power Shifter
Footboard
Traction Grip
Traction Plate
Single Chain
Key Bolt (for Footboard
Angle Adjustment )
Key Bolt (for Beater Setting)
Toe Stopper
Beater Setting
Stopper
Gauge
Belt
Aluminum Die-cast Wheel
NOTE:
The P-1000 comes with a Single Chain attached at the factory.
A
B
D C
Fig. 1
Fig. 2
Fig. 3
Key Bolt
Bolt
Single Chain
Chain Removal
To remove the Chain, remove the Key Bolt and Bolt as
shown in Fig.1
Belt Assembly
Before attaching the Belt, the Belt Guide must be installed.
Install the Belt Guide as shown in Fig.2 using the provided
Allen Wrench to tighen the set screw. Do not overtighten.
Next attach the Belt as shown in Fig.3 using the provided
Key Bolt and Bolt.
Belt Guide
Allen Wrench
A Felt Spot Warm Sound with Sharp Attack
B Felt Line Warm Sound with Fat Attack
C Plastic Spot Hard Sound with Sharp Attack
D Plastic Line Hard Sound with Fat Attack
Fig. 7
Fig. 5
Fig. 6
Beater Setting
Insert the Quad Beater into the Beater Holder Link with the
desired striking surface facing toward the bass drum head
and tighten the Key Bolt to set the Quad Beater at the
desired height ( Fig. 5 ). To retain the height setting and to
keep the Quad Beater from rotating while playing, loosen
the Allen Screw on the Beater Setting Stopper with the
provided Allen Wrench and slide the Beater Setting Stopper
into the notch of the Beater Holder Link ( Fig. 6 ).
Quad Beater
The Quad Beater has four striking
surfaces, each capable of producing
a different sound. Please refer to the
following chart to determine the
sound best suited to your playing
style ( Fig.4 ).
Beater Angle Adjustment
The Beater Angle can be adjusted by loosening the key bolt
on the Uni-Lock Beater Angle Cam and swinging the beater
to the desired angle. Re-tighten the key
bolt when the desired angle is achieved. A gauge is
provided on the side of the Uni-Lock Beater Angle Cam to
aid the setting process ( Fig. 7 ).
Uni-Lock Beater
Angle Cam
Beater Holder Link
Notch
Beater Setting Stopper
Surface Sound
Contact
Area
Surface
Material
Gauge
Fig. 4
Convertible Single Chain/Belt Drive System
The P-1000 comes with a Single Chain attached at the
factory, however, it can be replaced with the included Belt if
desired.
Fig. 10 Fig. 11
A. Strong
B. Normal
C. Light
ABC
Key Bolt
Fig. 8
Drive Connector
PowerShifter
The PowerShifter function allows you to change the feel and
action of the pedal by shifting the footboard toward or away
from the bass drum. To change the PowerShifter setting,
loosen the key bolt in the heel of the footboard and move
the footboard to the desired position: A, B or C. Re-tighten
the key bolt ( Fig. 10,11 ).
Spring Tension Adjustment
To increase the tension of the spring, loosen the
Upper Nut and tighten the
Lower Nut until the desired
tension is achieved. To
decrease the tension,
loosen the Lower Nut.
This adjustment assembly
employs a double nut
system to retain tension
settings. Before playing,
make sure that both nuts
are tight. ( Fig. 9 )
Footboard Angle Adjustment
The footboad angle is adjustable by loosening the Key Bolt
as shown ( Fig. 8 ) and sliding the Drive Connector of the
chain or belt to one of three positions and re-tightening the
key bolt.
Note:
Removing the beater first
facilitates easier footboard
angle adjustment. Changing
the footboard angle does not
change the beater angle.
Spring
Upper Nut
Lower Nut
Fig. 9
Traction Plate and Traction Grip Adjustment
The Traction Plate is reversible to provide just the right
amount of grip at either the front or rear of the footboard.
The Traction Grip dots can be removed as needed to
custom tailor the amount of traction for your personal
playing style. For either adjustment, remove the four Allen
screws holding the Traction Plate with the included Allen
Wrench. The Traction Plate can then be reversed, the
Traction Grip dots removed and rearranged, or both. Note:
When reattaching the Traction Plate, finger-tighten the four
screws to prevent cross-threading then tighten the screws
securely. ( Fig. 12,13 )
Toe Stopper
The Toe Stopper prevents your foot from sliding into the
chain or belt while playing. If you prefer, it can be easily
removed by undoing the key bolt as shown in ( Fig. 14 ).
Fig. 12
Fig. 13
Toe Stopper
Fig. 14
Key Bolt
Caution
Always use the pedal with the Traction Plate mounted to prevent
possible injury to your foot.
Caution
The heel must be flush with the Power Plate, or damage to the
pedal may result.
Wing Bolt Fig. 15
Fig. 16
Hoop Clamp System
To attach your pedal to the bass drum, slide the bass drum
hoop between the Hoop Clamp and the bottom lip of the
pedal. Square the pedal then tighten the Wing Bolt to
secure the pedal to the bass drum. If the bass drum hoop
doesn't fit or if the heel of the pedal jumps up while playing,
loosen the Allen screw with the provided Allen wrench and
turn the Adjustment Knob to compensate. Securely tighten
the Allen screw when done. ( Fig. 15 )
Anchor Screw
Turn the Anchor Screws clockwise to help prevent your
bass drum from sliding. ( Fig. 16)
Anchor Screw
Hoop Clamp
Caution
Take care when handling or moving the fully assemble
Twin Pedal to prevent damage to the Drive Shaft and
its components.

Periodically check all Allen Screws for tightness and
tighten them with the provided Allen Wrenches as
needed.

Periodically apply lube to all moving parts such as the
Chain, Cam Roller, Footboard Hinge, etc. for optimal
speed and extended life of your pedal. Bearings
should be lubricated with grease, not liquid oil. 

To maximize traction of the rubber mats underneath
the PowerPlate, keep them clean and dust free using a
damp cotton towel.
http://www.pearldrum.com
Products and specifications are subject to change without notice.
Printed in Taiwan.
-0710-
Caution
The tips of the Anchor Screws are sharp thus it is HIGHLY RECOM-
MENDED to use a rug or carpet to protect floor surfaces.

Other Pearl Music Pedal manuals

Pearl Demon Drive 3000C Series User manual

Pearl

Pearl Demon Drive 3000C Series User manual

Pearl P-2000C User manual

Pearl

Pearl P-2000C User manual

Pearl Eliminator Demon Drive Specification sheet

Pearl

Pearl Eliminator Demon Drive Specification sheet

Pearl Eliminator Demon Drive Specification sheet

Pearl

Pearl Eliminator Demon Drive Specification sheet

Pearl P-3000C User manual

Pearl

Pearl P-3000C User manual

Pearl Eliminator Demon Drive P-3002D Installation guide

Pearl

Pearl Eliminator Demon Drive P-3002D Installation guide

Pearl P-3002D User manual

Pearl

Pearl P-3002D User manual

Pearl P-120 User manual

Pearl

Pearl P-120 User manual

Pearl P-2052C User manual

Pearl

Pearl P-2052C User manual

Pearl Eliminator Demon Chain User manual

Pearl

Pearl Eliminator Demon Chain User manual

Pearl P-2050C User manual

Pearl

Pearl P-2050C User manual

Pearl RH-2050 User manual

Pearl

Pearl RH-2050 User manual

Popular Music Pedal manuals by other brands

digi-tech Crossroads Eric Clapton specification

digi-tech

digi-tech Crossroads Eric Clapton specification

Keeley MT-2 manual

Keeley

Keeley MT-2 manual

Korg FK1 Owners manualual

Korg

Korg FK1 Owners manualual

Wampler Hot Wired manual

Wampler

Wampler Hot Wired manual

TC Electronic Ditto manual

TC Electronic

TC Electronic Ditto manual

TRACE ELLIOT QUAD CHORUS operating instructions

TRACE ELLIOT

TRACE ELLIOT QUAD CHORUS operating instructions

Acoustic Control GAMMA CUMULUS owner's manual

Acoustic Control

Acoustic Control GAMMA CUMULUS owner's manual

Amptweaker BigRock Pro manual

Amptweaker

Amptweaker BigRock Pro manual

TC Electronic corona user manual

TC Electronic

TC Electronic corona user manual

Shaman VOD-01 manual

Shaman

Shaman VOD-01 manual

Danelectro Cool Cat V2 Drive CO-2 instructions

Danelectro

Danelectro Cool Cat V2 Drive CO-2 instructions

aion CRESCENT AMP DISTORTION manual

aion

aion CRESCENT AMP DISTORTION manual

FuzzDog Mutant Fuzz quick start guide

FuzzDog

FuzzDog Mutant Fuzz quick start guide

EBS BLACK LABEL OCTABASS user manual

EBS

EBS BLACK LABEL OCTABASS user manual

Two notes Audio Engineering Torpedo C.A.B. user manual

Two notes Audio Engineering

Two notes Audio Engineering Torpedo C.A.B. user manual

Donner Dynamic Wah owner's manual

Donner

Donner Dynamic Wah owner's manual

Snazzy FX Kitty Eyes manual

Snazzy FX

Snazzy FX Kitty Eyes manual

nux Phaser Core user manual

nux

nux Phaser Core user manual

manuals.online logo
manuals.online logoBrands
  • About & Mission
  • Contact us
  • Privacy Policy
  • Terms and Conditions

Copyright 2025 Manuals.Online. All Rights Reserved.