5 6
7
LIMITED SIX MONTHS WARRANTY
PÈLERIN hereby warrants that for a period of six (6) months from the date of purchase, this
product will be free from mechanical defects in materials and workmanship and for ninety (90)
days in respect to non-mechanical parts. At its sole discretion, PÈLERIN will either repair or replace
the product found to be defective, or issue a refund on the product during the warranty period. Any
refund to the customer will be at a pro-rated value based on the remaining period of the warranty.
The warranty is only valid for the original retail purchaser from the date of initial retail purchase
and is not transferable. Keep the original sales receipt, as proof of purchase is required to obtain
warranty validation. The terms and conditions of this warranty cannot be altered, modified or in any
way revised by any retail store, other business or individual.
EXCLUSIONS : The warranty does not cover normal wear of parts or damage resulting from any of
the following: negligent use of the product, use of improper voltage or current, improper routine
maintenance, use contrary to the operating instructions, disassembly, repair, or alteration by anyone
other than qualified PÈLERIN personnel. Also, the warranty does not cover acts of God such as fire,
floods, black holes, hurricanes or tornadoes.
PÈLERIN shall not be liable for any incidental or consequential damages caused by the breach of
any express or implied warranty. Apart from the extent prohibited by applicable law, any implied
warranty of merchantability or fitness for a particular purpose is limited in time to the duration of
the warranty. Some states, provinces or jurisdictions do not allow the exclusion or limitation of
incidental or consequential damages, or limitations may not apply to you. The warranty covers
specific legal rights which may vary by state, province and/or jurisdiction.
HOW TO OBTAIN WARRANTY SERVICE : You must contact customer service at our toll-free
number : 1 877 529-0024 ext. 284
A customer service representative will attempt to resolve warranty issues over the phone. If the
customer service representative is unable to resolve the problem, you will be provided with a case
number and asked to return the product to PÈLERIN. Attach a tag to the product that includes: your
name, address, daytime contact telephone number, case number and description of the problem.
Also, include a copy of the original sales receipt. Carefully package the tagged product with the
sales receipt and send it (with shipping and insurance prepaid) to PÈLERIN’s address. PÈLERIN shall
bear no responsibility or liability for the returned product while in transit to PÈLERIN’s customer
service center.
Pèlerin, 637, rue St-Vallier Ouest, Québec, QC G1N1C6, Canada.
If after having read this leaflet, you have any questions or comments on your products,
call 1 877 529-0024 ext. 284 (from 8h30 to 17h30, E.S.T.)
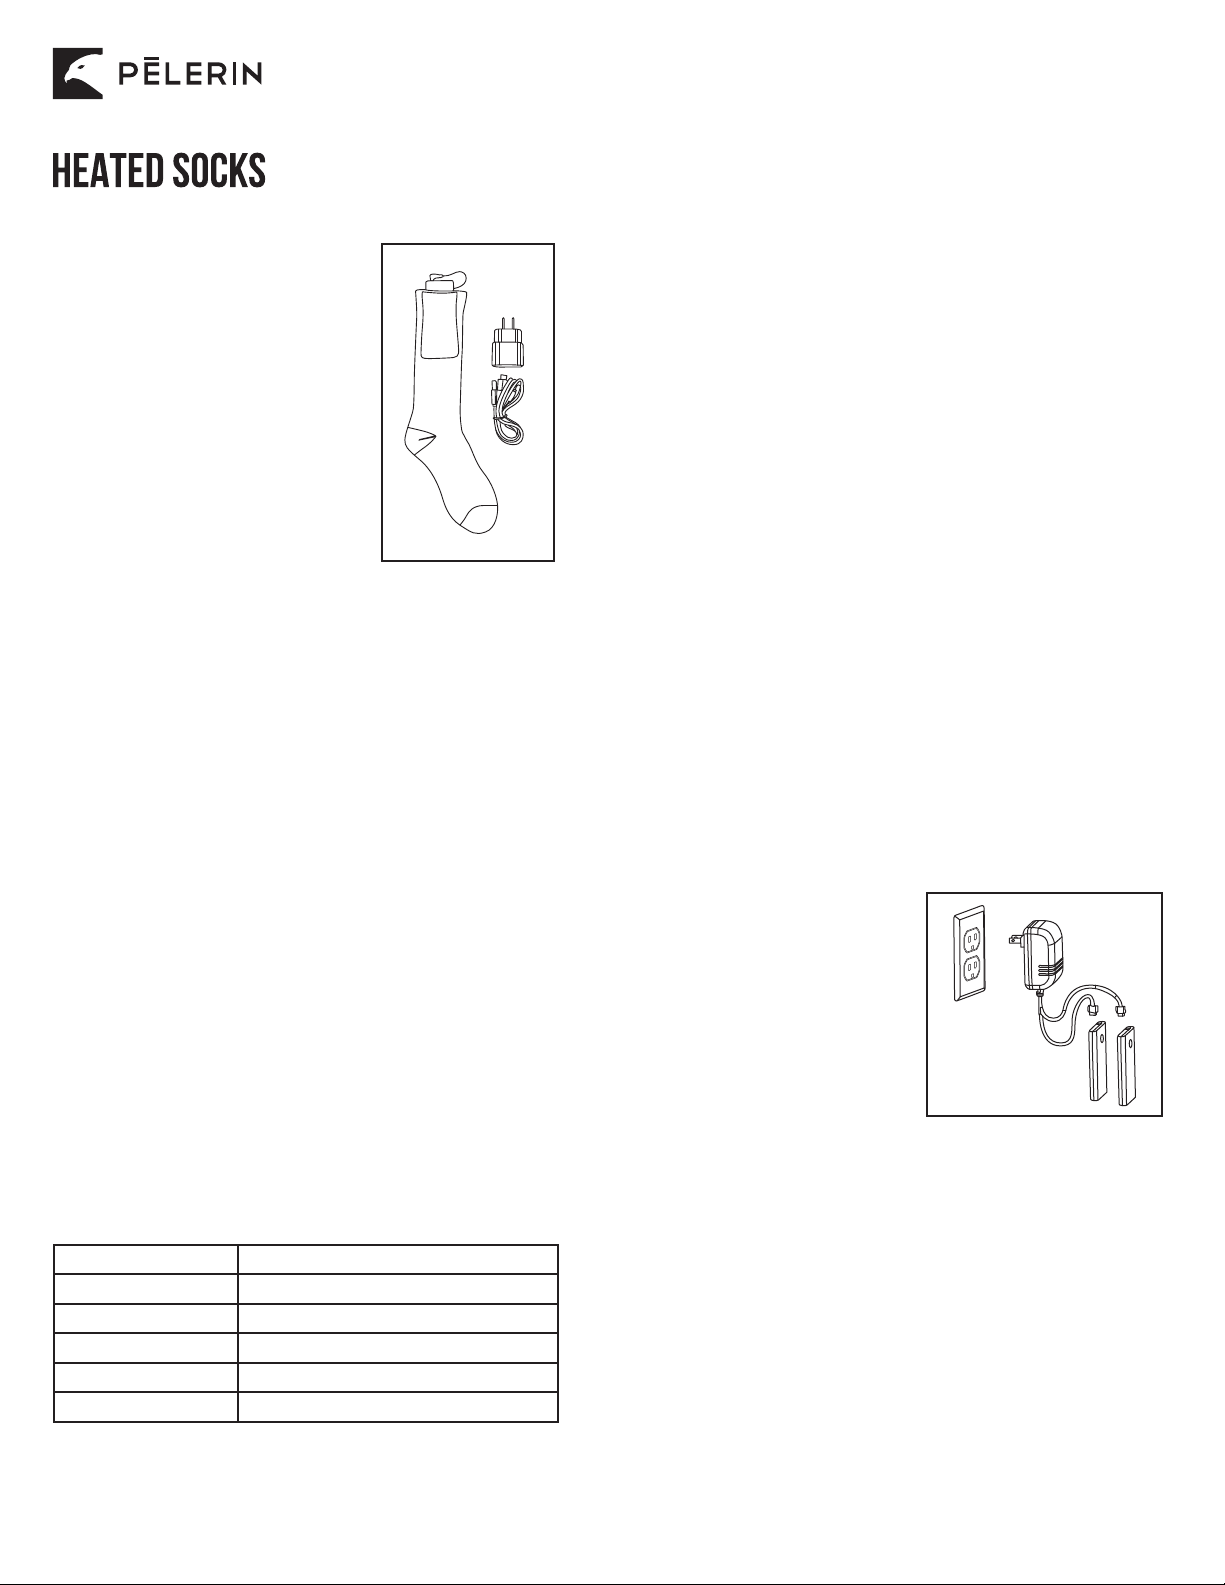
WHEN TO RECHARGE? For best results, fully charge each battery prior to each use. It is best to recharge
batteries within 48 hours of use. Also, fully charge batteries before storing for extended time periods as
PowerBank 2400 batteries do discharge over time.
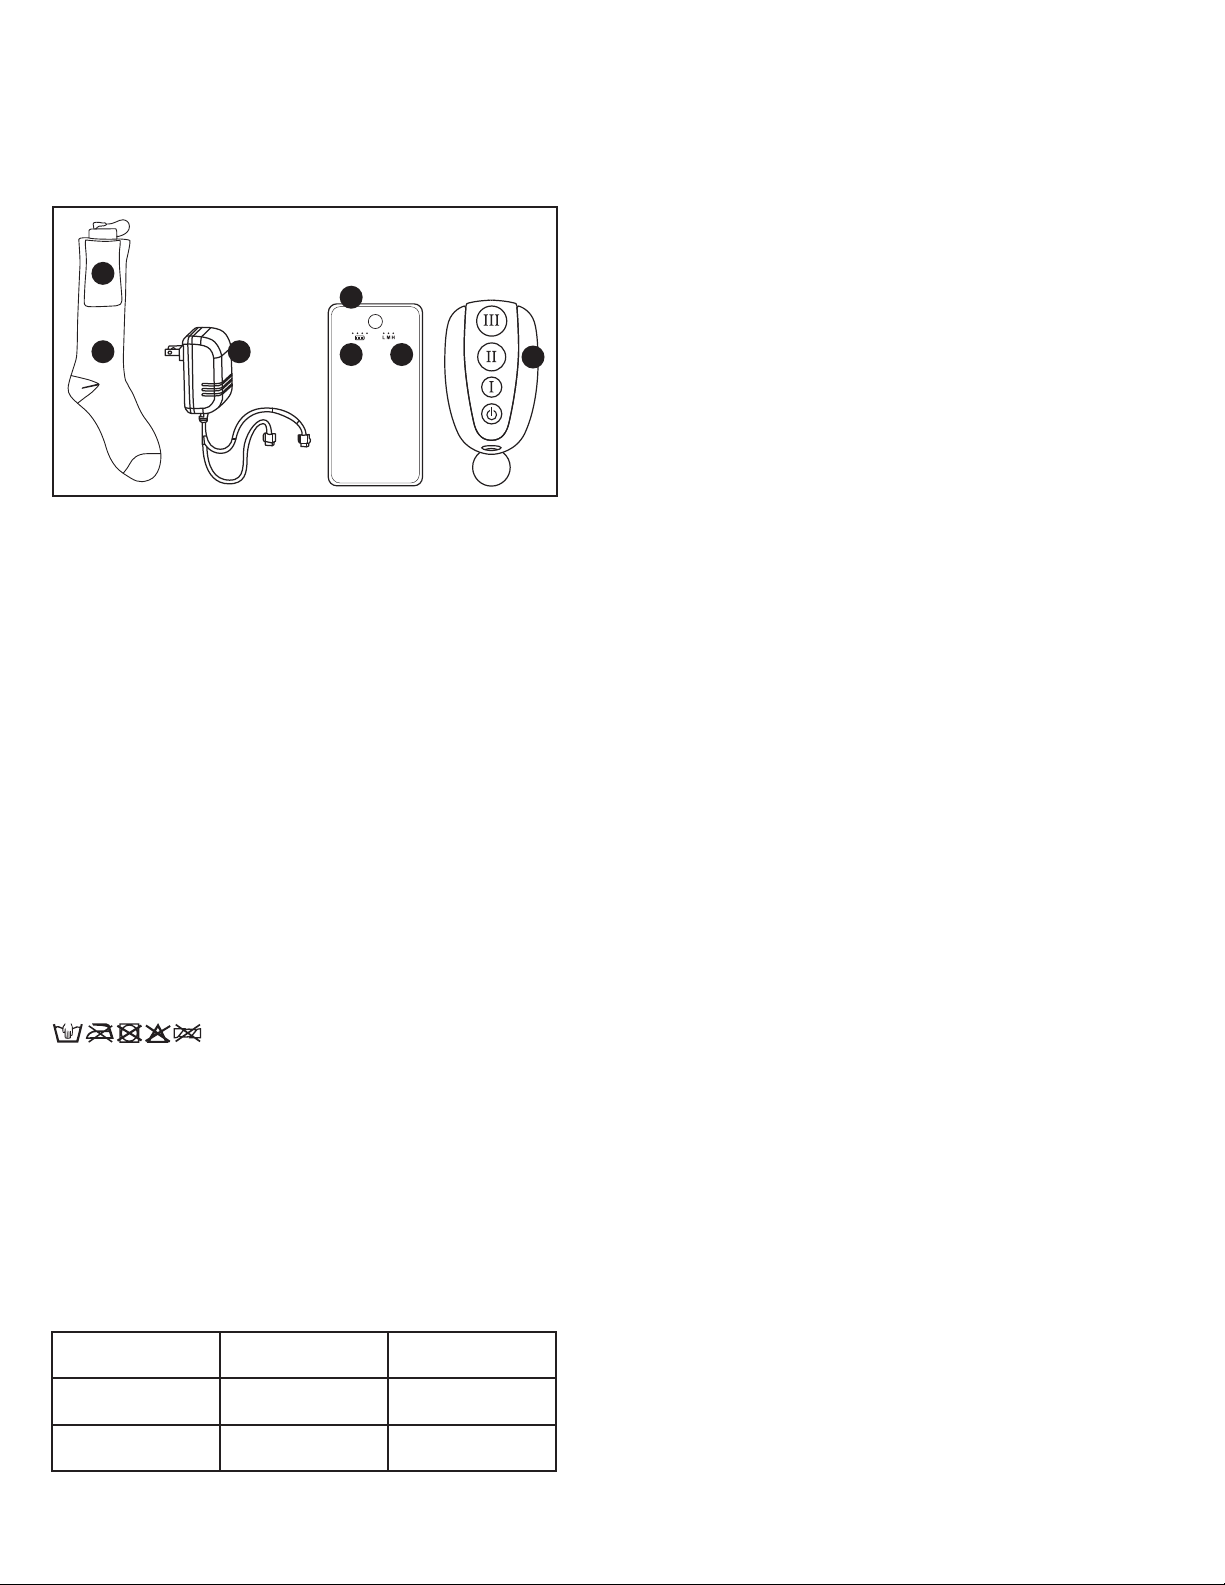
GETTING TO KNOW YOUR HEATED SOCKS
Product may vary slightly from illustrations.
Figure 3.
8
Heated sock is not warming.
Heated sock is not warming.
Battery has no power.
The heated sock is not
connected to the battery.
Fully charge battery.
Connect the heated sock’s
wire to the battery.
TROUBLESHOOTING
PROBLEM CAUSE SOLUTION
BEFORE USING FOR THE FIRST TIME
1. Carefully unpack the heated socks and accessories.
OPERATING INSTRUCTIONS
ASSEMBLY & ACTIVATION :
1. Open socket of the heated socks (see figure 3). Make sure inner pocket is completely dry and
free of any debris.
2. Gently reach into pocket and locate the heated sock connector plug.
3. Attach the connector plug to the battery connector socket by pushing firmly together.
4. To turn on battery power, press the battery button for 1 second to determine the heat level,
"high", "medium" or "low".
5. Gently insert battery into pocket.
TEMPERATURE ADJUSTMENT :
1. The heated sock has "high", "medium" and "low" settings. To change the heat setting,
open the pocket.
2. Press the battery button for 1 second to determine the heat level.
TO SHUT DOWN :
1. To power off, open the socket.
2. Press the battery button for 2 seconds to turn off the battery.
TO RECHARGE :
1. Open pocket.
2. Disconnect battery from heated sock connector plug.
3. Remove battery from the pocket.
4. Fully charge batteries (see instructions on how to charge the batteries and figure 2).
2. Remove all parts from the carton and familiarize yourself with all the components. Make sure all
components and accessories are present before discarding packing materials (see figure 3).
3. Visually inspect all components for damage. If any component is damaged in any way, DO NOT
operate heated socks.
4. Fully charge batteries (see instructions on how to charge the batteries and figure 2).
CARE AND CLEANING INSTRUCTIONS
1. Remove batteries from the pockets.
2. Machine wash the heated socks in a delicate mode (tuck cord inside pocket).
3. Hang heated sock for drying.
5. Keep batteries and charger away from water at all times.
6. Make sure heated sock is 100% dry and pockets are debris-free prior to reconnecting battery
to the heated sock.
4. DO NOT dry clean. DO NOT bleach. DO NOT tumble dry. DO NOT iron.
STORING INSTRUCTIONS
1. Never store the batteries while plugged into the charger. Remove the battery from the charger
and remove the plug from the electrical outlet.
2. Disconnect battery from the heated sock and store separately.
3. Store heated socks, batteries and charger indoors, in a dry, cool space within a temperature range
of 5 to 30 °C (41-86°F).
6. DO NOT store in extreme cold conditions and prevent heated socks from becoming frozen as this
will hurt performance and may cause damage.
4. Never store heated socks while still hot. Allow heated socks to cool completely prior to storing.
1
2 3 5
4
67
1. Pocket
2. Heated sock
3. Charger with split cord
4. Battery
5. Charge indicator
6. Heat level indicator
7. Remote control