4
Because of the higher loads the application of
Pendix in downhill-, freeride-, BMX-cycles, dirtbi-
kes and further related types as well as operation
in competition is prohibited. The usage in static
conditions (dyno, home gym) is also prohibited.
Using clipless pedals in combination with Pendix
is prohibited.
Before installing the Pendix system, check to see
whether your bicycle is suitable for it. In particu-
lar, there must be suicient stability provided for.
Consult your bicycle specialist for advice when in
doubt.
For the bicycle with an installed Pendix to be le-
gally accepted, the requirements of DIN EN ISO
4210:2014 (Safety Requirements for Bicycles) and
DIN 15194 (electrically power-assisted cycles
[EPAC]) as well as the requirements of 2006/42/
EU (European Union Directive on Machinery and
Certain Parts of Machinery) must be met. [DIN =
Deutsches Institut für Normung (German Stan-
dards Institute), EN = European Norm, ISO = Inter-
national Organization for Standardization]
The Pendix is not designed for installation and
eective use in bicycles for children and juveniles
up to the age of 14 years!
Before riding o, carefully read through the ope-
rating instructions for your Pendix drive system
(motor) and the operating instructions for the
general bicycle technical part. The manufacturer
assumes no responsibility for damage caused by
not adhering to instructions. Your Pedelec may
only be used in accordance with proper instruc-
tions. This is described in the technical part of the
bicycle instructions. Any other active use may re-
sult in a technical breakdown or defect, causing
accident and injury! Responsibility for possibly
defective parts at purchase and all guarantee
conditions become invalid if the Pedelec/Pendix
system is improperly used.
The electric parts of your Pedelec combine to
form a high-power system. Remove the battery
immediately when you see damage to the elec-
tric system or particularly if, aer a fall or acci-
dent, electric cables or parts are exposed. Always
refer to a specialist/bicycle technician for repairs,
The prescribed operating temperature is between -10° C and
+50° C (14° F – 122° F). The limit temperatures for storage of
the system are between -20° C and +60° C (-4° F – 140° F).
Carry out the steps described in these instruc-
tions only. No other or dierent changes to the
system may be performed. In addition: Do not
dismantle or open structural units!
Only replace parts that have become defective
or worn down, for example battery, charging
unit or sensors, by using original spare parts or
replacements either made by the manufacturer
or expressly allowed by the manufacturer. Note:
the manufacturer’s responsibility and/or guaran-
tee lose their validity when non-contract parts
are used. If such parts are used, a loss of function
may result! In cases of defect or wear and tear,
always refer to a specialist/bicycle technician to
carry out the necessary repairs or replacement
using original parts or components only.
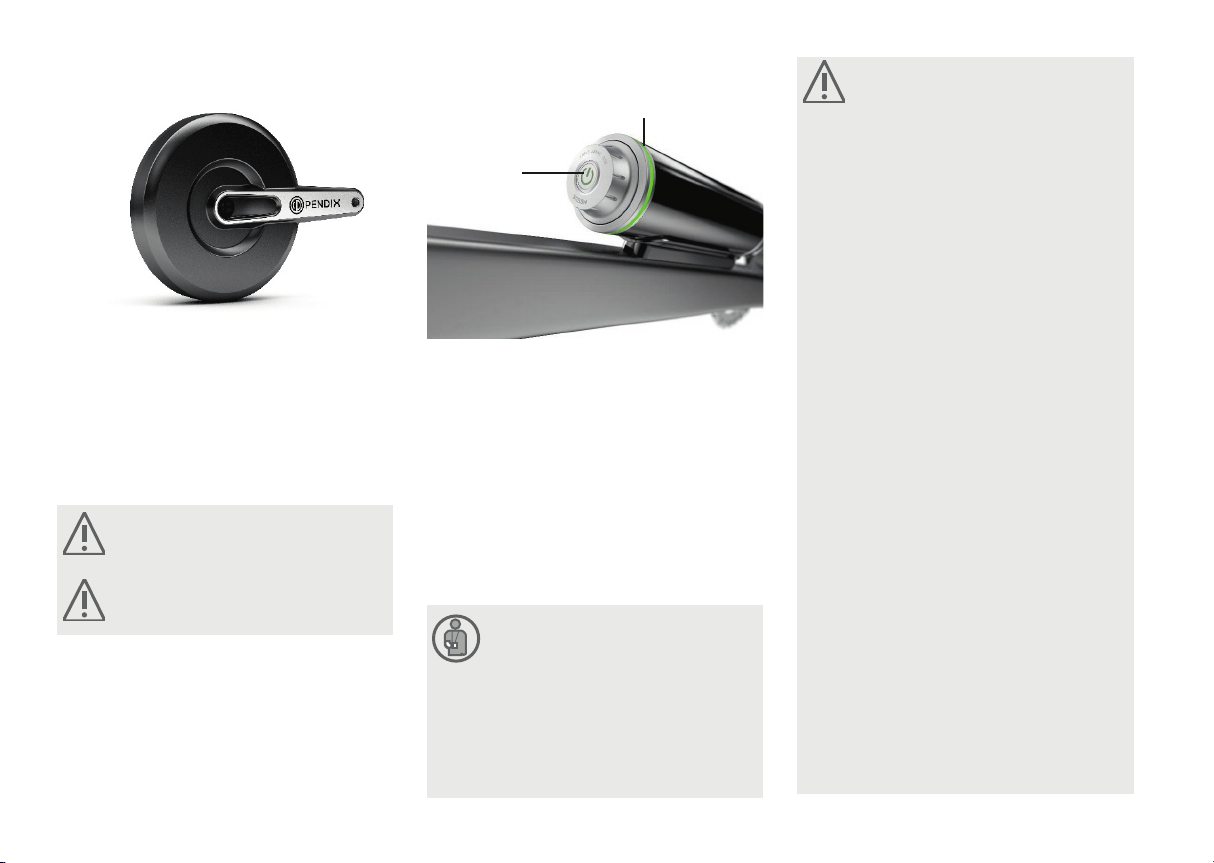
2.1 Field of application
If the speed of the Pedelec is above 25 km/h (*), the motor
support automatically stops. When the speed drops again to
below 25 km/h (*), the motor support is automatically reac-
tivated. As the motor has a permanent nominal performan-
ce of 250 W and supports you up to a speed of 25 km/h (*),
your Pendix-equipped bicycle still correctly belongs to the
bicycle category. For this reason the same regulations apply
(in Germany the StVZO [Straßenverkehrs-Zulassungs-Ord-
nung, accident prevention regulations] and STVO [Straßen-
verkehrs-Ordnung, national road traic regulations]) for
your Pedelec as for a normal bicycle. Therefore: adhere to
the traic rules and to the national legal regulations. (*) or
15½ mph.
This part of the system manual gives you specific informati-
on on how to handle the structural components of the elec-
tric motor of your Pendix drive system and on riding with a
Pedelec. General information, for example on bicycle tech-
nology, can be found in the instructions included.
The Pendix system is provided for the following bicycle
types:
City- / Trekking- / Touringbikes, Mountainbikes (Race/
Cross-Country), road bike, folding bike, recumbent bicycles
and further related types.
but also whenever you have a question or pro-
blem. A lack of expertise can result in accidents
and/or severe injuries! If you have discovered a
defect, please proceed as described in Chapter 7
„Default Measures“.
BEFORE carrying out any kind of work on your Pe-
delec, switch o the electric system and remove
the battery.
Do not clean your Pedelec with a steam jet,
high-pressure cleaner or water hose. If you do so,
water can enter electric parts or the motor and
destroy the equipment.
If the motor is not correctly operated and the battery, char-
ging unit and motor are interfered with in any way, this can
result in danger to health and material, even accidents. In
this case, Pendix assumes no guarantee for damage caused.
3. Electronical and
electric parts: Notes