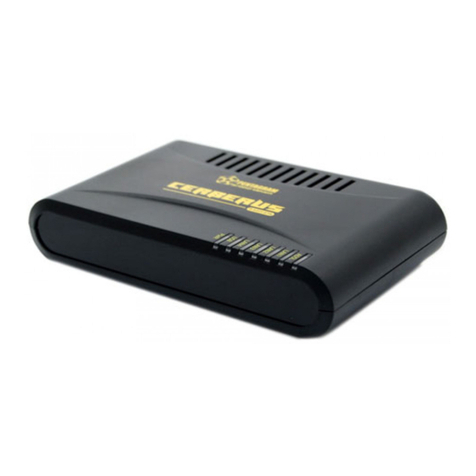
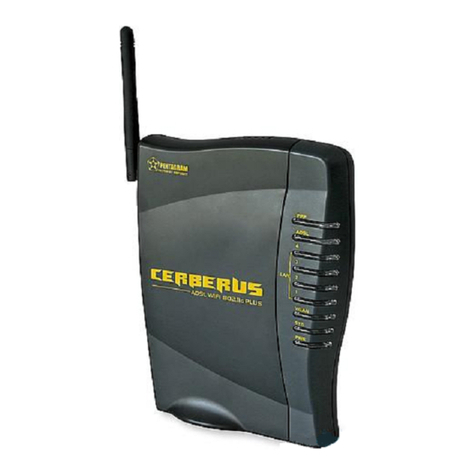
Pentagram Cerberus P 6311-072 User manual

2007-08-01
User’s Manual
PENTAGRAM Cerberus P 6311-072
The latest versions of manual, drivers and applications are available on
www.pentagram.eu

NOTE! Any information and technical data are subject to change without prior notification
and/or indication in this manual.
© 2007 PENTAGRAM
All rights reserved; copying and reproduction is strictly forbidden.

Cerberus P 6311-072
3
INDEX
INTRODUCTION ................................................................................................. 5
FEATURES..................................................................................................... 5
PACKAGE CONTENTS................................................................................... 7
PRODUCT OVERVIEW ....................................................................................... 7
IMPORTANT NOTES ...................................................................................... 7
FRONT LEDS ................................................................................................. 7
THE REAR PORTS......................................................................................... 8
DEFAULT SETTINGS ..................................................................................... 8
RESETTING ROUTER .................................................................................... 9
CONNECTING CERBERUS TO COMPUTER.................................................. 9
CONFIGURE TCP/IP....................................................................................... 9
CONFIGURE ROUTER VIA WEB BROWSER.................................................... 13
LOGIN .......................................................................................................... 13
NAVIGATION................................................................................................ 14
QUICK START WIZARD................................................................................ 15
INTERFACE SETUP TAB.............................................................................. 20
ADVANCED SETUP TAB .............................................................................. 27
ACCESS MANAGEMENT TAB...................................................................... 35
MAINTENANCE TAB..................................................................................... 42
STATUS TAB................................................................................................ 46
HELP TAB .................................................................................................... 50
TROUBLESHOOTING ....................................................................................... 51
USING LEDS TO DIAGNOSE PROBLEMS.................................................... 51
PROBLEMS WITH THE WEB INTERFACE.................................................... 51
PROBLEMS WITH THE LOGIN USERNAME AND PASSWORD.................... 52
PROBLEMS WITH LAN INTERFACE ............................................................ 52
PROBLEMS WITH WAN INTERFACE ........................................................... 52
PROBLEMS WITH THE INTERNET ACCESS................................................ 53

Cerberus P 6311-072
4

Cerberus P 6311-072
5
Introduction
Thank you for purchasing the Cerberus P 6311-072 ADSL2+ Modem/Router by
PENTAGRAM. Your new router is an all-in-one unit that combines an ADSL modem, ADSL
router, Ethernet network switch and wireless Access Point to provide everything you need to
get the machines on your network connected to the Internet over an ADSL broadband
connection.
The Cerberus P 6311-072 router complies with ADSL2+ standards for deployment worldwide
and supports downstream rates of up to 24 Mbps and upstream rates of up to 1 Mbps.
Designed for small office, home office and residential users, the router enables even faster
Internet connections. You can enjoy ADSL services and broadband multimedia applications
such as interactive gaming, video streaming and real-time audio much easier and faster than
ever before.
Features
•A 4-port 10/100Mbps fast Ethernet switch is built-in with automatic switching between
MDI and MDI-X for 10Base-T and 100Base-TX ports, with auto detection allowing you to
use either straight or cross-over Ethernet cables.
•With built-in 802.11g access point for extending the communication media to WLAN while
providing the WEP, WPA/WPA2 and WDS for securing your wireless networks.
•Network Address Translation (NAT) allows multiple users to access outside resources
such as the Internet simultaneously with one IP address/one Internet access account.
Many application layer gateways (ALG) are supported such as web browser, ICQ, FTP,
Telnet, E-mail, News, Net2phone, Ping, NetMeeting, IP phone and others.
•This protocol is used to enable simple and robust connectivity among stand-alone
devices and PCs from many different vendors, and it makes setting up a network simple
and affordable. UPnP architecture leverages TCP/IP and the Web to enable proximity
networking in addition to control and data transfer among networked devices. With this
feature enabled, you can seamlessly connect to Net Meeting or MSN Messenger.
•The Dynamic DNS service allows you to alias a dynamic IP address to a static hostname.
This dynamic IP address is the WAN IP address. To use the service, you must first apply
for an account from a DDNS service such as http://www.dyndns.org/.
•The Cerberus ADSL2 Wi-Fi Plus (P6311-6) provides an embedded PPPoE client function
to establish a connection. You get greater access speed without changing the operation
concept, while sharing the same ISP account and paying for one access account. No
PPPoE client software is required for the local computer. Automatic Reconnect and
Disconnect Timeout (Idle Timer) functions are also provided.
•Virtual Server: You can specify which services are visible to outside users. The router
detects an incoming service request and forwards it to the specific local computer for
handling. For example, you can assign a PC in a LAN to act as a Web server inside and
expose it to the outside network. Outside users can browse inside the web server directly
while it is protected by NAT. A DMZ host setting is also provided for local computers
exposed to the outside Internet network.
Cerberus P 6311-072
6
•Dynamic Host Configuration Protocol (DHCP) Client and Server: On a WAN site, the
DHCP client obtains an IP address from the Internet Service Provider (ISP) automatically.
On a LAN site, the DHCP server allocates a range of client IP addresses, including
subnet masks and DNS IP addresses and distributes them to local computers. This
provides an easy way to manage the local IP network.
•Static and RIP1/2 Routing: An easy static routing table or RIP1/2 routing protocol
supports routing capability.
•SNMP (Simple Network Management Protocol): SNMP allows convenient remote
management of the router.
•Web-based GUI: A web-based GUI offers easy configuration and management. User-
friendly and with on-line help, it also supports remote management capability for remote
users to configure and manage this product.
•Firmware Upgradeable: You can upgrade the router with the latest firmware through its
web-based GUI.
•Quality of Service (QoS) gives you full control over which types of outgoing data traffic
should be given priority by the router, ensuring important data like gaming packets,
customer information, or management information move through the router ay lightning
speed, even under heavy load. The QoS features are configurable by source IP address,
destination IP address, protocol, and port. You can throttle the speed at which different
types of outgoing data pass through the router, to ensure P2P users don’t saturate
upload bandwidth, or office browsing doesn’t bring client web serving to a halt. In
addition, or alternatively, you can simply change the priority of different types of upload
data and let the router sort out the actual speeds.
•High Speed Internet Access: downstream rates of up to 24Mbps and upstream rates of
up to 1Mbps. Cerberus ADSL2 Wi-Fi Plus (P6311-6) is compliant with the following
standards:
ANSI T1.413 issue 2,
ITU-T G.992.1 (G.dmt),
ITU-T G.992.2 (G.lite),
ITU-T G.992.3 (ADSL2 G.dmt.bis),
ITU-T G.992.5 (ADSL2+),
ITU-T G.994.1 (G.hs),
•Multi-Protocol to Establish a Connection: The router supports following protocols to
establish a connection with an ISP:
PPPoA (PPP over ATM Adaptation Layer 5 – RFC 2364),
PPPoE (PPP over Ethernet – RFC 2516)
RFC 1483/2684 encapsulation over ATM (bridged or routed),
The router also supports VC-based and LLC-based multiplexing.

Cerberus P 6311-072
7
Package Contents
1. PENTAGRAM Cerberus P 6311-072
2. Power adapter 12 V, 1 A
3. Ethernet cable (RJ-45)
4. Telephone cable (RJ-11)
5. USB cable
6. CD
7. Quick Installation Guide
Product Overview
Important Notes
•Do not use the router in high humidity or high temperatures.
•Do not use the same power source for the router as other equipment.
•Do not repair or open the case by yourself. If the router is too hot, turn off
the power immediately and have it repaired at a qualified service center.
•Avoid using this product and all accessories outdoors.
•Place the router on a stable surface.
•Only use the power adapter that comes with the package. Using a
different voltage rating power adaptor may damage the router.
Front LEDs
LED Action Description
PPP Steady light PPPoA / PPPoE connection established
ADSL Off No ADSL signal
Steady light ADSL signal is established
Blinking Light Establishing ADSL signal
LAN (1-4) Off No Ethernet connection
Steady light Connected to an Ethernet port
Blinking light Transmitting/Receiving data
SYS Steady light System is ready
PWR Off No power is supplied to the device
Steady light Connected to an AC power supply

Cerberus P 6311-072
8
The Rear Ports
ON/OFF Power switch button.
PWR Connect the supplied power adapter to this jack.
LAN (RJ-45)
Connect a UTP Ethernet cable (Cat-5 or Cat-5e) to one of the
four LAN ports when connecting to a PC or an office/home
network of 10Mbps or 100Mbps.
DEFAULT
After the router is powered on, press this recessed button
using the end of paper clip or other small pointed object to
reset the router or to restore it to factory default settings.
USB Use this port to connect router to computer via USB.
LINE (RJ-11) Connect the supplied RJ-11 (telephone) cable to this port
when connecting to the ADSL/telephone network.
Default Settings
Before changing configuration familiarize yourself with these default settings.
IP Address 192.168.1.100
Subnet Mask 255. 255. 255.0
DHCP Server Enabled
DHCP Server IP Address Pool 100 IP addresses
from 192.168.1.101
IP Address Lease Time 86400 seconds (24 hours)
User Name admin
Password pentagram
If you ever forget the password to log in, you may need to reset router to restore the factory
default settings. This procedure is described on the next page.

Cerberus P 6311-072
9
Resetting router
•Turn router on and wait for ADSL LED to lit or start blinking.
•Press and hold RESET button on the back panel of router for 5-10 seconds and then
release it.
•After reset LEDs will return to their normal behavior and all settings will be reset to their
default value. You can login web configurator using default username and password:
admin / pentagram.
Connecting Cerberus to Computer.
If there is an available LAN card present on your PC, you just simply connect ADSL router and
PC through the Ethernet cable. Once you establish Internet connection, you could browse the
Web through the Ethernet cable.
Configure TCP/IP
This part will help you to configure your computer to communicate with router properly.
Computer must be equipped with network adapter connected directly to router. You can also
connect to router via network hub/switch. Default IP address of the router is 192.168.1.100
and subnet mask is 255.255.255.0. Fastest and easiest method to configure your computer is
to obtain an IP address automatically from router’s DHCP server.
Make sure that TCP/IP protocol and network adapter are installed on your computer.

Cerberus P 6311-072
10
Windows Vista
Note: Network configuration require administrator privileges. When User Account Control
window pops up, either click Continue (Administrator user) or select Administrator user and
enter valid password (Standard user).
1. Click Start →Control Panel.
2. Click View network status and tasks.
3. Click View status for appropriate connection.
4. On General tab, Click the Properties button.
5. On General tab, select
Internet Protocol
Version 4 (TCP/IPv4) and click Properties.
6. On General tab, select
Obtain an IP address
automatically and Obtain
DNS server
address automatically.
7. Click OK to save settings and close Internet
Protocol Version 4 (TCP/IPv4) Properties
window.

Cerberus P 6311-072
11
Windows 2000/XP
1. Click Start →Settings →Control Panel.
Double-click the Network Connections
icon
(2000/XP Classic view) or click
Network and
Internet Connections icon and then
Network
Connections icon (XP Default view).
2. Double-click the Local Area Connection icon.
3. On General tab, Click the Properties button.
4. On General tab, select
Internet Protocol
(TCP/IP) and click Properties.
5. On General tab, select
Obtain an IP address
automatically and
DNS server address
automatically.
6. Click OK to save settings and close Internet
Protocol (TCP/IP) Properties window.

Cerberus P 6311-072
12
Windows 95/98/Me
1. Click Start →Settings →Control Panel. Double-
click the Network icon.
2. On Configuration tab, select TCP/IP for appropriate
network adapter and click Properties.
3. On IP Address tab, select
Obtain an IP address
automatically.
4. On DNS Configuration tab, select Disable DNS
5. Click OK to save settings and close
TCP/IP
Properties window.
To make sure that network adapter properly obtained an IP address from router’s DHCP
server, click Start > Run and type cmd (Win 2000/XP) or command (Win 95/98/ME). In
command line type ipconfig /all and check that value of the IP Address is 192.168.1.x

Cerberus P 6311-072
13
Configure router via web browser
Cerberus P 6331-072 router can be configured via web browser, which is usually integrated
with operating system. Router offers clear and simple interface.
Login
1. Launch the Web browser
2. In address bar enter the default IP address: http://192.168.1.100
3. If system password is set, enter username and password – default admin / pentagram

Cerberus P 6311-072
14
Navigation
Steps to navigate the Web configuration from the Site Map are summarized below:
•Quick Start – wizard that helps to configure your router,
•Interface Setup – configure Internet and LAN functions,
•Advanced Setup – configure advanced features,
•Access Management – manage Internet access options,
•Maintenance – set a new password, set the time zone, upgrade or reload firmware and
run diagnostic tests on the router,
•Status – router device information, system logs and performance statistics,
•Help – available help topics.

Cerberus P 6311-072
15
Quick Start Wizard
Click Quick Start to guide you to configure the device to connect your ISP and have Internet
access within minutes. This Quick Start will guide you step by step to configure the password,
time zone, and WAN settings of you device. This Wizard is a helpful guide for first time uses to
the device. It is strongly recommended to use Quick Start to configure your ADSL settings.
Click on the RUN WIZARD button to start the Quick Start wizard. The Quick Start wizard will
open a new browser window with the following screen:
Please follow the quick start step by step to configure the device.
Click on NEXT to continue, or on EXIT to exit the wizard without saving.

Cerberus P 6311-072
16
Setting a New Password
This screen helps you set a new password, replacing the default password.
Enter new password in New Password and Confirmed Password fields.
Click on BACK to return to the previous screen, on NEXT to continue, or on EXIT to exit the
wizard without saving.
Choose your Time Zone
Select the appropriate time zone for your location from the dropdown list.
Click on BACK to return to the previous screen, on NEXT to continue, or on EXIT to exit the
wizard without saving.

Cerberus P 6311-072
17
Set your Internet Connection
Glossary:
•Multiplexing - Two conventions identify what protocols a virtual circuit (VC) is carrying.
Be sure to use the multiplexing method your ISP requires:
VC-Based Multiplexing – In VC-based multiplexing, by prior mutual agreement, each
protocol is assigned to a specific virtual circuit. For example, VC1 carries IP, etc. VC-
based multiplexing may be dominant in environments where dynamic creation of large
numbers of ATM VCs is fast and economical.
LLC-Based Multiplexing – In LLC-based multiplexing, one VC carries multiple protocols
with protocol-identifying information contained in each packet header. While this method
requires extra bandwidth and processing overhead, this method may be advantageous if
it is not practical to have a separate VC for each carried protocol; for example, if charging
heavily depends on the number of simultaneous VCs.
•VPI and VCI - Be sure to use the Virtual Path Identifier (VPI) and Virtual Channel
Identifier (VCI) numbers assigned to you. The valid range for the VPI is 0 to 255. The
valid range for the VCI is 32 to 65535. 0 to 31 is reserved for local management of ATM
traffic.
•PPPoA – Point-to-Point Protocol over ATM Adaptation Layer 5 (AAL5) (PPPoA) provides
access control and billing functionality in a manner similar to dial-up services using PPP.
The router encapsulates the PPP session based on RFC1483 and sends it through ATM
PVC to the ISP’s DSLAM.
•PPPoE – Point-to-Point Protocol over Ethernet provides access control and billing
functionality in a manner similar to dial-up services using PPP. The router bridges a PPP
session over Ethernet (PPP over Ethernet, RFC 2516) from your computer to an ATM
Permanent Virtual Circuit (PVC) that connects to the ADSL Access Concentrator, where
the PPP session terminates. Single PVC can support any number of PPP sessions from
your LAN.
Select the Internet connection type you use to connect to your ISP. The following screen will
vary depending on which connection type you chose.
Click on BACK to return to the previous screen, on NEXT to continue, or on EXIT to exit the
wizard.

Cerberus P 6311-072
18
•Dynamic IP Address
A dynamic IP address connection requests a new IP address from your ISP each time
you connect to it.
Enter VPI (Virtual Path Identifier), VCI (Virtual Channel Identifier) and select your
Connection Type from the dropdown list. Your ISP should provide the above
information.
Click on BACK to return to the previous screen, on NEXT to continue, or on EXIT to exit
the wizard without saving.
•Static IP Address
A static IP address connection uses the same IP each time you connect to your ISP.
Enter VPI (Virtual Path Identifier), VCI (Virtual Channel Identifier), IP Address, Subnet
mask, ISP Gateway and select your Connection Type from the dropdown list. Your ISP
should provide the above information.
Click on BACK to return to the previous screen, on NEXT to continue, or on EXIT to exit
the wizard without saving.

Cerberus P 6311-072
19
•PPPoE/PPPoA
Configure connection based on PPPoE / PPPoA protocol.
Enter Username, Password, VPI (Virtual Path Identifier), VCI (Virtual Channel Identifier)
and select your Connection Type from the dropdown list. Note that you must enter the
user name exactly as your ISP assigned it. If the assigned name is in the form of
user@domain where domain identifies a service name, enter it exactly as given.
Click on BACK to return to the previous screen, on NEXT to continue, or on EXIT to exit
the wizard without saving.
•Bridge Mode
RFC 1483 explains two methods for Multi-protocol Encapsulation over AAL5. The first
method allows multiplexing of multiple protocols over just one ATM virtual circuit (LLC-
based multiplexing). The second method assumes that each individual protocol is carried
over a separate ATM virtual circuit (VC-based multiplexing). Please refer to RFC 1483 for
more information.
Enter VPI (Virtual Path Identifier), VCI (Virtual Channel Identifier) and select your
Connection Type from the dropdown list. Your ISP should provide the above
information.
Click on BACK to return to the previous screen, on NEXT to continue, or on EXIT to exit
the wizard without saving.

Cerberus P 6311-072
20
Finishing the Wizard
The Quick Start wizard now has all the information it needs. You MUST click NEXT, to save
configuration!
Click on BACK to make changes or correct mistakes. Click on NEXT to save the current
settings. Click on EXIT to exit the wizard without saving.
Your changes have been saved. Click on CLOSE. The Quick Start wizard window will close.
Interface Setup Tab
Glossary:
•RIP (Routing Information Protocol): Select this option to specify the RIP version,
including RIP1, RIP2-B and RIP2-M. RIP2-B & RIP2-M are both sent in RIP-2 format, the
difference is that RIP2-M using Multicast and RIP2-B using Broadcast format.
•RIP Direction: Select this option to specify the RIP direction. None is for disabling the
RIP function. Both means the ADSL Router will periodically send routing information and
accept routing information then incorporate into routing table. IN only means the ADSL
router will only accept but will not send RIP packet. OUT only means the ADSL router
will only sent but will not accept RIP packet.
•IGMP (Internet Group Multicast Protocol): It is a session-layer protocol used to
establish membership in a multicast group. The ADSL supports both IGMP version
IGMP-v1 & IGMP-v2. Select None to disable it.
Table of contents
Other Pentagram Modem manuals

Pentagram
Pentagram Cerberus P 6331-42 User manual

Pentagram
Pentagram horNET Wi-Fi PCI User manual

Pentagram
Pentagram horNET Wi-Fi PCI User manual

Pentagram
Pentagram Cerberus ADSL2+ Lite User manual

Pentagram
Pentagram Cerberus Wi-Fi Lite User manual

Pentagram
Pentagram Cerberus P 6331-4A User manual

Pentagram
Pentagram Cerberus ADSL2+ Lite User manual

Pentagram
Pentagram Cerberus ADSL2+ Lite User manual

Pentagram
Pentagram horNET Wi-Fi PCI User manual

Pentagram
Pentagram Cerberus P 6311-07A User manual