manuals.online logo
Brands
  1. Home
  2. •
  3. Brands
  4. •
  5. peplink
  6. •
  7. Network Router
  8. •
  9. peplink 210 User manual

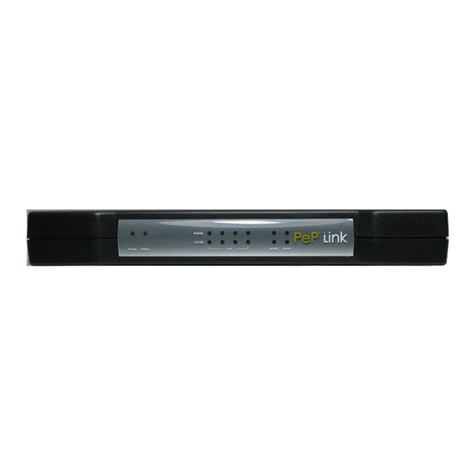
peplink 210 User manual

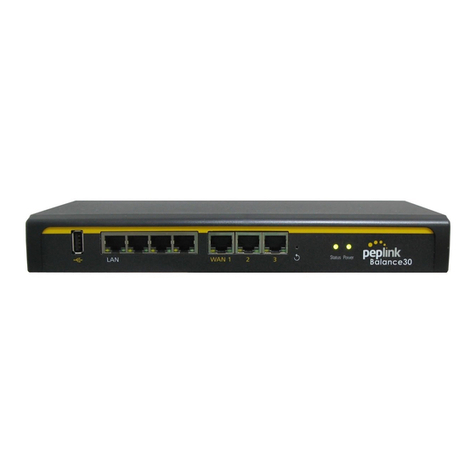
Peplink Balance –Quick Start Guide
Thank you for purchasing a Peplink Balance. This guide describes how to deploy the Peplink Balance in your
network replacing your existing firewall (NAT Mode). You can also deploy the Peplink Balance between the
Internet and your already existing firewall (Drop-In Mode). Instructions for both deployment methods can
be found in the Peplink Balance’s User Guide. The unit defaults to NAT Mode. These instructions allow you
to configure your unit’s LAN, WAN(s) and firewall.
Getting Started
To set up your Peplink Link Balancer, you need the following:
Peplink Balance, AC Power Cord (included)
Ethernet Cables
PC with Web browser
Register your Peplink Balance at www.peplink.com. You will need your serial number
to complete product registration. Download latest firmware specific to your device
and User Manual to your computers desktop.
AC input voltage range is 100-240 volts at 50/60 Hz.
Plug in the Peplink Link Balance and power it on.
Prepare the Peplink Balance:
1. Connect the PC to the LAN port on the front of the Peplink Balance unit using an
Ethernet cable.
2. By default the balance is setup as a DHCP server. Default settings of the DHCP pool are
192.168.1.x /24 (255.255.255.0)
3. Access the web interface of the unit by typing http://192.168.1.1 in a web browser. The
default username is admin and the default password is also admin.
4. Go to System Tab on the GUI interface.
Click on Firmware on the left hand side
Choose file from the Manual Firmware Upgrade and locate the firmware you
recently downloaded when you registered your device at www.peplink.com
After selecting your firmware file, click Manual Upgrade. You will be prompted
to download your active configuration. This is not necessary on this initial
setup, but is recommended prior to future firmware upgrades. Press Ok to
download/save your active configuration, or Cancel to skip this step and
proceed with the firmware upgrade.
Deciding Deployment Method
A. Go to the NETWORK>LAN page
B. Change default IP of your networks LAN if needed and enter correct Subnet Mask
and Port Speed
C. Decide if you will deploy the Peplink Balance in drop-In Mode or NAT Mode.
(Please note only Peplink Balance 210 and above has Drop-In Mode available)
Deploying in Drop-In Mode
A. Enable Drop-In Mode setting on the LAN configuration page.
B. Choose which WAN connection will be used in Drop-In Mode (Note: in
Drop-in Mode the chosen WAN and LAN will share a public Static IP).
C. Enter your chosen Public Static IP into LAN IP Address and your Subnet
Mask
D. Under Drop-In Mode Settings configure WAN Default Gateway and WAN
DNS Server settings.
E. In Drop-In mode the DHCP server on the Peplink is disabled.
F. Note –If you changed the LAN IP address, your web session of the Peplink
interface will time out once you SAVE and APPLY changes. You will need
to reset your static IP of the computer you are using to connect to the
Peplink to be on the same network.
Configuring connection settings for WAN used in
Drop-In Mode
A. Go to “Network” -> “WAN” -> click on the WAN chosen for Drop-In Mode
B. Input Upload and Download maximum speeds of your connection
C. It is suggested to keep settings under “Physical Interface Settings” at their
defaults
D. In Drop-In Mode your IP Settings will be transcribed from you LAN settings
previously inputted
E. Additional WANs can be configured now, all additional WANs will run in
“NAT Mode”
Note: The Connection Method in the WAN Configuration section defaults to
DHCP (auto-acquiring an address in the office network). Alternatively, you may
set it to Static and enter a specific IP address or choose PPPoE IF PPPoE is
chosen you will need your User Name and Password. Click Save Changes.
Peplink Balance –Quick Start Guide
Configure the Peplink Balance Firewall
If the Peplink Balance is deployed in Drop-In Mode, all traffic will be passed to your current
firewall. If the Peplink Balance replaces your current firewall, create firewall rules on the
Peplink Balance to match the settings of your current firewall:
1. To create Inbound and Outbound firewall rules, navigate to Network -> Access Rules -> and
select Add Rule for Inbound or Outbound
2. If 1:1 NAT’s are needed, you can create these by navigating to Network -> NAT Mappings ->
Add NAT Rule
Install into Production Network - Drop-In Mode
1. Now that the Peplink Balance is configured, start by connecting the WAN used in Drop-In
Mode to its corresponding WAN port:
2. Connect each of the cables from the Internet links into a WAN port on the front of the
Peplink Balance. Be sure to connect them according to your configuration.
3. Unplug your existing firewall from the network and plug its WAN link into the LAN /
Ethernet port of the Peplink Balance.
Test Connectivity - Drop-In Mode
Reboot your routers or modems on the WAN side of the Peplink Balance to clear their
ARP caches. Then test the connectivity to a client system:
1. Once installed, from an internal client, test connectivity by pinging the Peplink’s static
IP, the Default Gateway, and finally a public IP of your choice. Example: 8.8.8.8
2. If there are Inbound Services configured, it is suggested you test them from an external
client
Your Peplink Balance is now configured and operational.
Saving Current Configurations File
After setup is complete and the Peplink Balance is operational
save the current configurations file.
Go to the System Tab on the GUI interface, select
Configuration on the Left hand side
Download your active configuration and save it to your
computer.

Other manuals for 210

1

Other peplink Network Router manuals

peplink balance ONE User manual

peplink

peplink balance ONE User manual

peplink 20 User manual

peplink

peplink 20 User manual

peplink PEPWAVE MAX BR2 Pro User manual

peplink

peplink PEPWAVE MAX BR2 Pro User manual

peplink balance ONE User manual

peplink

peplink balance ONE User manual

peplink 20 User manual

peplink

peplink 20 User manual

peplink MAX HD2 Dome User manual

peplink

peplink MAX HD2 Dome User manual

peplink ONE User manual

peplink

peplink ONE User manual

peplink PEPWAVE SDX Pro Quick start guide

peplink

peplink PEPWAVE SDX Pro Quick start guide

peplink balance ONE User manual

peplink

peplink balance ONE User manual

peplink PEPWAVE FlexModule Mini User manual

peplink

peplink PEPWAVE FlexModule Mini User manual

peplink Pepwave MAX 700 User manual

peplink

peplink Pepwave MAX 700 User manual

peplink 20 User manual

peplink

peplink 20 User manual

peplink PEPWAVE Balance One User manual

peplink

peplink PEPWAVE Balance One User manual

peplink HD2 mini User manual

peplink

peplink HD2 mini User manual

peplink Balance 30 User manual

peplink

peplink Balance 30 User manual

peplink Pepwave MAX Series User manual

peplink

peplink Pepwave MAX Series User manual

peplink Pepwave MAX Series User manual

peplink

peplink Pepwave MAX Series User manual

peplink 20 User manual

peplink

peplink 20 User manual

Popular Network Router manuals by other brands

ZyXEL Communications P-334WT user guide

ZyXEL Communications

ZyXEL Communications P-334WT user guide

Billion BiPAC 5100S quick start guide

Billion

Billion BiPAC 5100S quick start guide

Nortel Passport 5430 Notice

Nortel

Nortel Passport 5430 Notice

NetComm AV SERIES quick start guide

NetComm

NetComm AV SERIES quick start guide

Patton OnSite 2603 quick start guide

Patton

Patton OnSite 2603 quick start guide

Asus DSL-N11 quick start guide

Asus

Asus DSL-N11 quick start guide

Sharedband Power Router 2+ Configuration guide

Sharedband

Sharedband Power Router 2+ Configuration guide

HP SCSI-Fibre Channel Router Installation and user guide

HP

HP SCSI-Fibre Channel Router Installation and user guide

Supermicro MicroBlade MBM-XEM-002 user manual

Supermicro

Supermicro MicroBlade MBM-XEM-002 user manual

ZyXEL Communications ES-2024A Specifications

ZyXEL Communications

ZyXEL Communications ES-2024A Specifications

Aztech na8300 Easy start

Aztech

Aztech na8300 Easy start

Digi TransPort WR11 Quick start quide

Digi

Digi TransPort WR11 Quick start quide

TP-Link Archer C3000 user guide

TP-Link

TP-Link Archer C3000 user guide

Intellinet 523776 user manual

Intellinet

Intellinet 523776 user manual

H3C S3610 Series quick start

H3C

H3C S3610 Series quick start

M2M PrestoAdvanced AD101 user manual

M2M

M2M PrestoAdvanced AD101 user manual

TRENDnet TE100-S16 - DATA SHEETS Kurzanleitung zur Installation

TRENDnet

TRENDnet TE100-S16 - DATA SHEETS Kurzanleitung zur Installation

Cisco Small Business Pro SRP527W user guide

Cisco

Cisco Small Business Pro SRP527W user guide

manuals.online logo
manuals.online logoBrands
  • About & Mission
  • Contact us
  • Privacy Policy
  • Terms and Conditions

Copyright 2025 Manuals.Online. All Rights Reserved.